![[Datsun 1200 encyclopedia]](/wiki/upload/wiki.png)
Changing the A-series head gasket is simple and straightforward. The head itself rarely warps and can almost always just be cleaned up and new gasket fitted.
Contents |
Before Beginning
Here are some helpful hints:
- Get yourself a Factory Service Manual, and carefully review the procedure before you start
- tag/bag nuts and wires etc so that you dont have to remember where all the bits go ...
- If you are just replacing the gasket, you can get by without removing the intake/exhaust manifolds. However you will need to be very careful to inspect the bolt holes and clean the gasket surfaces. It's easier to do this if you disconnect the manifolds and remove the head completely.
Important Considerations
- Loosen all the rockers and remove the pushrods before removing the head bolts. Do not remove the rocker shaft. Tape and label the pushrods so you can put them back in the same holes.
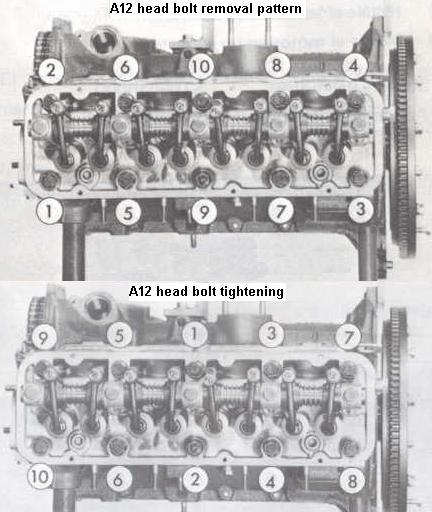
- Take the head bolts out in the opposite of the torqueing pattern
-

- Torque Pattern
-
- If you don't have a Torque Wrench, buy or borrow one. An inexpensive one will work, don't need a fancy ratchet type. If you don't use a torque wrench, there's a good chance the gasket will faill after driving it for a while, or the bolts break if you tighten too much.
- As mentioned below, get the head, block surface bolts and bolt holes clean
- Check for straightness of the head (discussed below)
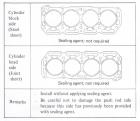
- don't use gasket sealer (according to my repair book and most gasket makers ...) unless your qasket maker specifically recommends it
-
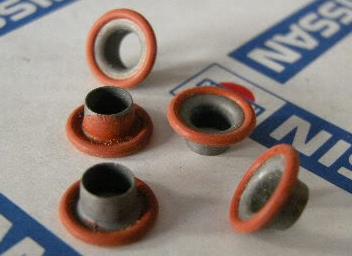
- Fit the O-ring correctly:
-
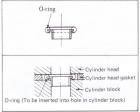
11045-H1000 RING-OIL,OIL GALLERY A12 0672- (one per engine)
Bolting It Up
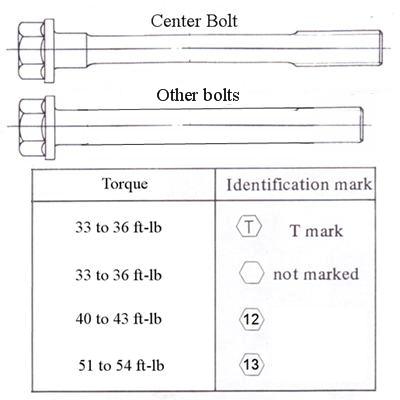
- The oil bolt goes in Number One position (has a T mark, hollow head or is shaped differently)
- Generally, for any engine, tighten the middle bolts first, then work your way outside in a circular pattern, see the pattern photos.
- Loosen/tighten in three steps, my book doesn't say exactly what, so you can guess at the exact amounts, for example:
- Tighten all 2/3 torque
- Tighten all 80% torque
- Final-tighten full torque
Torque Pattern
Torque Specification
| engine | torque lb ft | torque Mkg | comments |
|---|---|---|---|
| A12 | 33-36 ft-lb | 4.5-5.0 Mkg | (to engine # A12-470084) |
| A12 | 40-43 ft-lb | 5.5-6.0 Mkg | (from engine # A12-470085) |
| A12 | 51-54 ft-lb | 7.0-7.5 Mkg | GX engine |
| A12 | 51-54 ft-lb | 7.0-7.5 Mkg | mid-distributor A12 |
| A12A | 51-54 ft-lb | 7.0-7.5 Mkg | |
| A13 | 51-54 ft-lb | 7.0-7.5 Mkg | |
| A14 | 51-54 ft-lb | 7.0-7.5 Mkg | |
| A15 | 51-54 ft-lb | 7.0-7.5 Mkg |
QUESTION: What about A14 head on A12 engine?
ANSWER: Use the A12 torque specification.
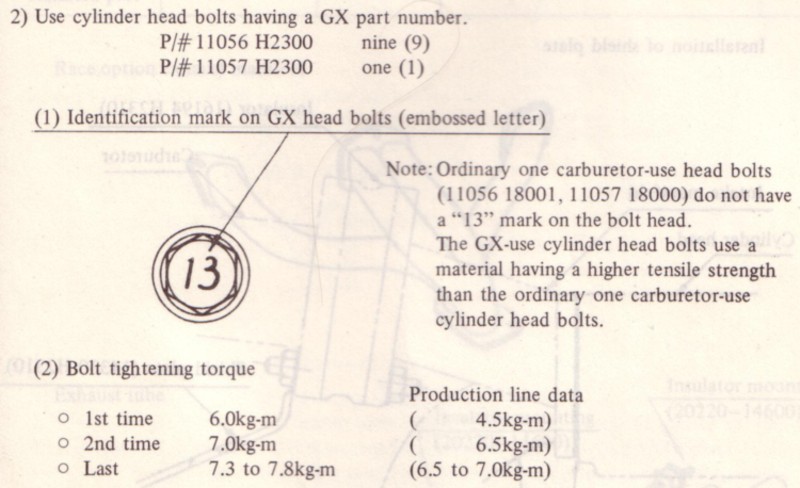
NOTE: A14/A15 head bolts are also marked '13'. This stands for 13T, a high strength steel alloy (Chromoly V).
Clean the bolts and bolt holes
check when reassembling an A series is that the bolts holding the head down are lightly oiled. Also clean out the boltholes as they easily fill up with crap and the bolt bottoms out. If the head has been machined a lot, ensure the bolts screw if far enough before putting the head back on.
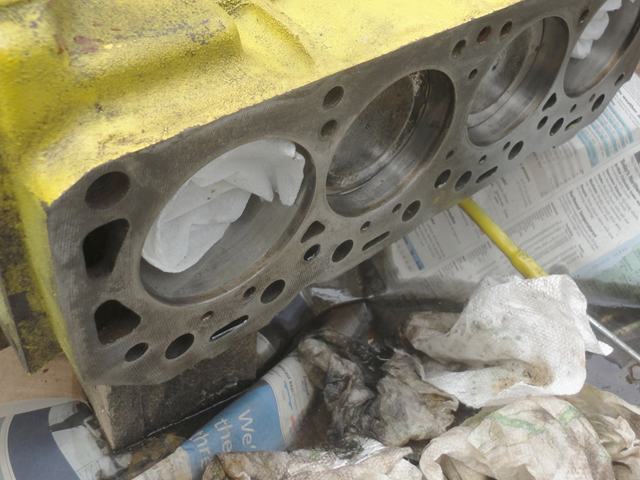
Get the head, block surface bolts and boltholes clean (no grease, no tiny remnants of the old gasket). Use a scraper and maybe a little ether spray to chase it off. Make sure nothing gets in the cylinders or oil passages, and clean out the boltholes when done. Oil or water in the boltholes will prevent proper torqueing. You can use a straw to blow out the boltholes. I use an old head bolt, with a slot filed along one side, as a poor-mans "tap". You can also use a can of compressed air.
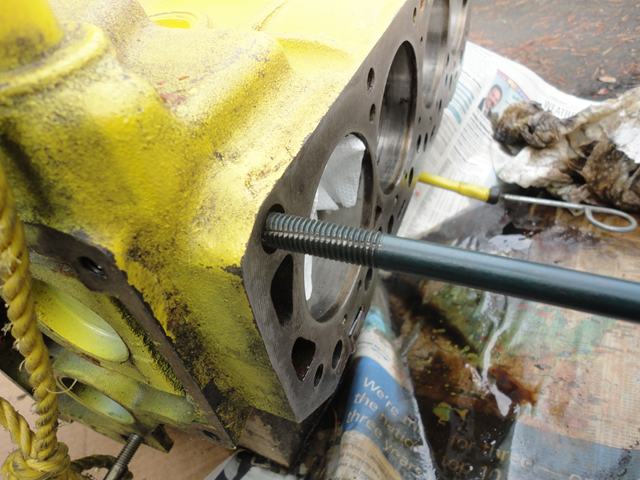
Everything must be absolutely clean, if there is any of the old gasket material left on any surface, or if you use any kind of sealer on the head gasket, this will cause standard-type gaskets to fail again. Cleaning and lightly oiling the threads will allow the bolts to torque to specifications instead of binding up and giving a false torque reading.
Before:

After:
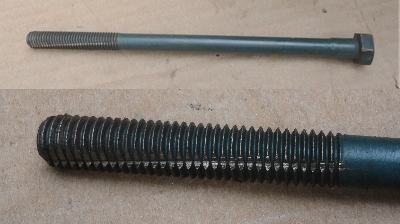
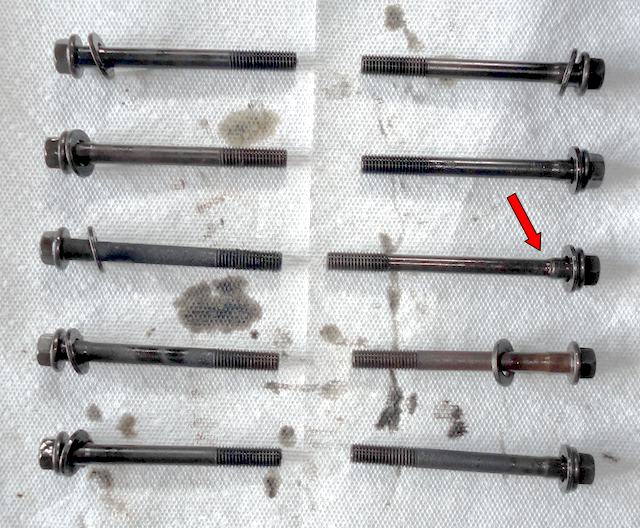
Special Bolt
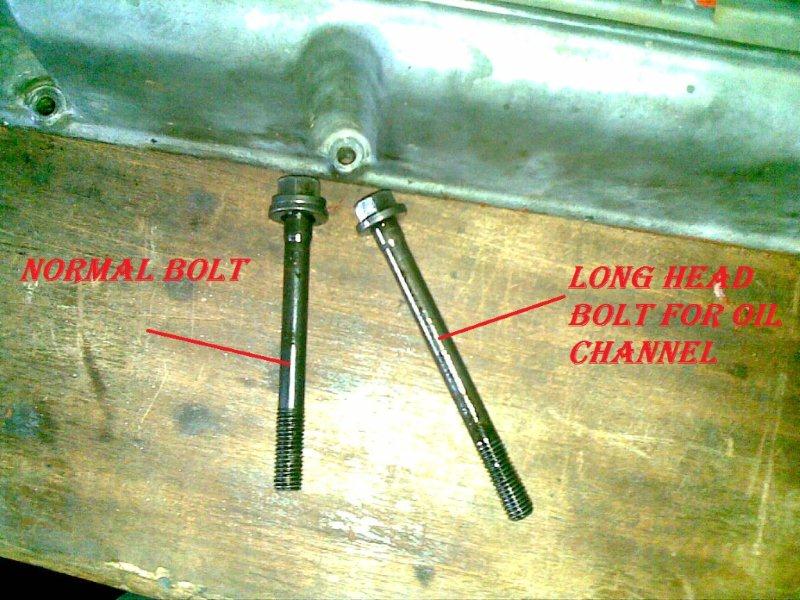
As for head bolts, the A series engine uses 2 different ones; the one that goes in the center right (distributor side) is different from the other 9. The oiling system for the valve train (rocker arms) feeds oil through this hole, putting the wrong bolt in that hole will restrict oil flow to the rocker arms and valves. Under high rpm conditions if the oil is restricted to the valve train it will cause excessive wear and possibly non-repairable damage. I have seen some so bad that the rocker arm shaft had grooves worn into it deep enough that the valves couldn't be adjusted.
Do I Need to Mill the Head Flat?
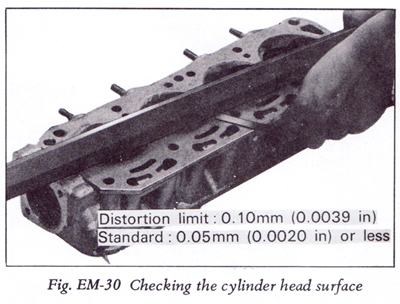
Head gaskets require flat surfaces on both the block and the head to seal properly, the block is heavy enough that it usually won't warp; heads on the other hand will and do warp very easily. The factory allowable tolerance for warp is 0.0039 inch, any thing more than this will require that the head be surfaced to make it flat again. This is no big deal to have done, just a little work to remove the manifolds so it can be done.
On the other hand, the problem is that every shop I've ever talked to says "oh that's not right, you got to mill 'em every time or you'll warp the gasket ... and it's only $ to do it - it's cheap insurance". What a bunch of baloney -- as if the factory doesn't know anything. For or a stock or mild engine, it is more important to get the block and head scraped clean (no old-gasket residue) and get the oil off the surface before putting the new gasket on. I use a little starting fluid (ether) to get the oil off. As rgrinder explains, torque the bolts in pattern to the correct torque steps (use a torque wrench) and it'll be just fine.
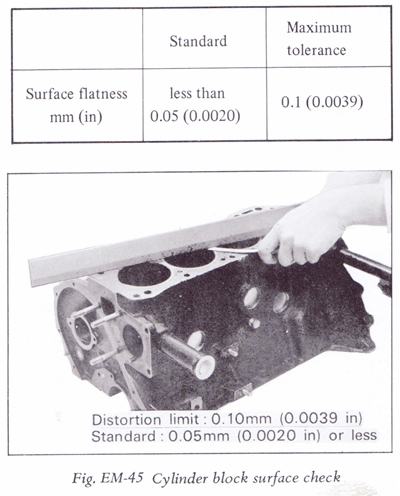
If your engine did blow the head gasket, use a quality straight edge and a feeler gauge to measure head warp (if any). A good straight edge is a precision device, so you might have to round up an old mechanic friend or have a shop check it. It usually doesn't warp 4/1000 of an inch even after blowing a gasket. But it can, so it is important to check.
Check for straightness of the head. Often it won't need machining, even after a blown gasket, but you want to be sure. Place a quality straightedge across the head surface and use a feeler gauge to check any warp. The spec is that it can be up to 0.004 in. (0.1 mm). If it's over this, get the surface machined flat (milled). Keep in mind that the "normal" warp is up to 0.05 mm, so yes even new heads aren't perfectly flat. A good straightedge is a precision device, so you might have to round up an old mechanic friend or have a shop check it.
Other Tightening Torque specs
| Rocker shaft bracket bolts | 14-18 ft lbs (2.0-2.5 Mkg) |
| Manifold nuts | 6.5-10 ft lbs (0.-1.4 Mkg) |
| Rocker cover bolts | just past finger tight. |
Don't overtighten or the flange will deform and oil will leak out. You can always tighten a little more later, but you can't un-tighten to fix a deformed flange
Tips
In general, to avoid a "blown" head gasket:
- Don't use Easy-Fit/Printo-Seal gaskets
- Clean *all* grease and gasket residue from block deck and head surface. Use ether (starting fluid) to clean the surface. It should be absolutely dry with no oil on it
- Torque the head bolts in the factory-recommended three stages
- In the A-series you may re-use the head bolts. Only some newer non-A-series engines require replacing them each time the head gasket is changed
- Use a torque wrench to torque to specifications
And most importantly for some of you guys:
- Turn down the boost!
Don't forget to adjust the valves!
Changing the head gasket will undoubtedly change the gap, even if you somehow get it back together without loosening them. See Valve Adjustment.
discussions: