|
|
| Re: racetech's 1200 SR20VE Project |
Subject: Re: racetech's 1200 SR20VE Project
by racetech on 2013/5/14 13:56:18
April 2013 - Fixing the List II
Looking back at the previous update, it was a slow month waiting for parts, but at least I'm quite confident the throttle body screws will stay intact. April was a much better month when it comes to parts arriving and work being done.
Orders, when it comes to waiting I'm quite bad, and these few was getting the better of me. I ordered a rotary table for the mill to make life easier drilling precision holes, no stock in the country and is waiting.
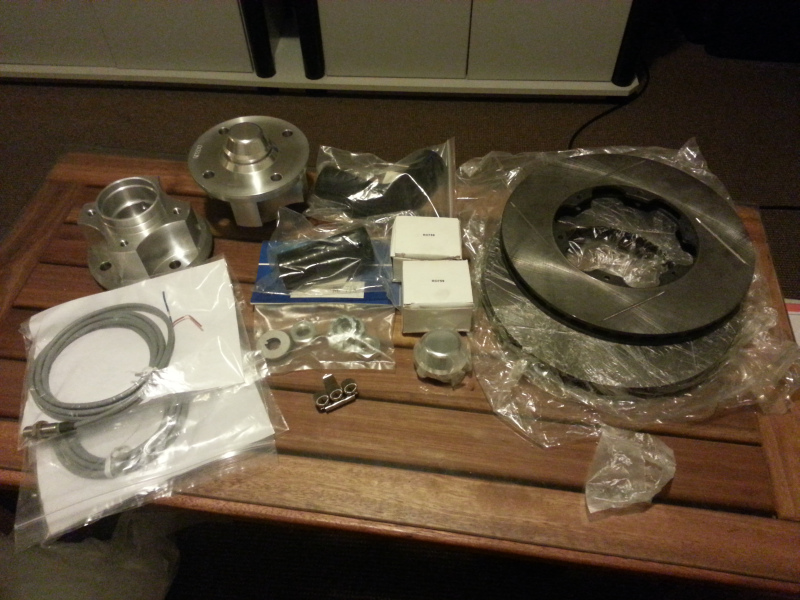
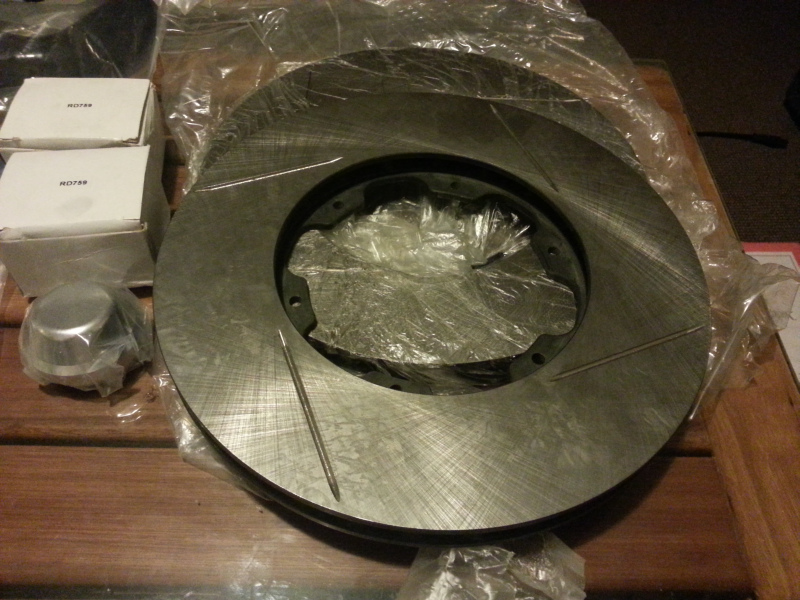
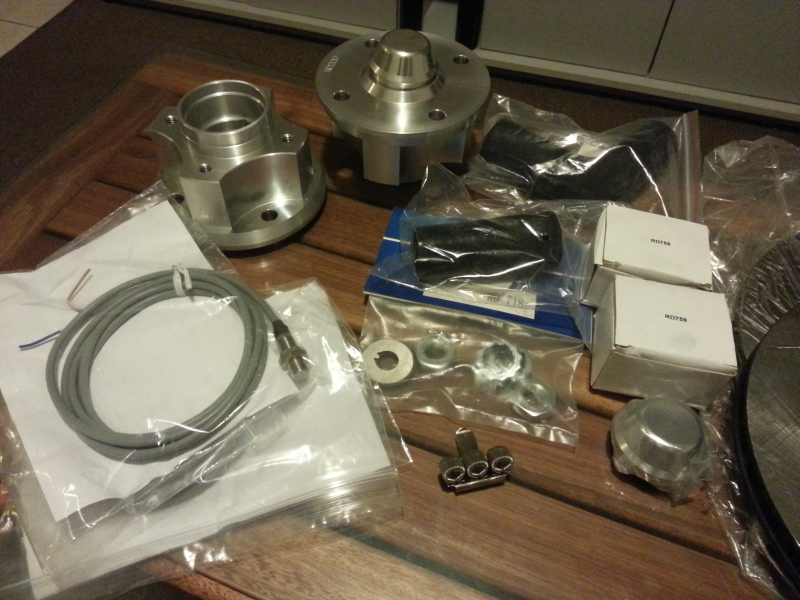
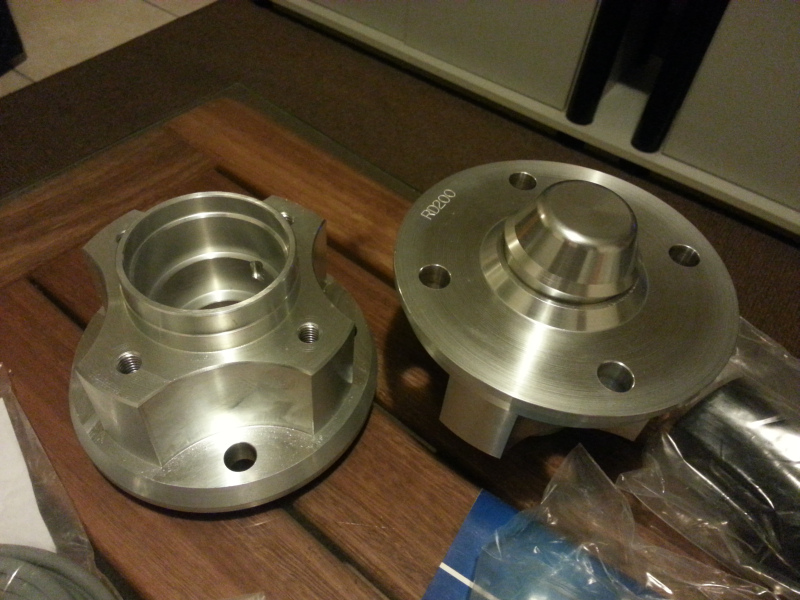
RallyDesign.com - This one consisted of Escort MK2 aluminium hubs, bearings, fastening kit, 266mm Forest Rotors, Brantz wheel speed sensors, silicone hoses and for flair a navigators pen holder. One of the reasons for the Aluminium hubs is the fact that these units uses a larger outer bearing, but still standard wheel studs. Seeing that the rotors does not have a integral hat, it is just another part that will have to manufactured, again waiting for the rotary table, on a positive note, I can at least continue with the calliper mounting seeing that the rotors can be fitted with a temporary hat.

Fittings - hose, spanners, v blocks, fittings and clamps to finish the fuel/oil hoses in the engine bay and rear fuel hoses.
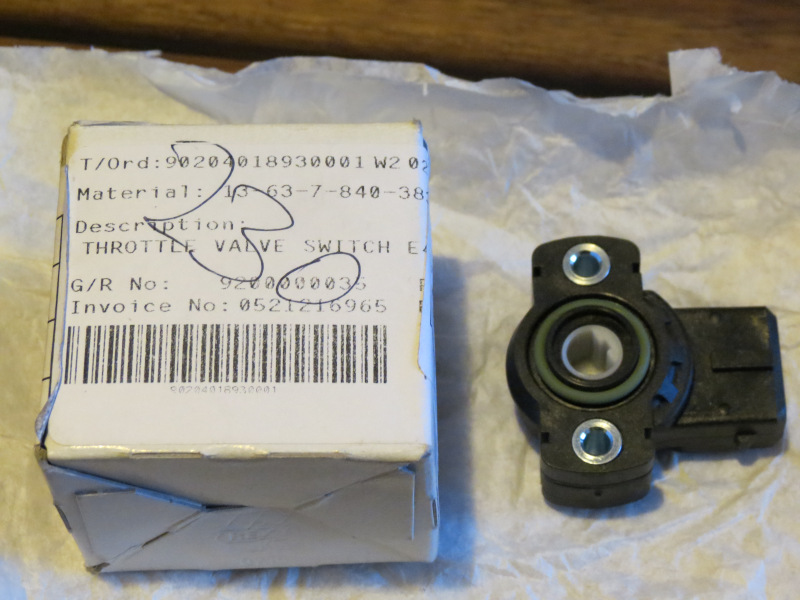
Throttle Position Sensor - if I knew I was going to manufacture a complete adaptor for the TPS I would have considered using a cheaper unit, but you cannot always win, this is a original E46 M3 unit, had to get this unit from the local agents as postage from the States would have killed me.
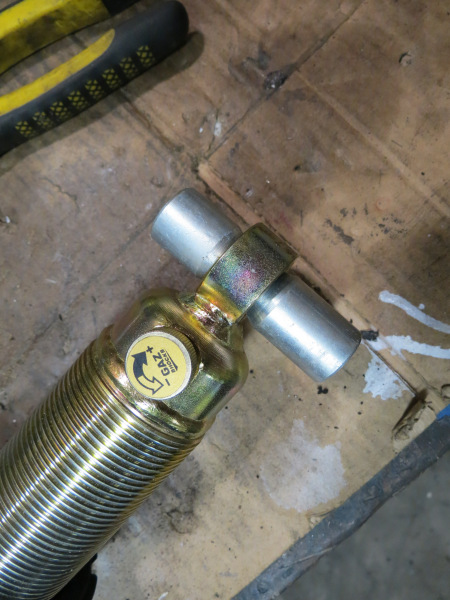
Ball Joints - since I decided not to use Escort lower control arms and unable to source a loose ball joint to fit the Escort struts, I opted for stronger Maxi ball joint, however I had to enlarge the taper on the struts if I wanted to use them, thus I had to wait for a reamer from the States as I was not willing for another rapping from SA tool shops.
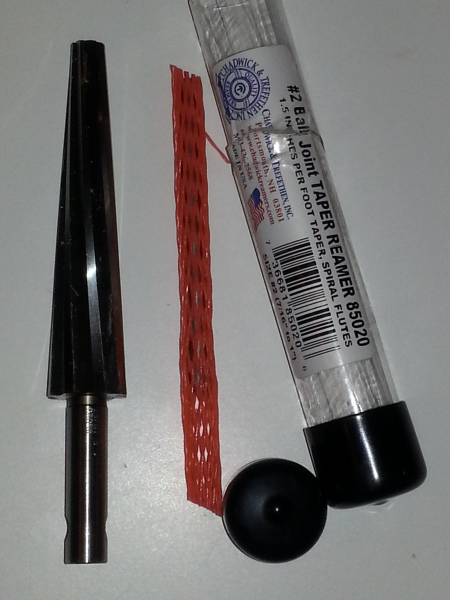
Taper Reamer - yes my first thoughts was also, damn this thing can be dangerous. This is a 1.5inch per foot taper reamer, what you are not willing to learn or research to buy the correct parts, thanks for the internet in this regards as our local part stores are either too stupid to be interested or just know a part number, not actual details around it. For those not as stupid as they, 1.5inch per foot tapers is what Ford used during the 70's and 80's on vehicles like the Cortina, Escort, Sierra, etc. onwards tie-rod ends and ball joints. At least we have a lot of work for this one, it will also be used to make tapers for my steering arms and parts for two other projects.

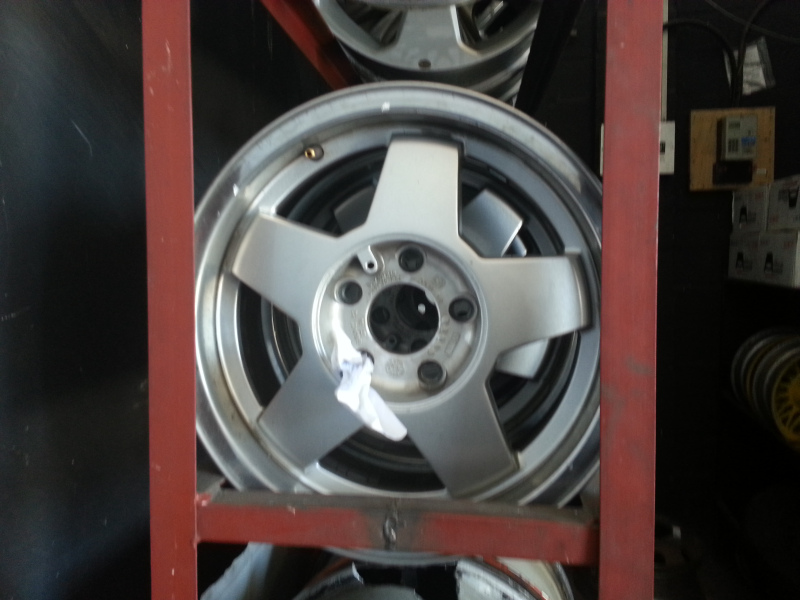
Rims - Since I decided to use 15" Rally rubber, I had to get the pcd changed of my Smith Wheels, when it comes to wheels, there is only one person that we use in Cape Town called Kassiem from A&K Magwheel Repair Centre (021 692 4412/4483). He was tasked to change the pcd and make sure they will handle the gravel roads. I'm still waiting on these, luckily they will only stop me from making spacers. While I was looking around in his shop, I noticed my next set of 15" wheels, seeing that these units are OEM VW Microbus units, they will be super strong and a good fit for the car.
Fuel & Oil Hoses

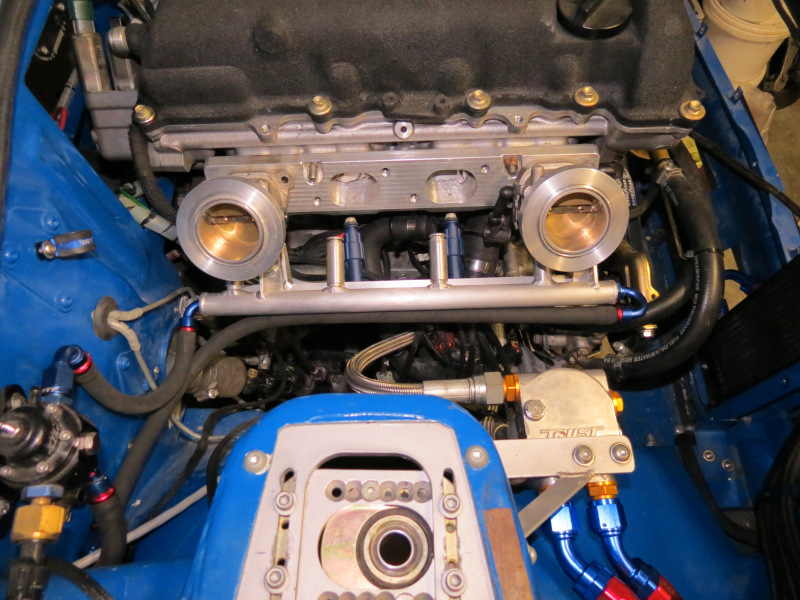
At least I did not spend the whole month waiting for parts, I actually did some work, starting with the fuel hoses front and back. These push on units are such a joy to work with, you can easily make a few hoses per night. But be damn sure about measurements before assembly as removing fittings are virtually impossible without the aid cutters and knives Now that two of the hoses in the boot is black I want all of them black, the silver are just to overplayed and hard to work with, as I experience issues with the old ones I'll replace them with black units.
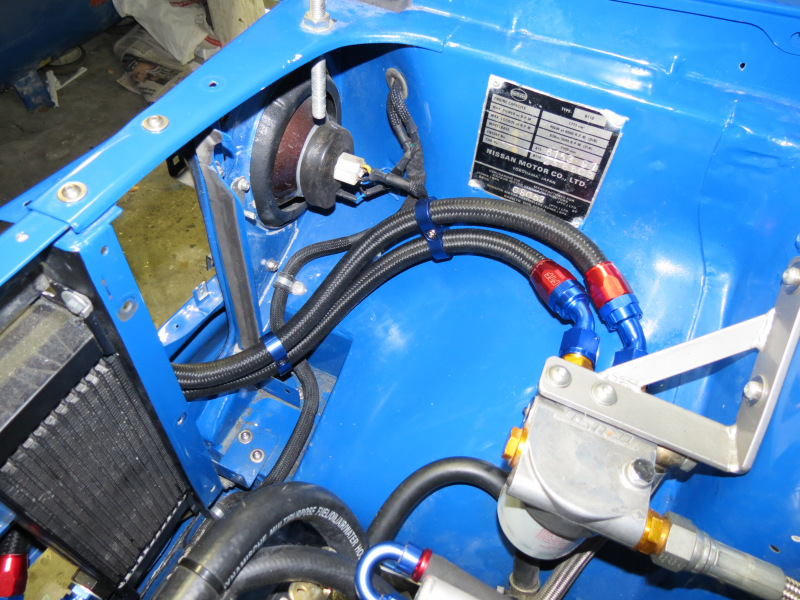

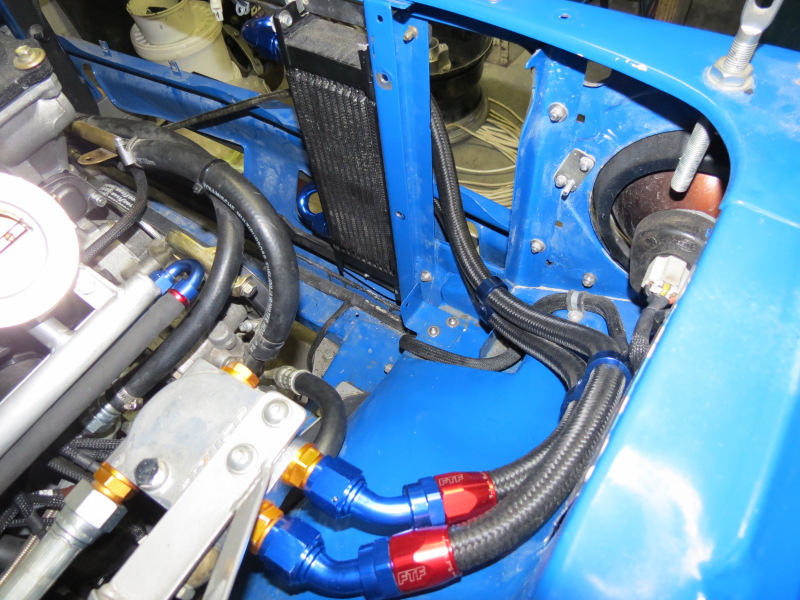
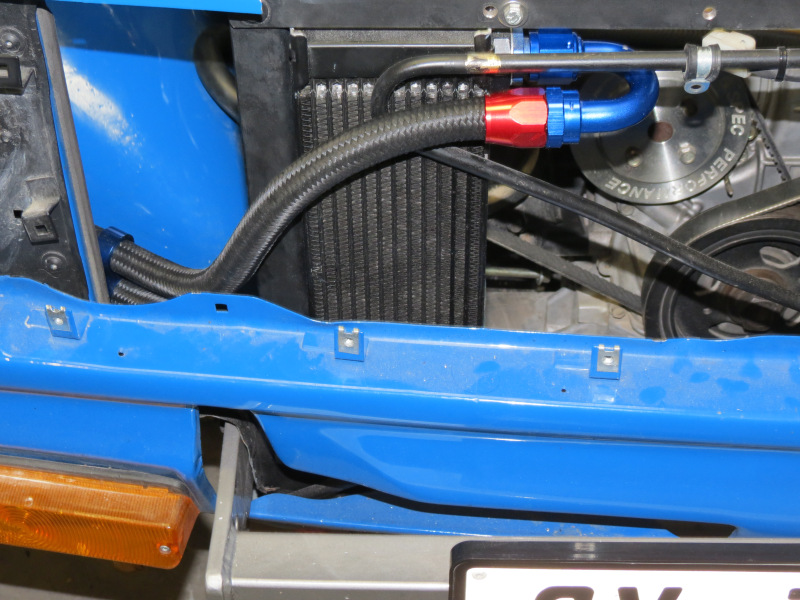
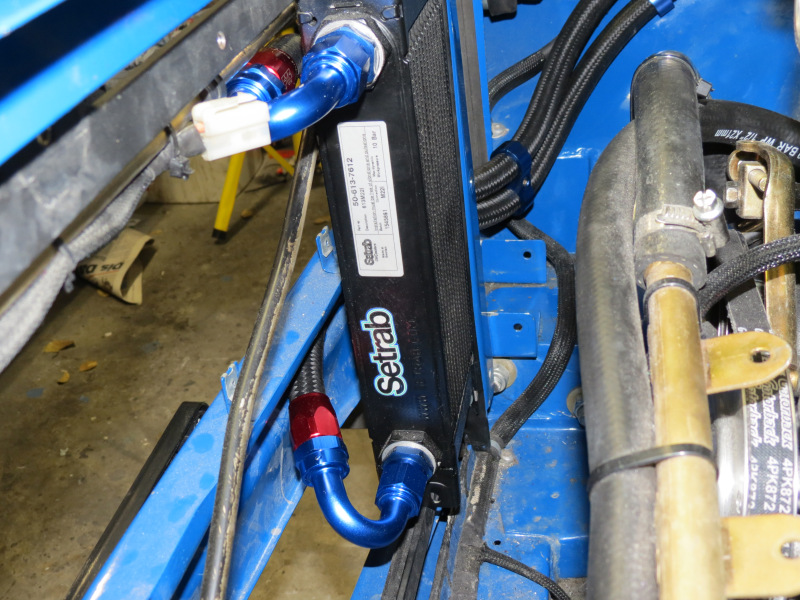
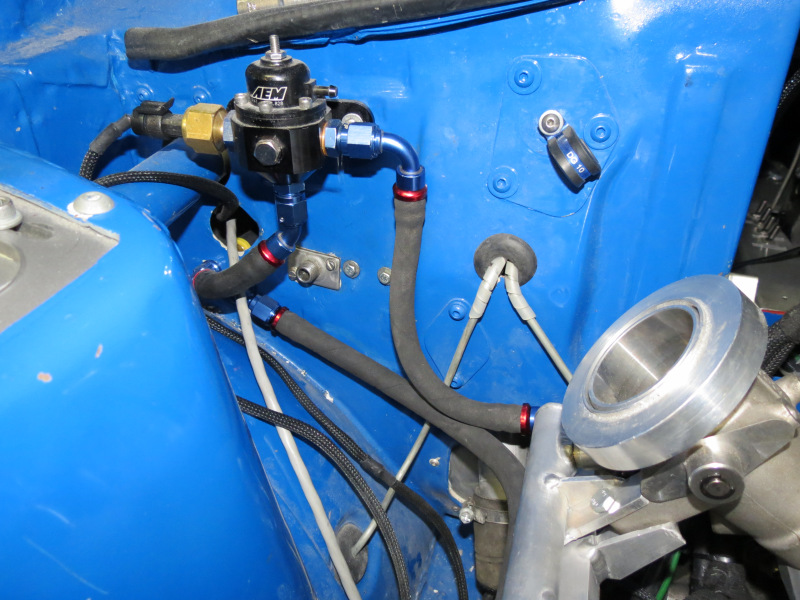
Seeing that I moved the oil cooler to the front of the radiator to aid with Intake temperatures and space was limited, I had to use some clever fittings to make everything work, here I opted for -10 AN units and Nylon braided hose, the final results is slightly different to what the pictures state as I added additional insulation in the spots were it could rub. I'm very happy with the neat outcome and will be replacing some of the old stainless braided lines with these black units in the future.
Rear Shocks


These units are originally designed for the Ford Escort MK2, I'll be using them with 225lbs/in x 12" long main springs and +-80lbs/in helpers, to always keep tension on the mains if at full droop. A few minutes in front of the lathe and the top and bottom bushes were done after some careful measuring and a few new techniques learned to cut taper surfaces. I must admit, since all the mounting is in place and originally designed for this kind of shock configuration, mounting them actually went quite easy, what took the longest was moving the suspension from full droop to maximum compression over and over to make sure nothing is touching or rubbing, especially the lower bushes.

While all of this was going on, I got my new front bearing retainers back from the machine shop as they were tasked to cut the bearing surface and circlip groove for the front top mountings, they also tapped the M18 thread in the bushes for the lower control arm's inner bearings. I'm still waiting on the suppliers stock to arrive for a set of Teflon lined plain spherical bearings, luckily I have some local units to use in the meantime. Here is a picture to illustrate how the 15" rubber will look on the car. I really prefer the look of the 13" rubber, but in RSA 15" rally rubber is just the best option without killing piggy bank.
TPS Adaptor
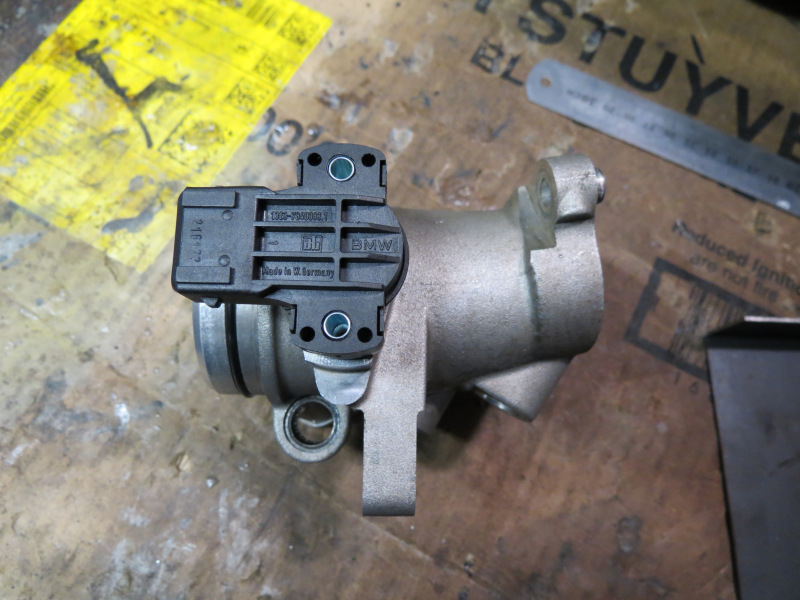
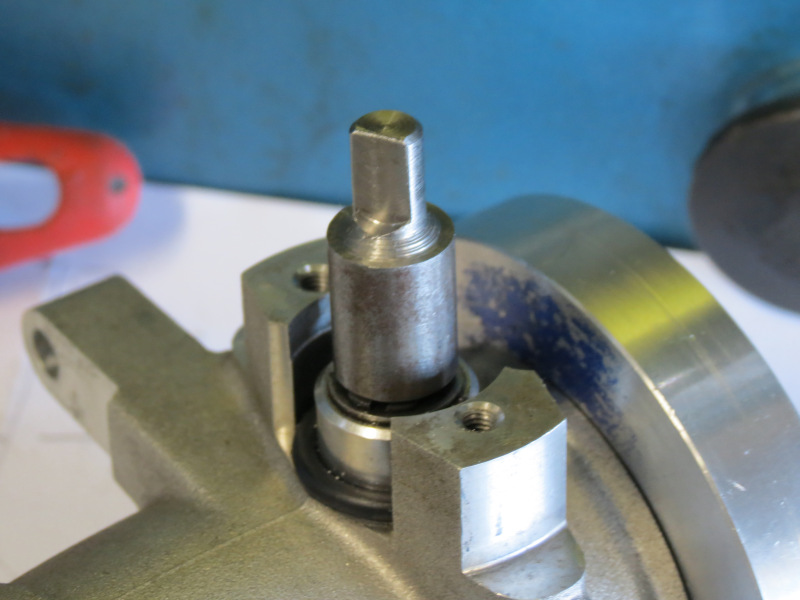
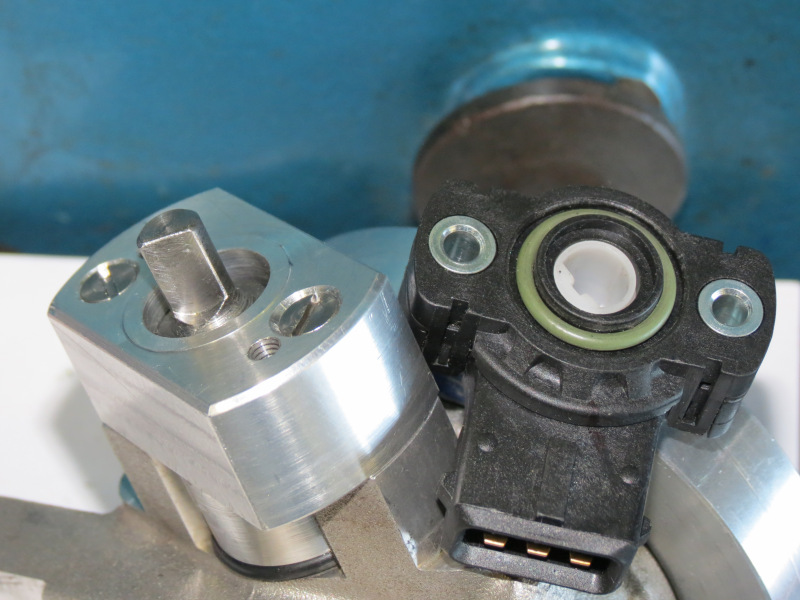
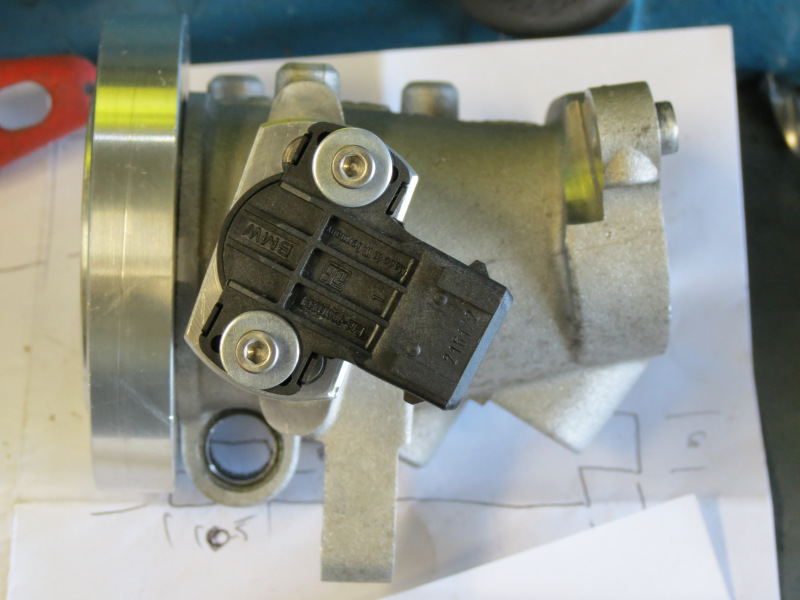
Just after the BMW E46 M3 OEM TPS (Part #: 13637840383) arrived, I noticed that the orientation is not what I needed as it was hitting the air box backing plate with the connector attached. The only option was build a recess into the backing plate or make an adaptor, seeing that the extra welding will destroy my idea of a clean look and the fact that I have access to a milling machine these days, I opted to make an adaptor that will change the units orientation enough to look neat and move the connector away from the backing plate and make the internals water tight from the shafts side at least. Seeing that the TPS body will be moving away from the original throttle shaft I had to extent it with another adaptor, this allowed me to make sure the flat surface on the shaft is in the correct position to allow full movement of the TPS.
Sill Stands

Seeing that the car is being transformed from a tarmac vehicle to a gravel vehicle, I felt it is absolutely necessary to make a set of Sill Stands for the car, unfortunately I'm unable or not willing to weld to the current paint covered sills, I'll make some special brackets that will be fastened to the bottom of the roll cage floor supports. While I was busy designing this stuff, I decided that I absolutely need small buckets on each stand to place wheel nuts in, nice and safe from the gravel which likes to end on the threads. Once I'm waiting on something again I'll continue with these.
Brake Rotors

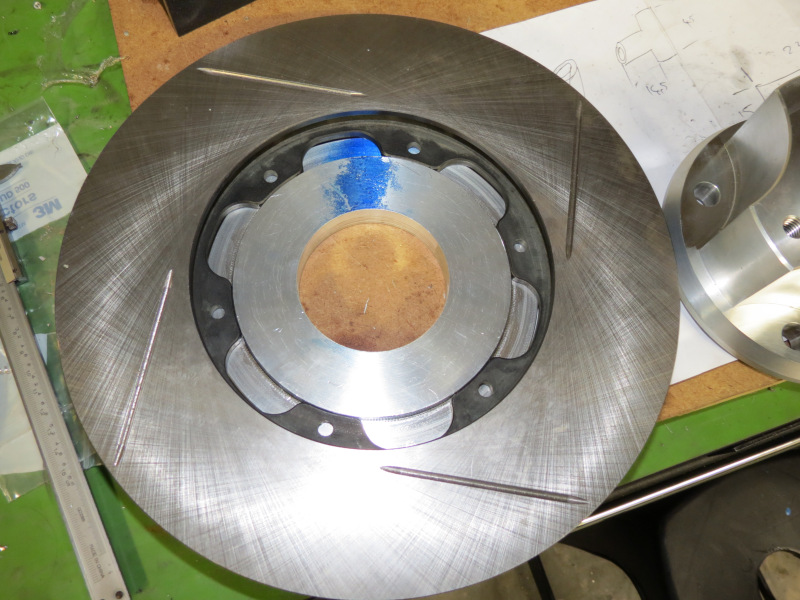
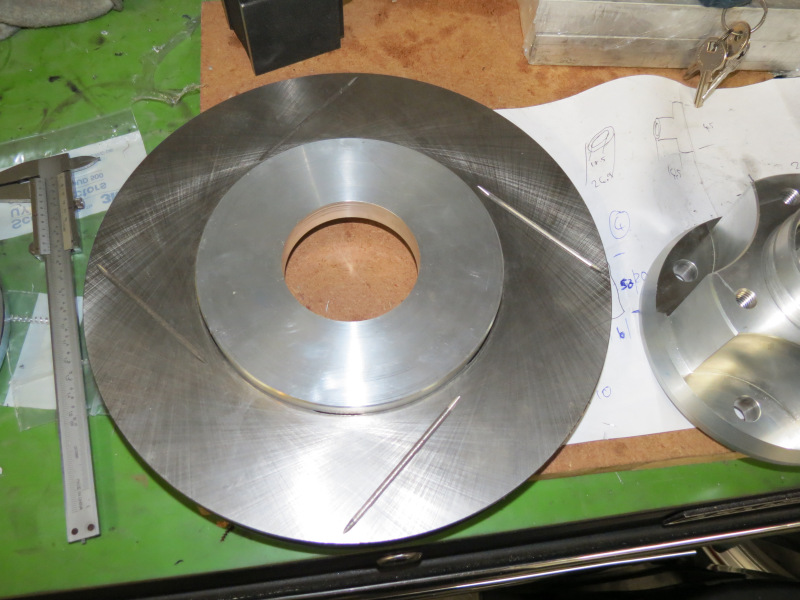
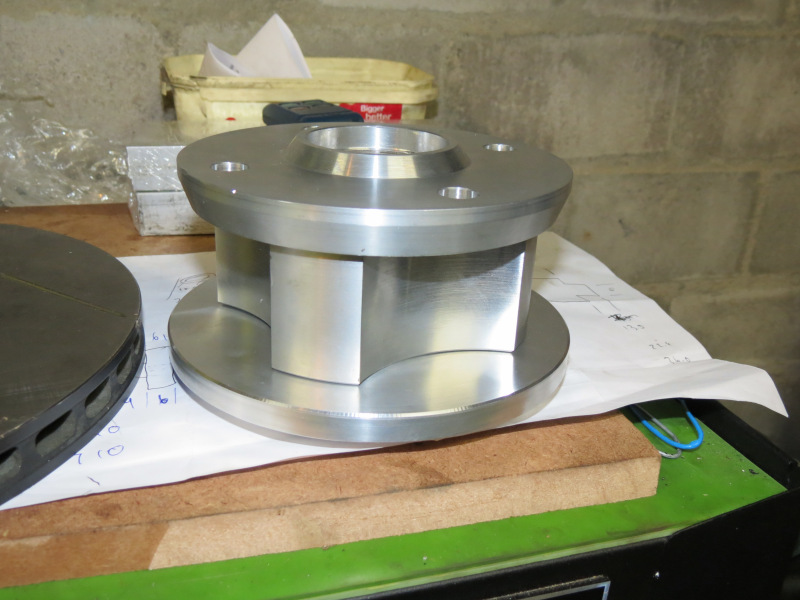

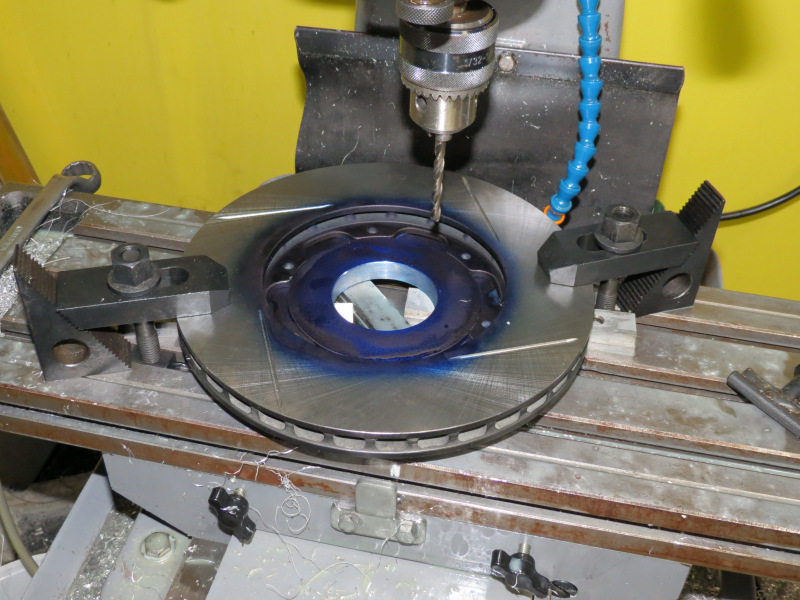


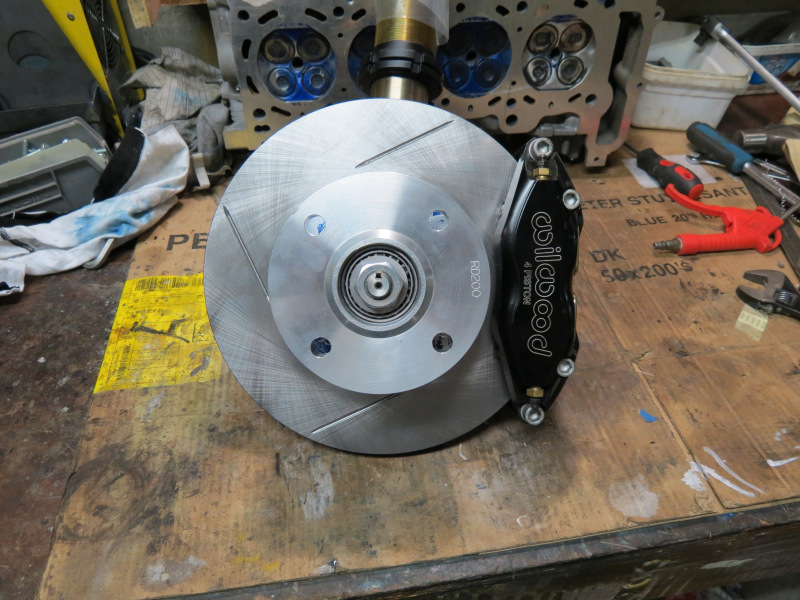


With the rotors sitting on the spares shelf, I developed quite an itch to mount these to the new aluminium hubs. But again the issue regarding the rotary tables voyage over the vast waters was placing a burden on these, but I quickly decided spending the extra money and effort on making a third hat/bell would pay off in the long run. For that I was more than willing to spend the extra R60 on extra slice of 150mmx15mm OD Aluminium. This units will be machined exactly as the other two units, the only difference are in the holes, which will be drilled by hand on this once versus the rotary table on the final two units, seeing that I'm not worried about thousands on the mock unit.
Next Steps
Mount the callipers, while I wait for the rotary table, build lower control arms, finish air box, make wheel spacers, do a few wiring changes and hope for the best.
|
|
;)
;)
;)
;)
;)
;)
;)
;)
;)
;)
;)
;)
;)
;)
;)
;)
;)
;)
;)
;)
;)
;)
;)
;)
;)
;)
;)
;)
;)
;)
;)
;)
;)
;)
;)
;)
;)
;)