|
|
| Re: racetech's 1200 SR20VE Project |
Subject: Re: racetech's 1200 SR20VE Project
by racetech on 2010/7/30 8:45:11
19 Junie 2010 - Gearbox Mounted
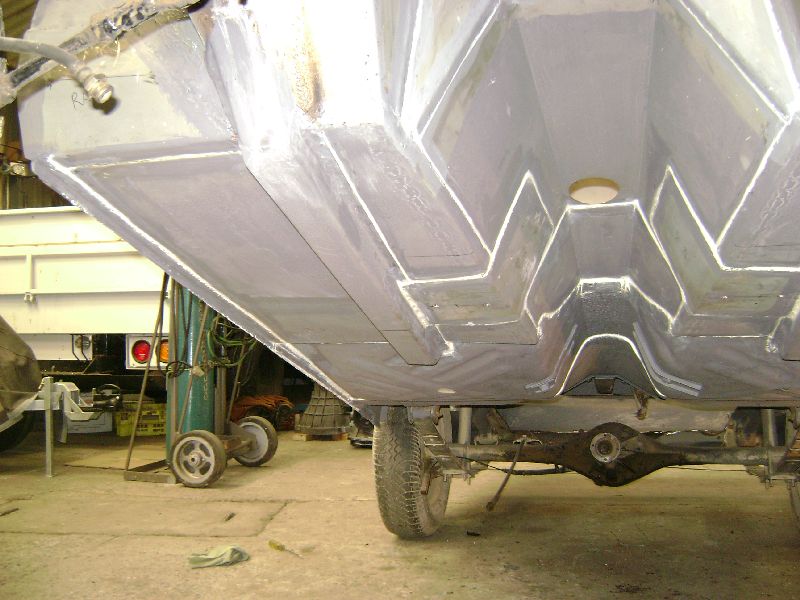

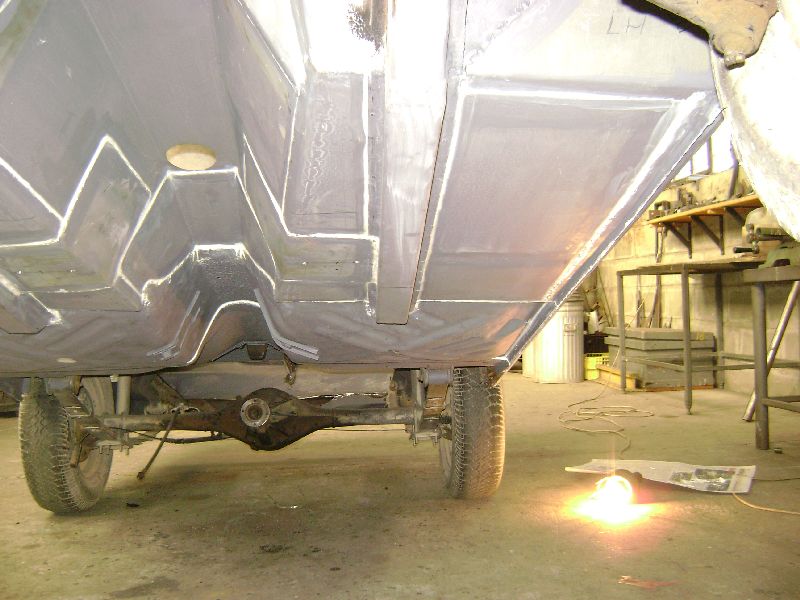
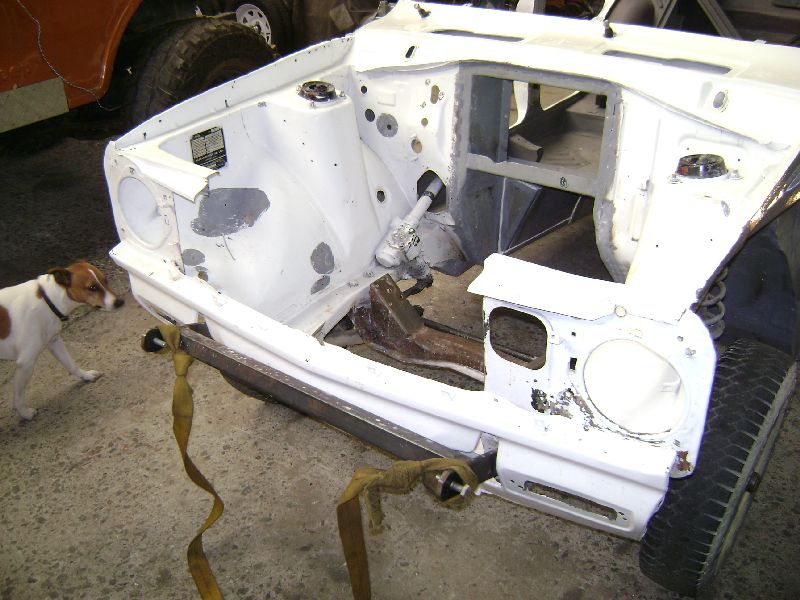
First order of business, get this new floors and transmission tunnel much stronger than the originals as the new gearbox is quite a bit heavier than the old one and I was not going to take changes with the construction and at the end of the day sit with bend floors etc. First of all 2 support plates was welded in on the underside were the gearbox was going to be mounted, they stretch from the support channels to the inside of the gearbox tunnel, this way the gearbox's weight will be carried over a very big area. All the seams was painted and sealed with polyurethane sealer.
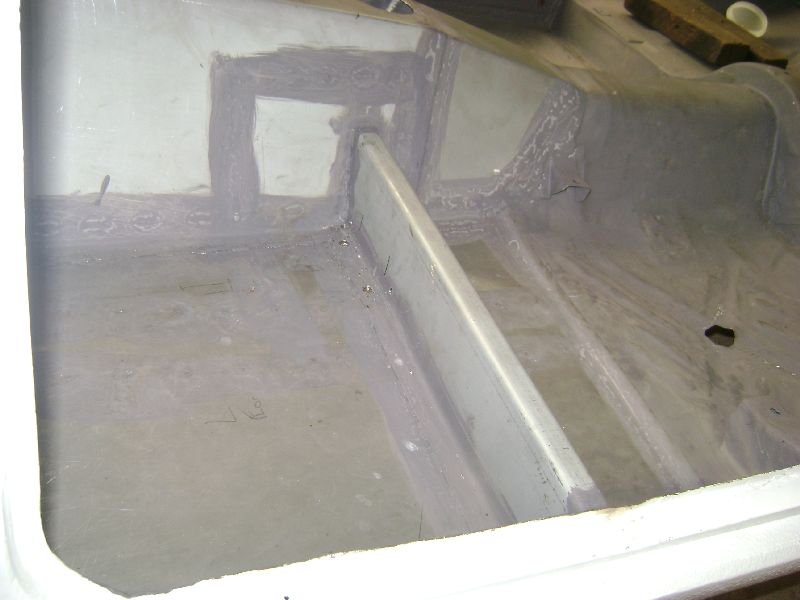
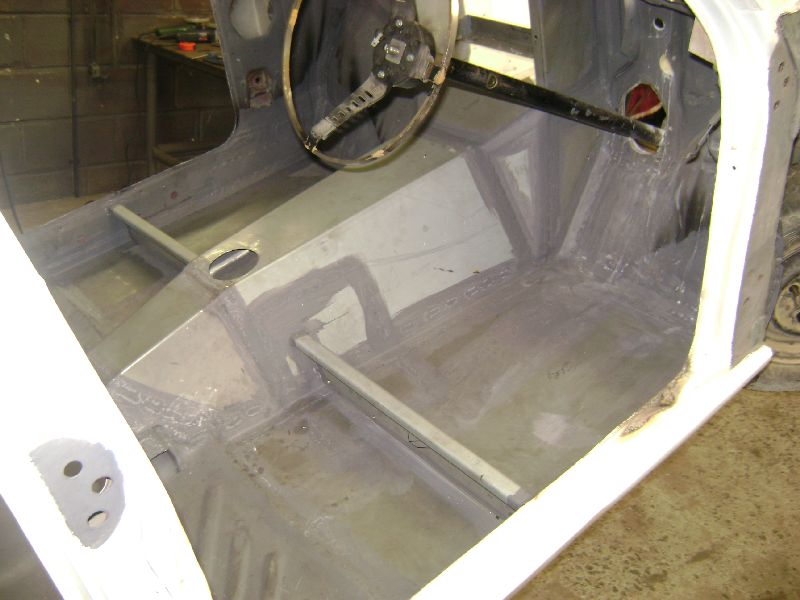
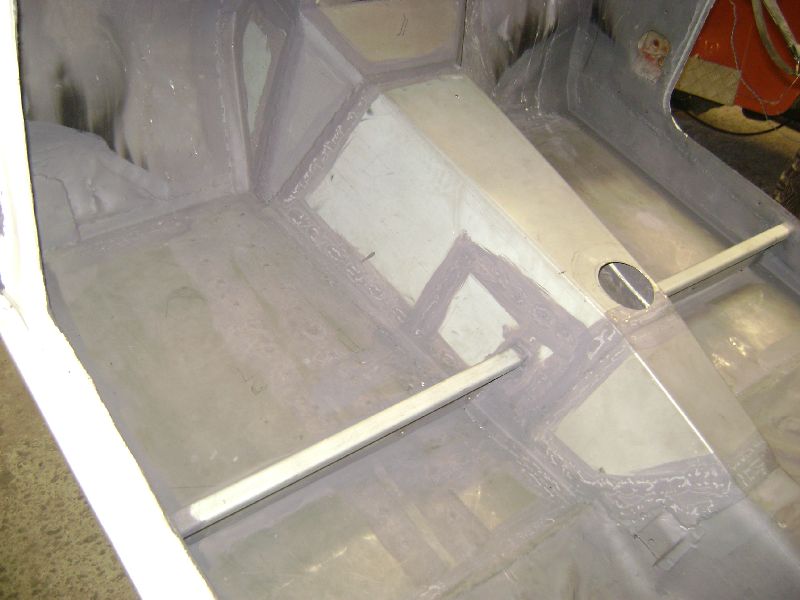
We then moved onto the inside of the car and started fitment of the new seat supports, this took awhile to get all the angles correct as there is a lot of bends in these supports, once we were happy with the fitment the welding started. I must admit, when it comes to working with mild steel sheet metal, there is no better option in my opinion that Electro Galv. This stuff is clean, does not mess oil on your hands, the Tig welder loves it and the added bonus is that it has a electro galvanized coat on as the name suggest; downside, much more expensive than normal hot or cold rolled plate, but worth every cent.
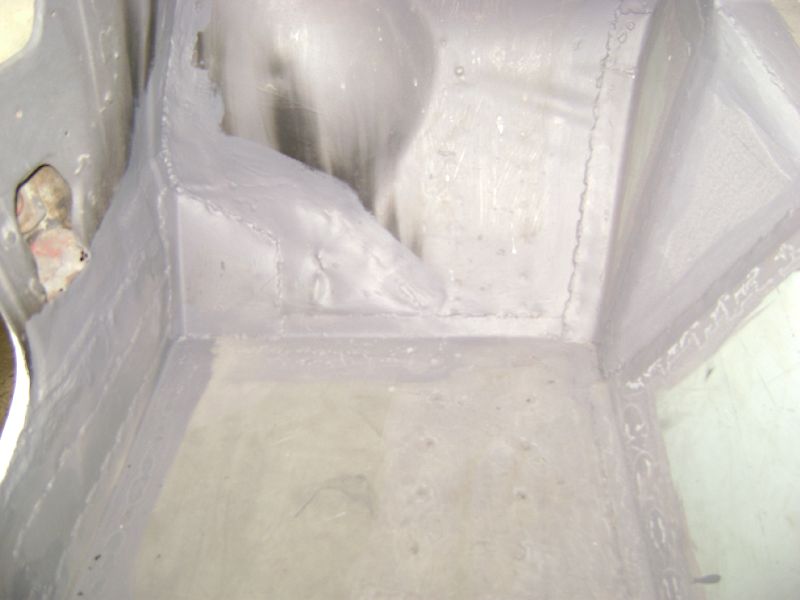
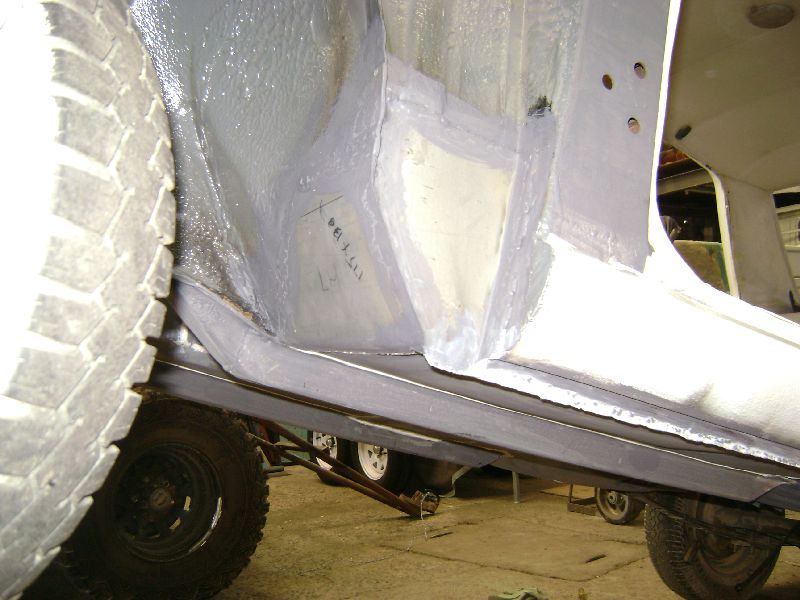
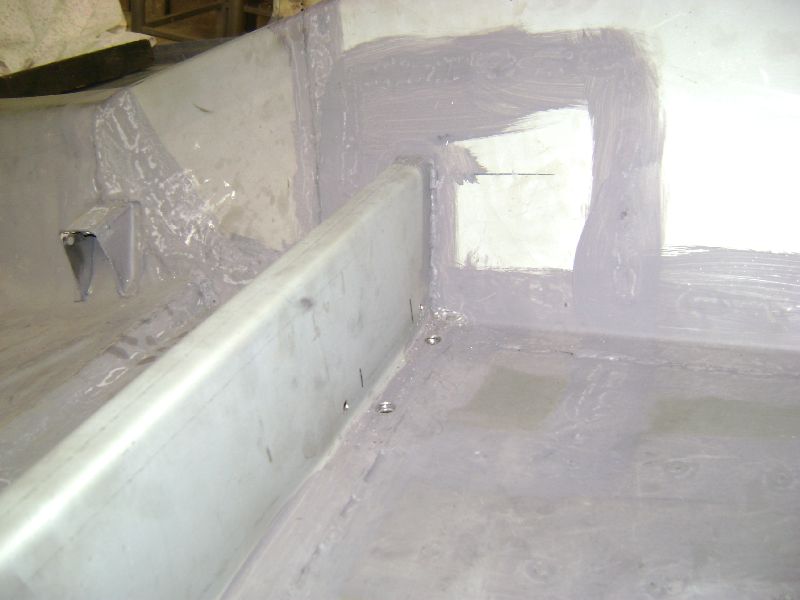
My father started to repair a rust spot on the left hand side of the interior, this one kept us thinking for a while, the metal was so bend and dented, the only way was to remove the whole thing or just cut out the affected piece and cover it again with a plate. I was busy finished the grinding of the welds on the underside. The left and right front wheel arches was also on the list to be done, as we had to get the corners correct after the new floors were joined to the sills and wheel arches.

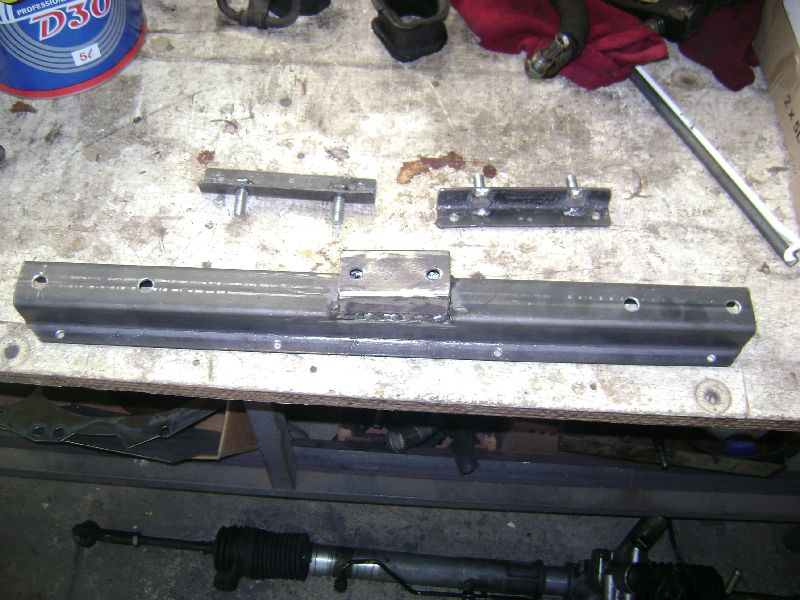
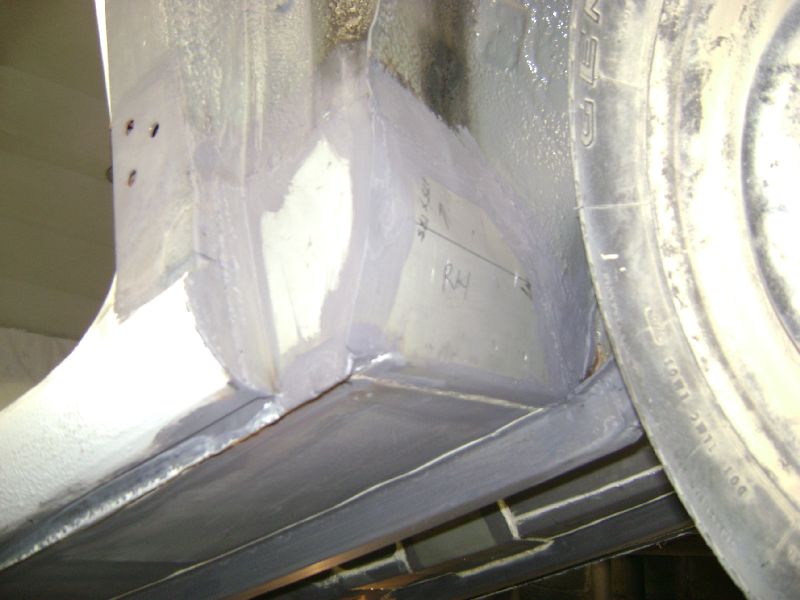
Finally we started with the work set aside for the weekend, the mounting of the gearbox. Our biggest challenge was the positioning of the mounting on the gearbox, obviously we wanted it directly underneath the seat supports for added strength, but if using the original mounting location on the gearbox we would have ended to far forward. After a inspection of the gearbox we decided to move the rubber mounting to the back of the box. This particular mounting spot seems that it is strong enough and could be used for mounting the box in a different application. The gearbox mounting itself was bend and drilled and a piece of metal welded on to the correct angle at which the gearbox sits in the car. To make life easier, we made to little plates containing the bolts that holds the mounting in place, which mounts on the inside of the car and gets bolted to the seat support, no need for another person to hold a spanner to remove the mount.
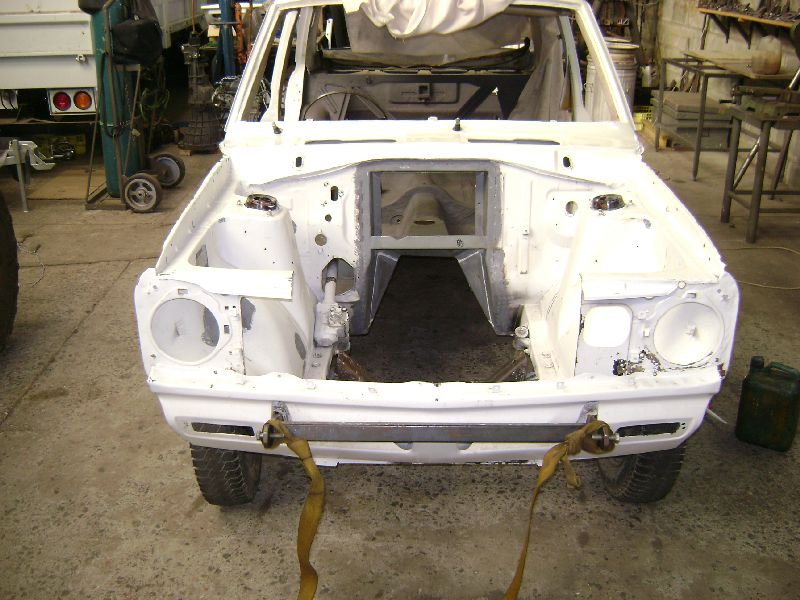
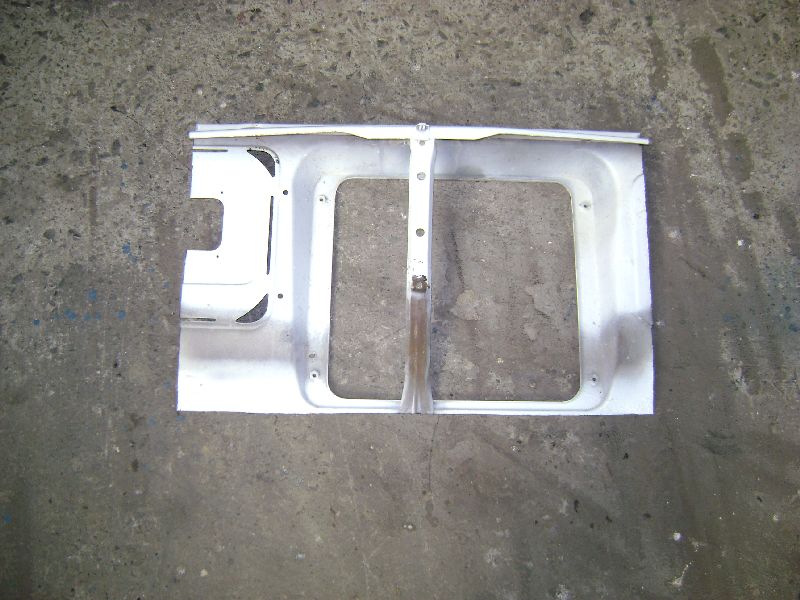

Just before we had to reinstall the motor and gearbox, my father asked me, "what do you think about the idea of making the radiator support a removable unit, as this would aid the removal and installation of the motor and gearbox as a unit much easier", it didn't take me more than 5 minutes to sum up the situation whip out a pencil to draw a few lines and install the thinnest cutting disc in the grinder. Allot of this material that we wanted to cut out was already on the list to remove as we need to make space for the biggest possible radiator to fit the front. Once the radiator arrives we will mount it and start rebuilding the front section which houses the bonnet catch and support, but in such away as it needs to be removable. By removing this piece of material, a nice location for a oil cooler also presented itself.
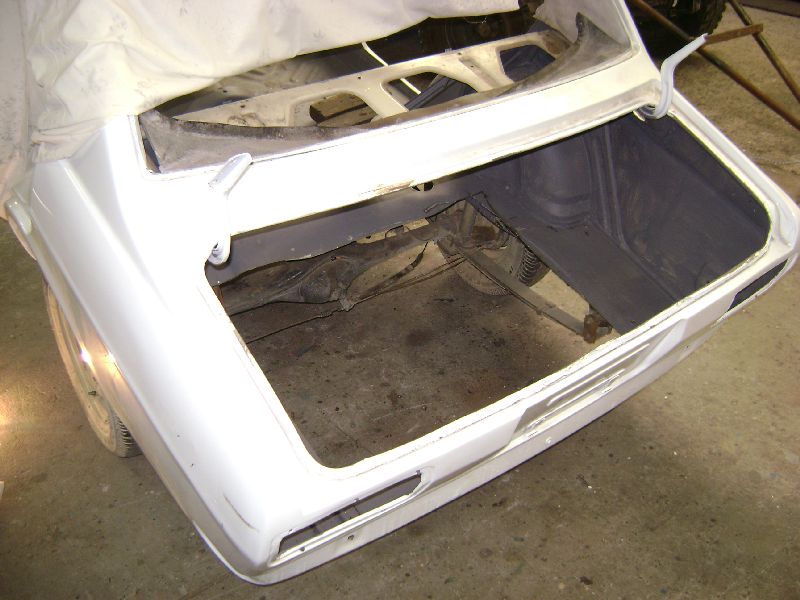
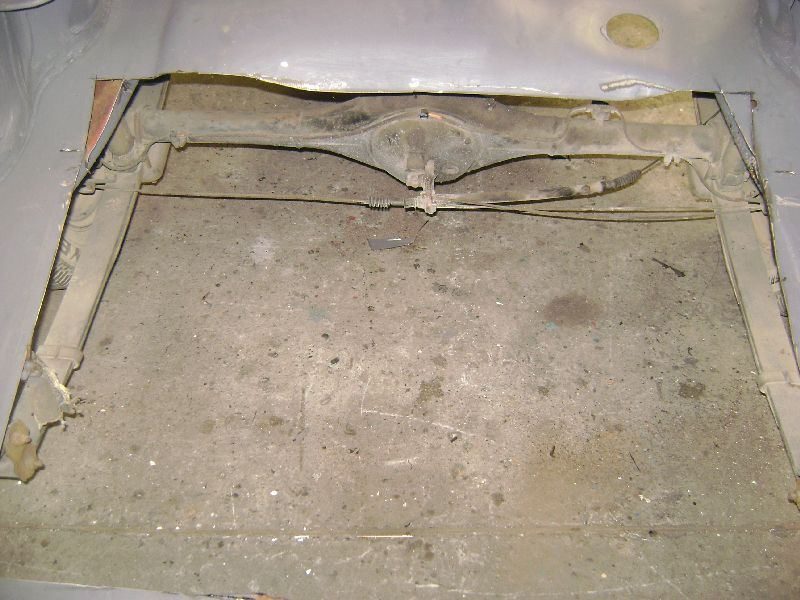
Since we were in the cutting up a Datsun spirit we moved to the rear of the car, in the boot we had to make space for the fuel cell, pumps and filters, the spare wheel hole seemed to be the obvious place to mount these goodies, but the small whole was not going to be enough. We traced the chassis from under the car and cut the biggest whole possible, the idea is to replace the hole with a box to house the above mentioned, an idea that I got from a picture showing a Datsun with a dropped fuel tank. My first thoughts after we cut the hole was that it is going to be a lot easier to design the rear suspension, provided now, that you can actually sit upright in the hole and do the work than lying on your side.
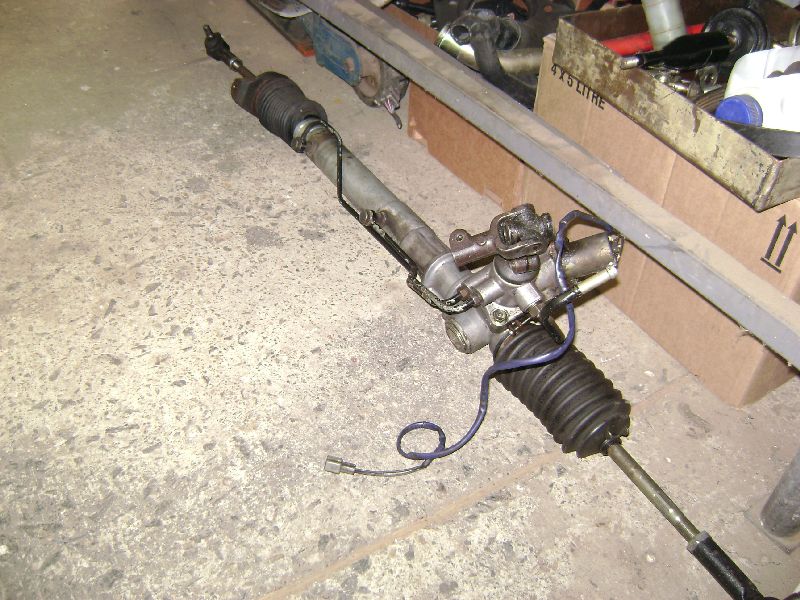
During the previous weeks, i had a little time on my hands and was able to visit some of the local wreckers to source a suitable power steering rack for the car. I only had to options, Nissan Skyline, the last one to be released in South Africa and the Toyota Cressida. These units mount on the rear of the cross member which will help allot with the actual mounting in this application and the other benefit is that if you turn the steering wheel left the wheel would actually move left. The exact opposite applies to units like those in the BMW's that mount on the front of the cross member. I was unable to source a decent Skyline one and had to settle for the Cressida unit. After holding it under the car it seems that the biggest modification that will need to be done to the unit is to machine down the rack ends and cut new thread for tie rods to work on the car.
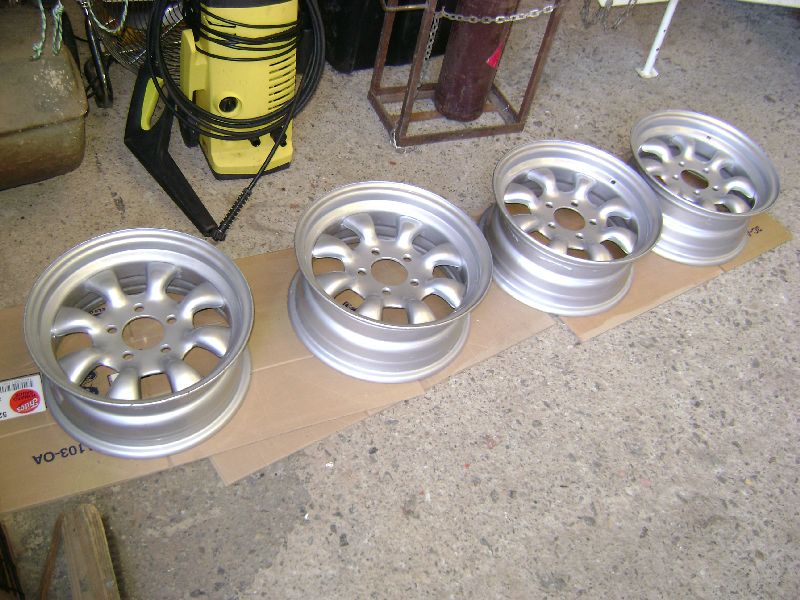
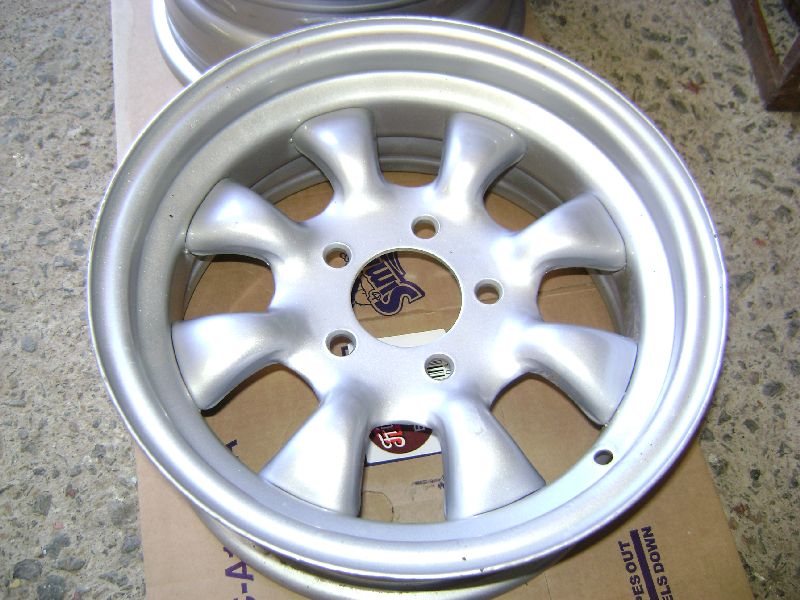

While I was busy on the upper level of the workshop, looking for parts in the containers, my eyes caught a glimpse of a set of Old Cyclone rims. I asked my father if he would donate it to the project and eagerly agreed as both of us knew this is the correct wheel for the car. After taking them down to get cleaned, I realized it is a set of 14" wheels with 5/108 pcd, the answer was easy, weld the holes up, redrill to 4/100 pcd, the pcd I will be converting the whole car to, as more options is available and then use them on the street or for a set of Semi Slicks. Damn these are sexy wheels, now to source 1 or 2 sets of them in 13" for use with low profile slicks.
|
|
;)
;)
;)
;)
;)
;)
;)
;)
;)
;)
;)
;)
;)
;)
;)
;)
;)
;)
;)
;)
;)
;)
;)