|
|
| Re: racetech's 1200 SR20VE Project |
Subject: Re: racetech's 1200 SR20VE Project
by racetech on 2012/9/26 14:23:58
August 2012 - Flares
Seeing that I cancelled my holiday plans as the destination was trying to drown itself, I thought this would be the best time to start with the flares. 11 days seems like an eternity, but I would have loved another 4, time goes by way to fast if you are busy, especially with things you have never worked with before like foam and fiberglass. I've been collecting pictures of flares or wheel arches as some people call them for about 2 years now, basically since I decided to make the car so wide, and stole ideas from these to get to what satisfies my taste. Since the car arrived at the shed the making of flares was my biggest nightmare, probably due to the unknown and the fact that a river rock have been blessed with more creativity than me, sculpting and the arty side of life I leave to those with the talent for it. Lucky for me I have a friend that works with fibreglass a lot and have been involved with this sort of thing previously to help me.

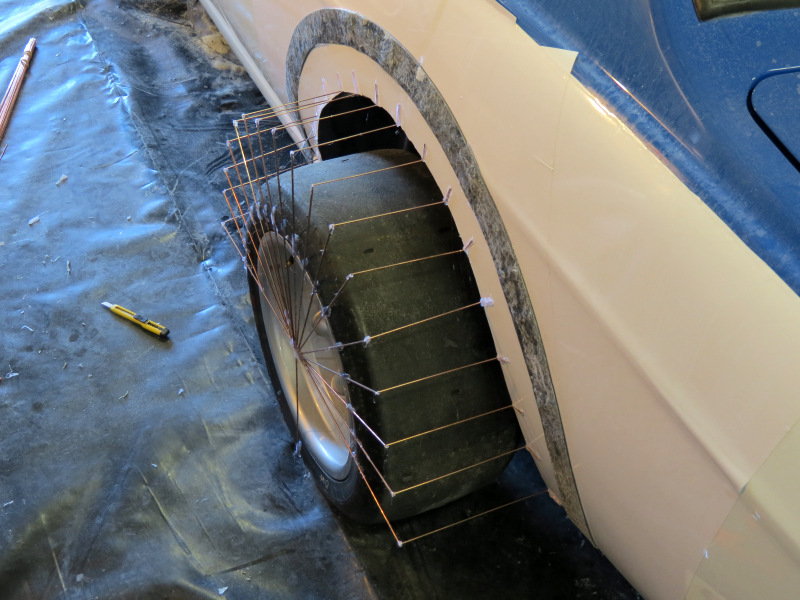
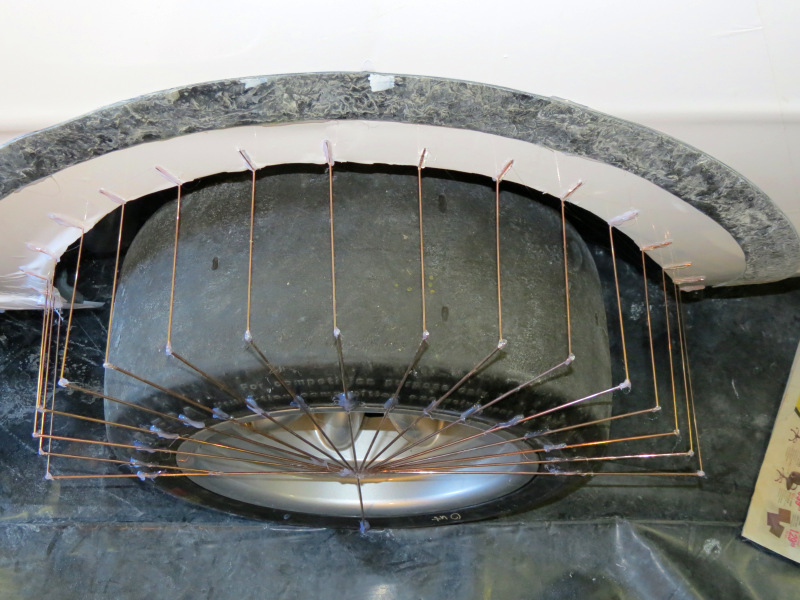

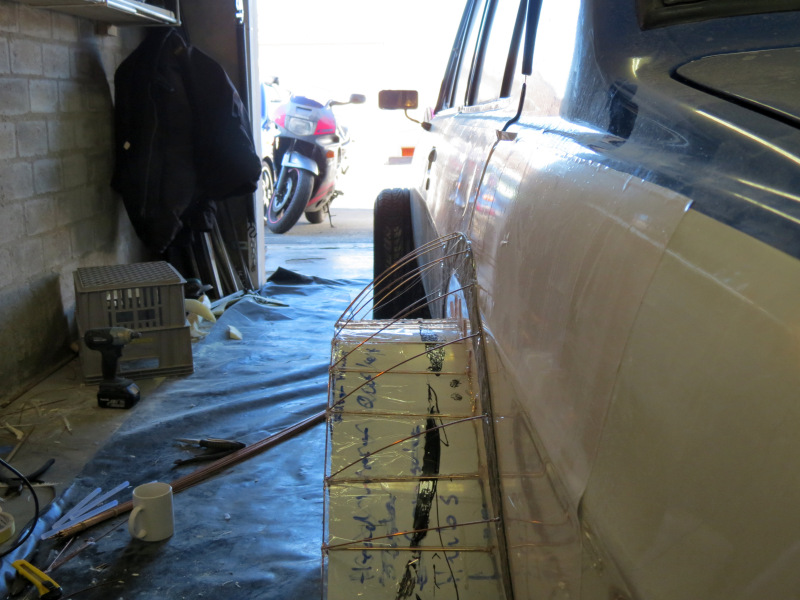
First challenge was to figure a way out to get the shape I had in my mind on the car to visually inspect it, this came in the form of plastic sheets and 2kg of welding wire. The initial plan was to make the flares round, but this would have been way to much work, especially with my lack of creativity, I'm more for the driving than sitting for weeks sanding. Thus I decided to make them flat, the idea sounded much more at home than round arty stuff, especially since my brother knows his way around CAD software and would be possible to provide me with a halve decent cut profile needed, well let me just say, that plan did not last longer than 30 minutes once I started sticking bend pieces of welding rod to the rear arches. The straight profile just did not do it for me and I had to give in to the arty side shouting by now to make the profile slightly round. I bend a few wires and stick them to the side, immediately it just looked correct.

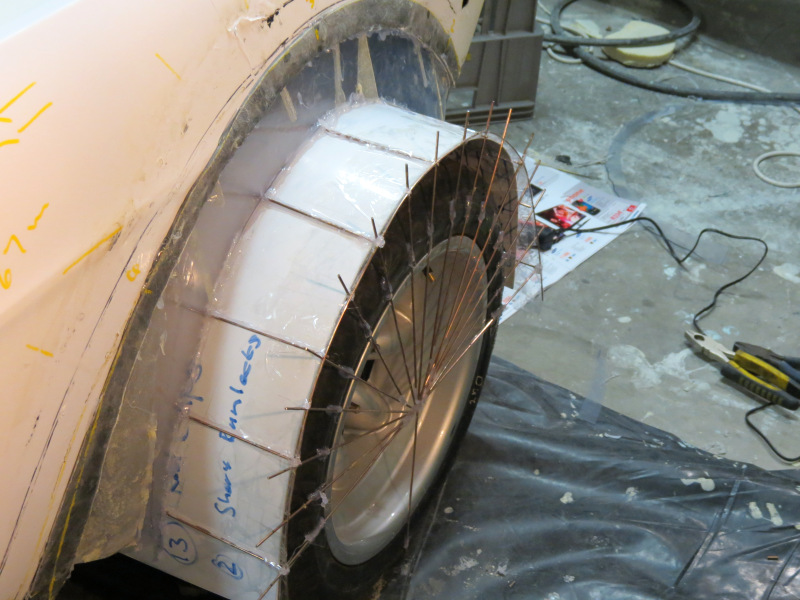
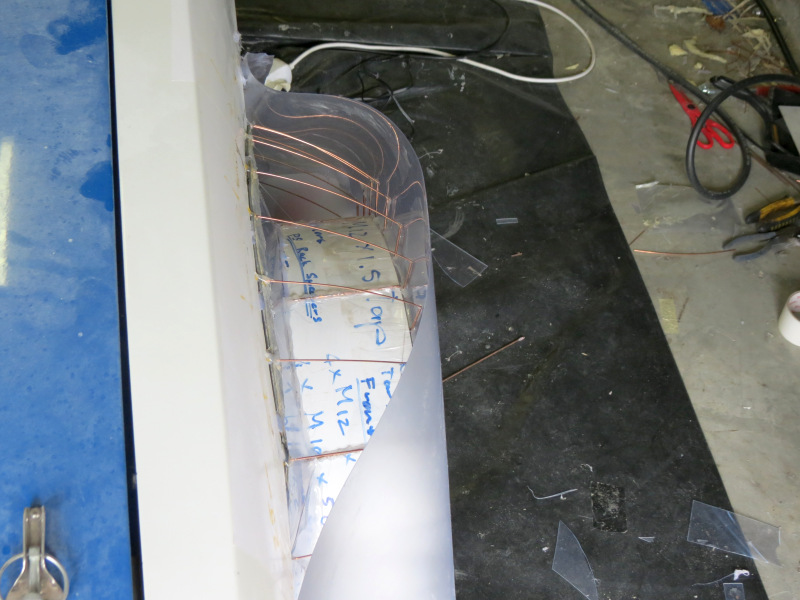

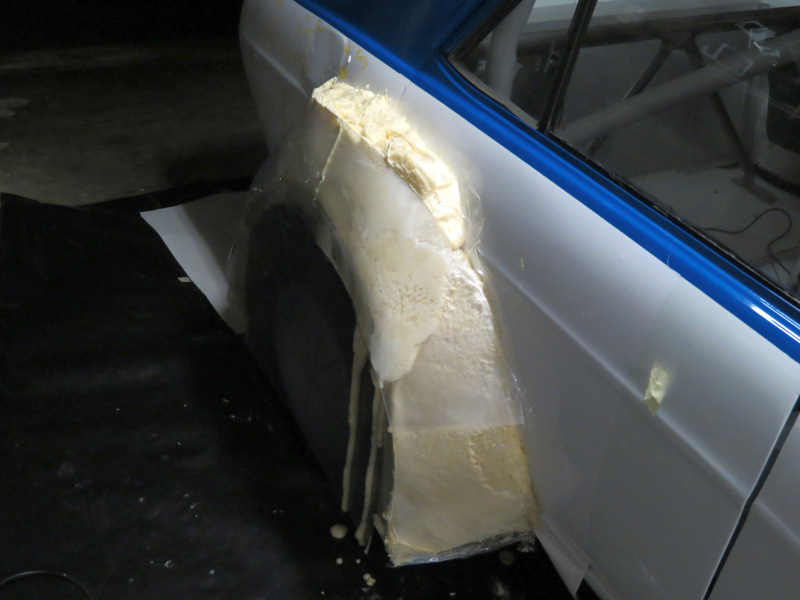
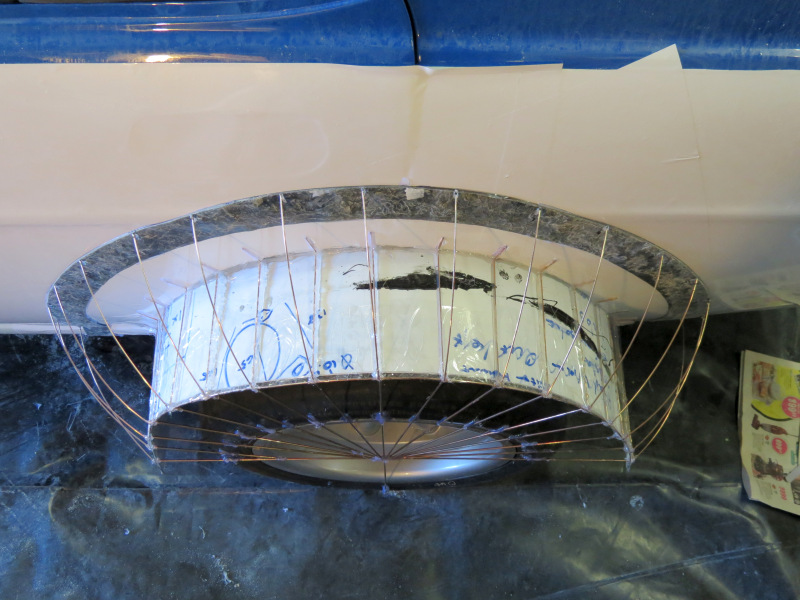
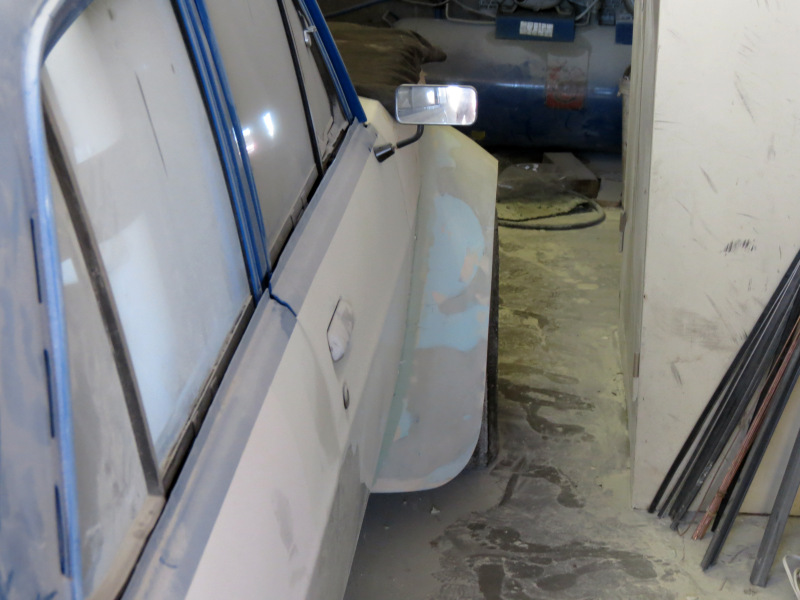
A few measurements later and we started with a layer of fibreglass to follow the contour of the rear wheel arch, once this was cured and shaped to the desired radius required, I started building the spider web of various lengths of wire to form the basic profile of the flare, then the expedition started to get this all boxed up with plastic sheets and to add to this, it needs to be water tight. You need more than enough glue sticks and tape to accomplish this. Doing this once is quite fun, but 4 times in total gets a little bored, at least I learned to talk to myself while doing this. After this whole contraption is glued together and covered with plastic, it is time for some fun with the Two Part Foam. Working with this stuff can't be easier, it comes in two different tins, part a and part b, start with a small amount of the one part, mixed exactly the same amount from the other amount, do mix it very good, but be in a hurry, once mixed pour it into the empty cavity, sit back and wait for the foam to start expand. Once this is all done, leave for a few hours to set and remove the plastic.
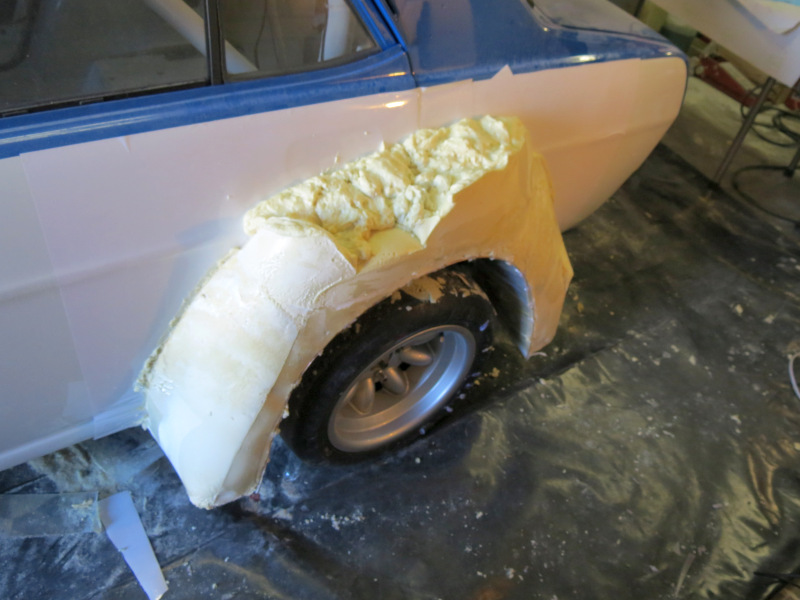

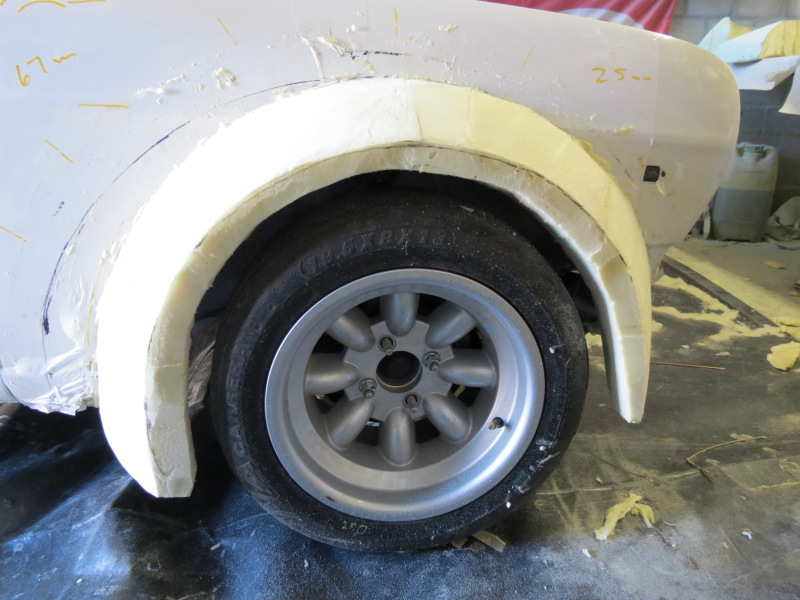
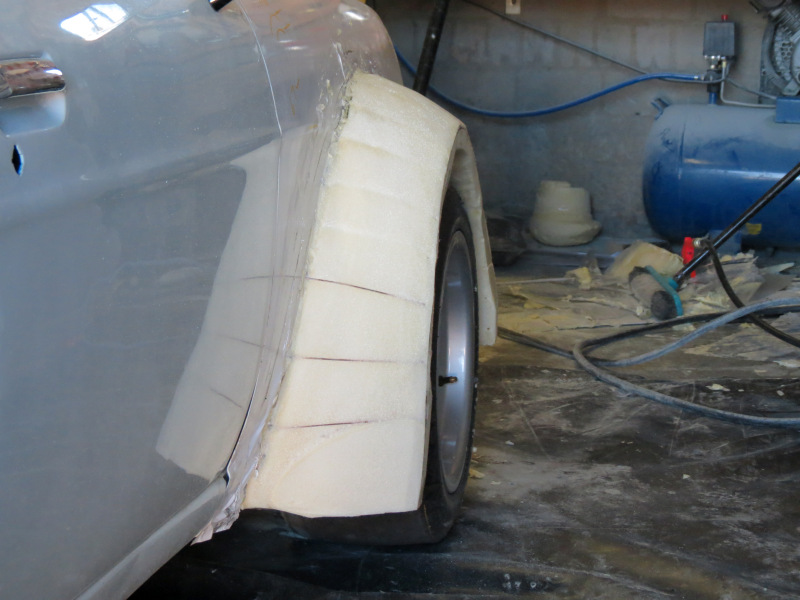
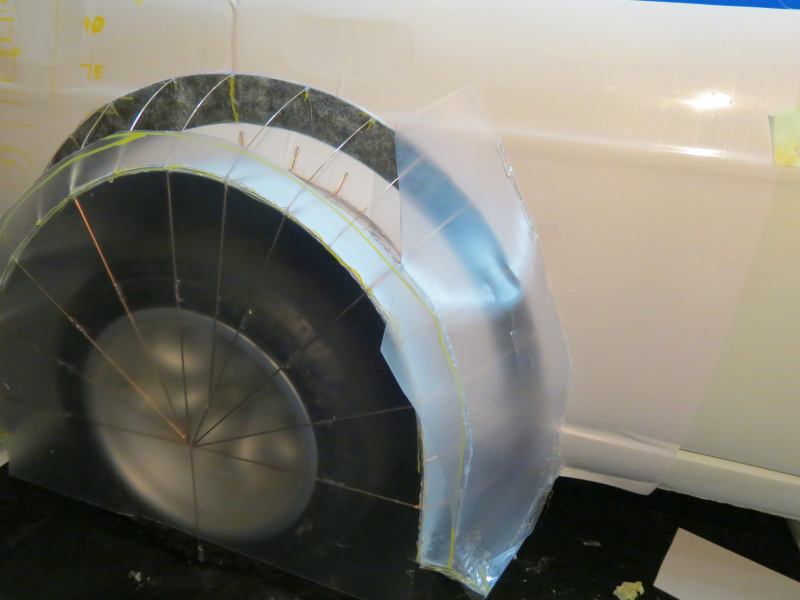
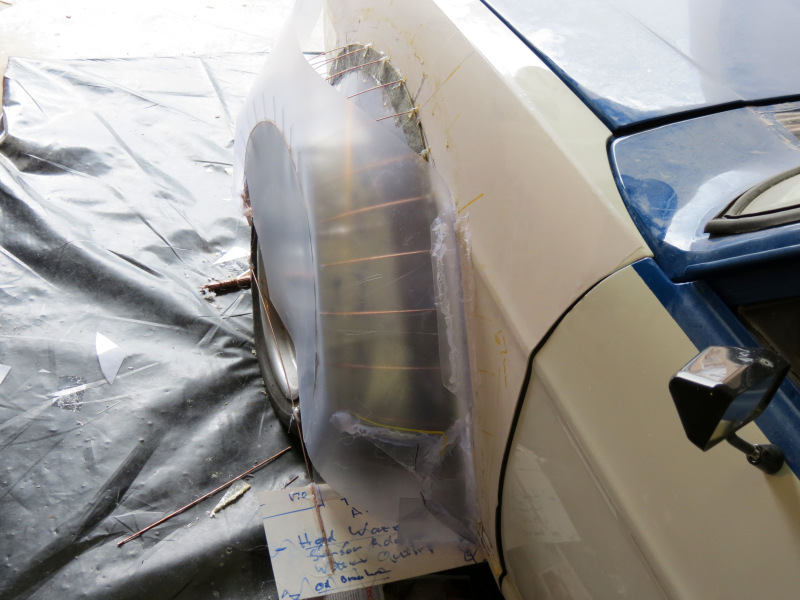
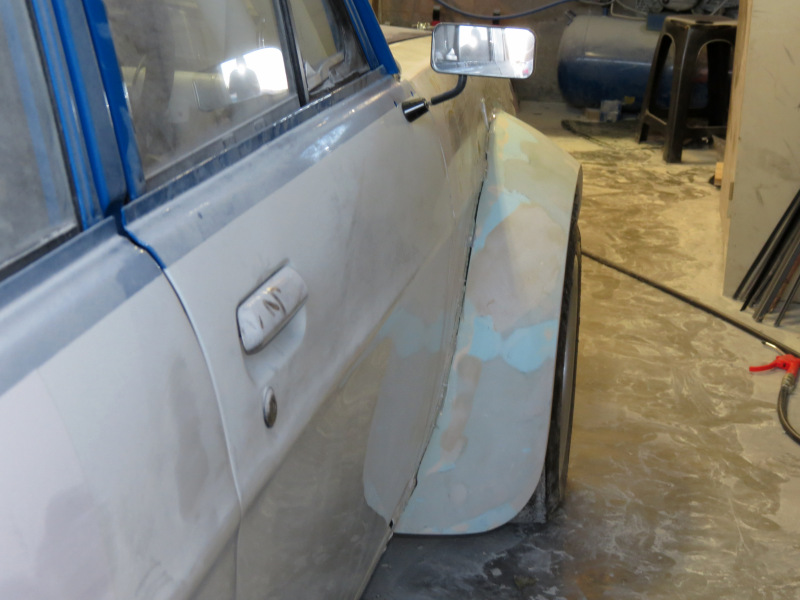
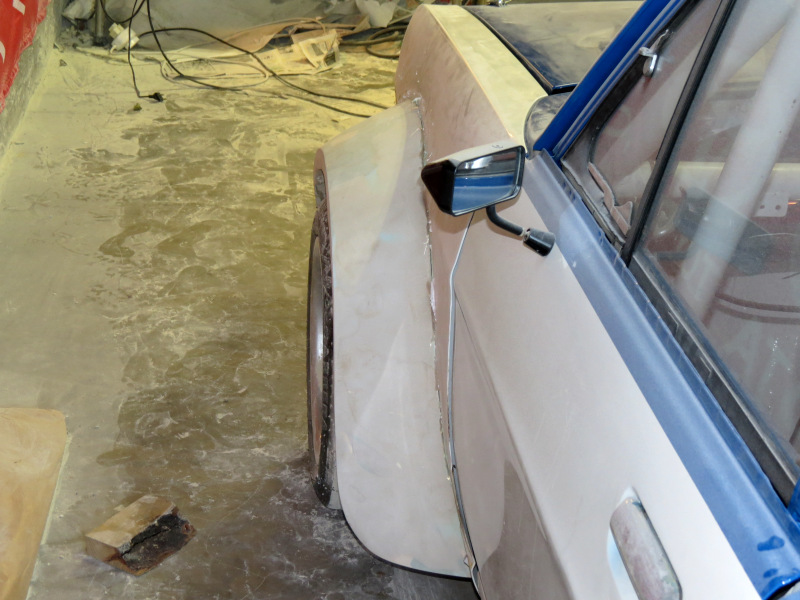
Once the plastic is off, the shaping starts, this is one messy story, the foam sticks to your skin and cannot be rubbed off, only high pressure air is able to remove it. Now you will start to see why I spend all the time with the wires, this at least gave me some form of indication how to shape the flare. This is also the point where I made one of the first mistakes, do not remove it until both sides are done, however, I did remove it and had fun getting the two sides looking the same. Once removed, it is time to start covering the flare with body filler, this is probably the easiest part, but more than likely the most dirty part, as the dust is everywhere. Once this is done it must be smoothed, this is where I ran out of talent very fast, it would have taken me months to get these 100% smooth. This process was repeated another 3 times, seeing that not even one of the flares can be used on another corner. Half way thru trying to smooth the flares out, I decided that I'm going to take them to a professional, this didn't make it any easier as I still had to get them in the correct shape and 100% covered with smoothed body filler. For the majority of people this would be good enough as they could finish off the final fibreglass flare, but I want them perfect, seeing that I want to colour match the gel coat to the cars paint and every flare that comes out of the mould are 100% done to attach to the car, maybe just add some sort of protection on the insides.
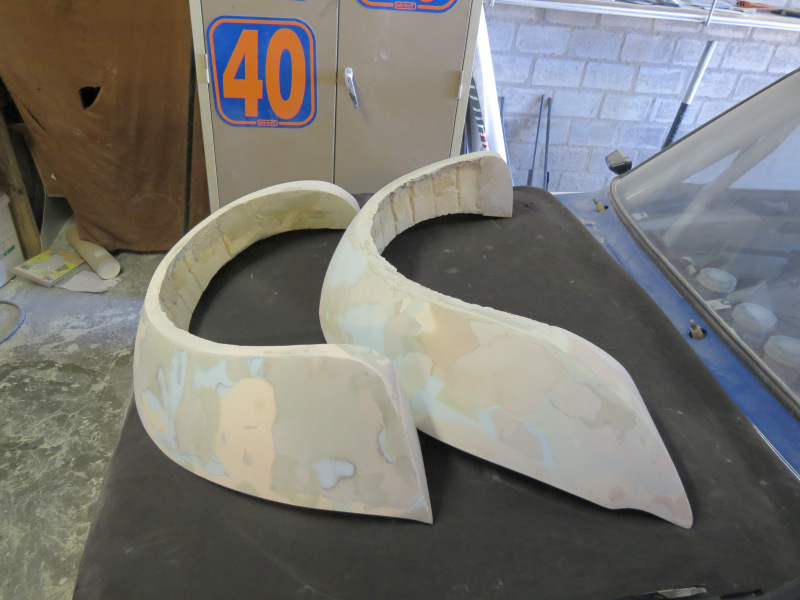
All in all, these flares took me about 1 month and 25 days to complete to what it is today, I have delivered them to a professional body shop for final preparation and some paint before I get them back and we can start with the moulds. This was hell, I really do not want to do it again in, everything is under dust, you cannot walk thru the garage without being full of dust, luckily I'm done with the mess. Personally I think it would be far better for your health to just save the money and get a set of side shafts made to suit the car with a set of pre-built flares.
|
|
;)
;)
;)
;)
;)
;)
;)
;)
;)
;)
;)
;)
;)
;)
;)
;)
;)
;)
;)
;)
;)
;)
;)