|
|
| Re: racetech's 1200 SR20VE Project |
Subject: Re: racetech's 1200 SR20VE Project
by racetech on 2014/4/11 8:51:05
FEBRUARY 2014 RALLY PREP II
In this update the car is transformed into what actually looks like a racing car and not a very wide arched road car with a roll cage. I don't know about you, but this thing looks damn good and I'm quite proud to be the owner of it and privileged to look at it every time I open the garage door, even thou there is still a million things I'm not happy with, at least it is in a state I can start to enjoy it and that is on the gravel fighting the forces to keep it in a straight line once I need a break from the forces trying to dirty my pants, let us forget about the new dictionary of swear words I learned during the build of the car and start wagging the tail around.</span>
Sill Stands & Brackets
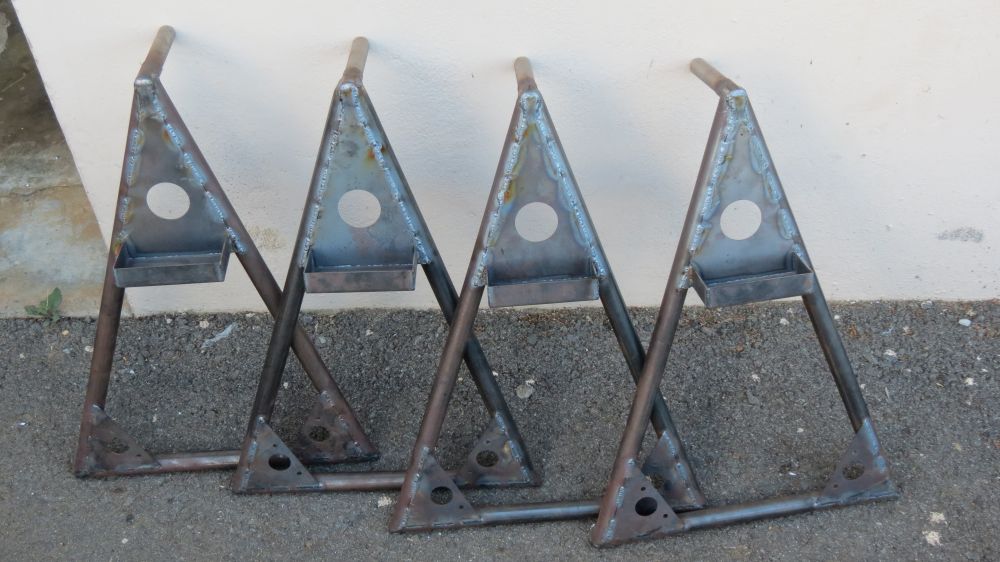
This being phase II of the sill stands due to the fact that I shortened the original stands as they were stupidly high and no jack in the Cape Town surrounds could lift it that high. In order to make it more practical but still at a comfortable height to work under the car they were shortened by 100mm. The bottom sill height from the ground once they sit on the new shorter stands is still +- 500mm, which make working on the car quite nice.
You will notice all the supports in the final product, first thing you notice is the top plate with the big hole, this piece also incorporates a little bucket to store wheel nuts out of the gravel once removed.
The bottom part is strengthen with a plate on both sides, then the pin is supported with two pieces of plate to aid with the weight distribution. Keep in mind these stands must be able to support at least 300-400kg depending on how even the ground is. I have tested them with the full weight of the car plus driver with only 3 stands touching the ground.

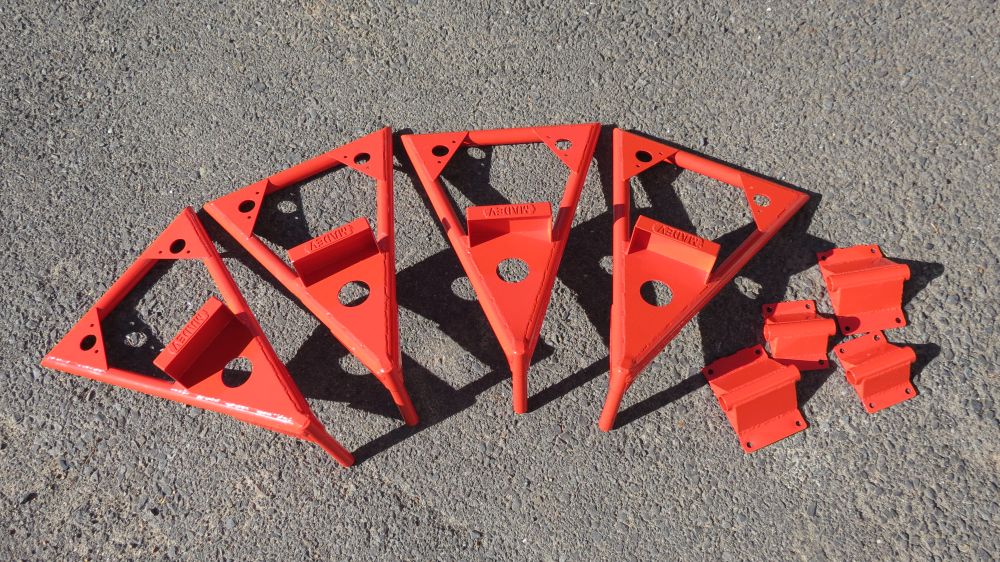
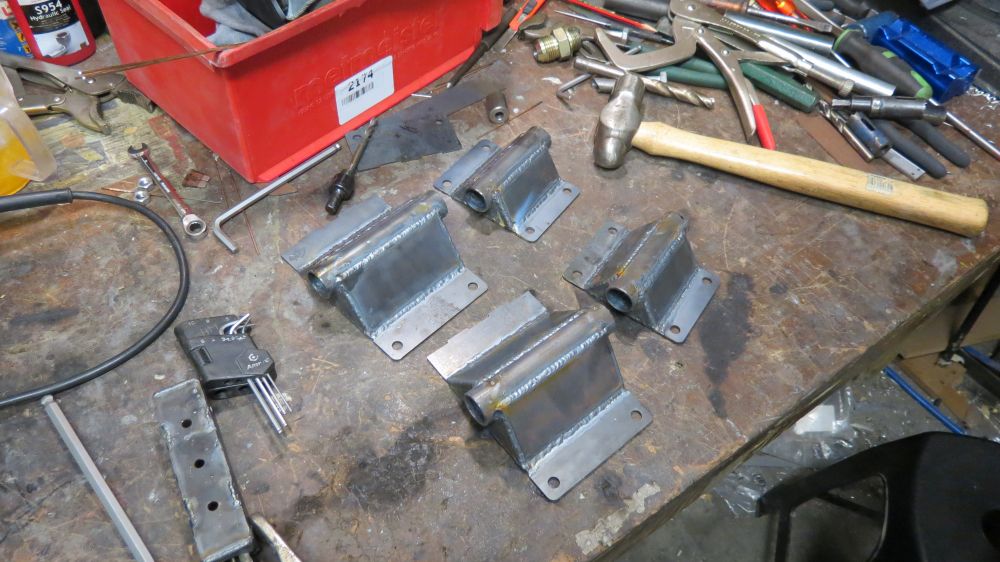
While all this was going on a set of brackets was also finished to bolt to the underside of the car, as I did not add these brackets while building the original car, I was not willing to weld on the sills, thus the brackets. All of the parts was epoxy coated by Metalseal Coatings in Parow with the same red as the front suspension parts.
Since working with these will never again build my own racing cars without the ability to use these, no more crawling under the car to position trestles just to re adjust them as you lower the car. These you jack the car, stand next to the car while inserting the stands, yes you stand, lower the car, jack the rear, insert stands and lower, no more laying on the ground while looking lowering the car.
Strut Brace
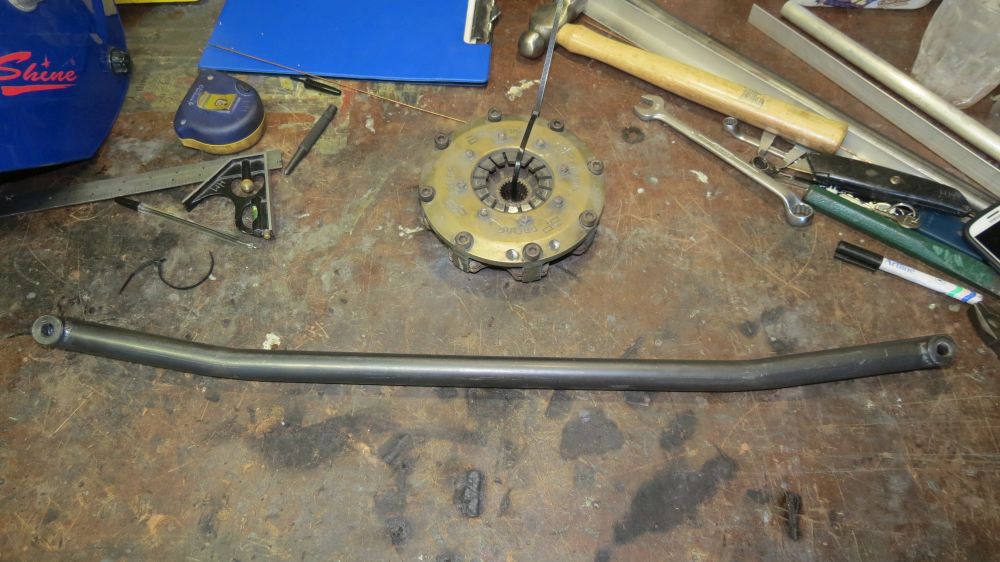


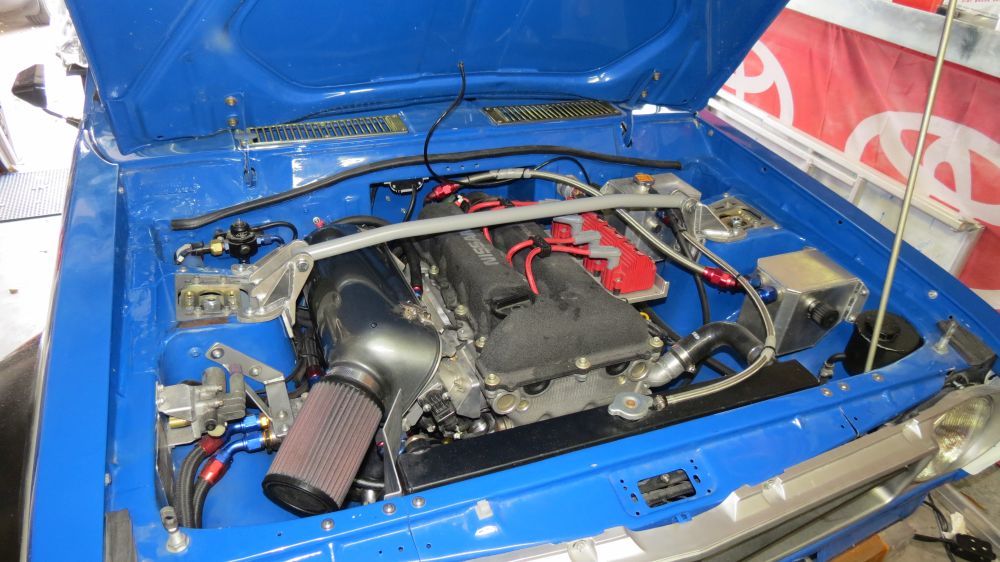
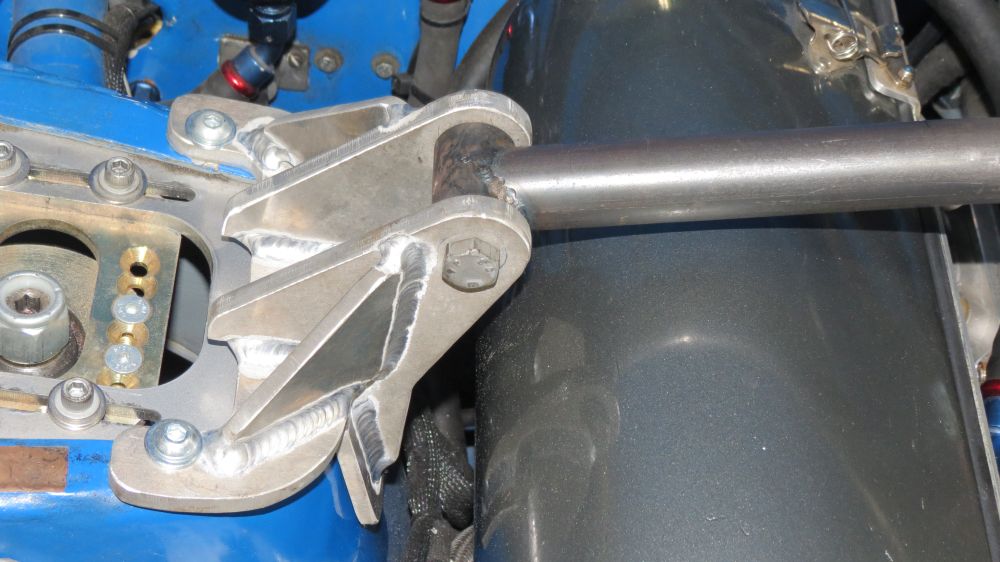

After spending almost an hour waiting for these strut mountings too cool down after the welder finished with them I could mount them and start planning the strut brace. Since we acquired our license for the popular Bend-Tech software, I was quite amped to test it on some in the real world but still simple enough to not waste a lot of steel, and the brace was the perfect job to test how accurate the software is, with confidence I can state that this software is and will be an assist in our garage for years to come.
After everything was measured and designed in the application, it was a matter of marking the tube and bend as instructed by the software, once the tube left the bender the application provides the profile for the mitre. In my case the brace were to mate with a 25mm bush on the mounts, whipped out a whole saw and completed the mitres on the mill as the application instructed. The fit is perfect, I would recommend the software for anyone willing to learn something new to make their projects more accurate and easier. Brilliant piece of kit.
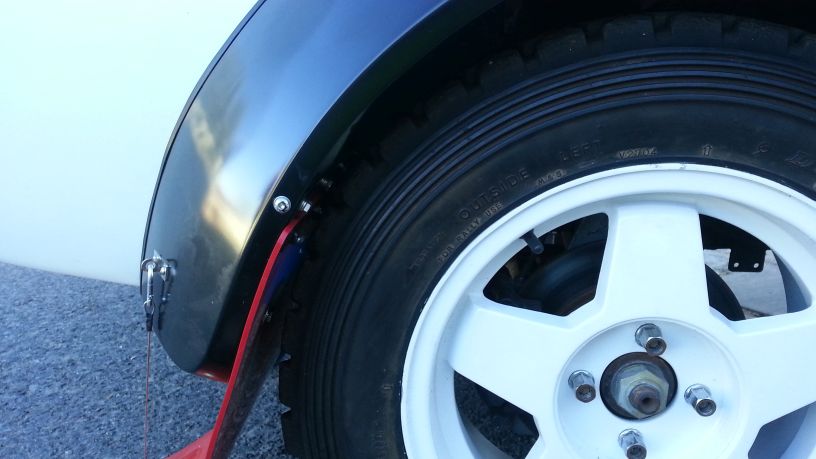
Mud Flap Chains


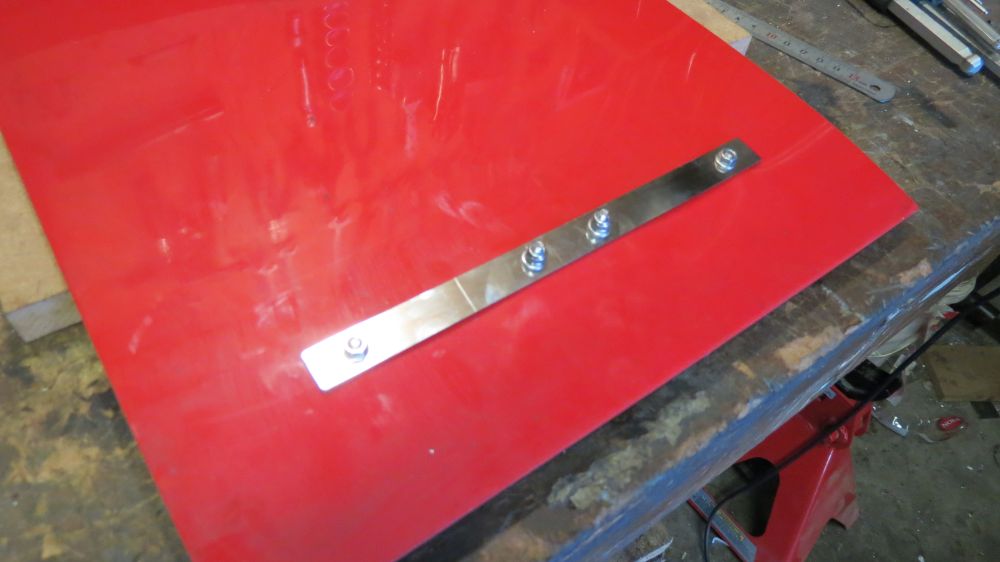

Seeing that the mud flaps were mounted with rally tires in mind, I had to make some sort of plan to raise them when using normal street tyres on the car. Eventually I settled on some small brackets I had cut and after welding, electro polished for a clean look. I used some 2mm cable and small snap hooks to attach to the brackets, raising the flaps enough to stay away from the wheels when reversing.
Wheel Arches
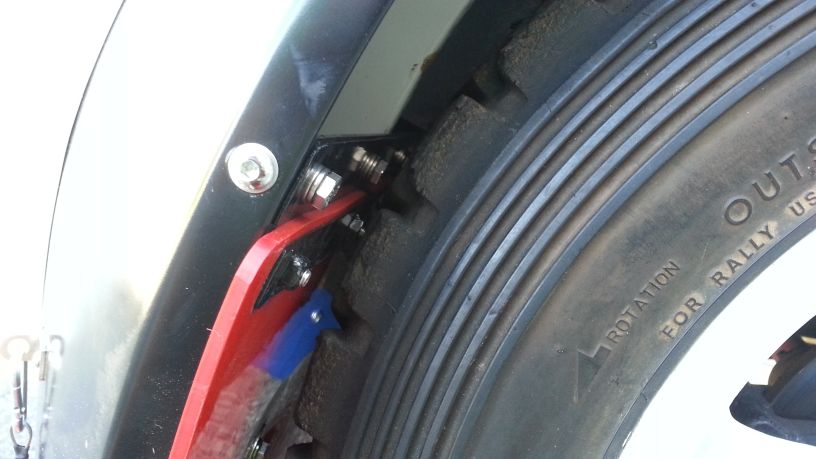
What an epic fail. Let me explain, as I was fitting the mud flap chains, all I could think of was taking the car for a spin on rally tyres for the first time, for me this was a big thing, well this big thing turned into a nightmare as I was driving down the driveway and the wheels caught the mud flap mountings and barely missing the front part of the inner arch. I was so focused on making space for the wheels to turn in front that I did not spend enough time on the back.
This ended up in stripping the coil overs, marking the arches and removing up to 30mm of bodywork just to move the mud flap brackets backwards. Redesigned the mounting slightly and replaced all the normal bolts with button head Allen caps, all this for more clearance. The flare was also moved back by about 25mm.
Once all this was done I had to make new pieces of flare that would be attached to the flares to fill the 25mm wide gap. This job was given to Car Boat Truck Mechanical & Bodyworks, they also managed to clean up the arches.
Off-road Jack Build

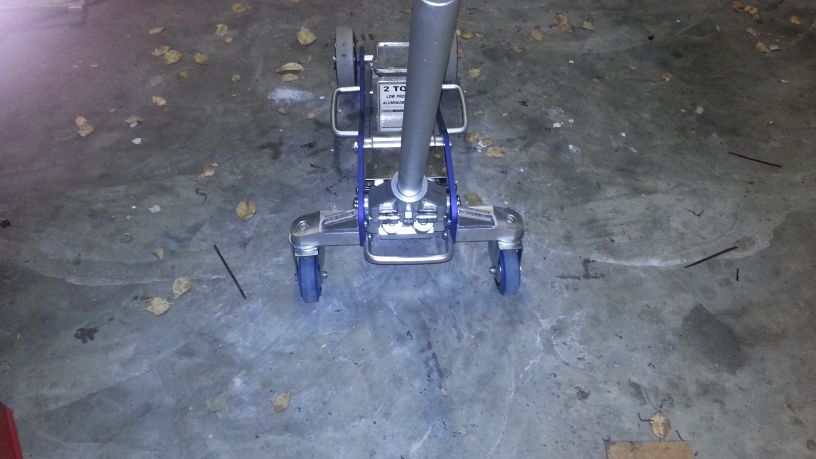
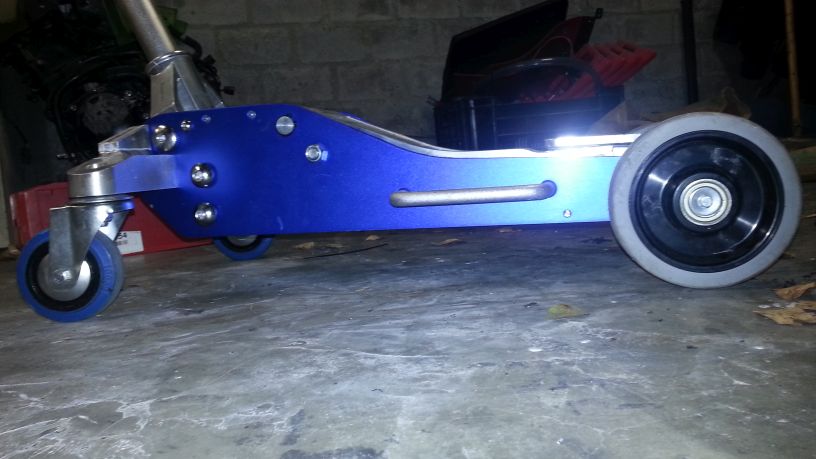
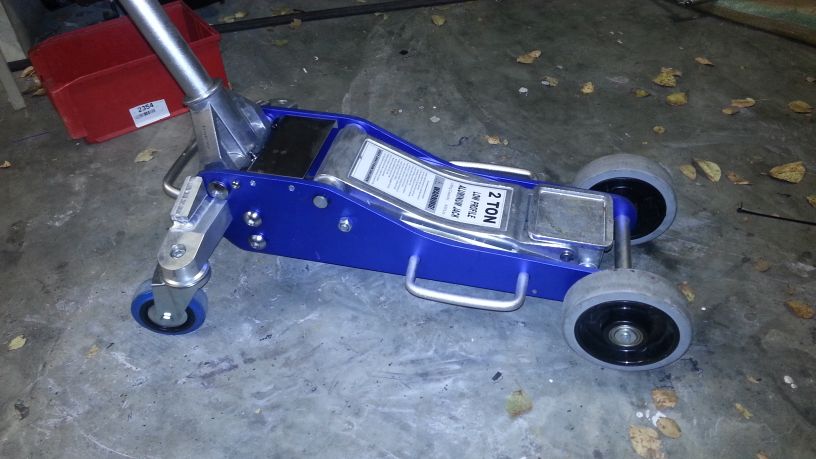


Seeing that my old aluminium jack wasn't up to the task to lift the car high enough to insert the sill stands, I had to purchase a new jack with a longer stroke. Since seeing my first 4x4 jack at one of the Adenco 400 off-road rallies I just knew I had to add the <a href="http://www.madev.co.za" target="_blank">Madev.co.za</a> touch to this one as the standard wheels was just not good enough, well I ended with a set of front wheels rolling on two bearings each, the rear units was package for me in order to have a smaller mounting but still keep the bearing wheel. A few bushes further and the front wheels were mounted. The rear wheels was not that easy as I needed new mountings as the wheels was hitting the body of the jack when swivelling. I made some new mounts and had some extra supports welded on.
The jack works very nice on all sorts of surfaces and is supper quite, only problem is the fact that you have to keep an eye on it, if you do not park it really good it will literally run away without you knowing it.
Next steps for it is to make some lifting shoes with rubber that is the correct height to avoid using spacers between the jack and the body of the car.
Decals
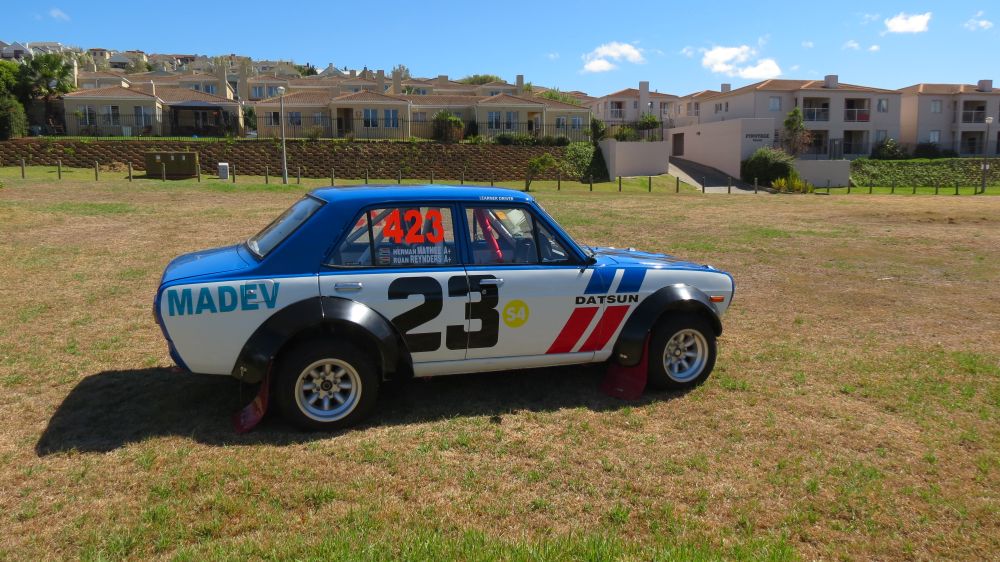
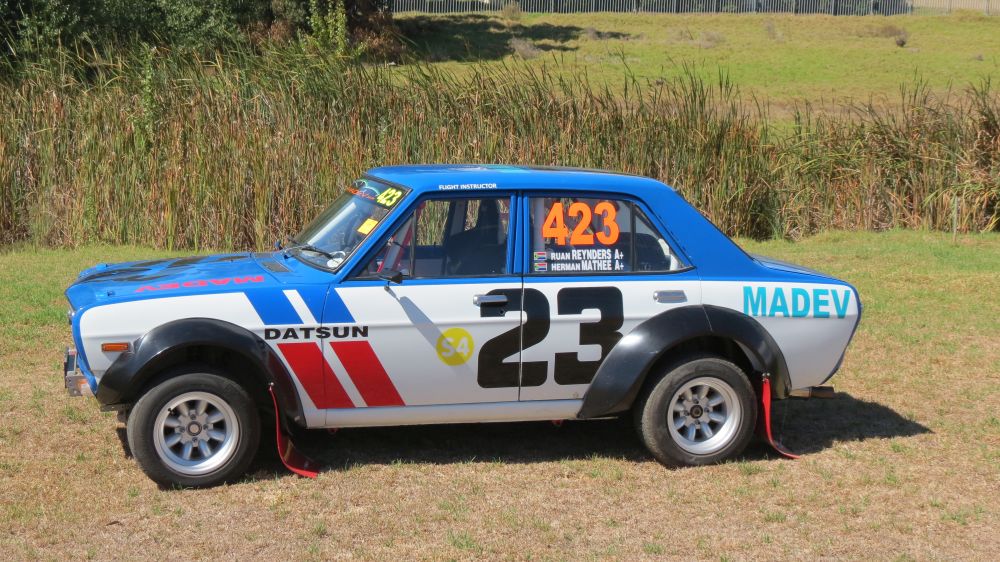

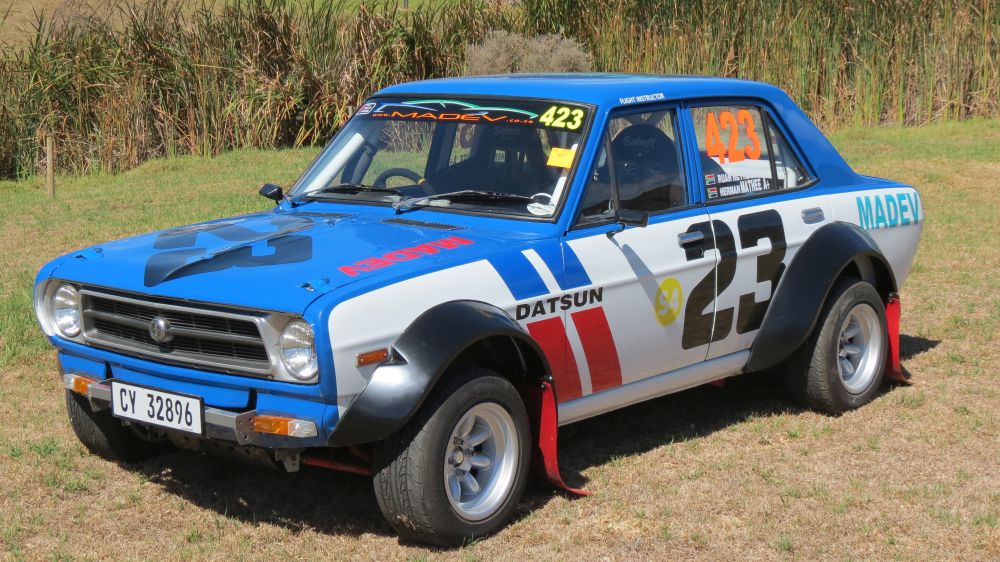

Since the beginning of the car the paint scheme was set as being something in the line of the old BRE Datsuns, seeing that I like blue much more than red, going with a blue roof was a no brainer. Having completed the majority of the mechanical work it was time to start with the stickers. As I'm not that creative, my brother helped a lot with the vinyl. Sizes was a very important thing as we started looking around a little and noticed way to much small high detail work on other cars that just disappear with distance and speed, we opted for the simple and big approach for the stripes and numbers, the smaller stuff will be visible at speed and distance but not readable, for that I invite you to come a little closer. A few smaller changes will be made when time allows as white pin striping around the black numbers and a few smaller support stickers.
Odds and Ends

Dimple Dies, don't you just love the way a few dimple dies in a project can set it aside from others, I just had to start playing with making my own as I do not know a place in the country selling them. A little more changes and I'll have the math all worked out and be able to make a full set.
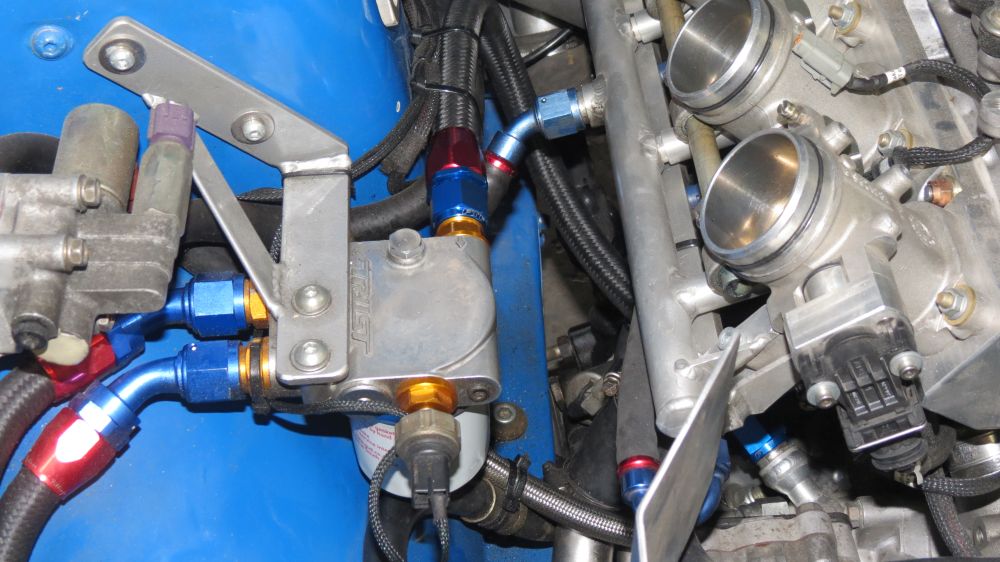
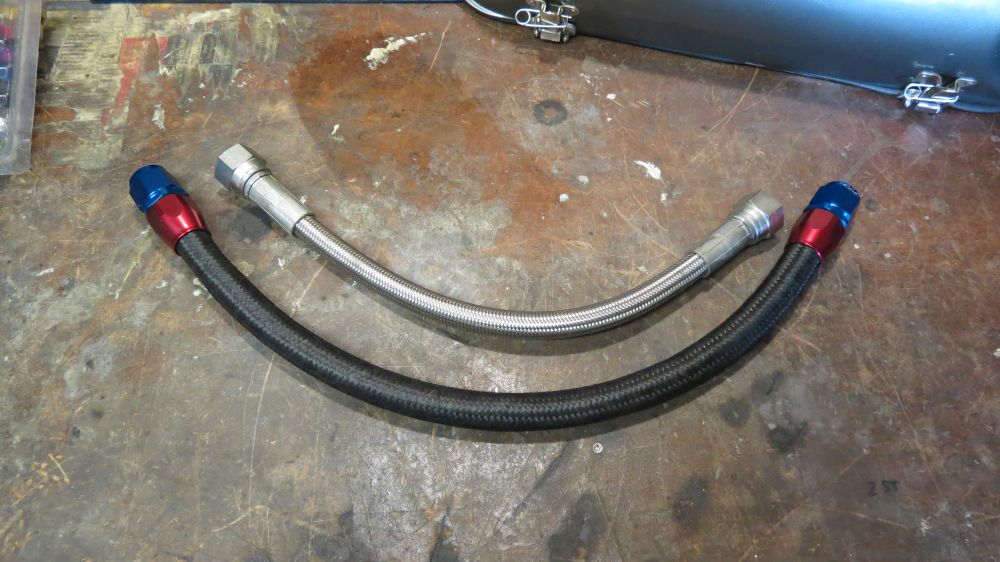
Oil Pipe, since helping a client with his racing cars plumbing, I ordered a few more fittings and replaced the oil feed from motor to remote filter with a lightweight nylon braided pipe.

Suspension Limiters, as I have so much suspension travel I have to limit the travel in order to not damage the CV joints and rack ends, as a temporary answer I crimped some 2mm cable to keep things from travelling to much. I'm well aware that this is a temporary answer and will have to be replaced with something more robust.

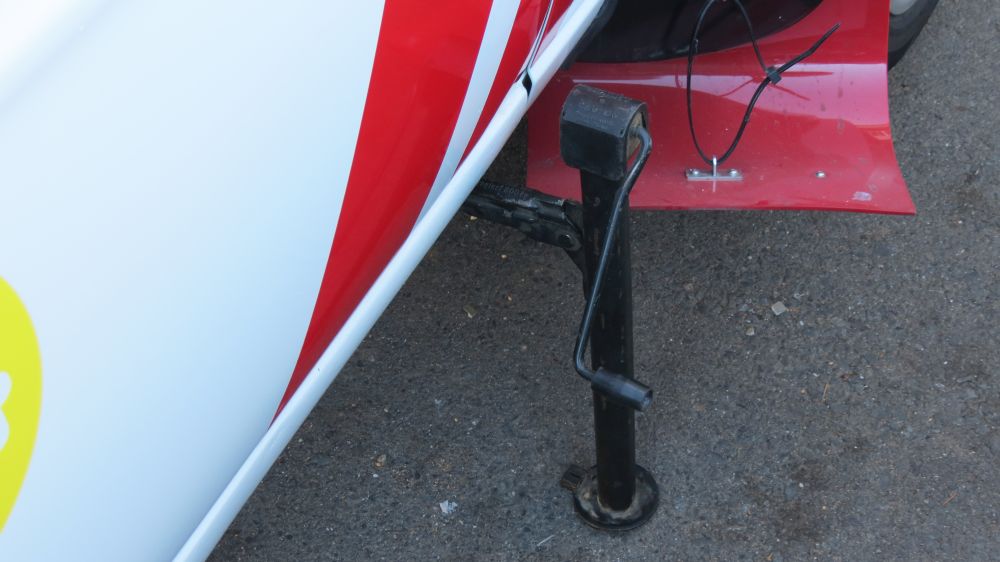
Rally Jack, seeing that I now have sill stand brackets in place on the car, I have a wider scope for sourcing a OEM type of jack with a huge stroke to lift the car in rally configuration in one go, the answer came in the form of a BMW E36 unit that needed only slight changes to fit my brackets. As you can see here it works nicely with the 13" wheels, only time will tell if it will work on the 15" rally wheels.
Polycarbonate Windows, all the polycarbonate needed to replace the side and rear glass arrived, even the polycarbonate air vents arrived from the UK that will help keep us cool and also aid in pressurizing the cabin to keep the dust at bay. This will only happen the upcoming months as time is limited.
All this will mean I need to redo the stickers on the rear windows. But seeing the ProSigns that originally done the current ones are too good to answer emails or phone calls. I think they should rather close their doors or learn to read emails. Probably filthy rich as they don't need business. The owner of Sticker King in Durbanville agreed to help me out with the new stickers as he heard I was struggling with the likes of ProSigns, thanks a lot Lourens.
Whats next: the first rally event will be at the end of March on my birthday, how lucky can I be, hopefully we will be able to do some testing on the track and on some actual gravel before that.
|
|
;)
;)
;)
;)
;)
;)
;)
;)
;)
;)
;)
;)
;)
;)
;)
;)
;)
;)
;)
;)
;)
;)
;)
;)
;)
;)
;)
;)
;)
;)
;)
;)
;)
;)