|
|
|
|
Re: Coupe Sports Sedan |
|
Home away from home  
Joined:
2008/7/20 3:16
From Adelaide
Group:
Registered Users
|
Howdy Bryan,
Yes I must admit the hand brake thing is a bit weird.
I would not have installed twin hand brakes as a retro
fit in a finished car, but as there where no brake lines there
it was easy.
I don't believe they will be of any use on a circuit track.
Where they might be of some use is on a couple of Hill climb
tracks I compete at.
if you youtube Collingrove hill climb and Mount Gambier hill climb,
both in South Australia you should be able to pick the corners I am
thinking might be assisted by a hand brake on the inside wheel only.
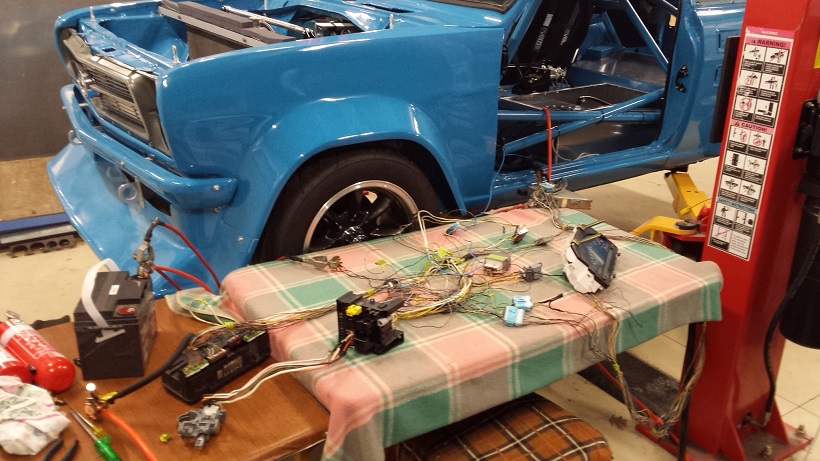
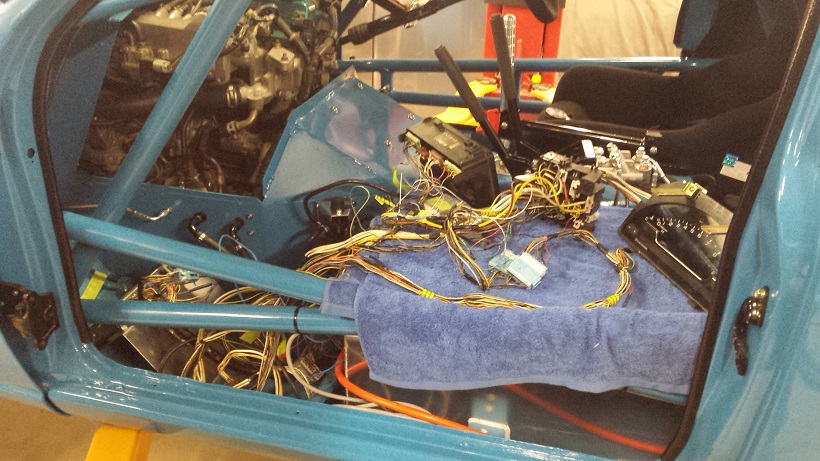
Next comes the electrics.
Having the front cut of the Honda supplied me with the ECU
and all the wiring looms I could ever need. . . . .
The motor loom was installed untouched from standard.
All the other looms are going to be cut down to the bare minimum. The Dash is the standard S2000 unit.
Before I cut anything out of the looms I wanted to get the "blue bastard" started.
So with the wiring connected but just sitting around I attempted to start the "Blue Bastard".
After THREE full days of the Honda wiring diagrams,
The BLUE BASTARD would fuel prime, the dash would go through
it's start up checks, it would crank but not fire.
Every time I came in from the shed my wife would ask how I was getting on and she received the same answer every time for three days.
THAT BLUE BASTARD WILL NOT START.
The name sort of stuck.
Anyone want to guess what I missed and why it would not start??
Posted on: 2016/4/15 9:46
|
_________________
Go Fast, Or Go Home. 
|
|
|
Re: Coupe Sports Sedan |
|
Home away from home Joined:
2008/7/20 3:16
From Adelaide
Group:
Registered Users
|
Not sure what you are talking about Scott?
Posted on: 2016/4/14 9:03
|
_________________
Go Fast, Or Go Home.
|
|
|
Re: Ordering from Maddat in US Shipping Costs? |
|
Home away from home Joined:
2008/7/20 3:16
From Adelaide
Group:
Registered Users
|
Howdy,
I know Scott and his team are quite busy at the moment.
There work is of the highest quality and they are in demand.
I am not making excuses for the lack an of e-mail reply,
but you can be reassured Scott will get back to you and it
will be worth the wait.
I have one of MADDAT's steering box braces in my 1200 and they look and work very well.
I have posted stuff to the US before and the cost is weight related. From memory its about $12 for upto 500 grams.
Cheers
Geoff.
Attach file:
 steering box brace 1 .jpg (115.67 KB) steering box brace 1 .jpg (115.67 KB)
Posted on: 2016/4/14 8:59
|
_________________
Go Fast, Or Go Home.
|
|
|
Re: Coupe Sports Sedan |
|
Home away from home Joined:
2008/7/20 3:16
From Adelaide
Group:
Registered Users
|
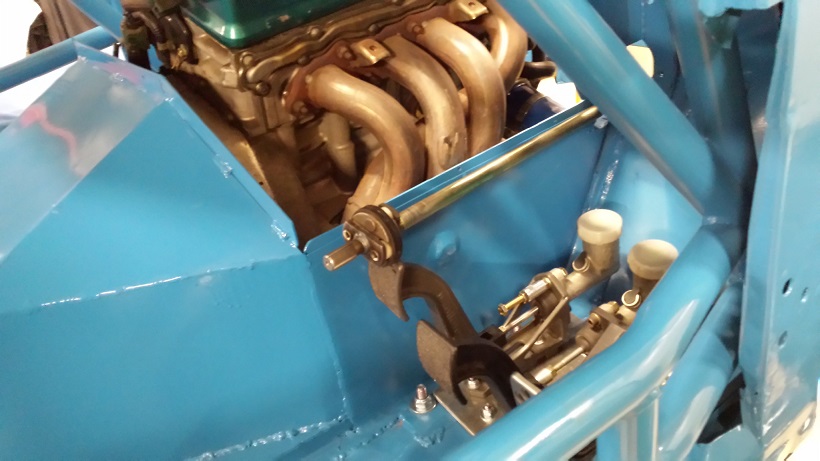
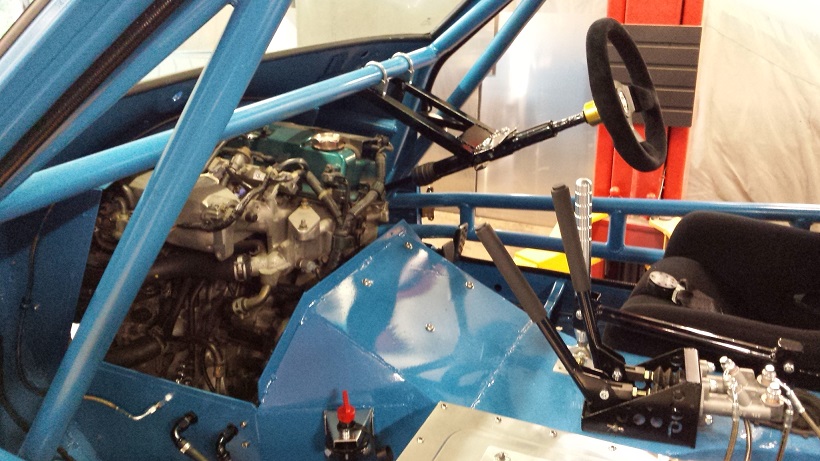
More cabin bits . . . .
The pedal box including the master cylinders are all in the cabin.
This allowed most of the brake and clutch lines to be run
inside the cabin.
I installed twin hydrolic handbrakes, one per rear wheel.
To help with slow hair pin turns.
The idea is to try and load up (not lock up) the inside rear wheel with the hand brake to try and
pull the front of the car around the corner.
It works with tractors . . . . . .
Have not been game enough to try it in a race yet.
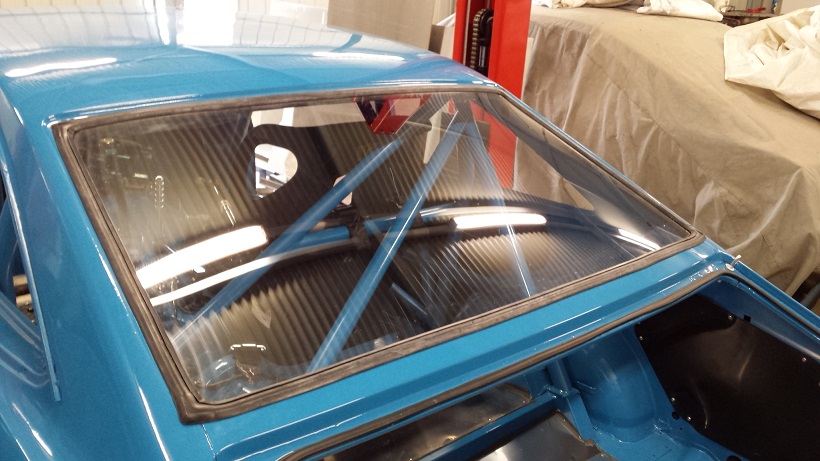
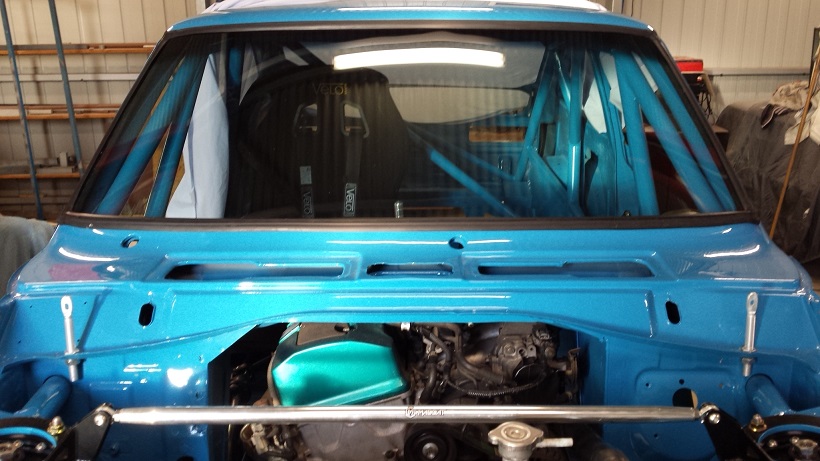
The Poly carbonate "Glass" is 3mm thick, the rear window
is installed with a standard rubber seal with no sealant
so it can be kicked out from inside the car if required.
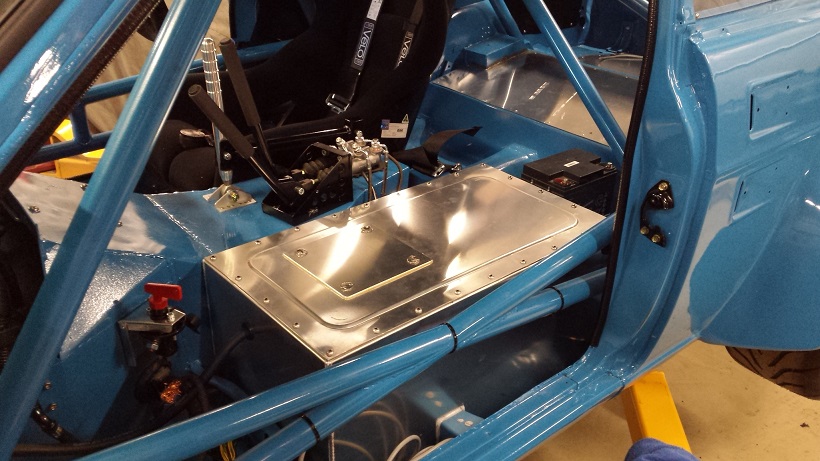
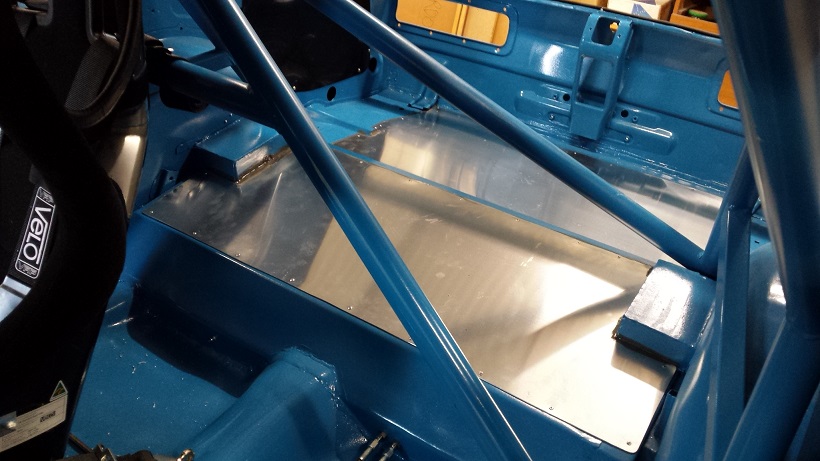
The fuel tank, fuel pump and filter are installed inside a
sealed box where the passenger seat should be.
It's all about weight balance.
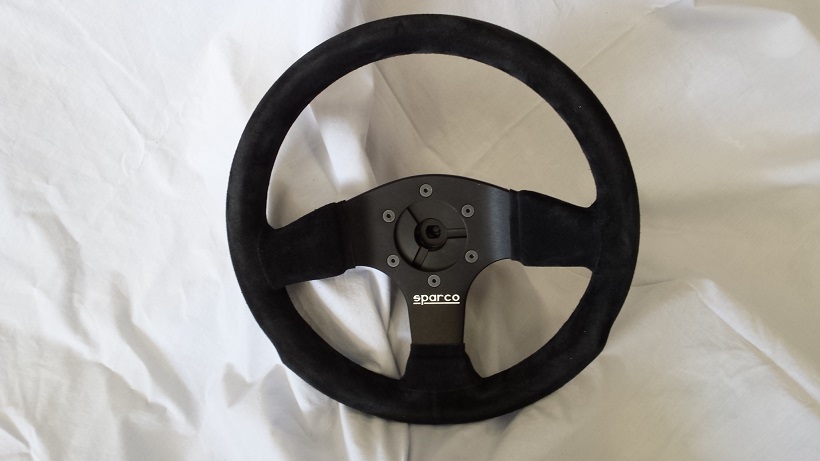
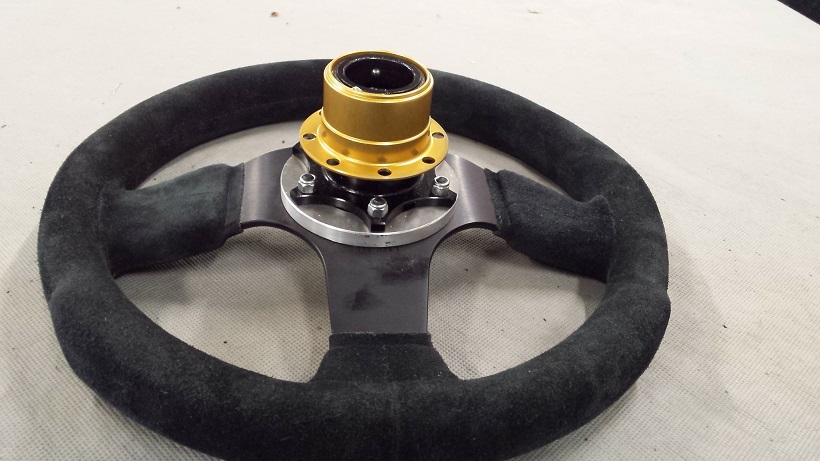
The steering wheel was bolted to the boss supplied with it, but the
horn button would not fit as the area inside the steering
wheel was not deep enough for the spring clips in the button.
I made a 6mm thick spacer to go between the boss and the wheel.
No the horn button does not work, but I like the look of it.
It completes the steering wheel.
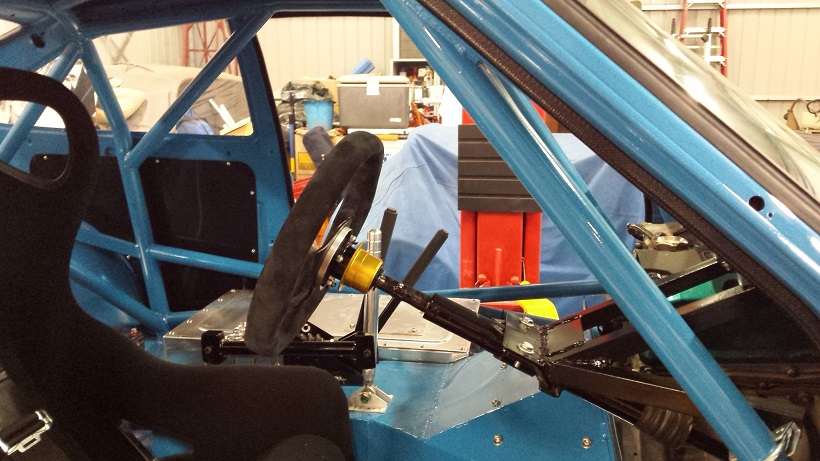
The steering column is the original S2000 one modified to fit.
I kept the collapsible bit in the column just in case.
I used angle iron and exhaust clamps to mount the column.
I did not realise just how strong the mounting system needed to
be until I started making it.
The forces applied when the steering wheel is turned are huge . . .
Posted on: 2016/4/12 12:12
|
_________________
Go Fast, Or Go Home.
|
|
|
Re: nice datsun rally car -- vid |
|
Home away from home Joined:
2008/7/20 3:16
From Adelaide
Group:
Registered Users
|
Both videos appear to be on sealed roads. . .
The first one had a lot of sideways "Drifting",
Looks like fun,
Looks fast but is not . . . . . .
The second vid is how you should drive sealed roads.
Smooth, neat, driving the apex of the corners.
Looks boring,
Looks slow, but is not.
Done properly it is the fastest way from A to B on tarmac.
Posted on: 2016/4/10 6:05
|
_________________
Go Fast, Or Go Home.
|
|
|
Re: Coupe Sports Sedan |
|
Home away from home Joined:
2008/7/20 3:16
From Adelaide
Group:
Registered Users
|
Thanks lamb_daiquiri for the web site.
After the wife had run out of finger nail polish remover is when she told me what she was doing.
The tail lights were finished off with some Acetone I had in the shed,
It just amazed me the plastic was unaffected by a chemical that is essentially a paint stripper. . . . . . .
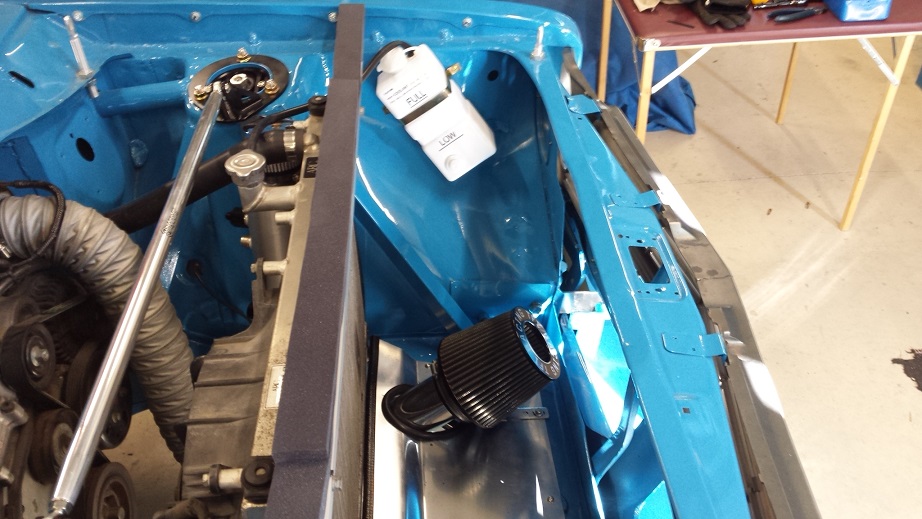
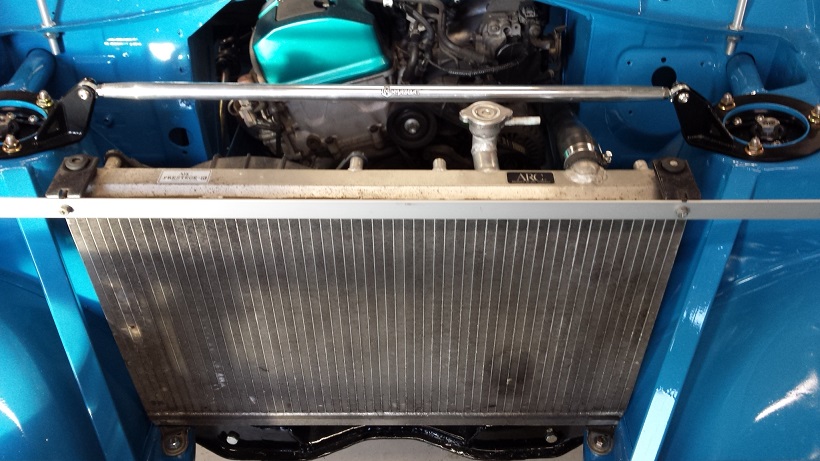
Next I decided to block in the radiator so all the air coming through the enlarged grill opening would go through the radiator and not around it.
This looked fine until I tried to install the air intel duct and filter and there was no way to get around or over the radiator.
I had not thought ahead far enough . . . . . .
So after a, "I fu###d that up moment" I decided to go under the radiator for some cold air.
The ducting is longer than I would have liked but it seems to work Ok.
Posted on: 2016/4/10 5:42
|
_________________
Go Fast, Or Go Home.
|
|
|
Re: Coupe Sports Sedan |
|
Home away from home Joined:
2008/7/20 3:16
From Adelaide
Group:
Registered Users
|
I would like to take the credit for the two CV's
in the tail shaft, but it is actually a HONDA thing.
All I did to the tail shaft was get it shortened and
balanced.
Next bit fitted was the radiator. I mounted it between
the strut towers to keep all the weight behind the front
axle line.
1.6 aluminium sheet was used for the rear sections of
the floor. riveted and body sealed in.
A new laminated wind screens and seal also went in.
I decided to keep the windscreen glass and not
poly carbonate as the poly scratches very easily.
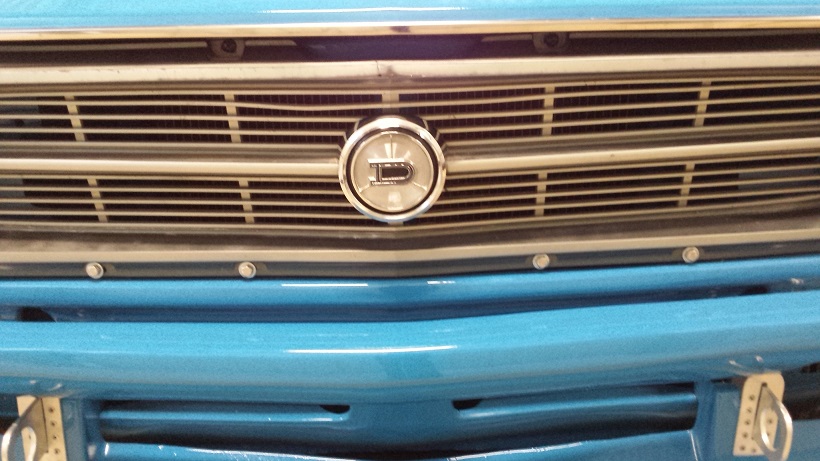
The grill badge had 30 years of crap encrusted into it.
My wife offered to give it a clean.
She was able to make it look like new.
At the same time she cleaned the tail lights and they
also came up like new.
After thanking her for the brilliant cleaning job I asked
her how she did it.
The answer freaked me out.
She used finger nail polish remover and ear buds.
The solvent did not effect the Chromed plastic at all.
and they still look great.
just don't get the solvent on the coloured pieces of the
tail lights as it will dissolve.
Cheers.
Geoff
Posted on: 2016/4/8 11:40
|
_________________
Go Fast, Or Go Home.
|
|
|
Re: 73 'Coupe du jour' |
|
Home away from home Joined:
2008/7/20 3:16
From Adelaide
Group:
Registered Users
|
Most race cars these days are wrapped so the
colour can be changed quickly to suit sponsor
requirements.
I'm very interested how you get on.
Please ad pictures of the process as you
go if you can.
Thanks
Geoff
Posted on: 2016/4/8 11:10
|
_________________
Go Fast, Or Go Home.
|
|
|
Re: Coupe Sports Sedan |
|
Home away from home Joined:
2008/7/20 3:16
From Adelaide
Group:
Registered Users
|
Seat in next . . . . . .
The seat was one of the first things that was positioned
in the car and the cage and trans tunnel were built
around it.
The mounting points for the seat mounting brackets
are part of the floor and are fixed.
The gear lever, pedal box and steering wheel are all
installed around the seat position.
I made every thing suit my sitting position, so the
fit is perfect for me.
Pity anyone else who tries to drive Blue Bastard.
Posted on: 2016/4/6 13:13
|
_________________
Go Fast, Or Go Home.
|
|
|
Re: Coupe Sports Sedan |
|
Home away from home Joined:
2008/7/20 3:16
From Adelaide
Group:
Registered Users
|
I can't remember the exact order of the next couple of
things fitted to the "blue bastard". . . .
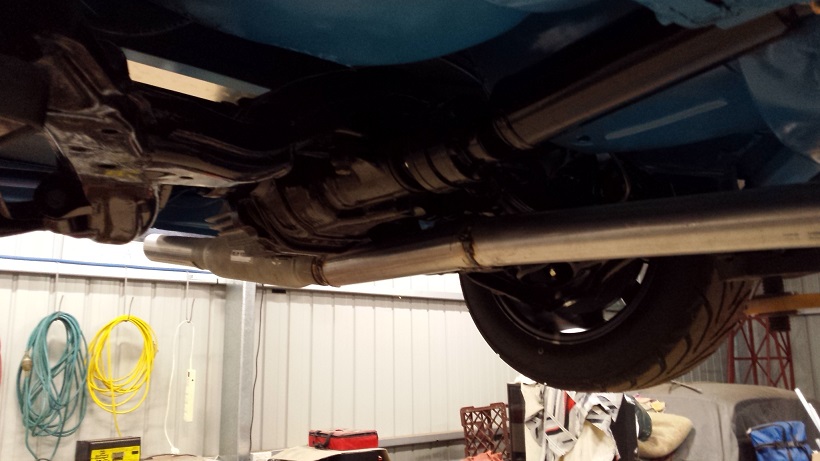
So lets just say it was the exhaust.
I bought a length of straight pipe,
a couple of 90 degree bends and a resonator.
All in 2.5" diameter.
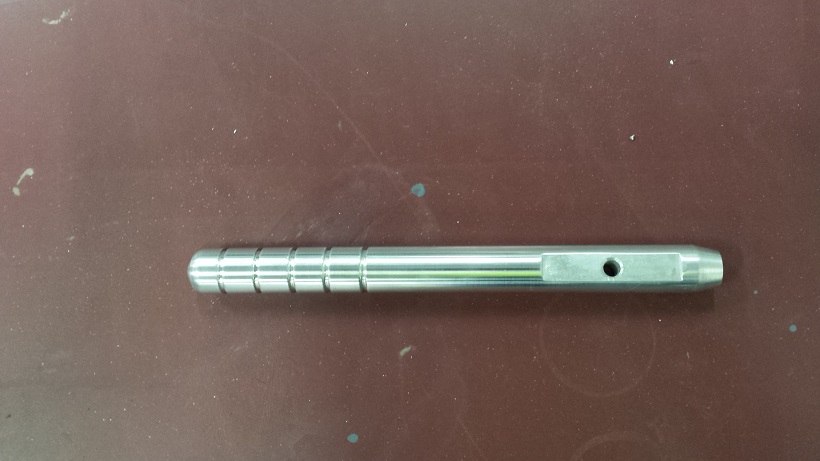
I then hand made a flange from 10mm plate to go onto
the extractors.
The three main things as I saw them were:
1 - to route the exhaust without going under the drivers
seat as its going to be hot enough in there as it is.
2 - to try and keep the exhaust as straight as possible.
3 - I wanted to go out the back of the car to help with the
noise side of things and as it's normally aspirated get
a little bit of back pressure happening.
So armed with a hacksaw and a welder I made this. . . .
Posted on: 2016/3/31 6:31
|
_________________
Go Fast, Or Go Home.
|
|
 All Posts (SaCoupe73)


 Transfer