| Revision as of 00:12, 15 May 2012 ddgonzal (Talk | contribs) (->Lamps Stuck On) <- Previous diff |
Current revision ddgonzal (Talk | contribs) (->Lamps Correct Part?) |
||
| Line 25: | Line 25: | ||
| = Indicators Flash Slowly = | = Indicators Flash Slowly = | ||
| - | The flasher units are load-dependent. So if the load is not correct -- for example, if one of the three bulbs is burned out -- it will not operate correctly. | + | The flasher units are load-dependent. So if the load is not correct -- for example, if one of the three bulbs is burned out -- it will not operate correctly. This will also occur if a bulb with less wattage than specified is used (like LED bulbs). |
| + | |||
| + | See section above on checking the lamps. | ||
| + | |||
| + | If the problem continues, follow the "Indicators Do Not Flash" section below. | ||
| + | |||
| + | = Indicators Flash Too Quick = | ||
| + | A lamp with too much wattage may be in place. Or a short. | ||
| See section above on checking the lamps. | See section above on checking the lamps. | ||
| Line 32: | Line 39: | ||
| = Indicators Do Not Flash = | = Indicators Do Not Flash = | ||
| - | The flasher units are load-dependent. So if the load is not correct it will not operate correctly. | + | The flasher units are load-dependent. So if the load is incorrect it will not operate properly. |
| Possible causes include: | Possible causes include: | ||
| Line 39: | Line 46: | ||
| * Flasher unit is incorrect part number. Most flasher units look identical, so check the Part Number on the flasher, and replace if it is the wrong type. | * Flasher unit is incorrect part number. Most flasher units look identical, so check the Part Number on the flasher, and replace if it is the wrong type. | ||
| - | ** For the Datsun 1200: | + | ** USA T/S flasher unit: 25520-89901 |
| - | **: T/S flasher unit: 25520-89901 | + | ** USA Hazard flasher unit: 25520-89990 |
| - | **: Hazard flasher unit: 25520-89990 | + | |
| ** For a more detailed list of compatible parts, see [[Turn_Signals#Part_Numbers|Turn Signal part numbers]]. | ** For a more detailed list of compatible parts, see [[Turn_Signals#Part_Numbers|Turn Signal part numbers]]. | ||
| - | * Flasher and Hazard units are swapped. Check the part numbers and swap them around correctly. | + | * USA 1200 or Later B210: Flasher and Hazard units are swapped. Check the part numbers and swap them around correctly. |
| *: [http://datsun1200.com/modules/myalbum/photo.php?lid=15949 http://datsun1200.com/uploads/thumbs/15949.jpg] | *: [http://datsun1200.com/modules/myalbum/photo.php?lid=15949 http://datsun1200.com/uploads/thumbs/15949.jpg] | ||
| *: See [[Turn_Signals#Flasher_Location|Flasher Location]] | *: See [[Turn_Signals#Flasher_Location|Flasher Location]] | ||
| Line 52: | Line 58: | ||
| = Lamps Stuck On = | = Lamps Stuck On = | ||
| - | If the HAZARD switch is ON, and all six ligths come on and stay one, the Hazard Flasher Unit is defective or the wrong part. Replace it. | + | When testing a stuck lamp it is important to check for a burnt-out bulb: |
| - | With key ON, if the T/S switch is to the Left or Right and all three lights for that side are on but don't flash, the Turn Signal Flasher Unit is defective or the wrong part. Replace it. | + | * If only two out of three lights for a side light up, replace the non-working bulb |
| + | |||
| + | |||
| + | If all the lamps light up... | ||
| + | * If the HAZARD switch is ON, and all six lights come on and stay on, the Hazard Flasher Unit is defective or the wrong part. Replace it. | ||
| + | * With key ON, if the T/S switch is to the Left or Right and all three lights for that side are on but don't flash, the Turn Signal Flasher Unit is defective or the wrong part. Replace it. | ||
| + | |||
| + | NOTE: Japan-market 1200s use a single flasher for both Hazard & Signals. | ||
| = Fuse Blows = | = Fuse Blows = | ||
| Line 77: | Line 90: | ||
| Since flashers only work correctly if the lamp load is normal, using a lower-wattage lamp can cause problems. | Since flashers only work correctly if the lamp load is normal, using a lower-wattage lamp can cause problems. | ||
| - | LED lamps are a particular problem, since LEDs use less power (watts) than a normal lamp. You can buy special LEDs, or use an expensive load-independent flasher unit. | + | LED lamps are a particular problem, since LEDs use less power (watts) than a normal lamp. You can buy special hi-load LEDs, or use an expensive load-independent flasher unit. |
| Specifications - Datsun 1200 | Specifications - Datsun 1200 | ||
| Line 110: | Line 123: | ||
| # Turn key ON | # Turn key ON | ||
| # Pull T/S lever to the left | # Pull T/S lever to the left | ||
| - | # Short the flasher terminals with a screw driver. | + | # Short the flasher terminals with a screw driver. Touch the one terminal to the other. |
| #* If ALL the left-side lights come on (Front, Rear, and dash), the system is good, except for the flasher unit. Replace the Flasher | #* If ALL the left-side lights come on (Front, Rear, and dash), the system is good, except for the flasher unit. Replace the Flasher | ||
| #* If only some of the three lights work for the side, check the non-working lights (see section "Specific bulb doesn't light up" above) | #* If only some of the three lights work for the side, check the non-working lights (see section "Specific bulb doesn't light up" above) | ||
| Line 120: | Line 133: | ||
| # Pull the other wire off and connect the two wires together (using a jumper wire). All three T/S lamps should go ON. | # Pull the other wire off and connect the two wires together (using a jumper wire). All three T/S lamps should go ON. | ||
| - | If both tests succeed -- and the lamps are the correct wattage bulbs -- replace the flasher unit. Remember, there are two flashers (Hazard and T/S), so repeat the test using the other flasher. | + | If both tests succeed -- and the lamps are the correct wattage bulbs -- replace the flasher unit. |
| + | |||
| + | NOTE: for USA there are two flashers (Hazard and T/S), so repeat the test using the other flasher. | ||
Current revision
Turn Signal (indicators) problems?
Contents |
Specific bulb doesn't light up
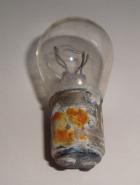
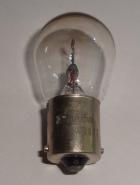
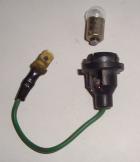
Remove the lens and twist the bulb out. Inspect it for:
* broken filament
* Loose glass
* Corrosion of socket
Clean any corrosion with a wire brush and contact cleaner like Deoxit spray. Be sure to clean the bulb contact metal as well as the light socket.

Replace any broken bulb.
One Side Flashes
The right & left sides are semi-independent. If one side works OK, but the other doesn't, then the Flasher Unit is good, but a bulb or wiring for that side is bad.
Verify that all three bulbs on the side are OK.
- Front t/s lamp
- Rear t/s lamp
- dash t/s lamp
Replace any damaged bulb.
Indicators Flash Slowly
The flasher units are load-dependent. So if the load is not correct -- for example, if one of the three bulbs is burned out -- it will not operate correctly. This will also occur if a bulb with less wattage than specified is used (like LED bulbs).
See section above on checking the lamps.
If the problem continues, follow the "Indicators Do Not Flash" section below.
Indicators Flash Too Quick
A lamp with too much wattage may be in place. Or a short.
See section above on checking the lamps.
If the problem continues, follow the "Indicators Do Not Flash" section below.
Indicators Do Not Flash
The flasher units are load-dependent. So if the load is incorrect it will not operate properly.
Possible causes include:
- One bulb burned out. See above section.
- Flasher unit is incorrect part number. Most flasher units look identical, so check the Part Number on the flasher, and replace if it is the wrong type.
- USA T/S flasher unit: 25520-89901
- USA Hazard flasher unit: 25520-89990
- For a more detailed list of compatible parts, see Turn Signal part numbers.
- USA 1200 or Later B210: Flasher and Hazard units are swapped. Check the part numbers and swap them around correctly.
-

- See Flasher Location
-
- Flasher unit is broken. Test it. See Troubleshooting section below.
- Wiring problems. Trace it per Troubleshooting section below.
Lamps Stuck On
When testing a stuck lamp it is important to check for a burnt-out bulb:
- If only two out of three lights for a side light up, replace the non-working bulb
If all the lamps light up...
- If the HAZARD switch is ON, and all six lights come on and stay on, the Hazard Flasher Unit is defective or the wrong part. Replace it.
- With key ON, if the T/S switch is to the Left or Right and all three lights for that side are on but don't flash, the Turn Signal Flasher Unit is defective or the wrong part. Replace it.
NOTE: Japan-market 1200s use a single flasher for both Hazard & Signals.
Fuse Blows
Fuse blows when T/S lever is activated left or right. Possible causes include:
- Incorrect fuse. For a Datsun 1200, the T/S fuse is the 15A Hazard/Horn/Stop fuse. If a smaller fuse is installed, replace with the correct 15A size.
- The t/s switch (which is inside the steering column) may be loose. Tighten the switch, replace the fuse, and test again.
First Checks
- Verify that the HORN/STOP Fuse is 15A and is not blown.
- Verify that the Hazard switch is OFF.
- Verify that all three bulbs on each side are OK.
- Front t/s lamp
- Rear t/s lamp
- dash t/s lamp
- Replace any damaged bulb.
- Verify that all lamp sockets are OK, and not corroded
- Pull connectors off the flasher units, clean with Deoxit, and put back on.
Lamps Correct Part?
Since flashers only work correctly if the lamp load is normal, using a lower-wattage lamp can cause problems.
LED lamps are a particular problem, since LEDs use less power (watts) than a normal lamp. You can buy special hi-load LEDs, or use an expensive load-independent flasher unit.
Specifications - Datsun 1200
FRONT (USA): 12V-23W #1034
REAR (USA): 12V-23W #1073
DASH (USA): 1.7 watt #1445
* For other 1200 models, see Lights#Lamp_Specifications
Compare Hazards with T/S
The Hazards and the Turn Signals use the same lamps, but different fuses. So if they flash on one, but not the other, your lamps are good, but likely a fuse is out. Check the Fuse Box.
Datsun 1200 Fuse Box
HAZARD - 'H' Fuse 15A (Horn/Stop/Hazard)
TURN - 'M' Fuse 10A (Meter/Reverse/Regulator)
Troubleshooting
Trace The Wiring
In Datsuns, lighting circuit wires are usually Green (or green with various color stripes).
- Follow each wire, looking for breaks, cuts, burns or other tell-tale signs.
- At each connector, pull it apart, clean the connection, and push the connector back in
- With key ON, measure the voltage at each component and connection, to find out where it stops. Start at the Fuse box (check for 12V at the T/S fuse). Then check for 12V at the Hazard switch. For 12V at the Dimmer/TS switch. At the headlight switch. At the Flasher unit. At the front combo lamp. At the rear combo lamp.
Note that the Turn Signal circuit in Instrument Panel (switches & flasher unit) do NOT involve ground/earth. Only the lamp bulbs involve a ground connection. However, ensure you have a good body ground (wire from engine block to body, or from battery Negative cable to body) so that the lamp bulbs will have a proper ground.
Test Flasher Unit
- Turn key ON
- Pull T/S lever to the left
- Short the flasher terminals with a screw driver. Touch the one terminal to the other.
- If ALL the left-side lights come on (Front, Rear, and dash), the system is good, except for the flasher unit. Replace the Flasher
- If only some of the three lights work for the side, check the non-working lights (see section "Specific bulb doesn't light up" above)
- Repeat with switch on Right-side position
Manual Flasher Test
- With key ON, pull T/S lever to left.
- Pull one of the two wires off the Flasher. All three T/S lamps (Front, Rear, and Dash) for that side should be OFF.
- Pull the other wire off and connect the two wires together (using a jumper wire). All three T/S lamps should go ON.
If both tests succeed -- and the lamps are the correct wattage bulbs -- replace the flasher unit.
NOTE: for USA there are two flashers (Hazard and T/S), so repeat the test using the other flasher.

![[Datsun 1200 encyclopedia]](/wiki/upload/wiki.png)


