![[Datsun 1200 encyclopedia]](/wiki/upload/wiki.png)
Distributor repair.
[edit]
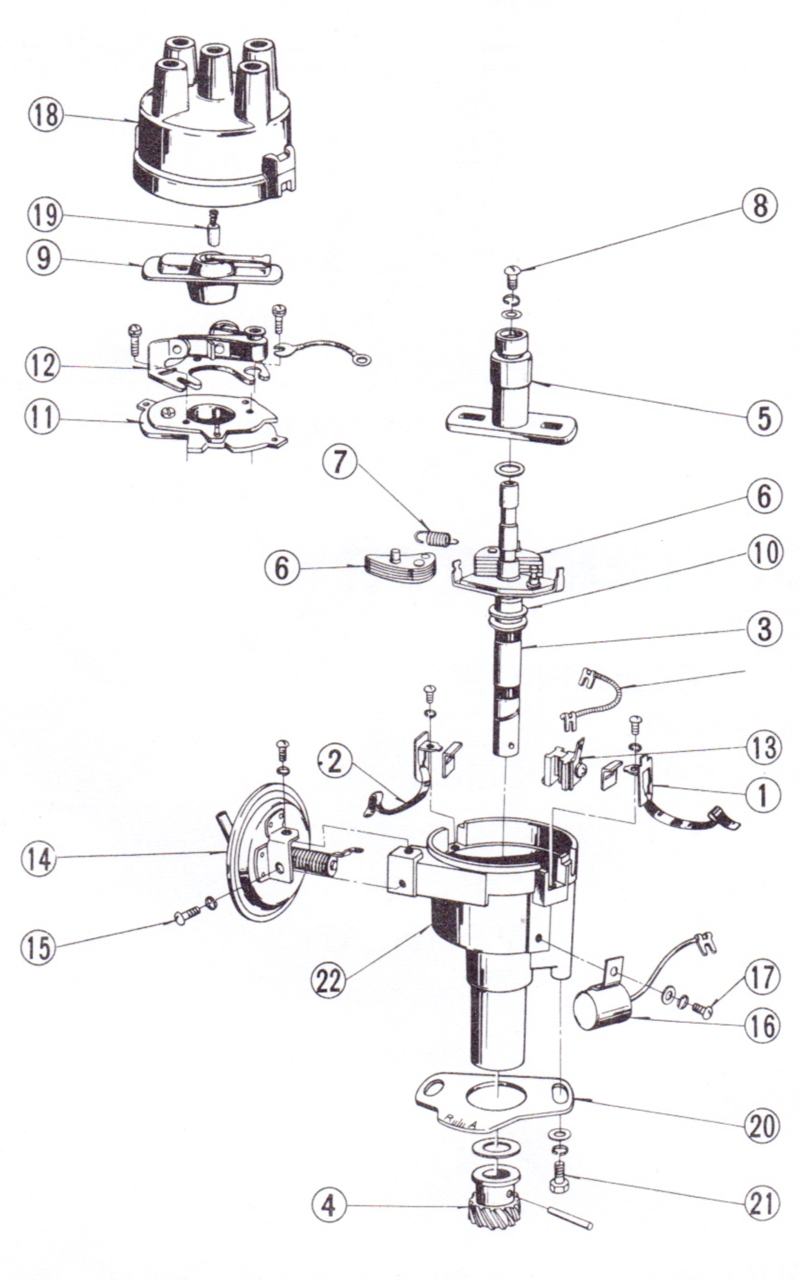
Parts Diagram
[edit]
Inspection
- Remove cap and pull the rotor off
- check to ensure the shaft screw (#8 in diagram) is not loose
- Take the shaft with your fingers and see if it moves side to side any noticeable amount. There should be no discernable amount. If there is the bearing is worn and should be replaced. Alternatively (which may be less expensive), another good distributor may be fitted.
[edit]
Disassembly
- Remove cap and pull the rotor off
- Remove the two screws (15) holding on the Vacuum advance (14) and pull advance unit out, lifting the arm gently to remove it
- Loosen the screw holding the wire to the points (12)
- Unscrew the points and remove
- Unscrew shaft screw (8). You may need to pry the rubber out if there is one
- Remove two screws which hold down the cap clips
- Remove the breaker plate (11) from the housing
- Remove roll pin from gear (4). Use a hammer and brass drift. Then remove the gear.
- Pull the shaft from the housing carefully. Note any felt and metal washer and their location
¤