![[Datsun 1200 encyclopedia]](/wiki/upload/wiki.png)
| Revision as of 22:01, 28 August 2016 ddgonzal (Talk | contribs) <- Previous diff |
Current revision ddgonzal (Talk | contribs) |
||
| Line 5: | Line 5: | ||
| = Stock Location = | = Stock Location = | ||
| {{Album|5023}} | {{Album|5023}} | ||
| - | |||
| - | = Alternate Mounting Locations = | ||
| - | In center [[Console]] | ||
| - | <br>{{Album|834}} {{Album|4823}} | ||
| - | |||
| - | Receiver in glovebox door | ||
| - | <br>{{Album|6655}} {{Album|12040}} | ||
| = DIN Chassis = | = DIN Chassis = | ||
| Most modern stereos are DIN-mounted, requiring you to use an alternate mounting location, or cut the metal dash to fit it. | Most modern stereos are DIN-mounted, requiring you to use an alternate mounting location, or cut the metal dash to fit it. | ||
| - | |||
| - | amplifiers, equalizers, CD players, etc | ||
| You have to cut out the metal around the radio to fit a modern DIN-chassis receiver. | You have to cut out the metal around the radio to fit a modern DIN-chassis receiver. | ||
| <br>{{Album|572|gif}} | <br>{{Album|572|gif}} | ||
| - | mounted in rear-seat area | + | amplifiers mounted in rear-seat area |
| <br>{{Album|2250}} | <br>{{Album|2250}} | ||
| - | |||
| - | == Glove Box == | ||
| - | If you prefer not to cut the sheet metal on the [[Instrument Panel]], you can mount it in the [[Glove Box]]: | ||
| - | <br>{{Album|6655}} {{Album|22386}} | ||
| - | |||
| - | == Console == | ||
| - | Mounted in the [[console]], some modification required: | ||
| - | <br>{{Album|4823}} | ||
| == Fitting == | == Fitting == | ||
| - | [http://datsun1200.com/modules/newbb/viewtopic.php?topic_id=54705&forum=1&post_id=395465 Main Forum discussion] | + | Also See: [http://datsun1200.com/modules/newbb/viewtopic.php?topic_id=54705&forum=1&post_id=395465 Main Forum discussion] |
| DIN-mount radios are the same size as the original, but do not have shafts in the front. Instead they attach at the sides of the radio. | DIN-mount radios are the same size as the original, but do not have shafts in the front. Instead they attach at the sides of the radio. | ||
| Line 51: | Line 34: | ||
| Carefully cut the center out of the delete plate: | Carefully cut the center out of the delete plate: | ||
| - | <br>{{Photo2|DSC04090.jpg}} | + | <br>{{Album|26882}} |
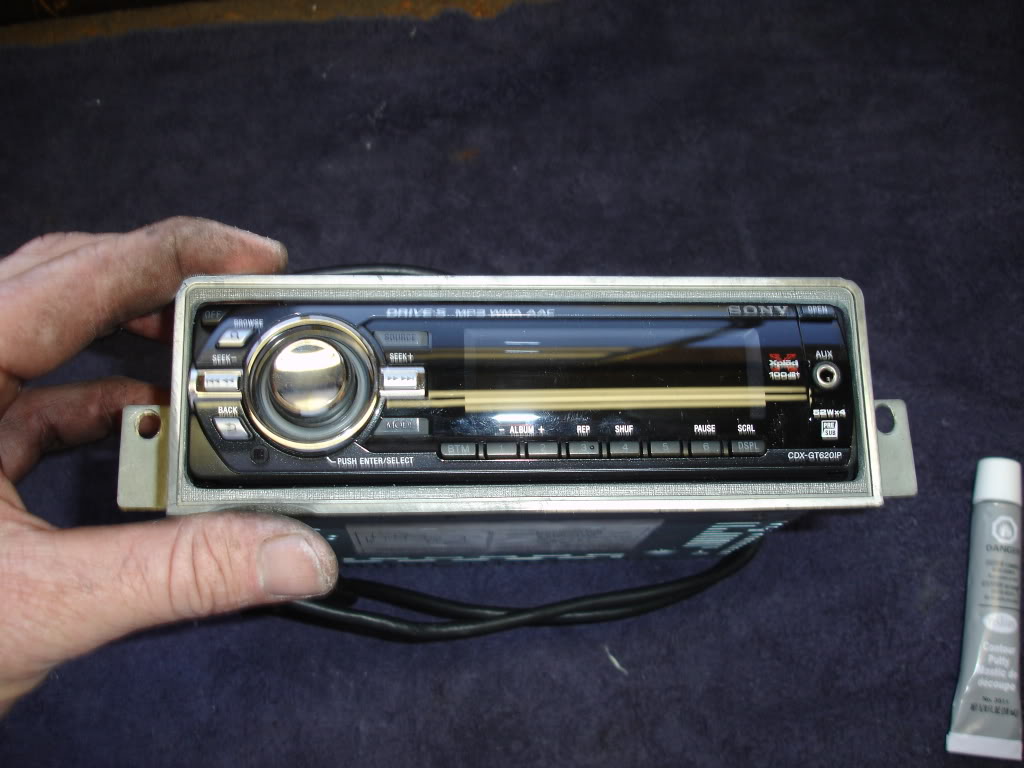
| Fit the bezel to the radio: | Fit the bezel to the radio: | ||
| - | <br>{{Photo2|DSC04093.jpg}} | + | <br>{{Album|26881}} |
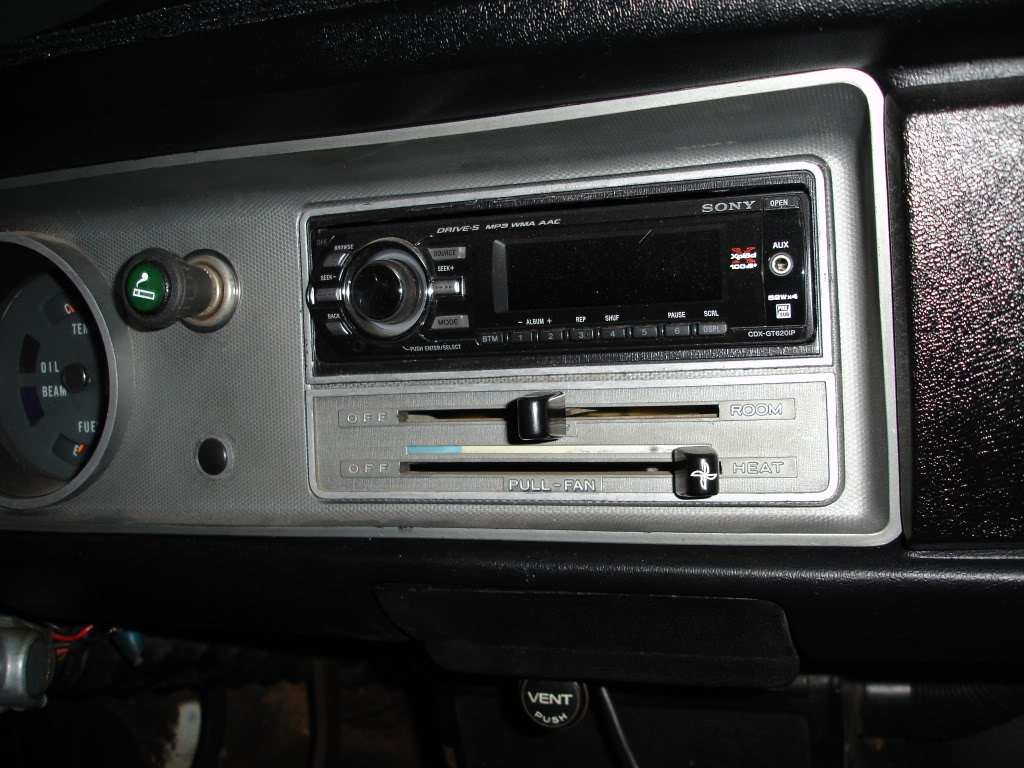
| Finished product: | Finished product: | ||
| - | <br>{{Photo2|DSC05010.jpg}} | + | <br>{{Album|26880}} |
| + | |||
| + | = Alternate Mounting Locations = | ||
| + | In center [[Console]] | ||
| + | <br>{{Album|834}} {{Album|4823}} | ||
| + | |||
| + | Receiver in glovebox door | ||
| + | <br>{{Album|6655}} {{Album|12040}} | ||
| + | |||
| + | == Glove Box == | ||
| + | If you prefer not to cut the sheet metal on the [[Instrument Panel]], you can mount it in the [[Glove Box]]: | ||
| + | <br>{{Album|6655}} {{Album|22386}} {{Album|12040}} | ||
| + | |||
| + | == Console == | ||
| + | Mounted in the [[console]], some modification required: | ||
| + | <br>{{Album|4823}} | ||
| + | |||
| + | amplifiers, equalizers, CD players, stereo, head unit | ||
| [[Category:Body Electrical System]][[Category:Options]]{{End}} | [[Category:Body Electrical System]][[Category:Options]]{{End}} | ||
Current revision
<-- Back to Radio
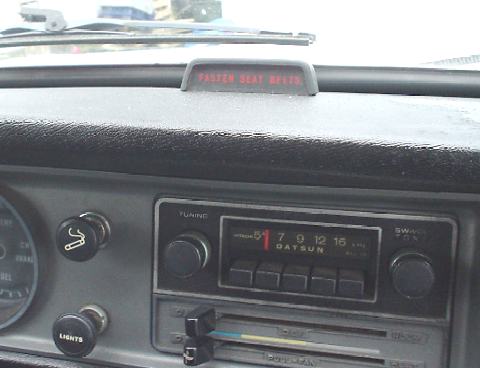
The radio mounts in the center of the dashboard, and is covered by the Dash Fascia.
Contents |
Stock Location
DIN Chassis
Most modern stereos are DIN-mounted, requiring you to use an alternate mounting location, or cut the metal dash to fit it.
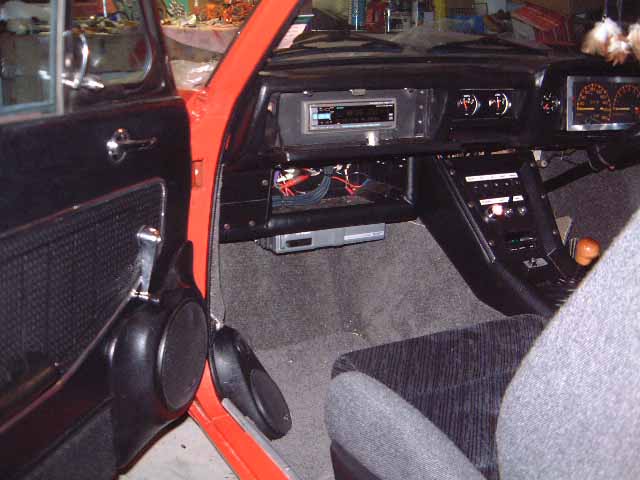
You have to cut out the metal around the radio to fit a modern DIN-chassis receiver.
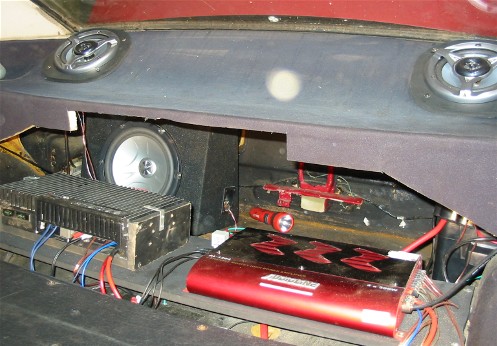
amplifiers mounted in rear-seat area
Fitting
Also See: Main Forum discussion
DIN-mount radios are the same size as the original, but do not have shafts in the front. Instead they attach at the sides of the radio.

First, cut out the facia. Cut out the metal around the radio to fit a modern DIN-chassis receiver:

Rectangle cut larger, radio shaft holes now missing
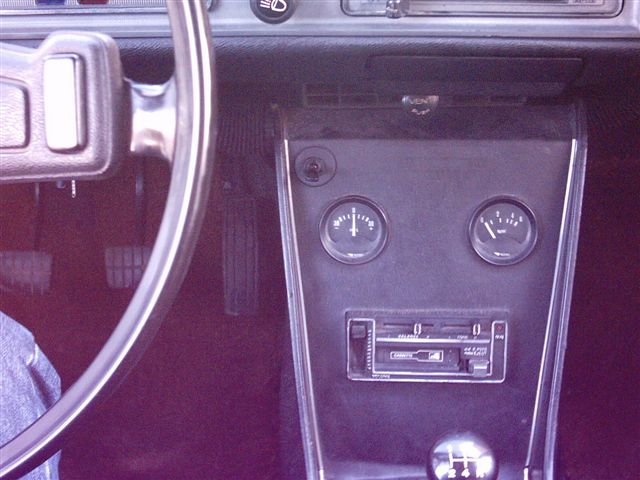
Compare to an uncut dash:
Fabricate a DIN adapter bracket (or modify a commercial one).
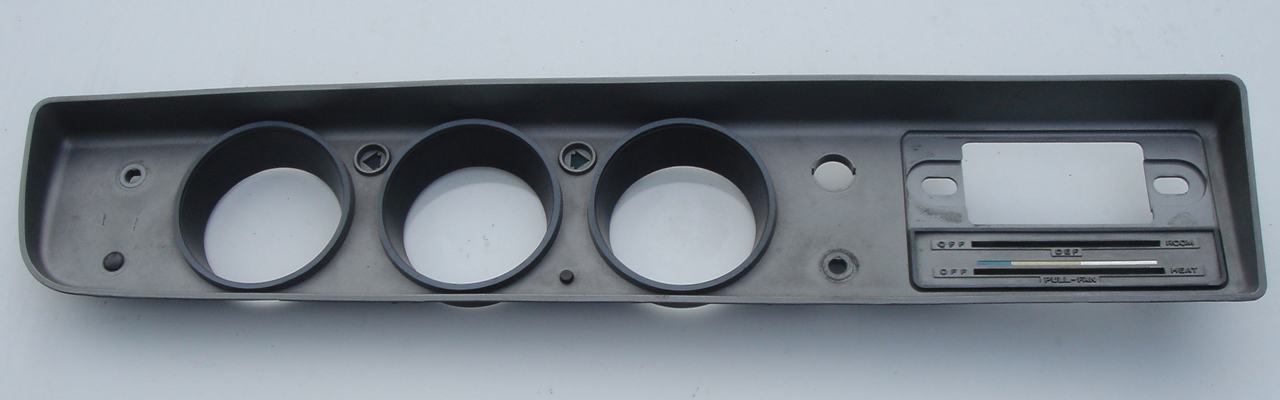
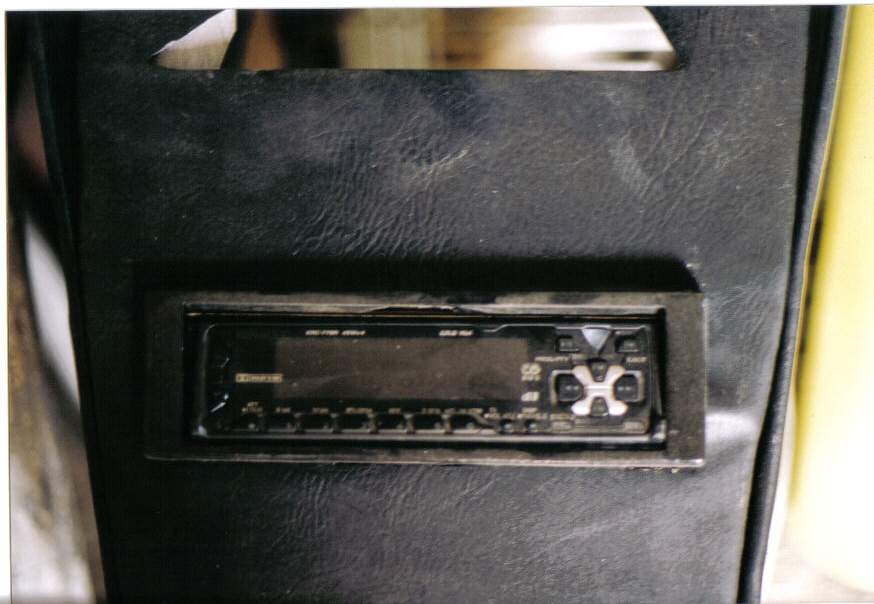
Create a bezel, by modifying the stock radio delete plamote:
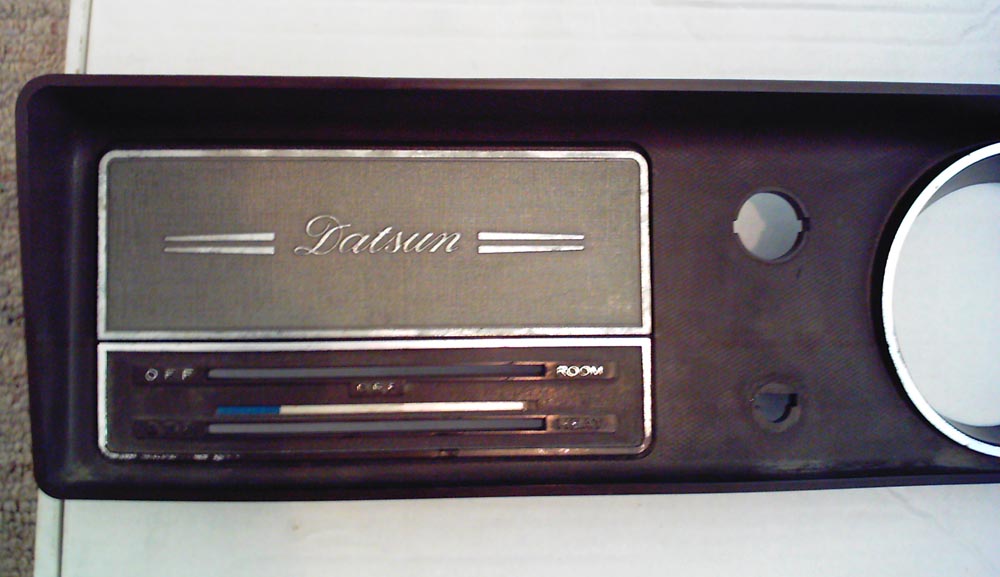
Carefully cut the center out of the delete plate:

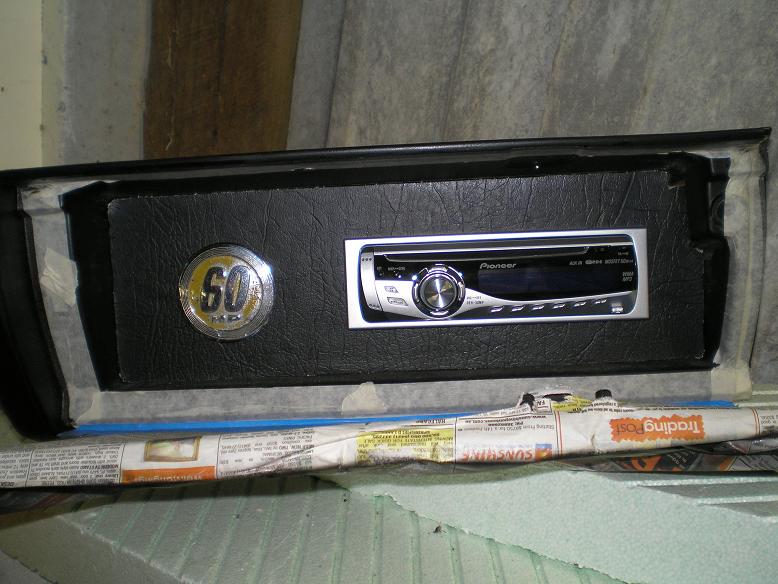
Fit the bezel to the radio:
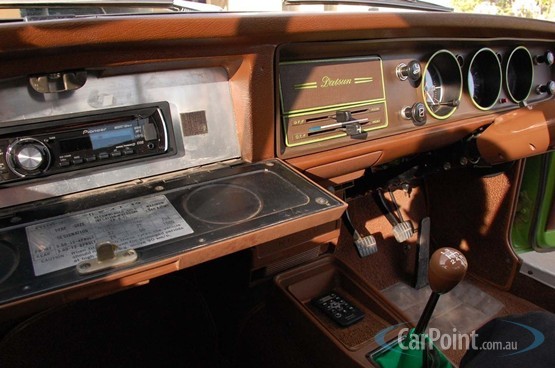
Finished product:
Alternate Mounting Locations
In center Console
Receiver in glovebox door
Glove Box
If you prefer not to cut the sheet metal on the Instrument Panel, you can mount it in the Glove Box:
Console
Mounted in the console, some modification required:
amplifiers, equalizers, CD players, stereo, head unit