[< Previous 1479 1480 1481 1482 1483 1484 1485 Next >]
[< Previous 1479 1480 1481 1482 1483 1484 1485 Next >]
The comments are owned by the poster. We aren't responsible for their content.
| Poster |
Thread |
| kululadotgroen |
Posted: 2008/5/13 21:54 Updated: 2008/5/13 21:54 |
No life (a.k.a. DattoMaster)   Joined: 2006/7/12 From: Cape Town ZA Posts: 1054 |
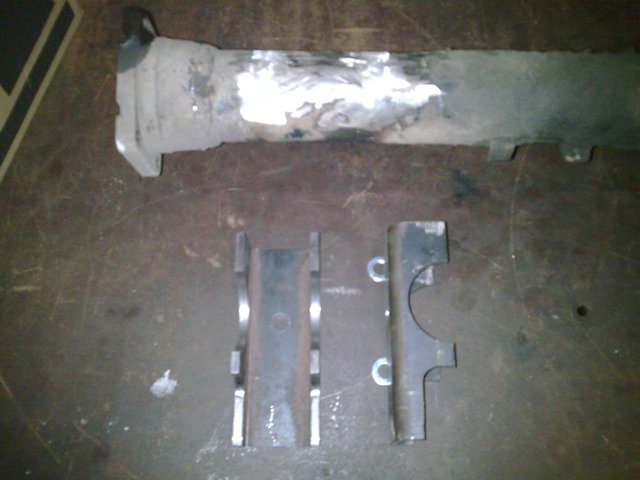
 Re: Diff preparation The old leave pedestals have been ground of, and you can see the new ones below the housing. They are made out of 5mm u-channel, and the holes and halfrounds for the locating pin and tube was machined out on a milling machine. The lower part which is machined down, is to allow for the shock bolts to be inserted. I ground the old shock mounts from the old pedestals, and will be welding them back on these.
The locating holes are perfectly center to the halfrounds, and when welding the pedestals back on, I'll fit the leaves, rest the pedestals on them with the pins in place. I'll then rest the diff in the halfrounds, and set the diff at the right angle to the prop. I'll simply make a few good tacks, and then weld them shut outside the car. that should ensure perfect alignment.
|
|
|


 Misc
Misc

 0.00 (0 votes)
