User Login    
 + Register
  • Main navigation
Login
Username:

Password:


Lost Password?

Register now!
Fast Search
Slow Search
Google Ad


Browsing this Thread:   1 Anonymous Users


« 1 ... 22 23 24 (25) 26 27 28 ... 57 »


Re: Fuel hose routing for Weber 32/36
Moderator
Joined:
2001/5/3 7:04
From Kent, WA
Group:
Registered Users
Contentmaster
Usermaster
Posts: 31751
Offline
Quote:
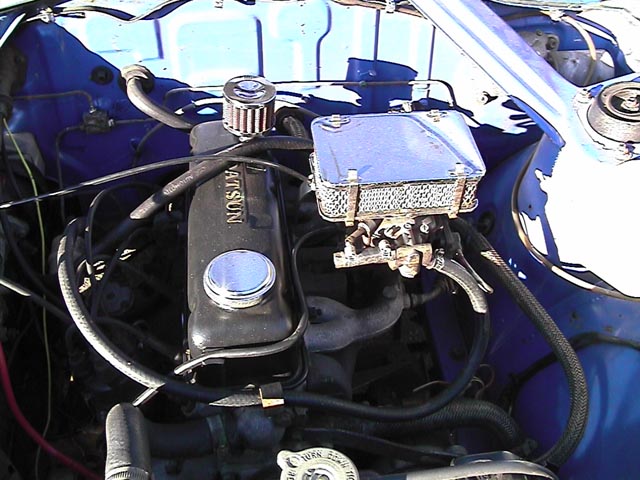
I am not sure how to run the fuel line to the carb. It seems to be on the wrong side of the carb. (maybe more suited for LHD model?)
That is the correct side for the Weber 32/36 (DGV). Remember it's a universal carburetor, not designed for any specific car. The 32/36 DFV is the mirror image version, but that has the large primary on the other side.

Some guys ditch the metal fuel tube altogether:
Open in new window


I would keep it and just use a simple loop of fuel hose from the end of the metal line curved down and around to the DGV inlet.


Once you get it running, be sure to adjust the Weber. It will be jetted OK and initially adjusted, but it won't be a final adjustment. It's adjusted exactly like a stock carb. See http://datsun1200.com/modules/mediawi ... php?title=DGV#Adjustments

Posted on: 2015/7/10 2:43
Transfer the post to other applications Transfer


Re: Stretching vacuum hose onto carburetor vacuum port
Moderator
Joined:
2001/5/3 7:04
From Kent, WA
Group:
Registered Users
Contentmaster
Usermaster
Posts: 31751
Offline
Quote:
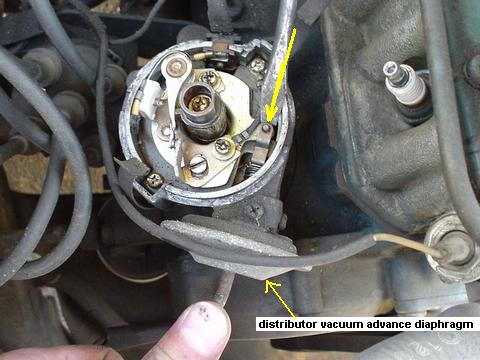
the vacuum line from the distributor will NOT go on the damn carb not matter how hard I try. Any tricks here?
I know what you mean. The later Sunny Trucks used an even smaller teeny tiny distributor vacuum hose.

options include:
* Cut the old hardened end off the hose, then stretch the fresh cut end onto the Weber port
* Replace the entire hose with the next biggest size
* Replace the end of the hose. Purchase a hose connector, and a bit of the next biggest hose


Also verify that the distributor advance unit is holding vacuum. You can push on the linkage, then put your finger over the port. If it won't hold vacuum, then plug the port on the carburetor. It'll run better than leaving the hose connected to a bad advance unit.
Open in new window

Posted on: 2015/7/10 2:54
Transfer the post to other applications Transfer


Re: Accelerator cable linkage
Moderator
Joined:
2001/5/3 7:04
From Kent, WA
Group:
Registered Users
Contentmaster
Usermaster
Posts: 31751
Offline
Quote:
Installed the accelerator pedal and cable. The cable is very slack at the moment. I will need a way to tighten the cable. Hopefully the chrome rocker cover (see a few pages back) with the stop tab welded on will help to take up the slack in the cable.

I found the grooved round connector at the driver's side end for the accelerator cable very difficult to tighten. I used a pair of pliers to get it as good as I could but it still has a little bit of slack at that end.


I had the same problem with my RHD ute and the RHD Mikuni carburetors -- way too much slack in the cable. What I did was:
1. Wrap the cable around the pedal rod once or twice before fitting into slot
2. Take up a bit of slack at the carburetor bracket

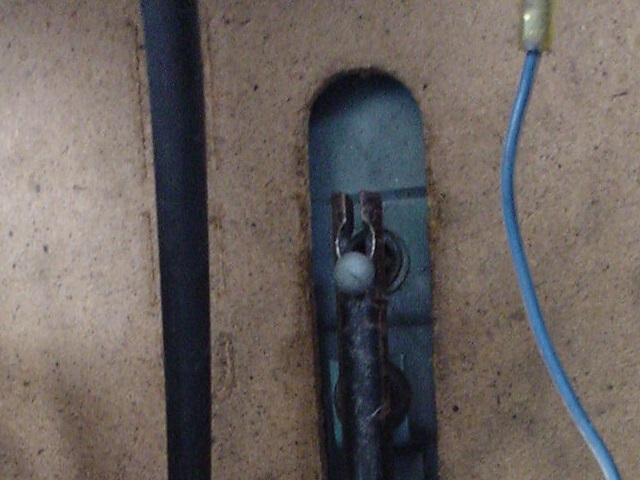
Throttle Cable ball-end fits into slot on end of Accelerator Pedal. Usually a clip goes over the cable ball-end. But as long as the cable is properly adjusted you can drive it for years without the clip in place.
Open in new window


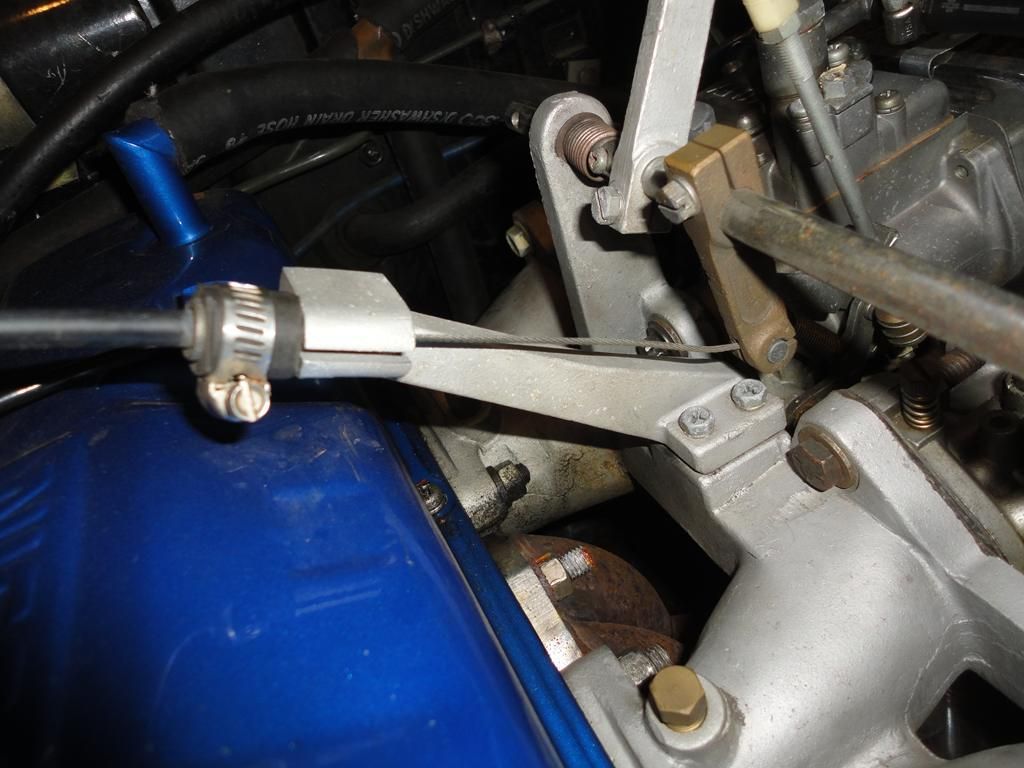
Adding this spacer to the end of the cable help take up the last bit of slack:
Open in new window

Posted on: 2015/7/10 3:41
Transfer the post to other applications Transfer


Re: Steering Lock
Moderator
Joined:
2001/5/3 7:04
From Kent, WA
Group:
Registered Users
Contentmaster
Usermaster
Posts: 31751
Offline
Quote:
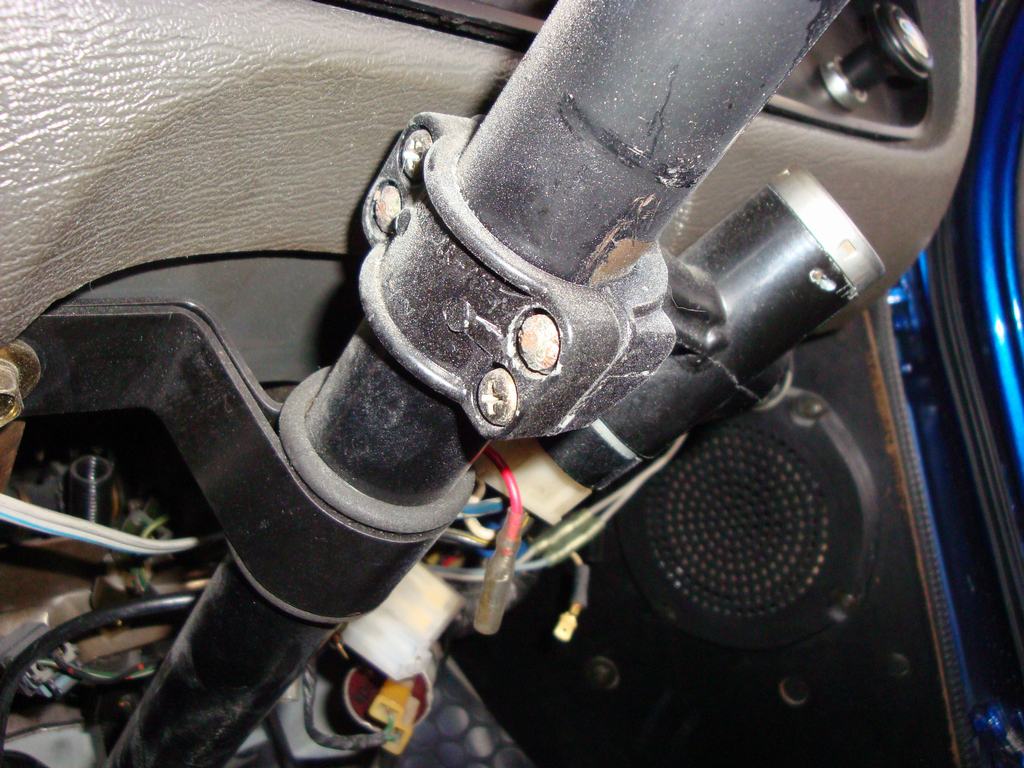
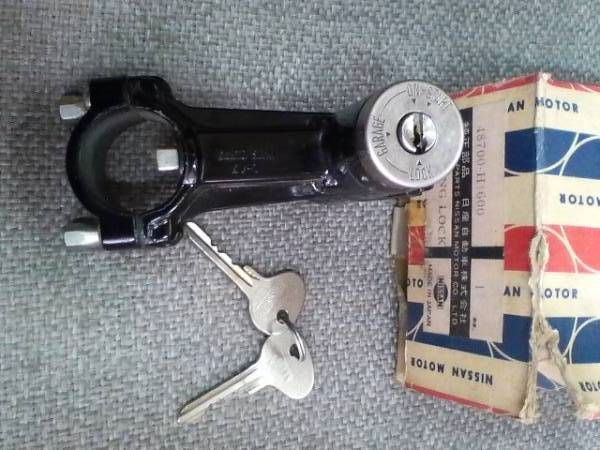
I also noticed that there are four screws on the steering lock. Only two of them are phillips head and the other two look like a security screw or something? How do I tighten the other two?

Open in new window

Is normal, two bolts are Philips-head, two are security screws:
Open in new window


On a new unit, two of the four bolts are break-off bolts. Once tightened, the heads break off.
Open in new window


If the bolt heads are already broken off, tighten by using a punch/drift/flat-screwdriver, slowly hammering the screws clockwise. Or remove the screws and hacksaw a slot in them (but then you lose the security feature).

Another idea is to JB-Weld bolts to the screws, and hope then when they are tight enough they will break off.

Posted on: 2015/7/10 5:29
Transfer the post to other applications Transfer


Re: Datsunbeginner becomes an expert - Vanilla Ice ute build USA
No life (a.k.a. DattoMaster)
Joined:
2010/6/2 13:35
From Toowoomba & New Jersey USA
Group:
Registered Users
Posts: 2341
Offline
Got some new parts in the mail. Cigarette lighter assembly reproduction part from Thailand. Also 2 x chrome plated knobs from California. I have never seen these types of knobs before. It seems like the 1200 ones are always black. I can only hope that I can also find some heater knobs to match?

Had a problem with the Cigarette lighter assembly. It seems like the brass screw in backing plate is waaaaaaaaaay too long. I cannot get it screwed onto the dash. Do you guys reckon I trim a section of it off to get it to fit or am I doing something wrong?

Open in new window


Comparo

Open in new window

Open in new window

Open in new window


New knobs

Open in new window

Posted on: 2015/7/21 1:27
_________________
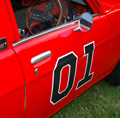
---1976 B120 "THE GENERAL REE"--- Former build
---1980 B120 Vanilla Ice --- current build
Transfer the post to other applications Transfer


Re: Datsunbeginner becomes an expert - Vanilla Ice ute build USA
Guest_
I like nom nom nom nom

Posted on: 2015/7/21 4:39
Transfer the post to other applications Transfer


Re: Datsunbeginner becomes an expert - Vanilla Ice ute build USA
No life (a.k.a. DattoMaster)
Joined:
2010/6/2 13:35
From Toowoomba & New Jersey USA
Group:
Registered Users
Posts: 2341
Offline
Glad to see you are back Mik.

Also thanks DD for clarifying those issues I was having. Still need to sort some of those items out

Posted on: 2015/7/22 0:16
_________________
---1976 B120 "THE GENERAL REE"--- Former build
---1980 B120 Vanilla Ice --- current build
Transfer the post to other applications Transfer


Re: Datsunbeginner becomes an expert - Vanilla Ice ute build USA
Moderator
Joined:
2001/5/3 7:04
From Kent, WA
Group:
Registered Users
Contentmaster
Usermaster
Posts: 31751
Offline
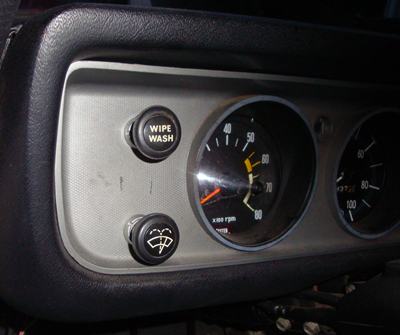
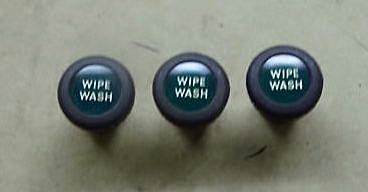
Nice looking knobs. Definitely not 1200, which were only black or green. Notice that headlight knob is oriented the wrong direction. Maybe came from Datsun 520 pickup? If from California, they must be pre-1972 as words were required starting in 1972.

Knobs
1972 USA (top) vs normal (bottom)
Open in new window


1200 Illuminated Knobs
Open in new window

Posted on: 2015/7/22 1:47
Transfer the post to other applications Transfer


Re: Datsunbeginner becomes an expert - Vanilla Ice ute build USA
Moderator
Joined:
2001/5/3 7:04
From Kent, WA
Group:
Registered Users
Contentmaster
Usermaster
Posts: 31751
Offline
Chrome wiper knob is listed on eBay as Nissan 25265-Y0102
Quote:
this is fit the datsun 330 ( 260C 280C ) but it can be used on many old datsun models
So that's Cedric 330 1976-1979 non-USA

Posted on: 2015/7/22 2:02
Transfer the post to other applications Transfer


Re: Datsunbeginner becomes an expert - Vanilla Ice ute build USA
No life (a.k.a. DattoMaster)
Joined:
2010/6/2 13:35
From Toowoomba & New Jersey USA
Group:
Registered Users
Posts: 2341
Offline
Mr. DD (aka walking encyclopedia) do you happen to know if there are matching heater knobs on the Cedric or any other Datsun model?

Posted on: 2015/7/22 2:39
_________________
---1976 B120 "THE GENERAL REE"--- Former build
---1980 B120 Vanilla Ice --- current build
Transfer the post to other applications Transfer


« 1 ... 22 23 24 (25) 26 27 28 ... 57 »


You can view topic.
You cannot start a new topic.
You cannot reply to posts.
You cannot edit your posts.
You cannot delete your posts.
You cannot add new polls.
You cannot vote in polls.
You cannot attach files to posts.
You cannot post without approval.

[Advanced Search]