![[Datsun 1200 encyclopedia]](/wiki/upload/wiki.png)
| Revision as of 23:21, 11 January 2012 ddgonzal (Talk | contribs) <- Previous diff |
Revision as of 23:24, 11 January 2012 ddgonzal (Talk | contribs) Next diff -> |
||
| Line 8: | Line 8: | ||
| A new gasket comes with a carburetor repair kit. | A new gasket comes with a carburetor repair kit. | ||
| - | == Hitach DCx series == | + | == Hitachi DCx series == |
| The hardest part is disconnecting the throttle pump linkage on the outside of the carb. This is the long lever along the top of the carb and a connecting rod that connect the throttle to the pump. There are also small clips that hold the levers. | The hardest part is disconnecting the throttle pump linkage on the outside of the carb. This is the long lever along the top of the carb and a connecting rod that connect the throttle to the pump. There are also small clips that hold the levers. | ||
| Line 20: | Line 20: | ||
| # carefully lift the top straight up a small amount. Check the gasket. | # carefully lift the top straight up a small amount. Check the gasket. | ||
| # If needed, pry the gasket from either the top or the body, so it stays in one piece | # If needed, pry the gasket from either the top or the body, so it stays in one piece | ||
| - | # remove top completely | + | # remove top completely. The float comes out with the top, so carefully guide it past the edges of the gasket |
| == Hitachi Twin Carb == | == Hitachi Twin Carb == | ||
| For [[Hitachi Twin Carb]], the float bowl top is held on by four screws. | For [[Hitachi Twin Carb]], the float bowl top is held on by four screws. | ||
| + | |||
| + | [http://datsun1200.com/uploads/photos/23425.jpg http://ddgonzal.members.winisp.net/getThumb.aspx?width=400&uri=http://datsun1200.com/uploads/photos/23425.jpg] | ||
| # remove fuel inlet line | # remove fuel inlet line | ||
| - | # remove fuel overflow line | + | # remove fuel overflow line (vent line on newer versions) |
| # remove the four screws | # remove the four screws | ||
| # carefully lift the top up a small amount. Check the gasket. | # carefully lift the top up a small amount. Check the gasket. | ||
| # If needed, pry the gasket from either the top or the body, so it stays in one piece | # If needed, pry the gasket from either the top or the body, so it stays in one piece | ||
| - | # remove top completely | + | # remove top completely. The float stays in the bowl |
| = Re-assembly = | = Re-assembly = | ||
Revision as of 23:24, 11 January 2012
Removing the top of thecarburetor is relatively easy, and is the key to setting the float level. Almost all repairs can be done by partially disassembling the carburetor, meaning take the top off.
Contents |
Take the Top Off
Note that the top gasket is not a critical piece. On downdraft, there is only one vacuum passage. The rest of the top gasket is mostly there to seal the carb from dirt, and to prevent vapors from escaping (air pollution).
The carburetor will run fine with a partially torn top gasket as long as it seals around the center hole (for downdraft type).
A new gasket comes with a carburetor repair kit.
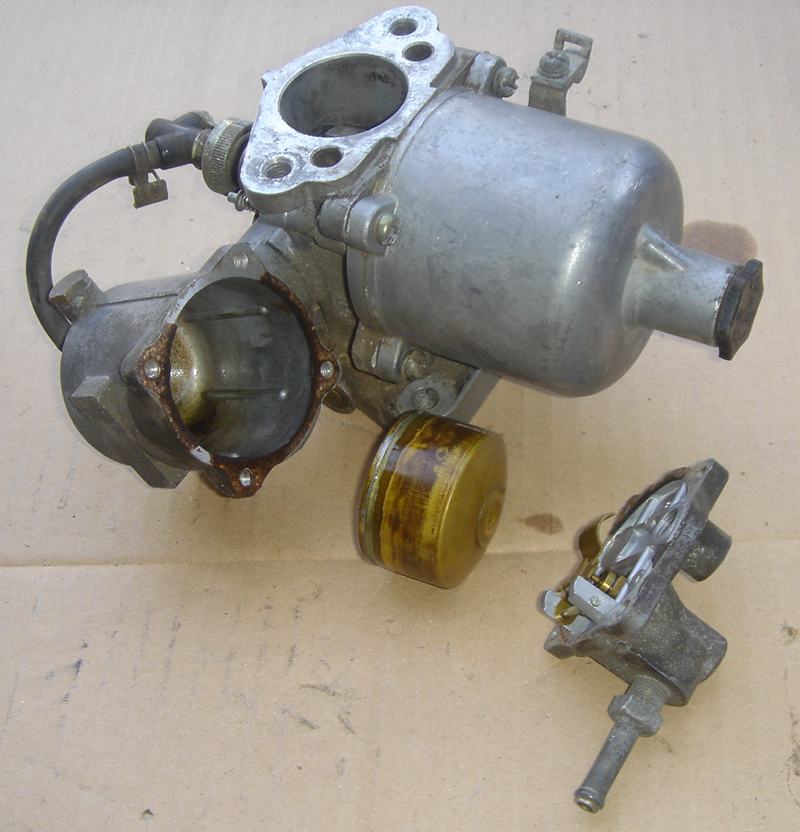
Hitachi DCx series
The hardest part is disconnecting the throttle pump linkage on the outside of the carb. This is the long lever along the top of the carb and a connecting rod that connect the throttle to the pump. There are also small clips that hold the levers.
Be careful and don't lose these small parts
- remove pump lever cotter pin
- remove choke linkage cotter pin
- remove and plug fuel line
- remove choke pull-off hose (auto choke models)
- remove the top screws
- carefully lift the top straight up a small amount. Check the gasket.
- If needed, pry the gasket from either the top or the body, so it stays in one piece
- remove top completely. The float comes out with the top, so carefully guide it past the edges of the gasket
Hitachi Twin Carb
For Hitachi Twin Carb, the float bowl top is held on by four screws.
- remove fuel inlet line
- remove fuel overflow line (vent line on newer versions)
- remove the four screws
- carefully lift the top up a small amount. Check the gasket.
- If needed, pry the gasket from either the top or the body, so it stays in one piece
- remove top completely. The float stays in the bowl
Re-assembly
Put the top back on in reversal of the steps above. Tighten the bolts only enough to compress the lock washers, no more.