|
|
Browsing this Thread:
2 Anonymous Users
|
|
Re: racetech's 1200 SR20VE Project |
|
Home away from home  
Joined:
2009/4/16 10:37
From Cape Town, South Africa
Group:
Registered Users
|
June & July 2012 - Wiring IV & Start-up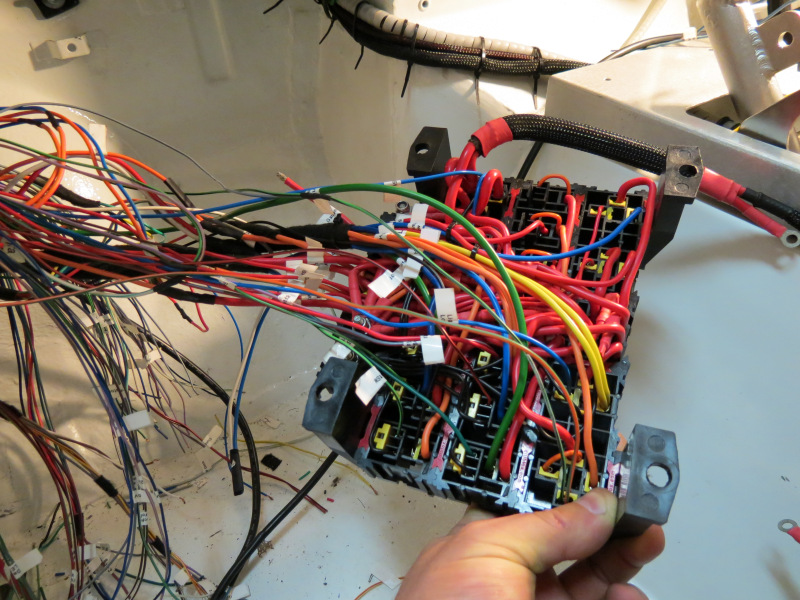  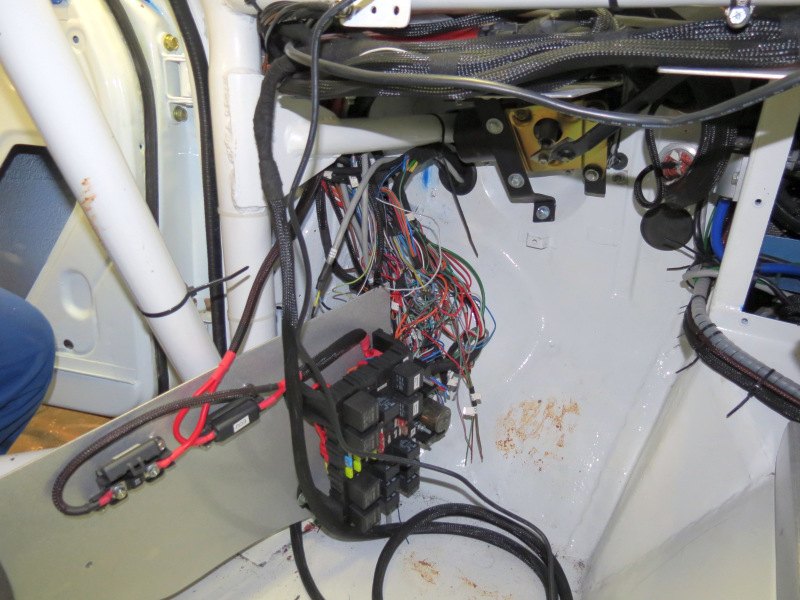 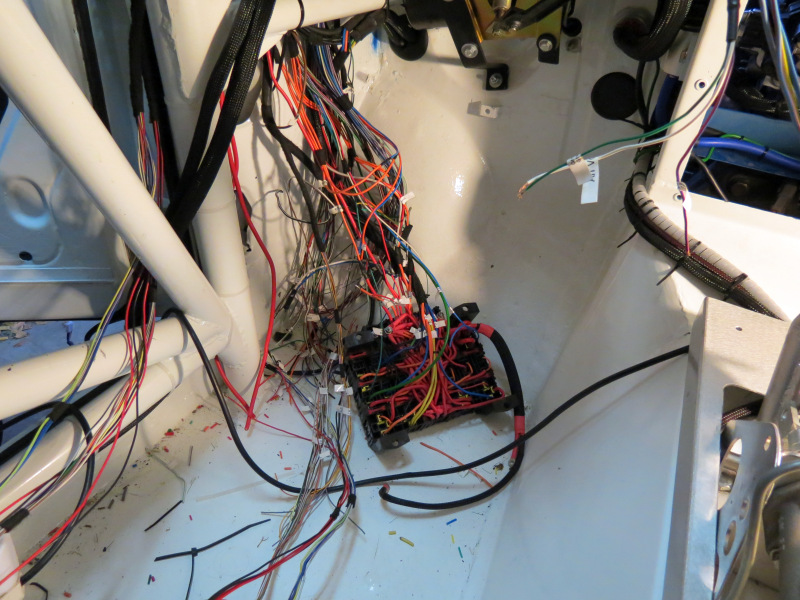 Wiring, well all the time available I spend on the wiring when not working during the day and night, 90% of it is done, just a few small things and it will be done. The biggest news to date is the fact that the motor started for the first time and I took the car for a drive, but more of that later. 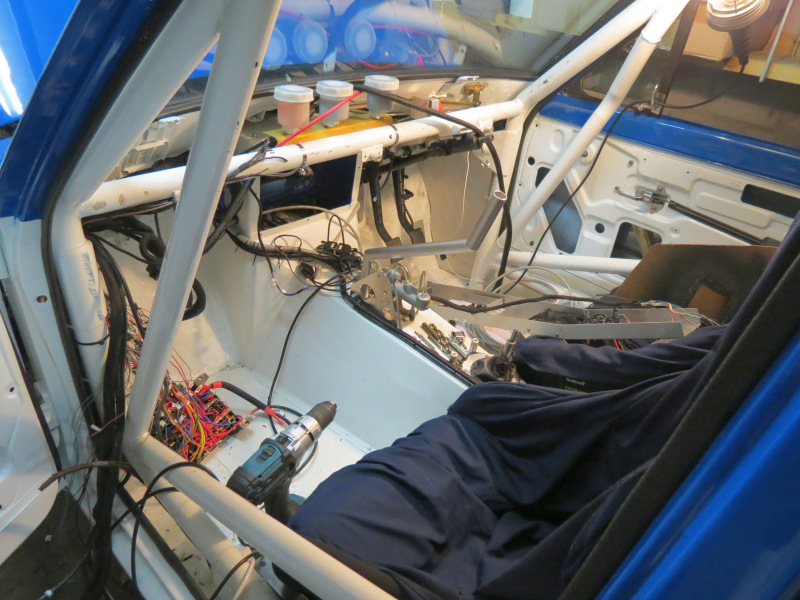  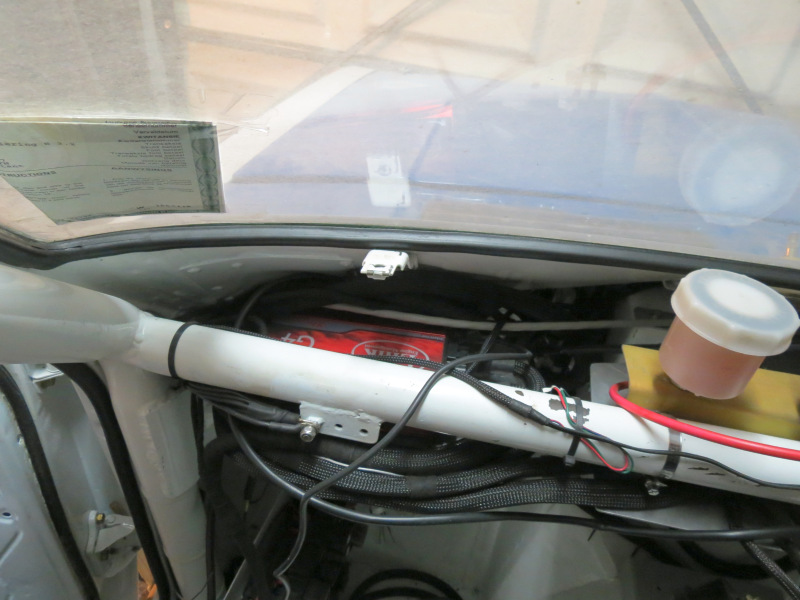 As the time went by breaking my back in the navigator seat getting every wire in place, I started thinking and making changes to the wiring as I went on. The more experience the better the decisions. I realised that you cannot drive the LCD Screen via a serial connection while having a laptop connected to it for tuning. This had me going for a while, until I decided to run a dedicated rpm output from the LINK to the Dash, now I always have rpm on the screen. Seeing that the Gearbox speed sensor is a variable reluctant unit which the DASH2 cannot read, I had another issue, I was just about to hit the order button on Rallynuts website for a Monit VR conditioner, when the light went on, the final result, seeing that I'm already inputting the Diff speed to the Link, just setup a output as an Electronic Speedo driver and all issues resolved and another R500 saved. Another R500 reason to buy decent management. 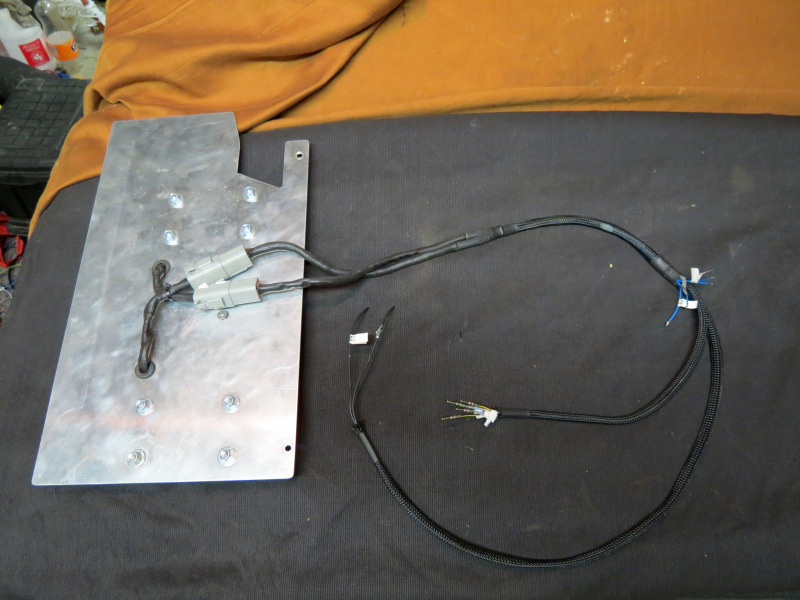 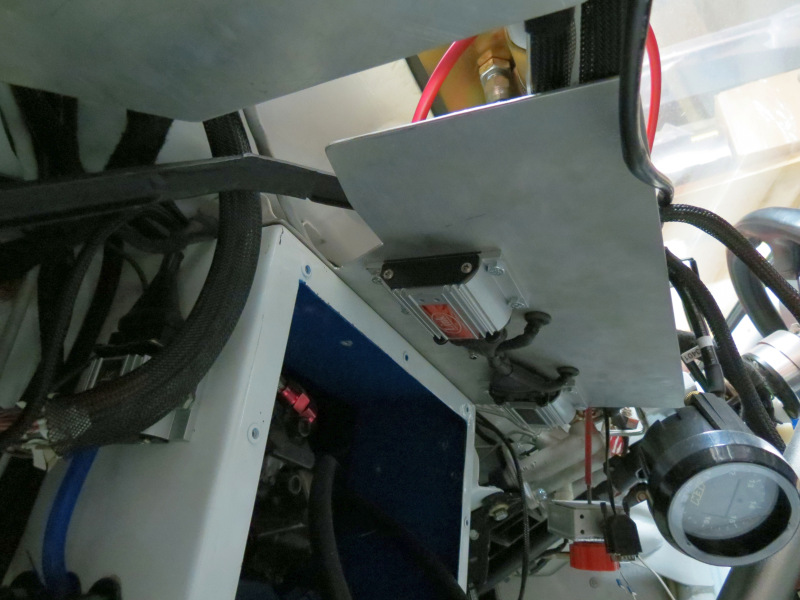  After bolting a few items like the Ignitors and coils on and off a few times, I decided to add a multi pin Deutsch connector for each, Now I'm able to unplug them without having to struggle with removing terminals etc. While I was busy making life easier for one day, I decided to replace all the el cheapy plugs I installed for the gearbox wiring with decent single Deutsch unit. A few additional switches was added to the center console and fuel pump wiring also changed. To date, the following Input/Outputs are used on the car: [list]2 Triggers Inputs 4 Ignition outputs 4 Injector outputs 10 General Purpose Outputs 11 Analog inputs 8 Digital Inputs[/list] First Start-up: All the wiring was manually tested for any funnies, a few beginners mistakes fixed. One of the biggest weapons on the LINK is the various test functions, first we tested all the Injectors, then ignition outputs, this is magic especially to eliminate any bad wiring. 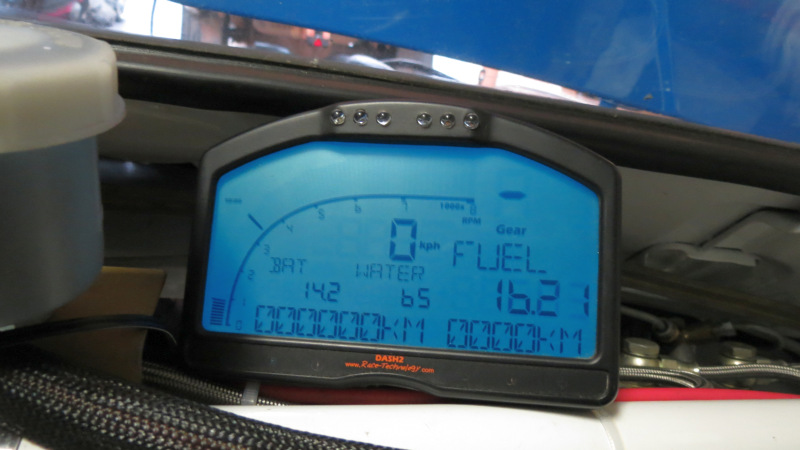 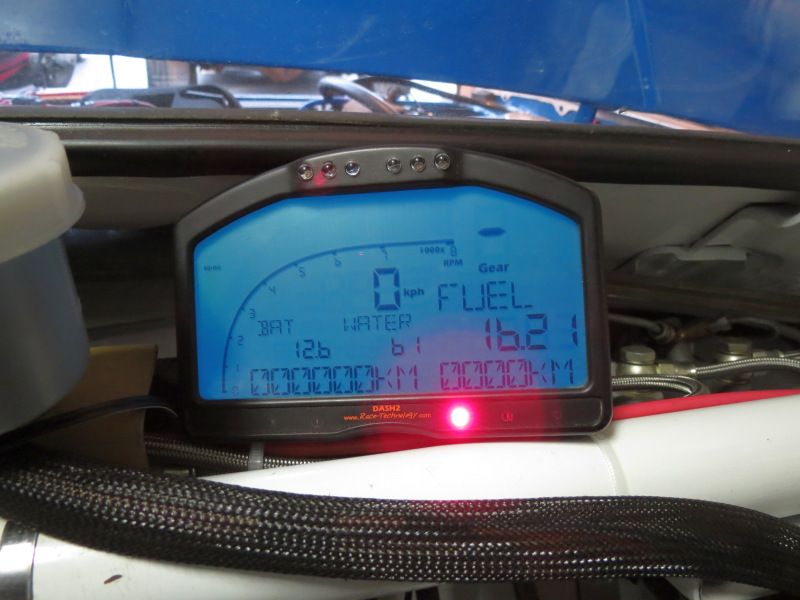 Once I read the start-up instructions a few times provided with the manual, the actual process was quite quick. I started with the basics as the manual dictated, made sure the triggers are picking up, calibrated the triggers. Then I got my brother to check the timing while I cranked it and set the base offset on the LINK, applied some throttle and it started hissing, spitting and it had life, all this from a SR20DET base map with a few changes I made. Starting the car and playing around with the map kept me happy for a while, but I wanted to drive the car for the first time, but that idea was quickly diminished when I noticed the power steering fluid had a tendency to escape from the reservoir. It didn't take long to realise that the oil seals must have become brittle after more than 2 years of non-use. I had two options, get it fix as quick as possible or look at the car without playing with it, the answer was easy, start phoning around to get a good company to replace the seals. Nearly had a heart attack when I realised what it costs to get work done on these units, at the end of the day I settled for a full recon on it. Then the fun started to get the car ready for the first drive. Have a look at the Startup video's [url]http://www.youtube.com/watch?v=ADWmZx_fN_M[/url] Datto Startup 1 [url]http://www.youtube.com/watch?v=3x1bXqiUtW4[/url] Datto Startup 2 Anyways, a few days later my brother and I took Datto out for the first drive, all the way logging as we go along, switched on all the compensations and made sure the Air/Fuel corrections are working and off we went. This thing is freak in hard, I need to find out what sort of spring rates is on the coil overs, or the damping is thru the roof. It did not take long to realise I need to get the car together as the sensation to drive the car after two and a half years overwhelmed me, besides driving around only at night to keep unwanted attention away as the wheels are sitting 150mm out per side and no mirrors is looking for trouble. The first drive went better than expected, I seriously expected some more issues, however, the biggest mystery is a fuse that likes to pop on a prolonged drive. The one supplying 12V to the CAS, reverse and brake lights. Yea yea I know, I was stupid doing it this way, but at the time it made sense to save on available pins on the firewall connectors. The car can stand and idle for hours in the garage, reverse and brake lights operated to death, no blown fuses, but after driving for 10minutes longer, it will blow. I'll separate the CAS from the lights and see what happens.  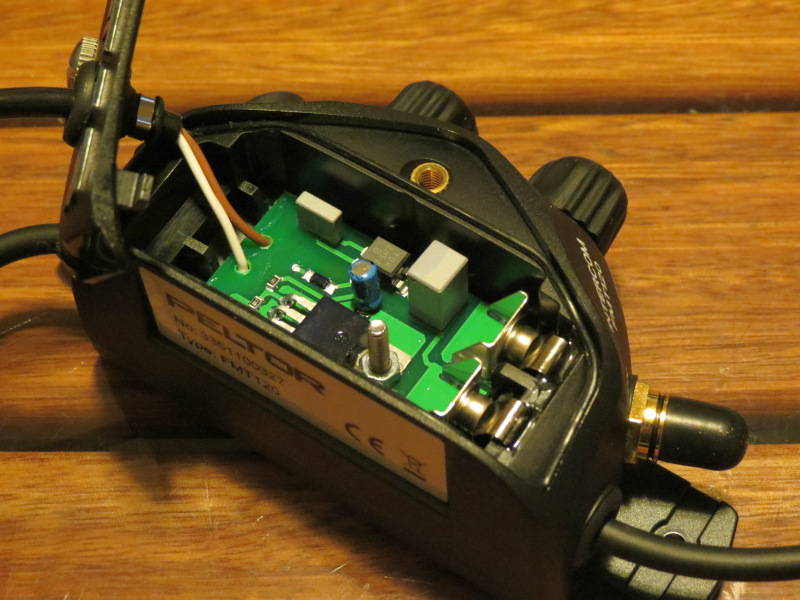 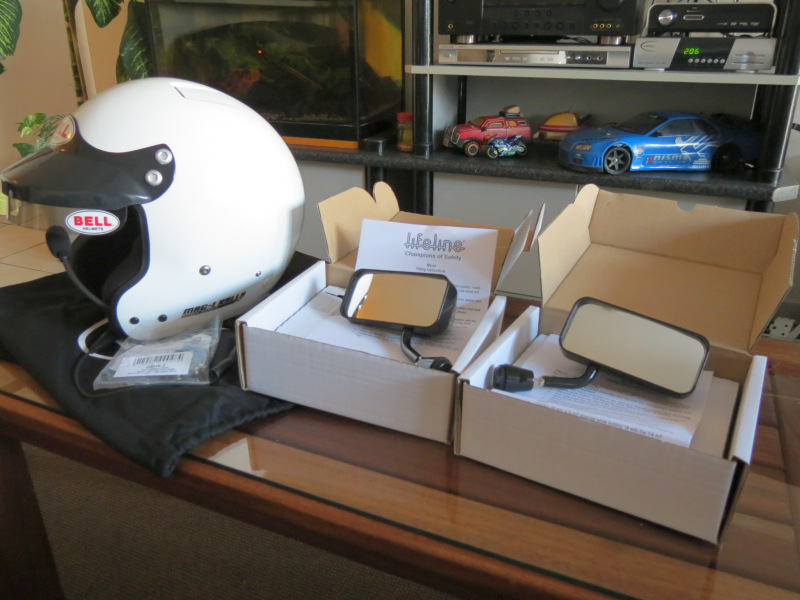 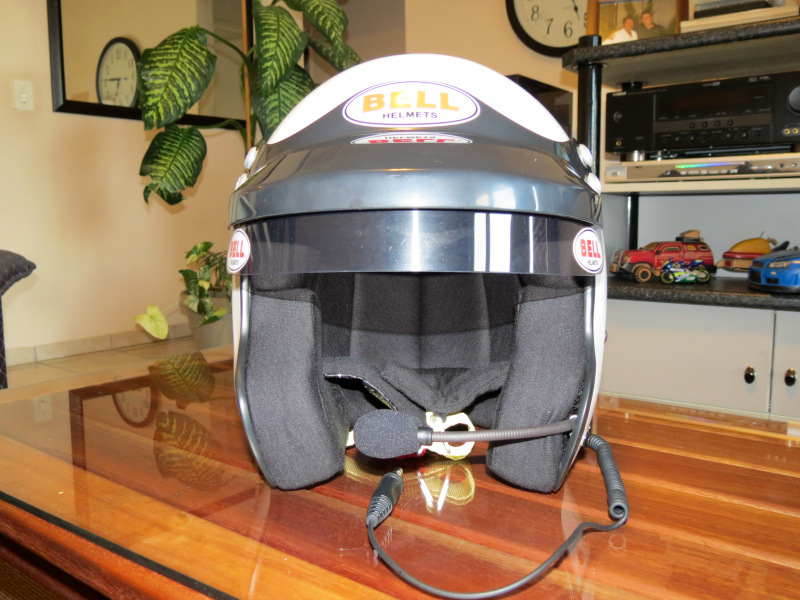  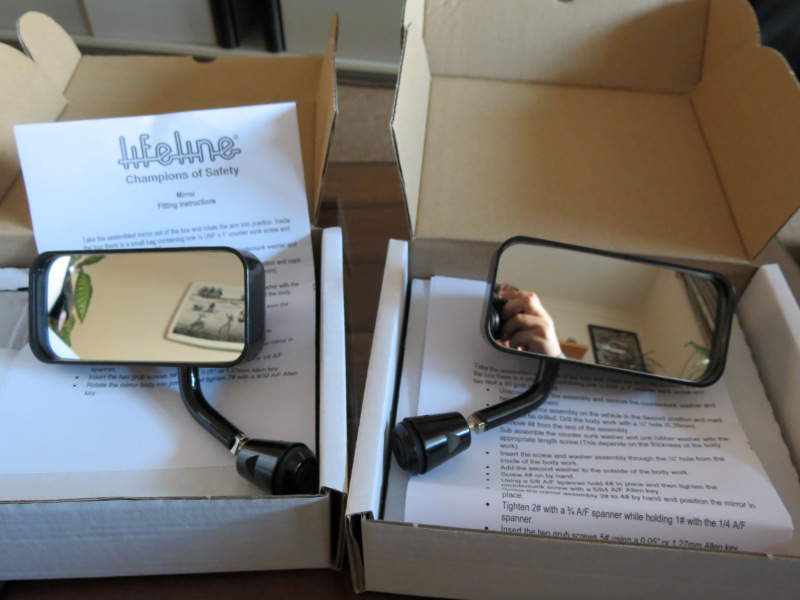 During the course of the two months, two very game changing parcels arrived. Finally I made up my mind that the cars focus will be shifted away from Gymkhana/Tar Rally (which we only have one a year) to gravel rally. Luckily for me I have a very good friend that is either stupid enough to get in a car with me on gravel or this will be my opportunity to convince him a MKII Escort was designed to be a rally car. First was the intercom, this after a shocking few days researching safety products and prices, not to mention the prices the monopoly charged for this sort of products in our country. I decided that I'll rather import some of the stuff, even if it works out to the same amount of money. Next up was the helmets and mirrors, another case to vomit about, these Bell Mag-1 Rally helmets is basically the entry level WRC intercom compatible units on the market landed in South Africa, but the price is still ridiculous. Carrying a FIA Snell2010 certification, meant that we could choose our own make of HANS anchors, here we opted for Schroth units as we will most probably be using there HANS devices. The mirrors was another trial and error purchase, seeing that this was the 3rd set of mirrors bought, the first set imported was slightly to big, 2nd set not even good enough to use on your lawnmower, seeing that you need two hands to adjust them. This set comes from Lifeline, a well-known UK company specialising in fire extinguishers, these are pure racing car style mirrors and I was quite scared they would be to modern for a 1970 vehicle, but luckily for me, they fit like a glove to the racing car theme, on a normal road going car of that decade, it would look out of place. Thanks to Rallynuts for their great service. Next big steps will be to get the car road legal, meaning I would have to man up, pull a finger, brave the cold and figure a way out to get flares/wheel arches hugging the tires.
Posted on: 2012/8/16 10:12
Edited by racetech on 2013/12/23 11:54:57
|
|
|
|
|
Re: racetech's 1200 SR20VE Project |
|
Home away from home Joined:
2009/4/16 10:37
From Cape Town, South Africa
Group:
Registered Users
|
August 2012 - FlaresSeeing that I cancelled my holiday plans as the destination was trying to drown itself, I thought this would be the best time to start with the flares. 11 days seems like an eternity, but I would have loved another 4, time goes by way to fast if you are busy, especially with things you have never worked with before like foam and fiberglass. I've been collecting pictures of flares or wheel arches as some people call them for about 2 years now, basically since I decided to make the car so wide, and stole ideas from these to get to what satisfies my taste. Since the car arrived at the shed the making of flares was my biggest nightmare, probably due to the unknown and the fact that a river rock have been blessed with more creativity than me, sculpting and the arty side of life I leave to those with the talent for it. Lucky for me I have a friend that works with fibreglass a lot and have been involved with this sort of thing previously to help me.  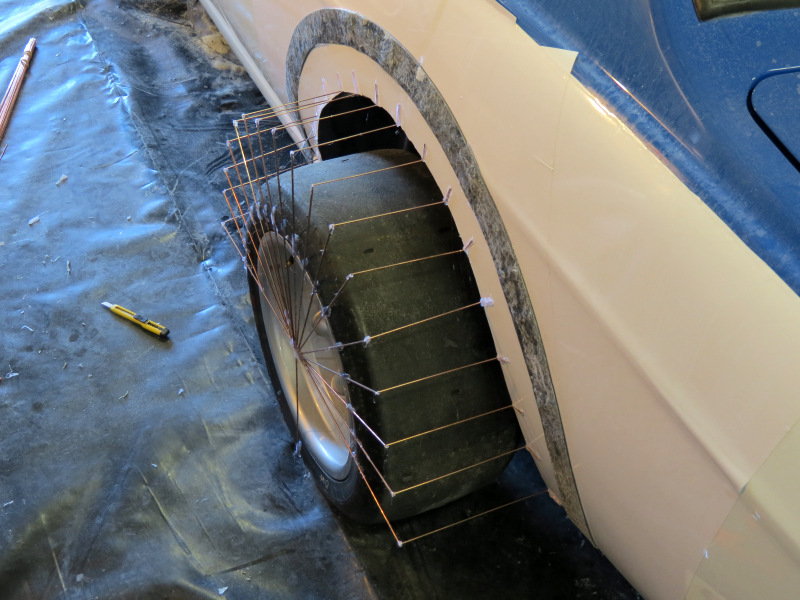 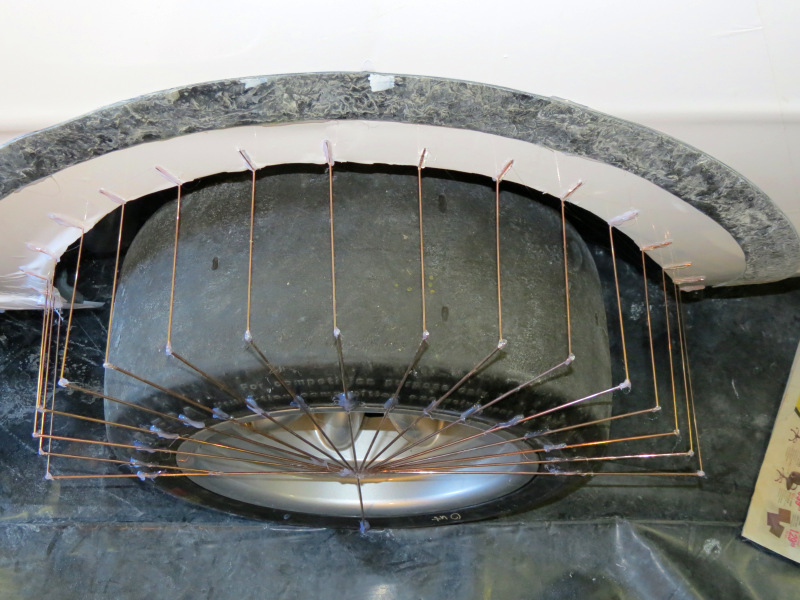 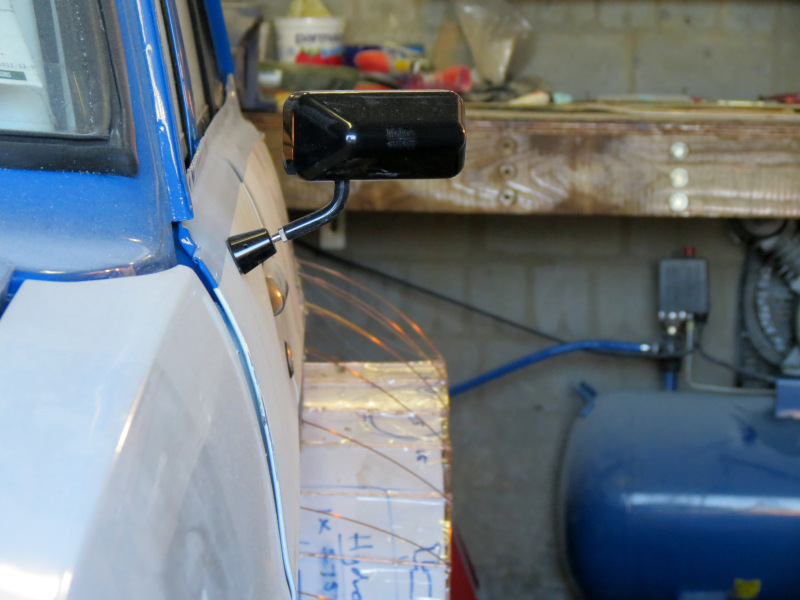 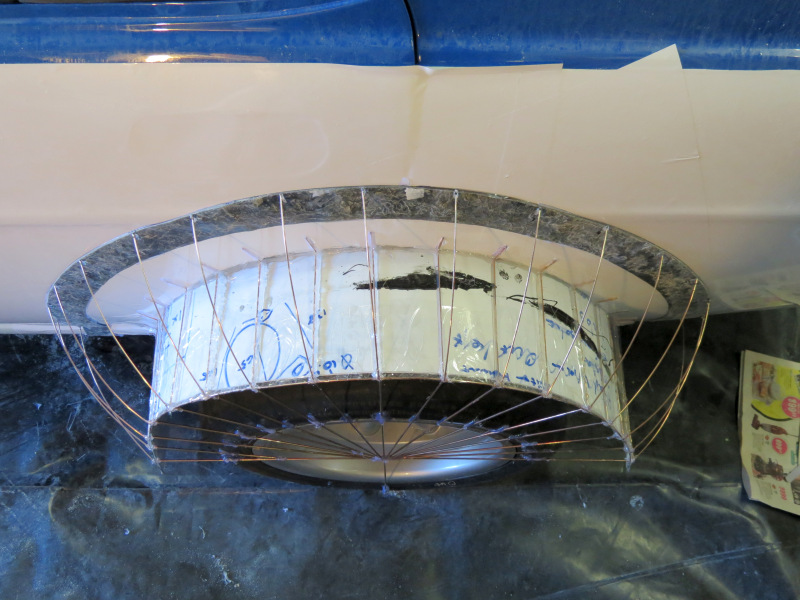  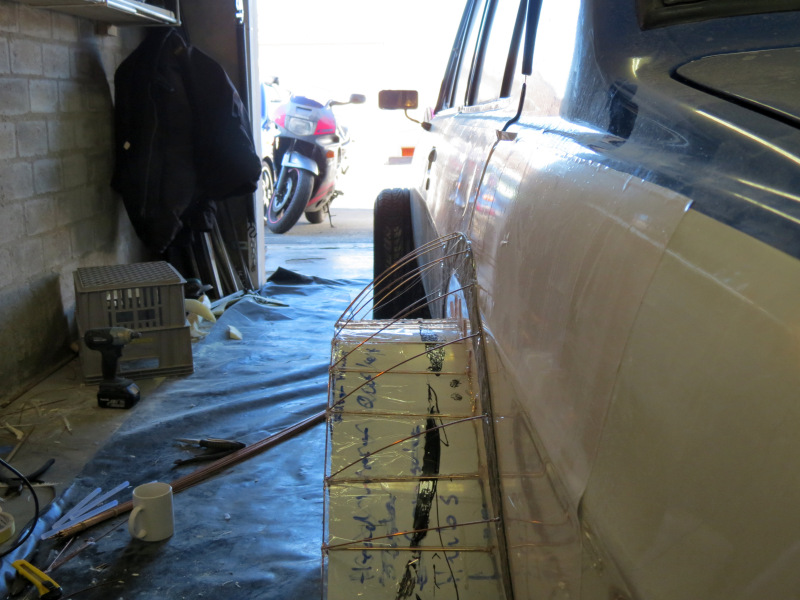 First challenge was to figure a way out to get the shape I had in my mind on the car to visually inspect it, this came in the form of plastic sheets and 2kg of welding wire. The initial plan was to make the flares round, but this would have been way to much work, especially with my lack of creativity, I'm more for the driving than sitting for weeks sanding. Thus I decided to make them flat, the idea sounded much more at home than round arty stuff, especially since my brother knows his way around CAD software and would be possible to provide me with a halve decent cut profile needed, well let me just say, that plan did not last longer than 30 minutes once I started sticking bend pieces of welding rod to the rear arches. The straight profile just did not do it for me and I had to give in to the arty side shouting by now to make the profile slightly round. I bend a few wires and stick them to the side, immediately it just looked correct.  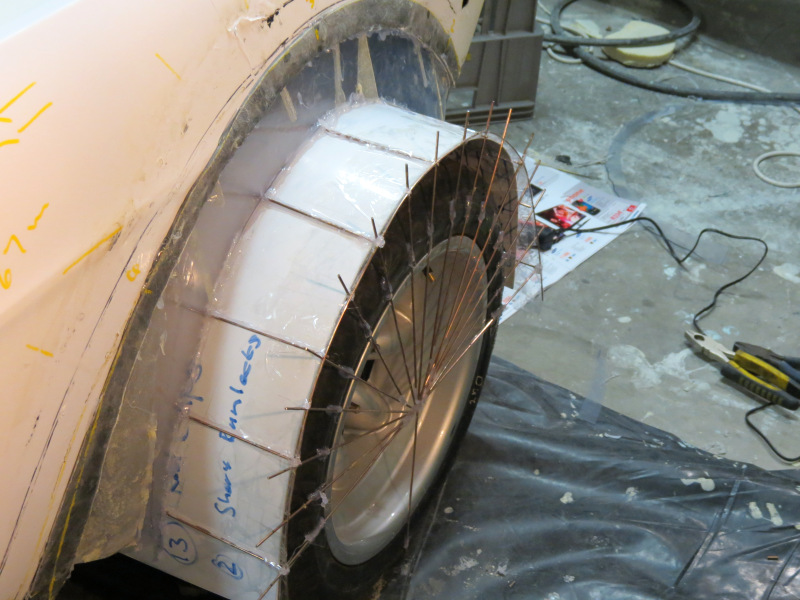 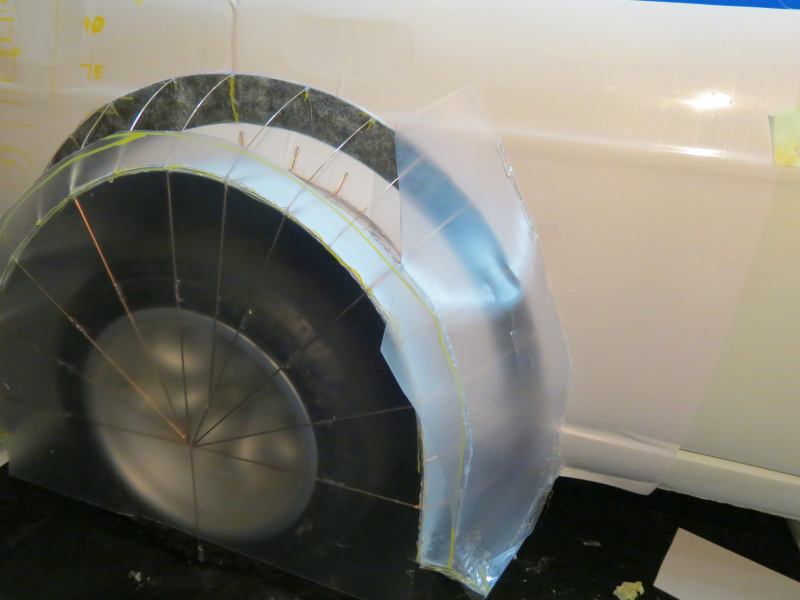 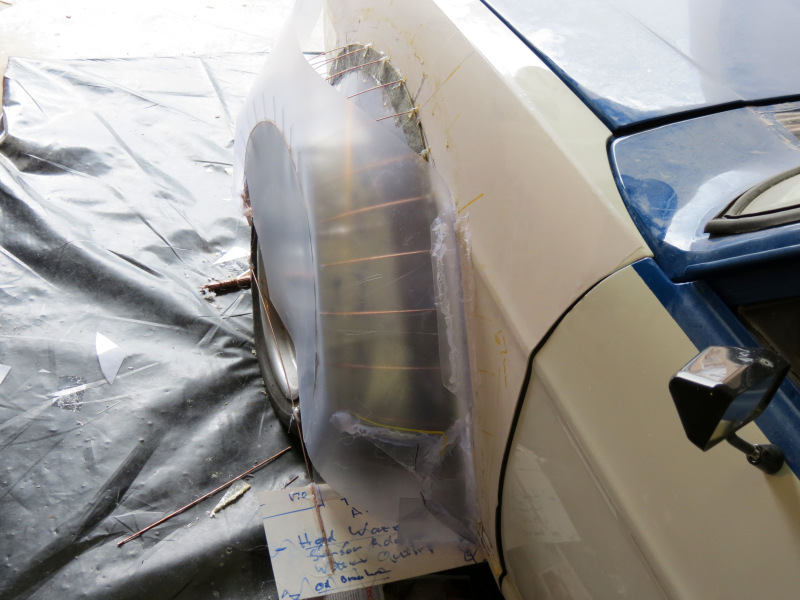 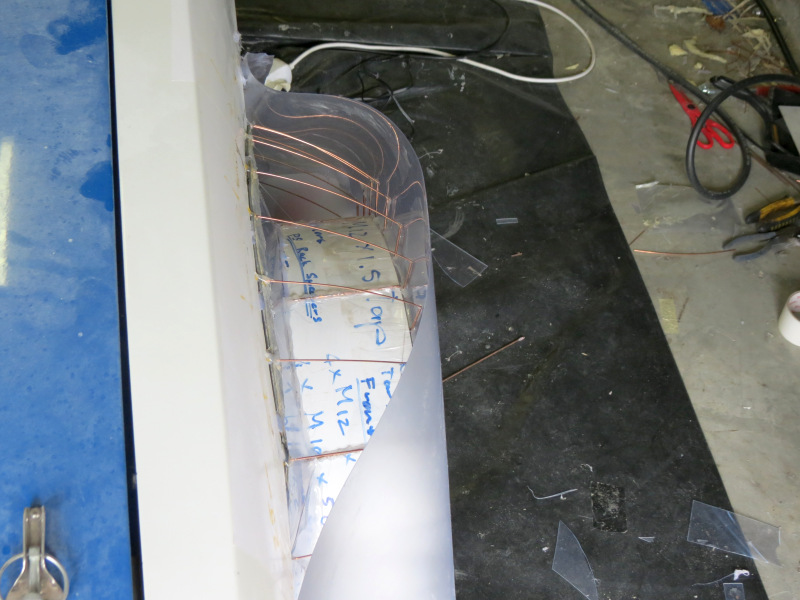  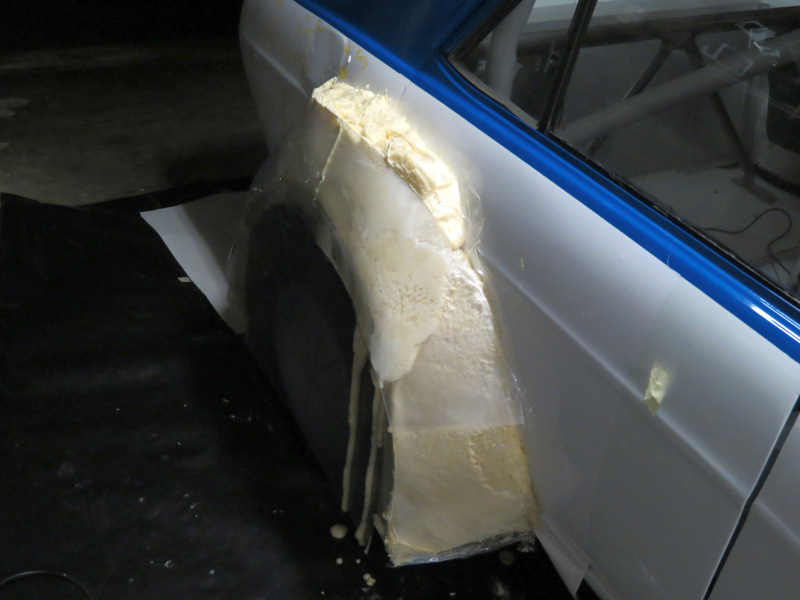 A few measurements later and we started with a layer of fibreglass to follow the contour of the rear wheel arch, once this was cured and shaped to the desired radius required, I started building the spider web of various lengths of wire to form the basic profile of the flare, then the expedition started to get this all boxed up with plastic sheets and to add to this, it needs to be water tight. You need more than enough glue sticks and tape to accomplish this. Doing this once is quite fun, but 4 times in total gets a little bored, at least I learned to talk to myself while doing this. After this whole contraption is glued together and covered with plastic, it is time for some fun with the Two Part Foam. Working with this stuff can't be easier, it comes in two different tins, part a and part b, start with a small amount of the one part, mixed exactly the same amount from the other amount, do mix it very good, but be in a hurry, once mixed pour it into the empty cavity, sit back and wait for the foam to start expand. Once this is all done, leave for a few hours to set and remove the plastic. 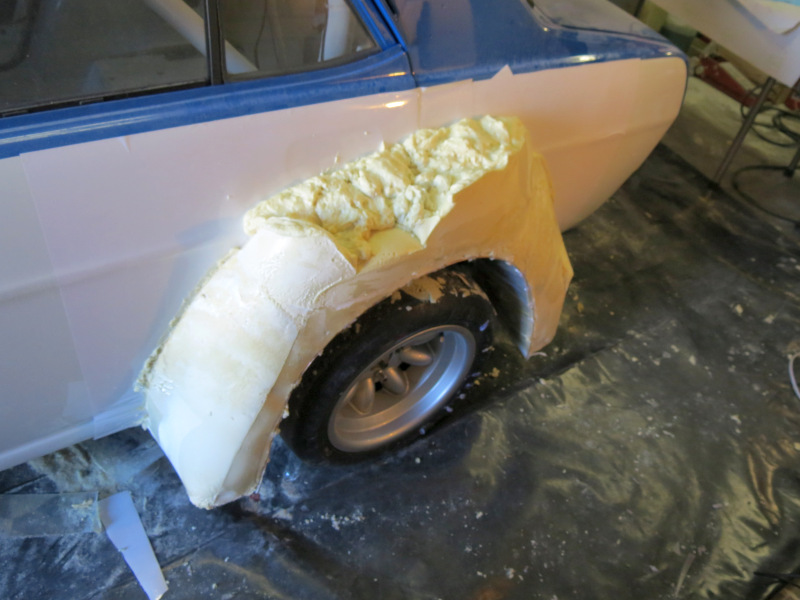  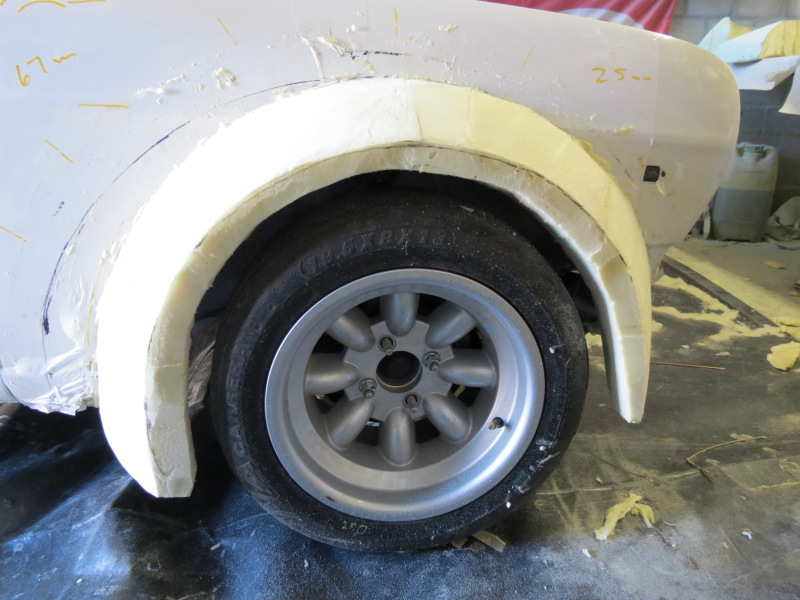 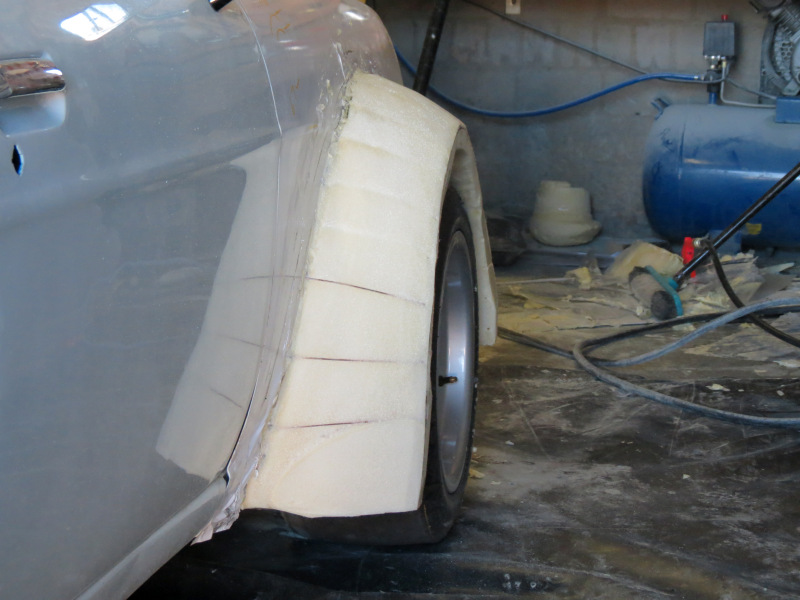 Once the plastic is off, the shaping starts, this is one messy story, the foam sticks to your skin and cannot be rubbed off, only high pressure air is able to remove it. Now you will start to see why I spend all the time with the wires, this at least gave me some form of indication how to shape the flare. This is also the point where I made one of the first mistakes, do not remove it until both sides are done, however, I did remove it and had fun getting the two sides looking the same. Once removed, it is time to start covering the flare with body filler, this is probably the easiest part, but more than likely the most dirty part, as the dust is everywhere. Once this is done it must be smoothed, this is where I ran out of talent very fast, it would have taken me months to get these 100% smooth. This process was repeated another 3 times, seeing that not even one of the flares can be used on another corner. Half way thru trying to smooth the flares out, I decided that I'm going to take them to a professional, this didn't make it any easier as I still had to get them in the correct shape and 100% covered with smoothed body filler. For the majority of people this would be good enough as they could finish off the final fibreglass flare, but I want them perfect, seeing that I want to colour match the gel coat to the cars paint and every flare that comes out of the mould are 100% done to attach to the car, maybe just add some sort of protection on the insides. 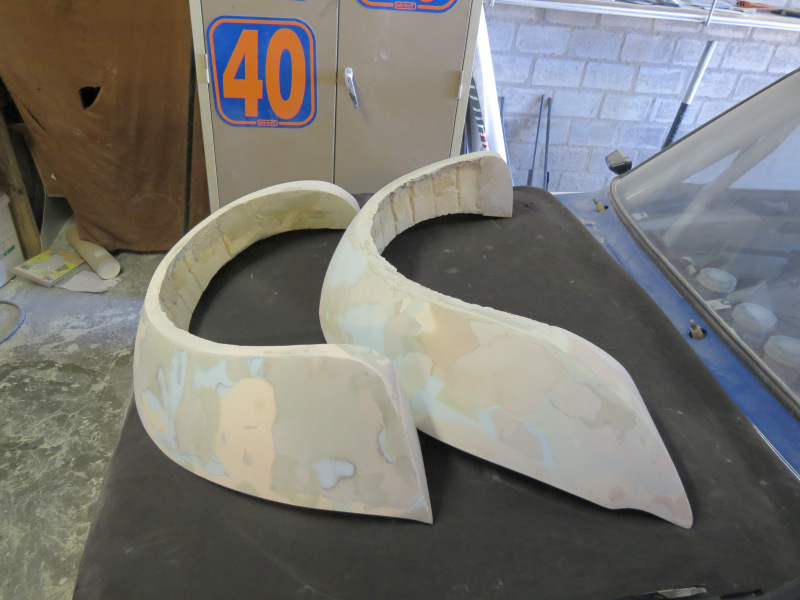 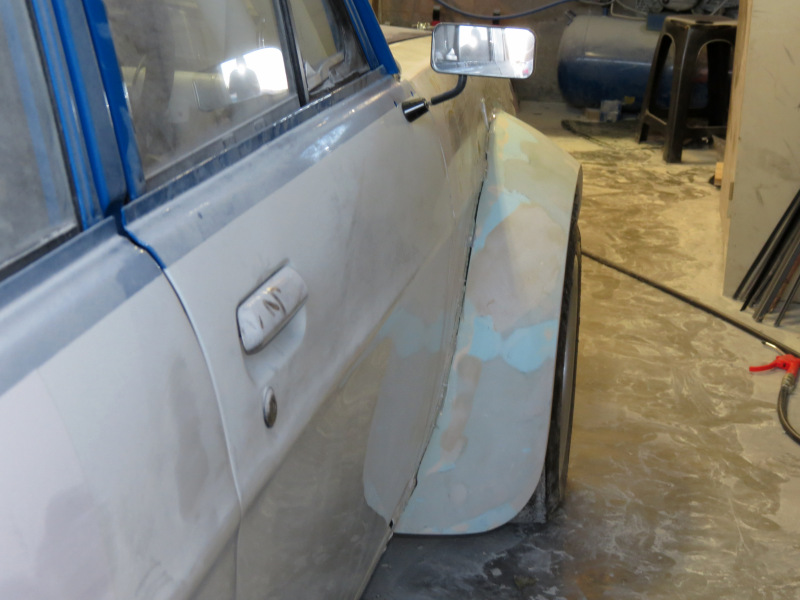 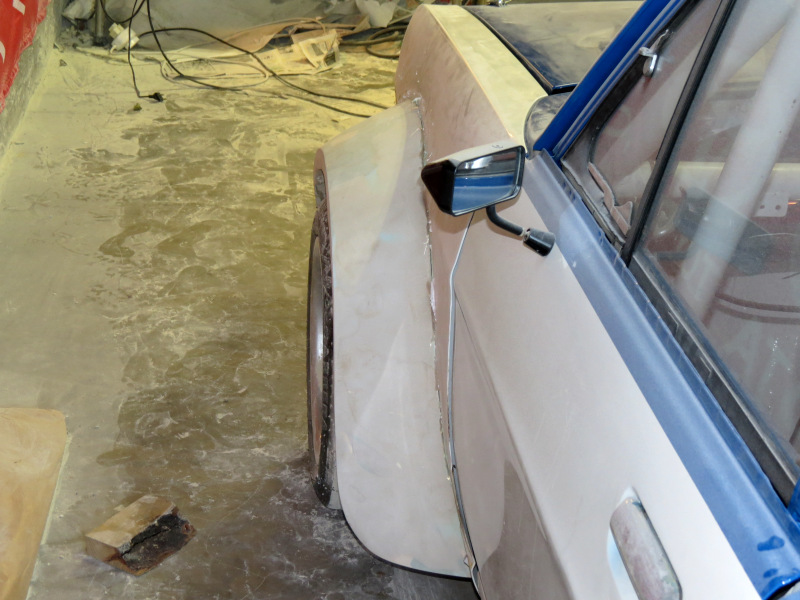 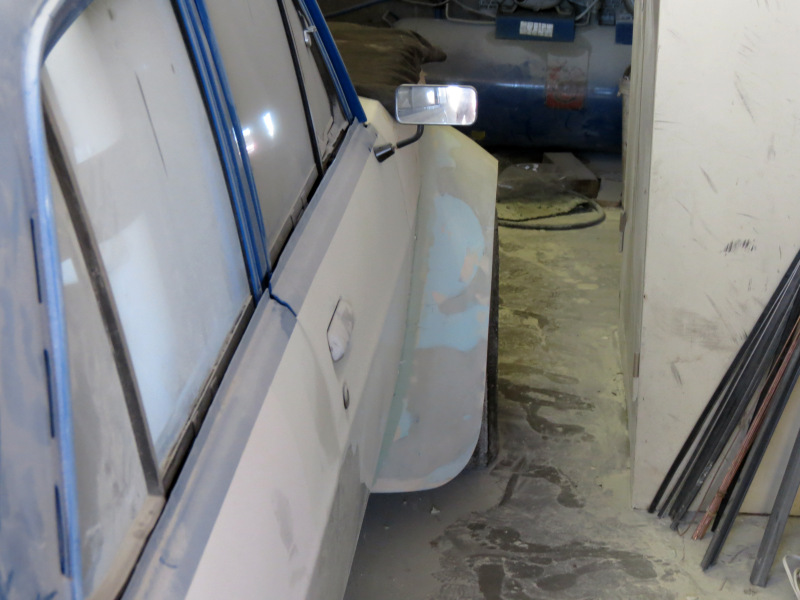 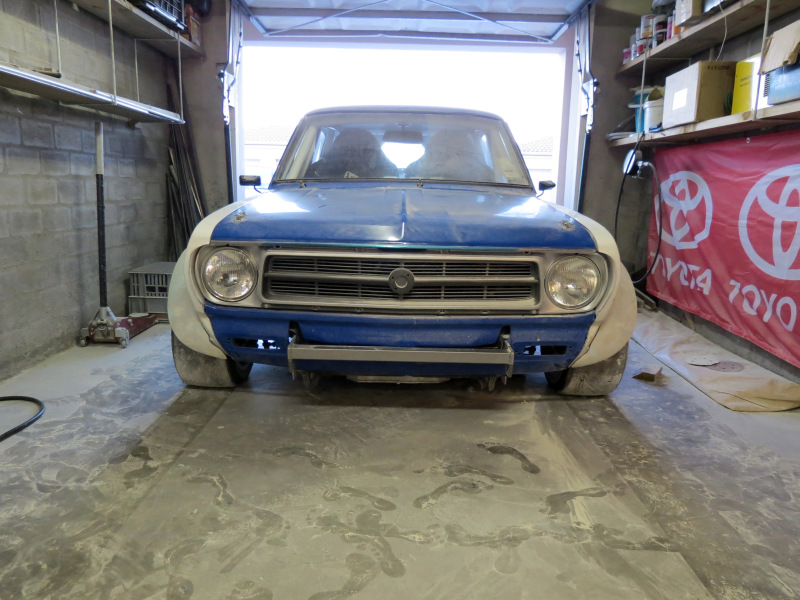 All in all, these flares took me about 1 month and 25 days to complete to what it is today, I have delivered them to a professional body shop for final preparation and some paint before I get them back and we can start with the moulds. This was hell, I really do not want to do it again in, everything is under dust, you cannot walk thru the garage without being full of dust, luckily I'm done with the mess. Personally I think it would be far better for your health to just save the money and get a set of side shafts made to suit the car with a set of pre-built flares.
Posted on: 2012/9/26 14:23
Edited by racetech on 2013/12/23 11:53:45
|
|
|
|
|
Re: racetech's 1200 SR20VE Project |
|
No life (a.k.a. DattoMaster)  
Joined:
2002/10/28 6:49
From under the Firmament LOL no twiglight effect BS
Group:
Registered Users
|
sickness with a T for terminal!!!
Posted on: 2012/9/26 14:42
|
|
_________________
"Australia" is formed by all its geographically listed territories "including" Norfolk, Christmas & Cocos Islands. The word include excludes all else before it therefore you have no legal rights.
|
|
|
Re: racetech's 1200 SR20VE Project |
|
Home away from home Joined:
2009/4/16 10:37
From Cape Town, South Africa
Group:
Registered Users
|
This was a crap job that took way to much time to complete, hopefully the fiberglass work will be easier.
Posted on: 2012/9/27 9:23
|
|
|
|
|
Re: racetech's 1200 SR20VE Project |
|
Home away from home Joined:
2009/4/16 10:37
From Cape Town, South Africa
Group:
Registered Users
|
September 2012 - Flares, Throttles and Air boxThe last month was quite busy, majority of time spend on finishing the flares, well to a state that I could send them off to the professionals to add there flare to them in the form of smoothing them out and spraying them. Hopefully I will have them back before the end of the month, seeing that they are just plugs, I still need to make moulds and then the actual flares. Seeing that I started losing my mind getting this stuff ready, I needed something to keep me distracted and going, this came in the form of some parts or at least the idea that I already paid for them and just need to wait for delivery. 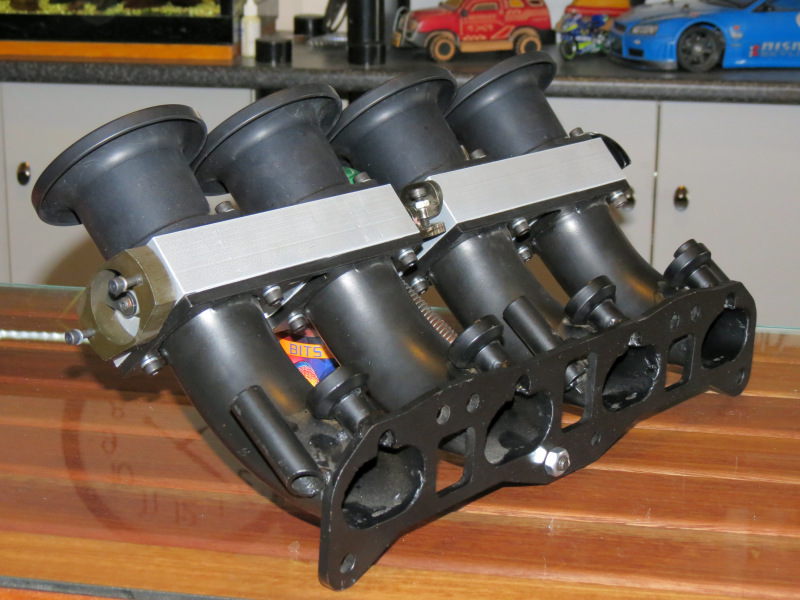 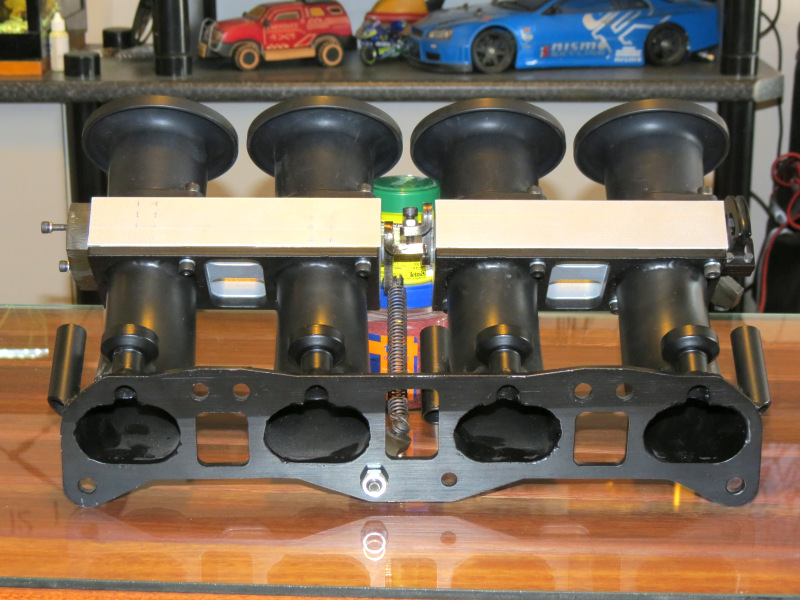 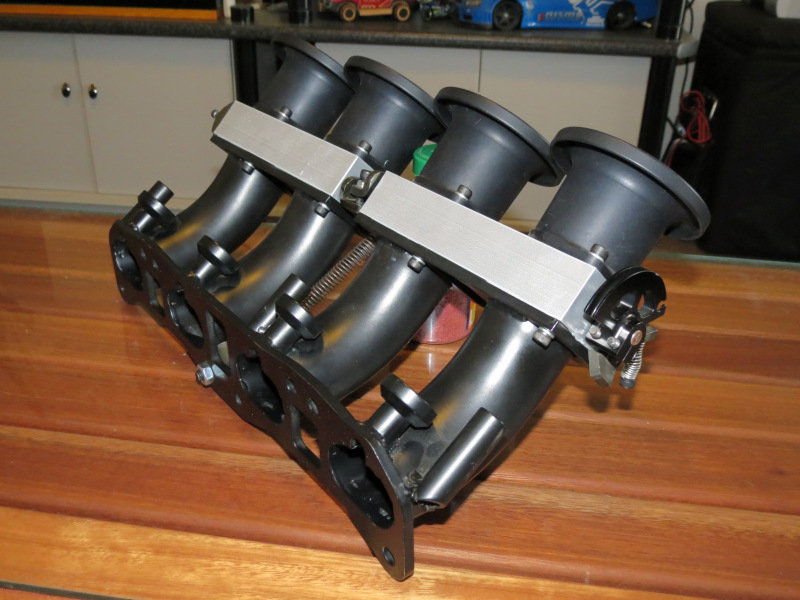 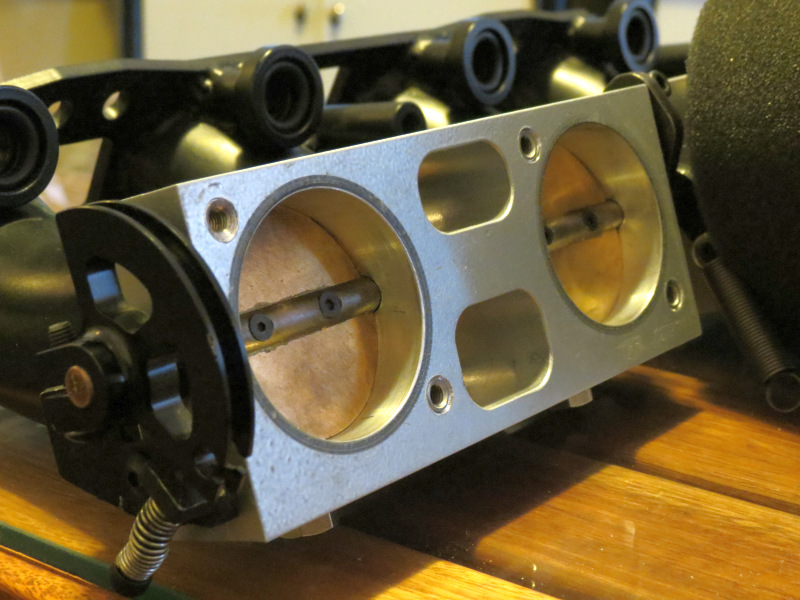 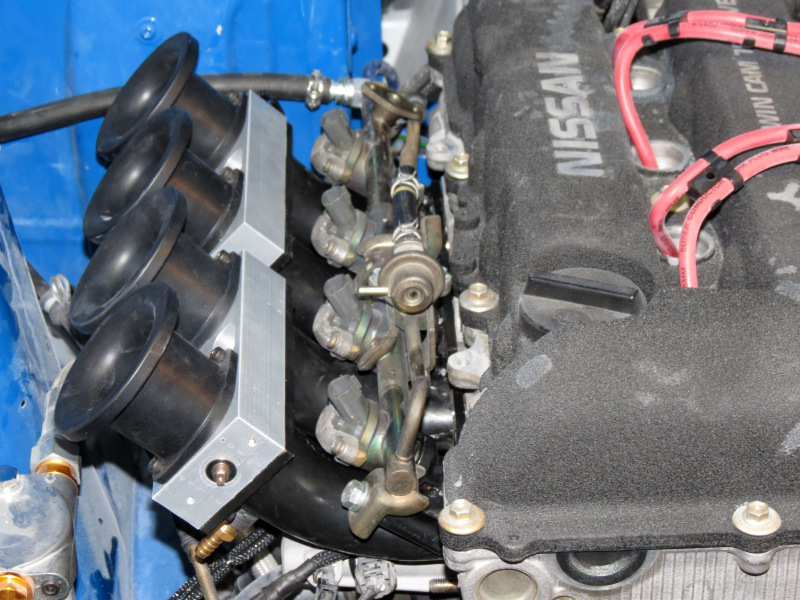 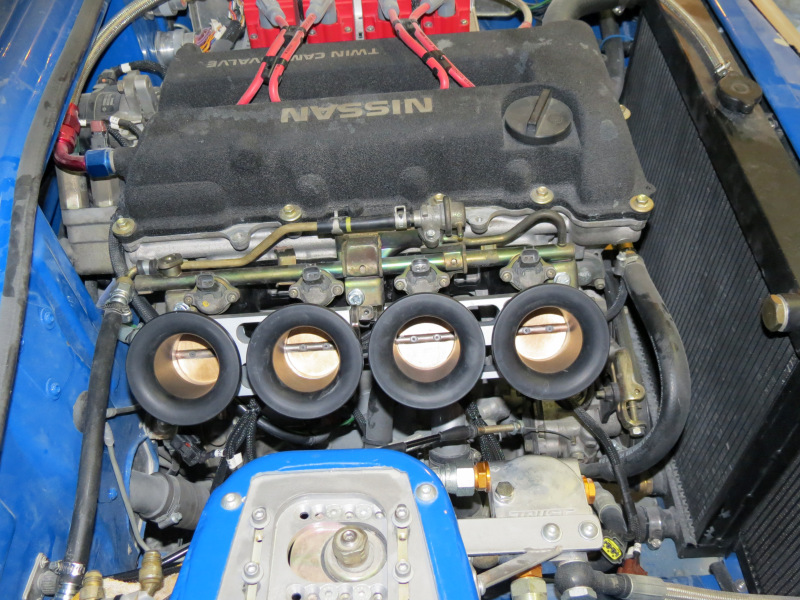  The first of these came in the form of throttles, 4 x 50mm of it made to fit the VE motor. Well I removed the piggy bank, took it for a ride with a bag over its head, stopped hit it with a baseball bat and bought the set. This was either a very good idea or a very crappy one at best, I spend hours getting the FWD intake to fit the RWD configuration, bought a very specific air filter etc., now it will just sit in the cupboard waiting on better days. This was the kind of thoughts that went thru my mind, to add to this loosing idle control was going to hurt. What is done is done, once I got home with them in hand, it didn't take long to strip them for further inspection, seeing that everything can be improved or made to work, hell I'll even strip it just to assemble it again, just maybe a brain wave hit me. Seeing that time is my current enemy, I was under the impression that sock filters will be the temporary solution until I can build an air box for it. Luckily my brother had a set laying around I could use for measurements. 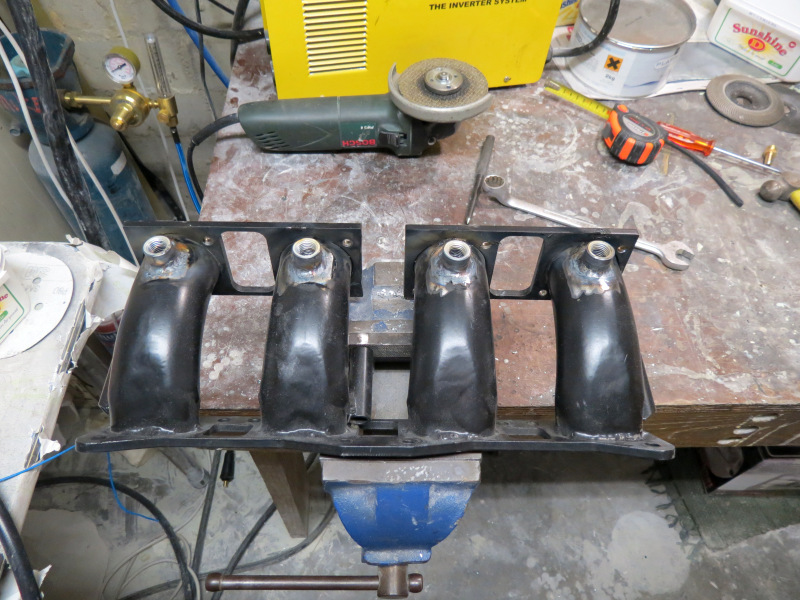 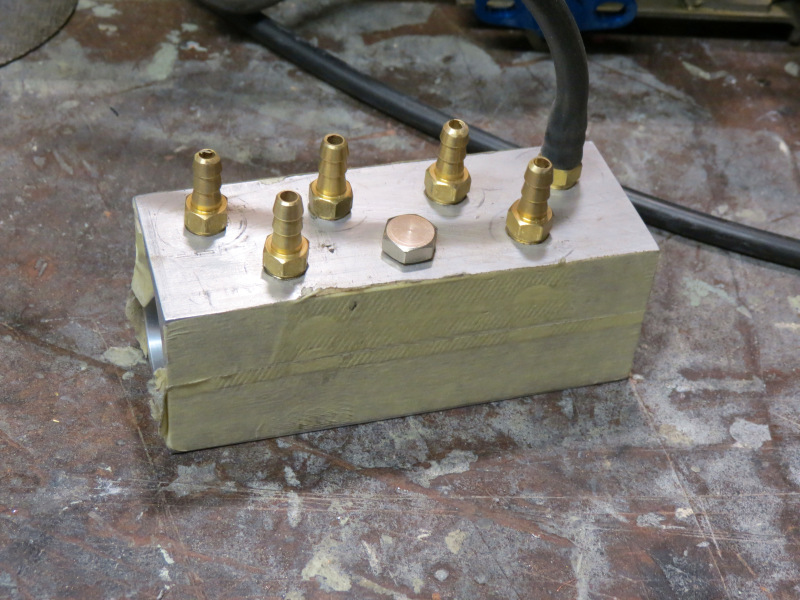  Luckily for me Ian from Rezlo Auto Works that supplied the majority of the imported parts on the car quickly solved my idle control dilemma. The solution was actually quite easy, drill a few holes in your new set of ITB's, weld a few sockets in place and build a custom vacuum manifold for the Idle Air Control Valve. The merits in doing this out weight the cost off a new coat of epoxy and welding commenced. While I'm waiting for the piece to come back from the engineering shop,(which was tasked to tap the 5 1/4" BSP holes, as I'm not willing to spend R350 - R600 on a BSP or NPT tap to do it myself) I started with a second vacuum manifold for the MAP sensor and Fuel Pressure Regulator. Once the lazercutting arrives I'll be able to finish the manifolds and mount them, part of this mounting would also incorporate the throttle cable brackets. This reminds me, I still need to redesign the original idle adjuster and butterfly stop for my needs.  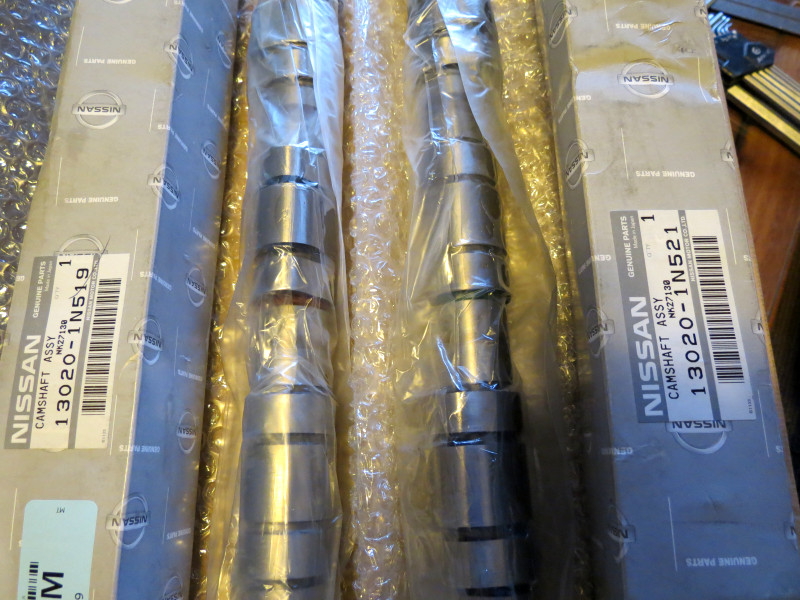  A week or two later a box from RAW arrived with a few parts, most noticeably the set of Genuine OEM SR16VE N1 cams. This was only 2nd or 3rd time during this cars build that a set of these cams became available and had to put my name on them. Not much to look at, but I'm pretty sure they will do their work quite good above a decent set of springs and retainers. Digging deeper in the box the two fuel rail adaptors jumped out just before a small AEM Fuel Pressure Regulator, now at last I can replace the busted FPR and in the process get rid of the damper on the rail. The FPR was specifically chosen due to its small size and mounting configuration, seeing space in the engine bay is limited. Hopefully the fittings will arrive soon in order to get the car running again to move it around. 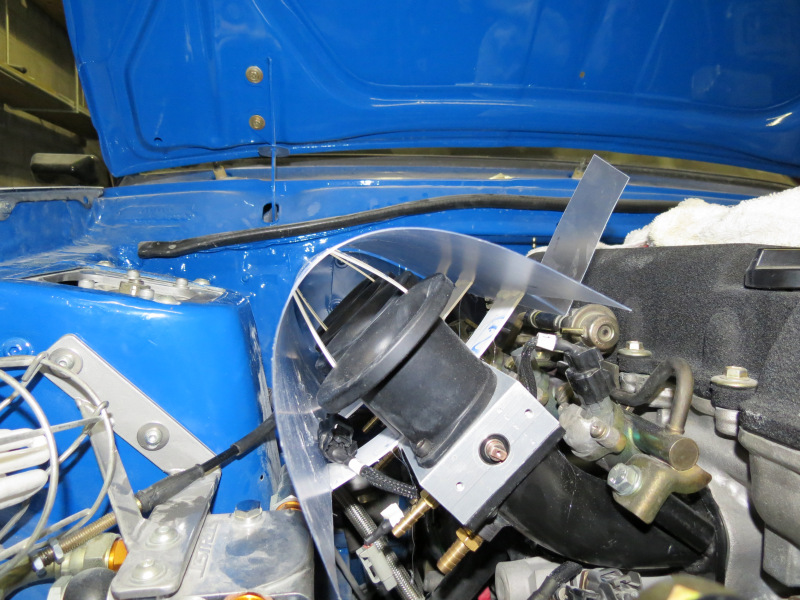 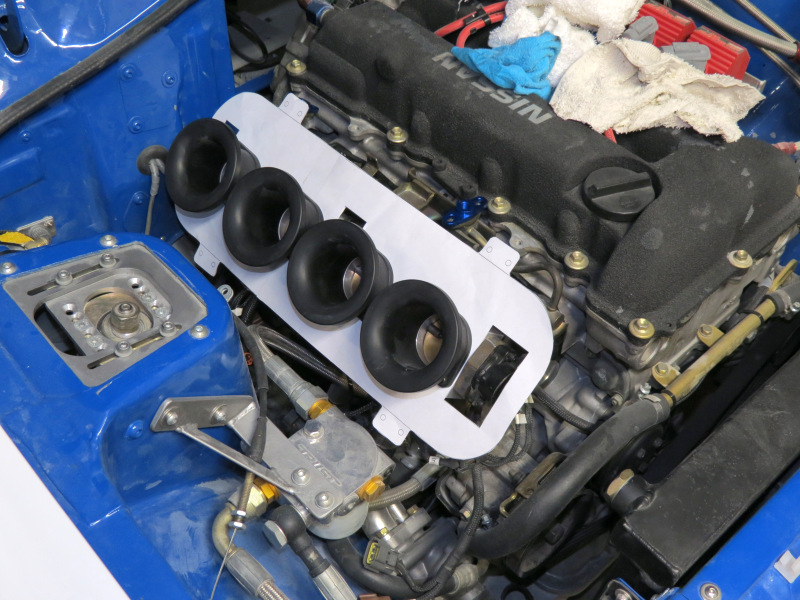 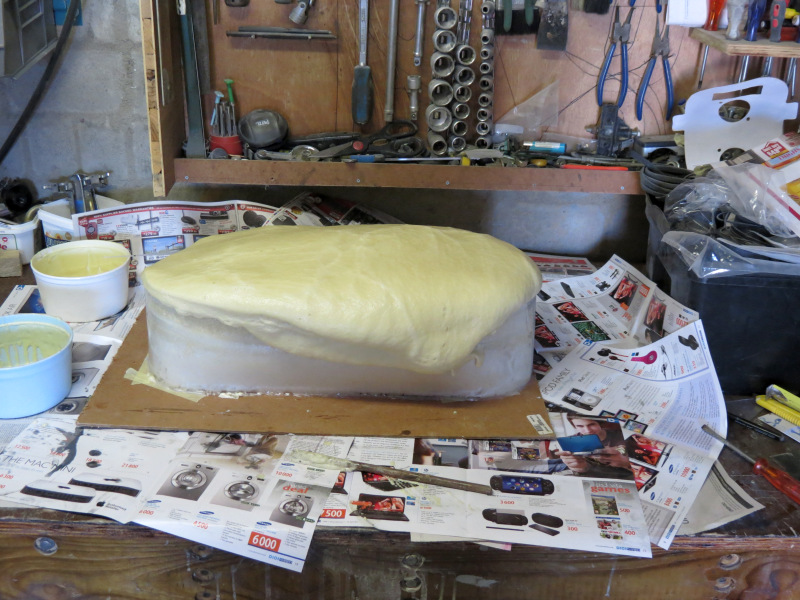 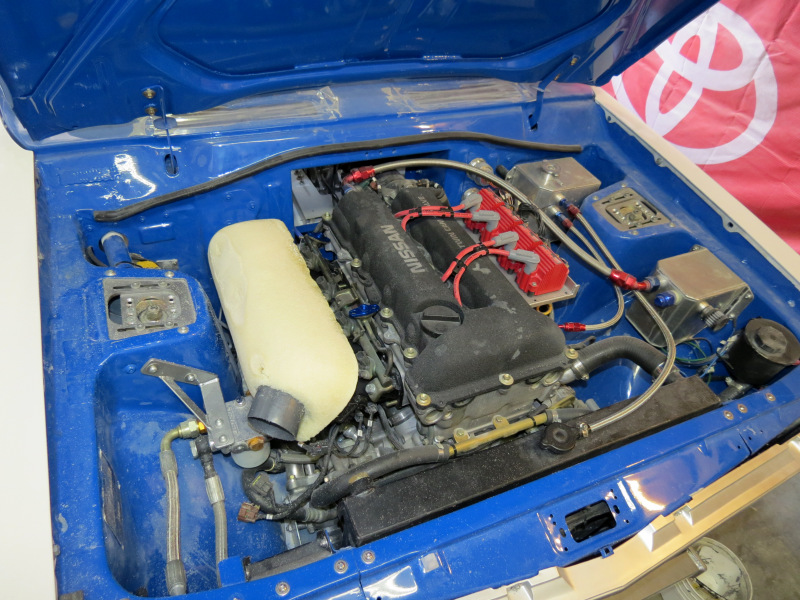 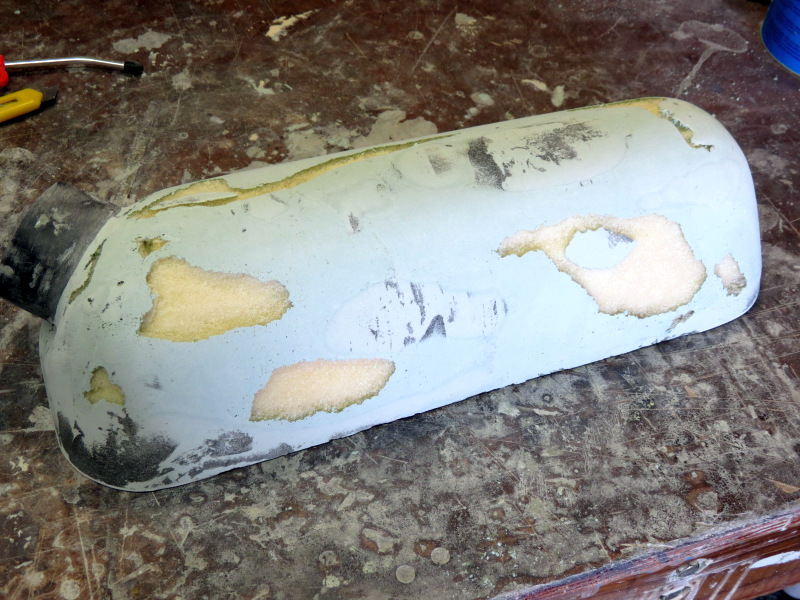 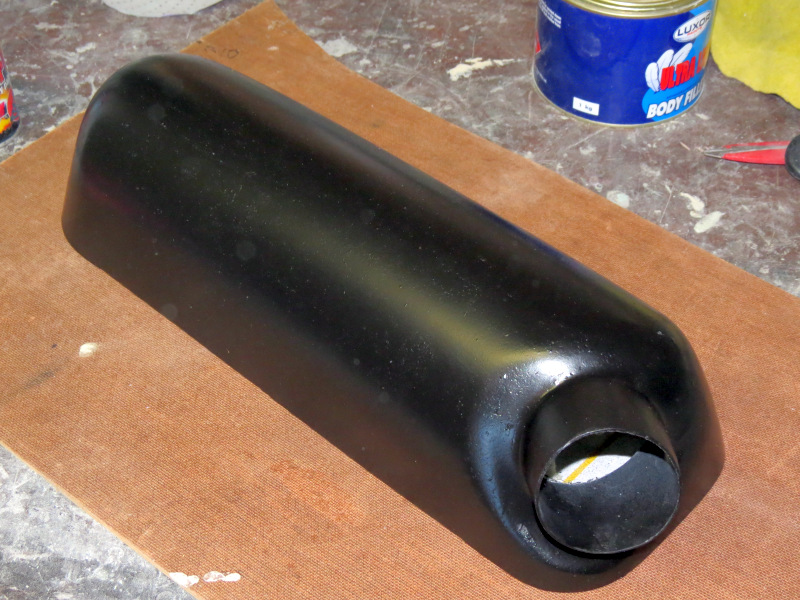 Seeing that the flares are almost on their way back and then I will have to make moulds of them, I needed an air box, seeing that the unit I bought from the builder of the throttles was not to my taste and would be hacked to piece to work in my car. This proved to be the perfect circumstance to build my own air box, make a mould and then the actual air box from fibre glass...... and here I thought I was done with foam and sanding body filler for an eternity. A few measurements later and a couple of plastic pieces glued together I was able to designed a backing plate and used that as the basis for the air box. Some foam was mixed together to form a nice bread like shape, left it to dry overnight. The next morning I was up nice and early and started shaping the bread. A few hours later it started to look like an air box that was made for the car. Found a piece of pipe with a 70mm OD and started positioning it on the foam air box as the filter mount, seeing that I have this brand new unused K&N, I hope the 70mm will be enough. Once this was in place, I started covering the outer with body-filler, once dry, sanding it down, adding again, sanding again, this continued until the tin of body-filler was almost empty. By that time I was happy with the finish, not perfect, but due to the fact that I was in a hurry it was good. Grabbed a tin of Hi Heat black paint in the cupboard, why, because it dries fast and I had to leave for a family affair 120km away and was already late. This was also the first fail, as will be told later on, well sprayed it 3 nice thick coats and off I was. 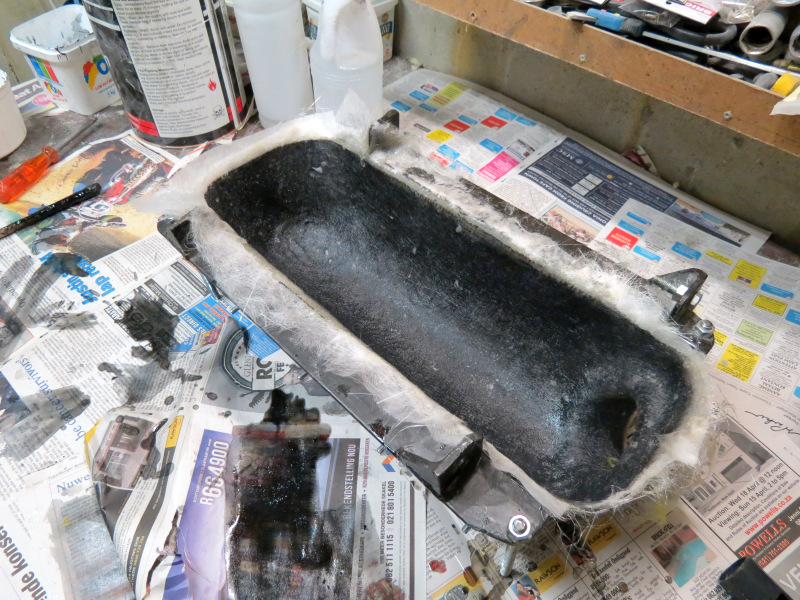  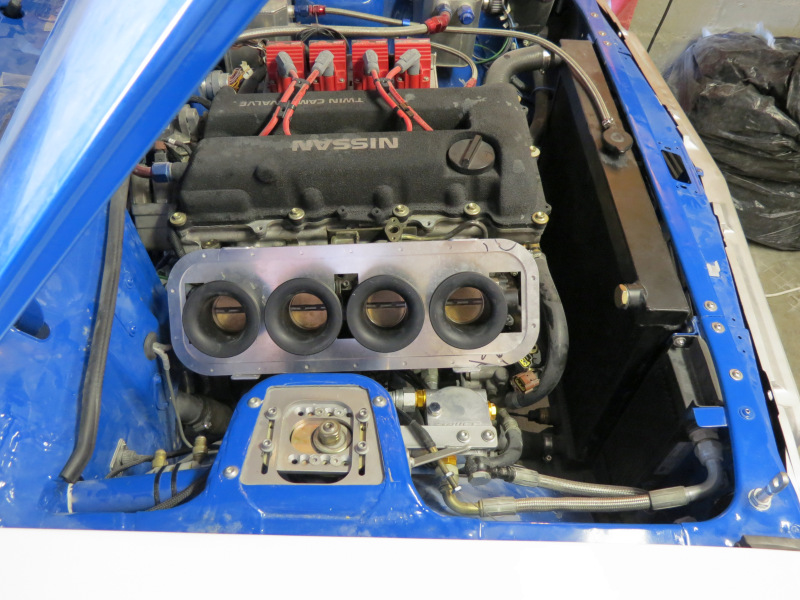  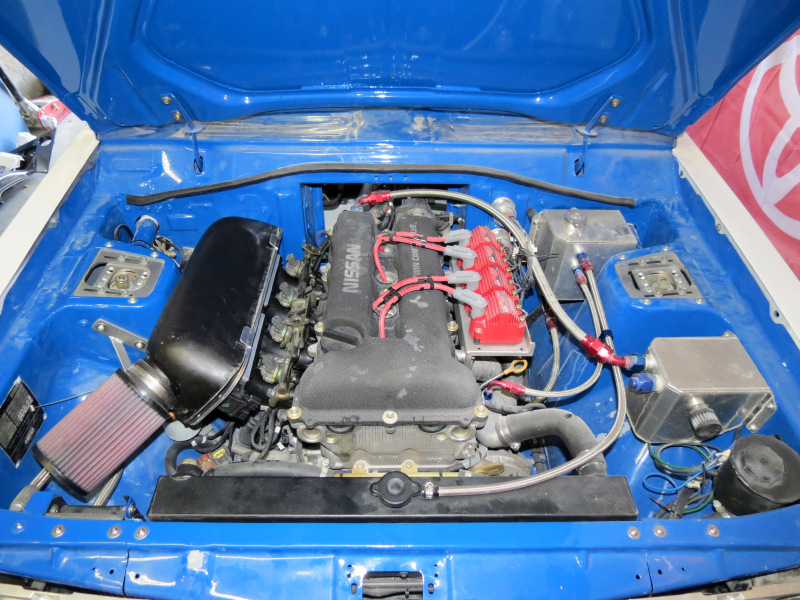 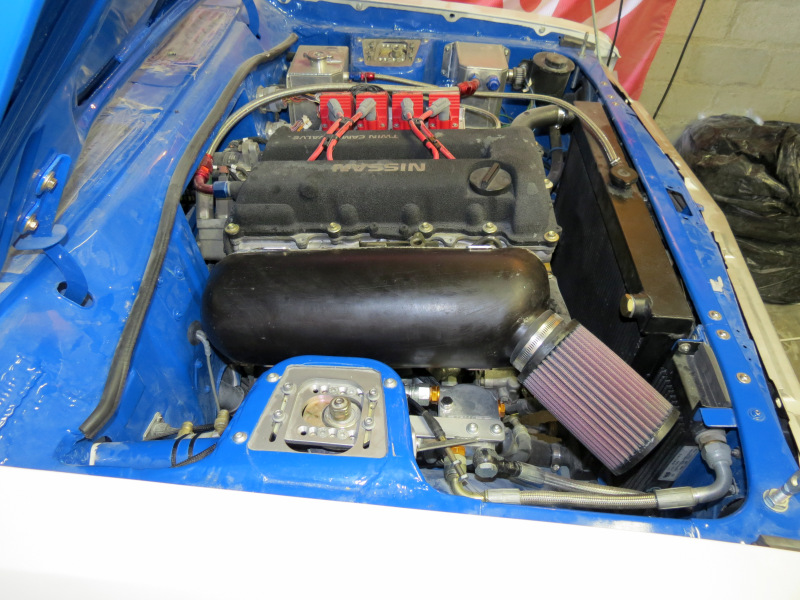 Once back home the next day, I started applying wax and polishing it, 3 layers later and I added a single layer of gel coat. Once the gel coat dried I started with the 4 layers of 450g fibre-glass cloth to get the mould nice and strong. The next morning I tried removing the plug from the mould, this is where the fail part came in, I had to break it out, I'm pretty sure the Hi Heat paint was not what I should have used, seeing that it almost melted. The one thing that was strange was the fact that the sides crimped, this was rectified with bolting two pieces of angle iron to the sides to pull them straight, this also provided an excellent location to mount some feet. Again, wax and gel coat went on, once this was done, I started with 1 layer of tissue, 1 layer 450g fibre and another layer of tissue on the sides. The corners received an additional layer of fibre. The next evening my brother had to help me pull it from the mould, but this was due to the strange angles of the mounting flange for the filter, but I as very satisfied with my first ever fibre-glass part. Just a few spots to fix and then some paint and it would look real nice. All in all I learned a lot with this little part and will apply the newly gained knowledge when working with the flares.
Posted on: 2012/10/1 10:11
Edited by racetech on 2012/10/11 7:44:21
Edited by racetech on 2013/12/23 11:50:55
|
|
|
|
|
Re: racetech's 1200 SR20VE Project |
|
|
Guest_
|
IM in love
Posted on: 2012/10/1 10:29
|
|
|
|
|
Re: racetech's 1200 SR20VE Project |
|
Home away from home Joined:
2009/4/16 10:37
From Cape Town, South Africa
Group:
Registered Users
|
October 2012 - Cams&Springs - Fuel Pressure RegulatorSeeing that we were still trying to get the plugs for the flares 100% correct, I at least had more than enough to keep myself busy. These flares is turning out to be the biggest reason for all my headaches and sleepless nights. After I finished with them, they were sent to the Spray painters for the final work and paint. After a week or three I got the two rear units back fresh from paint on the Friday, the Saturday morning I placed them in the sun as advised to make sure the paint hardens 100%. I left home to get some supplies and wood to reinforce the moulds I will start making the Sunday. Once I returned home with the supplies I saw that the paint on the plugs wasn't looking as good as when I left, further inspection revealed that they had some sort of sun burn, some places the body filler beneath the paint was separating from the foam etc. The paint was cracking and my heart sank to the floor. You know that feeling you get when you spend a lot of effort, money, time and patience on something just to see it break or fall apart, well I was so angry I could not even utter a swear word. I just left them and proceeded to cut the wood to the desired sizes for future use if we could save the plugs. After that I retired thinking how much money will I need to spend on import a set of flares, get a set of side shafts made and rebuilding the front and rear suspension arms. I was not in happy land.  Seeing that I wasn't as positive as needed, work was slow, but at least some parts arrived and I could find comfort in and do some work on the car. The first packages came from FTF - Future Tech Fittings and Aeroquip, these contain all the relevant fittings, adaptors and hose in AN6 size needed to complete the new piping around the FPR and fuel rail. These FTF products looks like quite a decent product, I presume they are FTF branded from some other supplier. I just hope they live up to their price as they aren't exactly cheap.  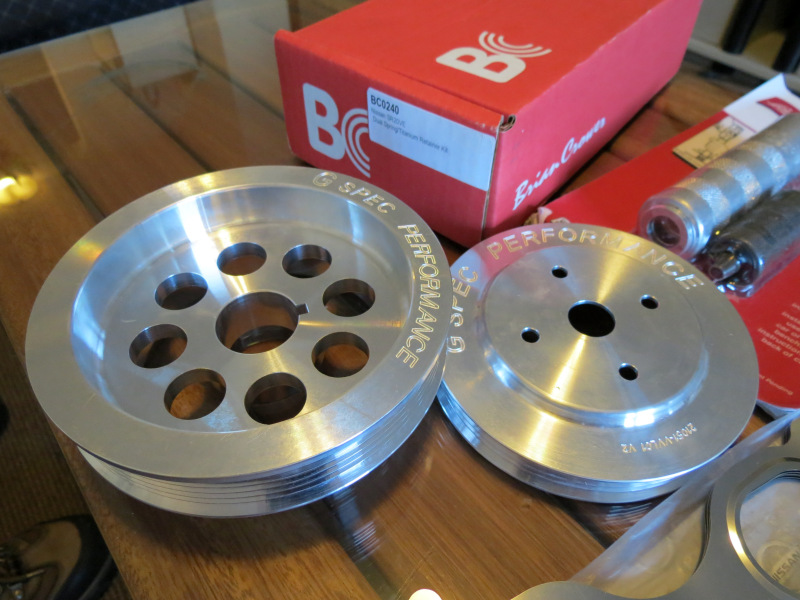 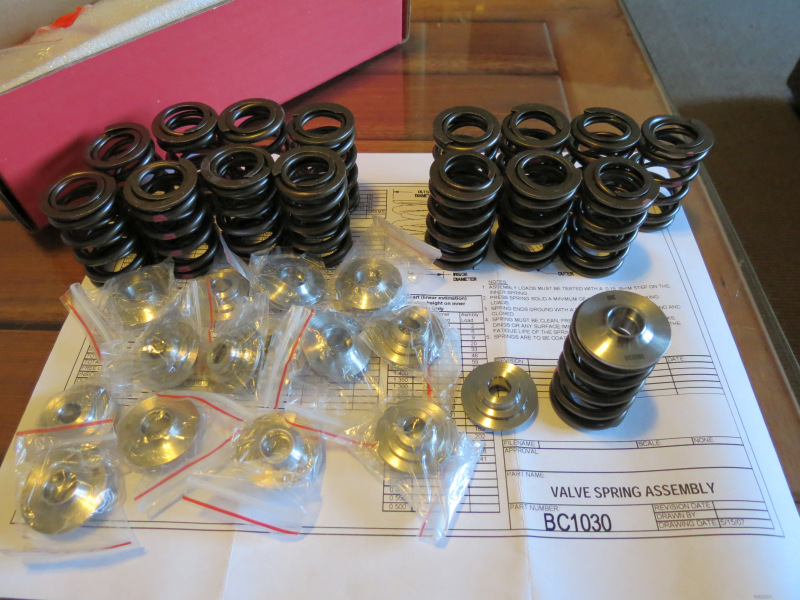 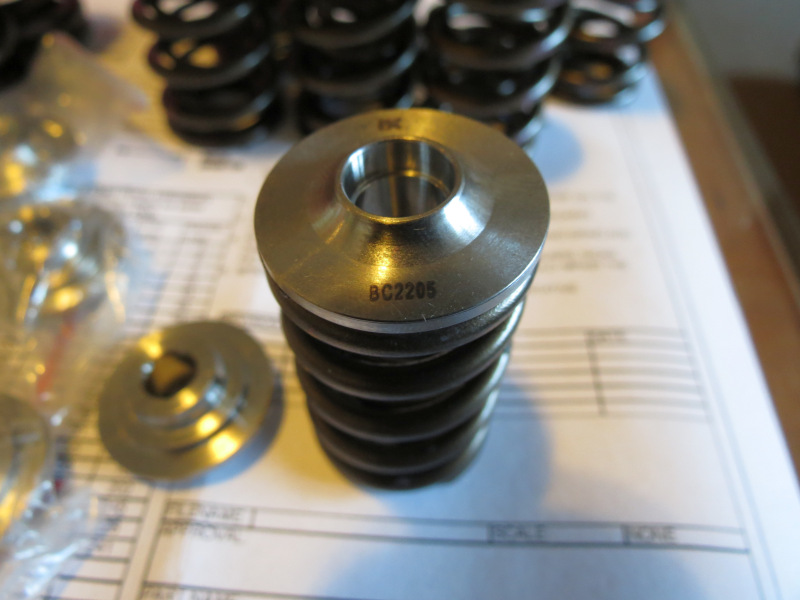 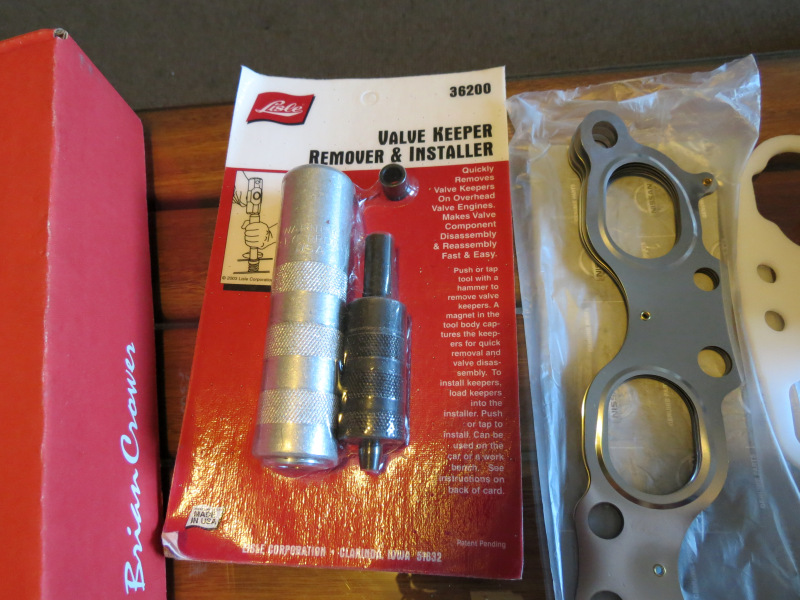 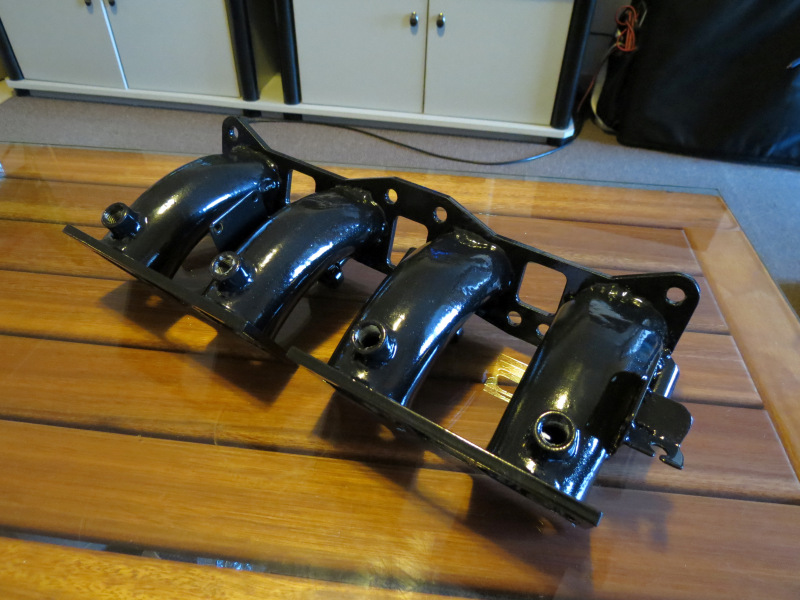 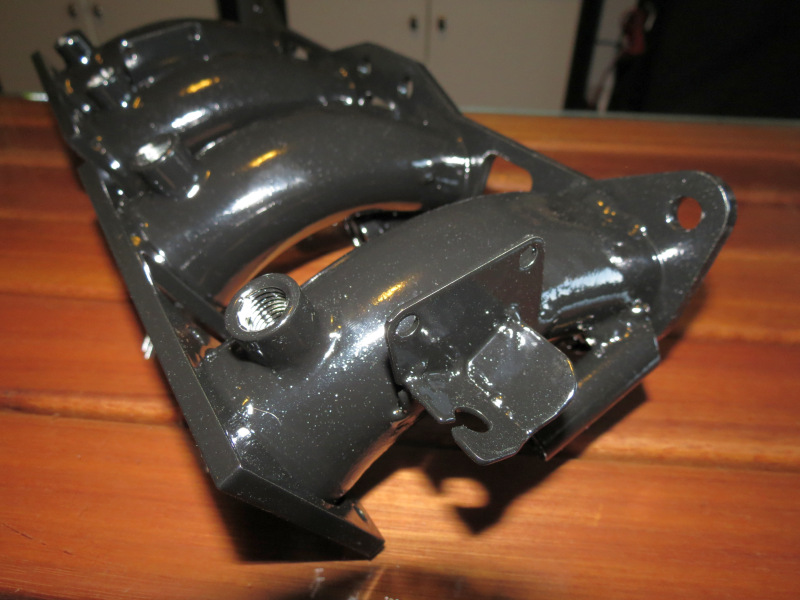 The next little box was from our friends in the States, [img]www.gspec.com" target="_blank">GSpec to be exact. I must say I had quite a pleasant experience working with them, the only thing that bothered me was the fact that I had to wait for some parts and was not told about it. All in all Greg is a very nice person to work with. Unpacking the box revealed the following parts, Genuine Nissan Front crank seal, SR20VET exhaust gasket, radiator cap and washers for the VE tappet cover. A set of Gspec vernier pulleys was included to be mated to the SR16VE N1 cams and under drive pulleys. A thermal spacer and a set of plugs was added. Then while I was busy ordering a set of [img]http://www.briancrower.com/makes/nissan/sr20det_valvetrain.shtml" target="_blank">Brian Crower Valve Springs and Titanium Retainers for the VE to be on the safe side and a Lisle Valve keeper and remover tool to make the job easier since the head will stay on the engine. On the same day the ITB's manifold also got back from Metal Seal Coatings after receiving a new layer of plating and black epoxy. 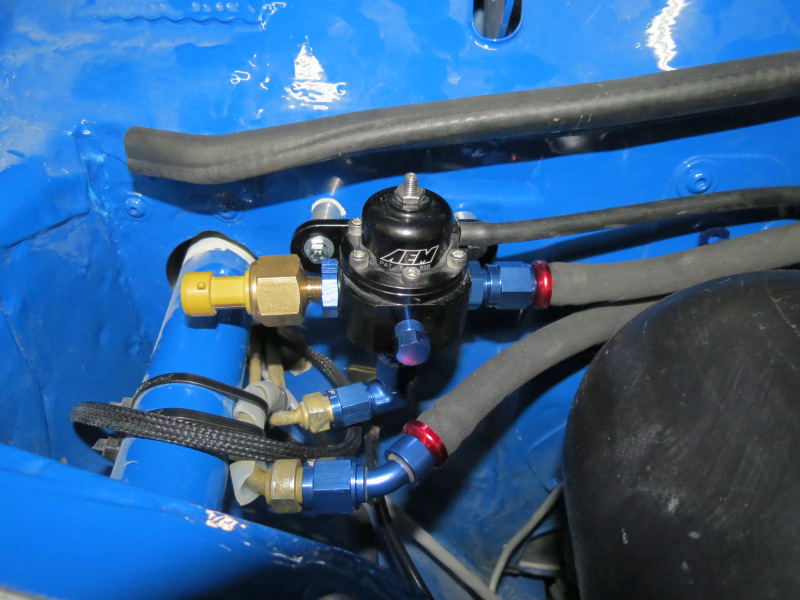 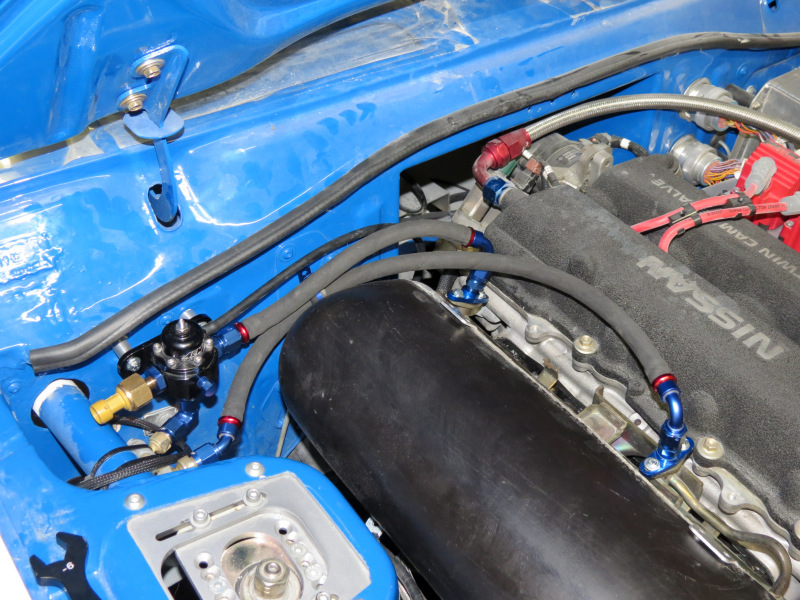  The first order of business was the Fuel Pressure Regulator, this had to be mounted and the relevant pipes made to fit the new unit. The FPR in question was the AEM unit supplied by [img]http://shop.rezlo.com/SA/index.php?act=viewProd&productId=896" target="_blank">RAW, this time round I opted to try push lock fittings and hose, seeing that I'm not a big fan of the braided lines any more, it is hard working with them, not that flexible and the look of a black pipe just looks better, thus I opted for some decent Aeroquip hose. Finding an ideal location for the unit took a while to plan, seeing that the fittings is only at a certain angles and the pressure transducer takes up quite some space, at the end of the day I opted to mount it high on the firewall to make the routing of the hoses the easiest. I had to use one of the blank off plugs for one off the intakes and tap 1/8 NPT thread to mount the pressure transducer as out of the way as possible. I would just like to share the following, whenever you need to use high quality hose for low pressure applications, consider push lock fittings and hose, especially if you will be removing it often. These hose assemblies are a breeze to put together. It will be hard not to use this on future projects or replace some of the existing hose assemblies. 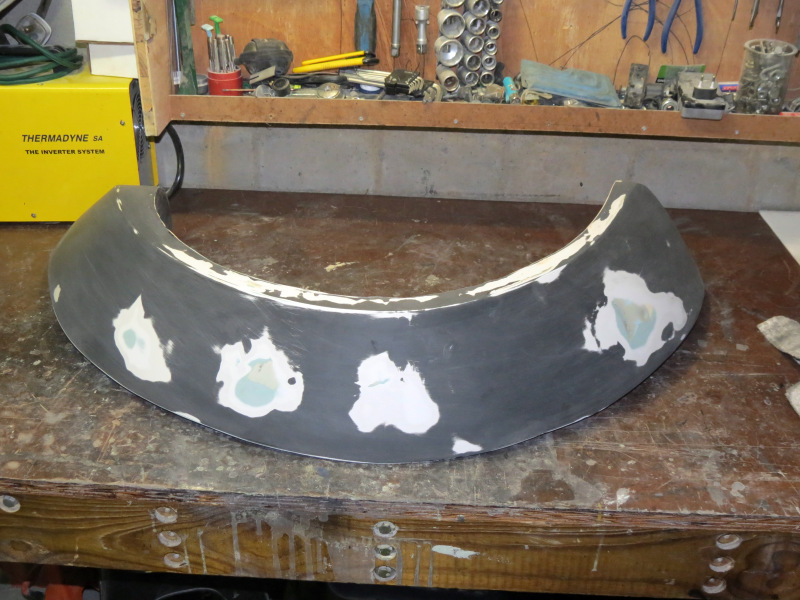 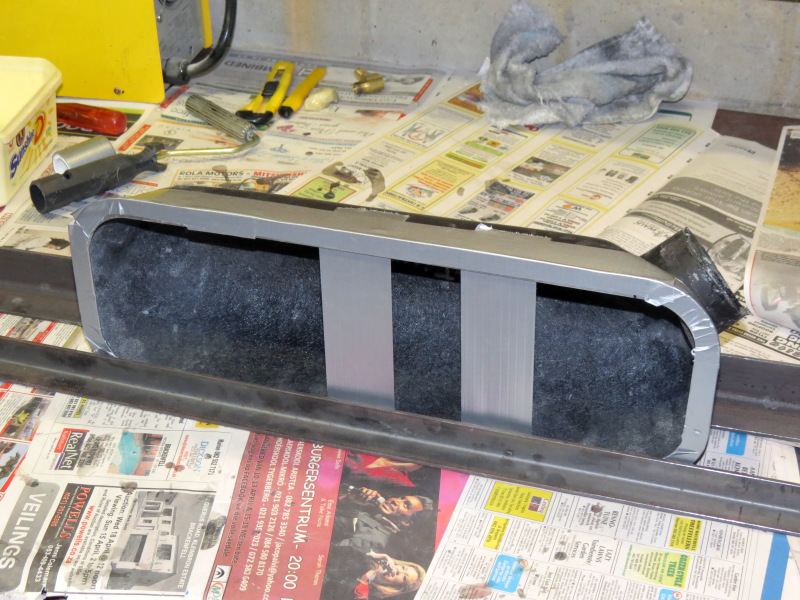 While all this was going on, my brother came up with the brilliant plan to cover the plugs for the flares with a single layer of fibreglass tissue and resin, this would create a decent strong barrier, which will keep out thinners and harmful substances that could resolve the inner foam again. The plugs was sanded again and the tissue added, hopefully this will do the job and I can get them back looking mint. I also found some time in between to glue the aluminium flange to the air box, this will be used to create a positive seal between the mounting flange and the air box. 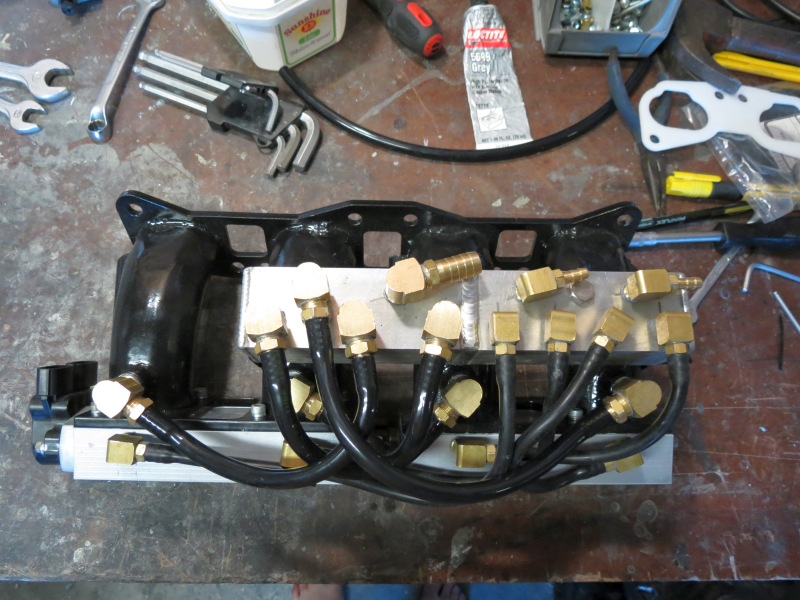  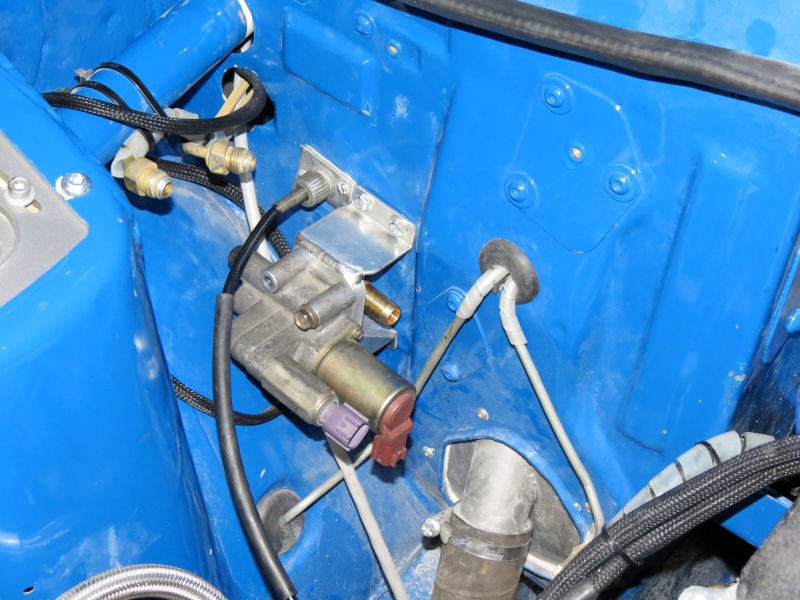 Since I had a 100% working fuel pressure regulator on the car, I wanted to start the engine with the throttles, make the necessary adjustments if needed before installing the cams. I was just afraid to many changes at once could prove to be too much for my limited mapping experience to figure out where to start if something was not working. I have struggled quite a lot with management in the past due to a lack of knowledge, I must add, this was with locally produced units, let's see if the imported units can live up to their reputation and price tag. First on the to-do list was the piping for the vacuum manifolds to work, you'll notice a welding line in the middle of the unit, this is a separator which actually holds two separate manifolds together, one for accessories needing vacuum like the MAP sensor and FPR, the other for idle control. I opted to use a pipe per cylinder on both sides, it is quite a maze of pipes, but luckily it is well hidden and cannot be seen. Seeing that it is already so busy under the intake manifold, I decided to remote mount the IACV - Intake Air Control Valve. The ITB's was installed, fuel lines fastened and during the first crank the engine started, I was amazed, this without a single change to the management besides calibration of the MAP Sensor and Throttle position sensor. Seeing that it was only a temporary install the big leak was not bothering me much, as I knew once the setup is installed permanently, hopefully the air leak will be gone. http://www.madev.co.za/wp-content/upl ... 12/11/DattoOctober521.jpg[/img] http://www.madev.co.za/wp-content/upl ... 12/11/DattoOctober531.jpg[/img] Seeing that TDC is marked clearly on the Gspec crank pulley, I decided to install the under drive pulleys before the cams, this went flawless besides the 15 minutes spend on making a quick puller to get the old pulley from the crank. The biggest hiccup is in the belts, the power steering and water pump belt is a easy one in the country, the difficult one is the alternator, especially since I removed the air con. The pulleys are for a 6pk belt, but I was only able to source a 4pk unit in the correct length, I'm pretty sure this will be fine for the interim, but I will try and get the correct belts sourced or import it. 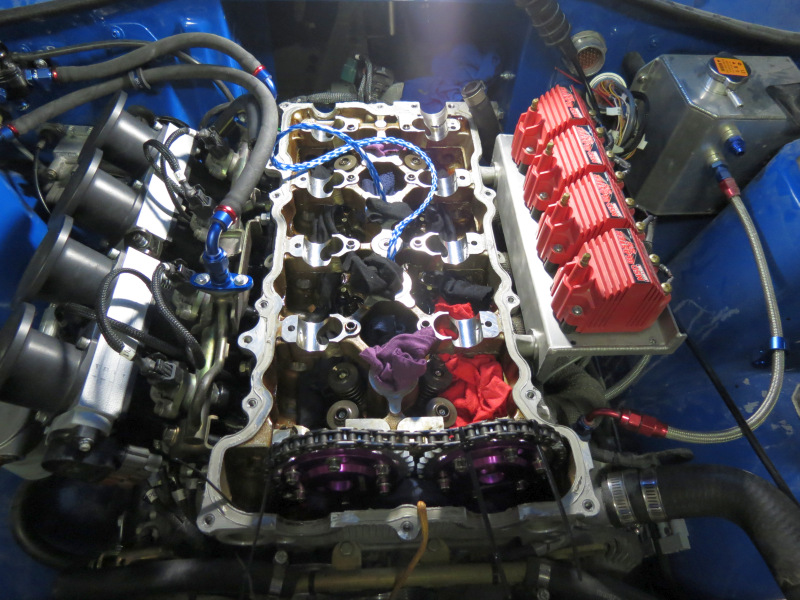 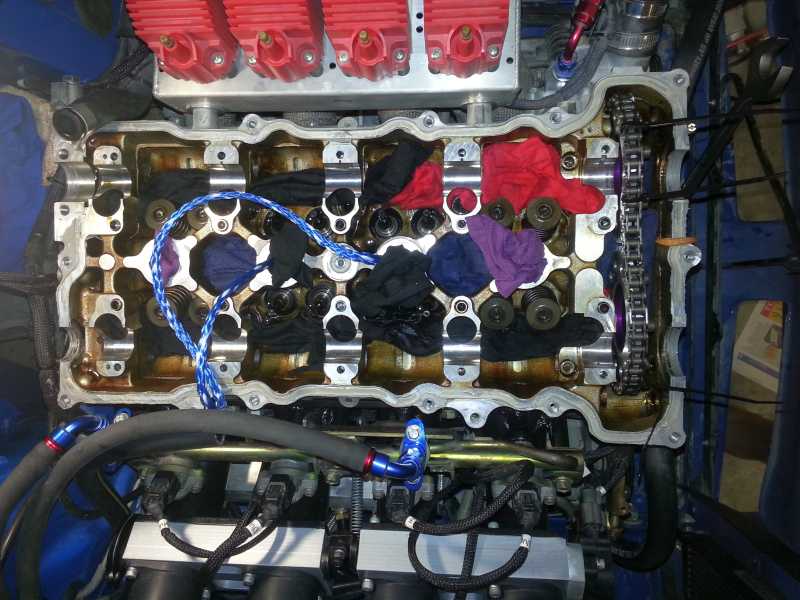 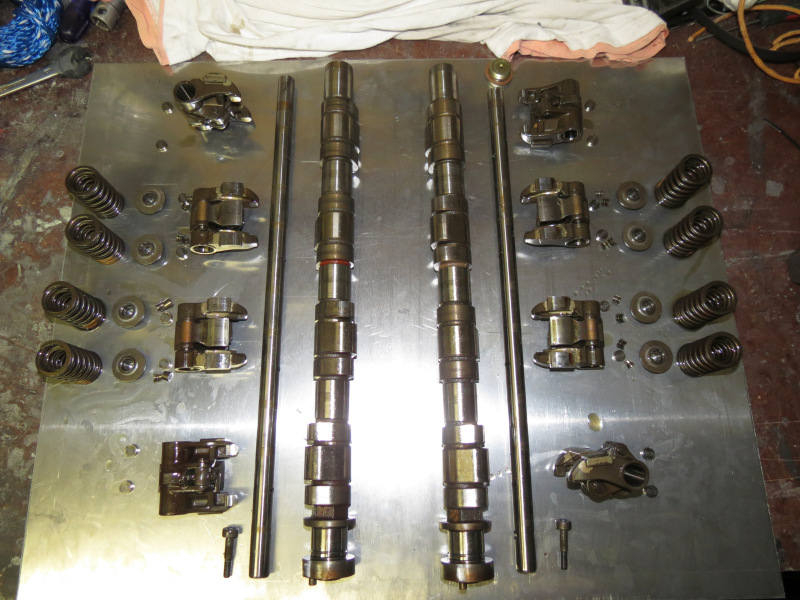 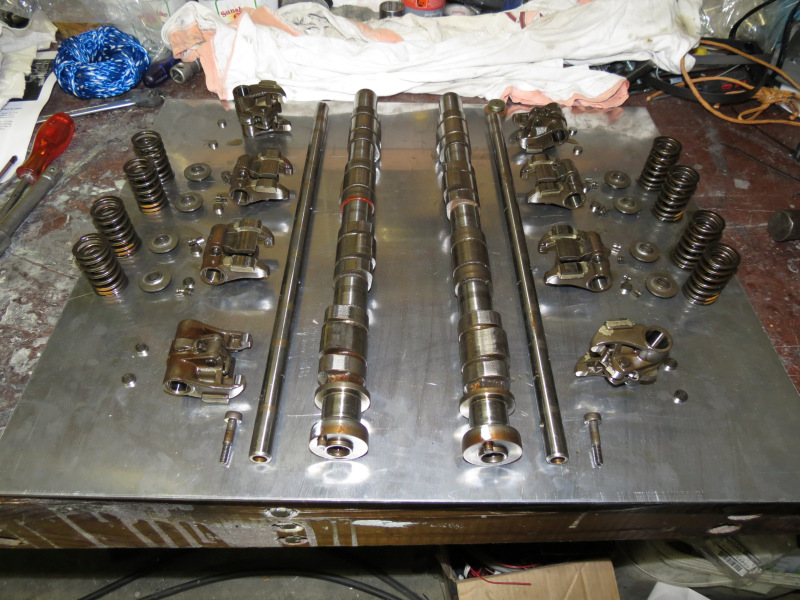 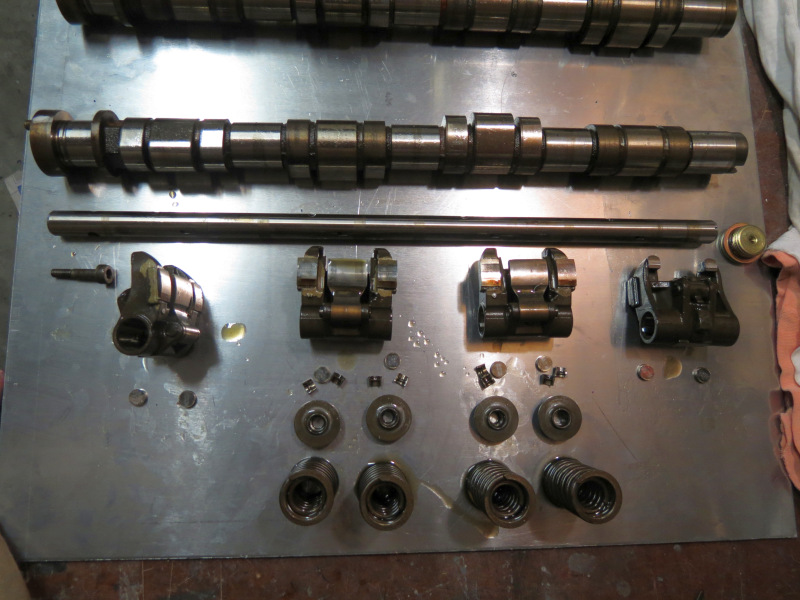 Next in line was the springs and retainers and finally the cams and verniers. For anyone trying to attempt this, use this guide [img]http://www.sr20forum.com/sr20ve-sr16ve/198451-how-install-cams-springs-retainers-ve.html" target="_blank">How to install Cams and Springs and/or Retainers in the VE, it was a great help, just a few pointers, when removing the rocker shafts a flat screw driver works nicely, put the flat piece in the hole, add some sideways pressure and pull them out. Mark the rocker shaft orientation before removing, even though the set bolt hole is off centre. Besides that, there is not a lot I can add that the guide does not cover, work as clean as possible, make sure to have enough clean rags covering all the oil return holes and between the various parts to keep the keepers retained in a certain area if the feel the need to explore. The Lisle tool works great for removing the keepers, put is quite tricky hen installing them, use a decent size hammer and make sure to align everything with the hand before whacking. I used the old rope in cylinder trick for keeping the valves in place, just make sure the holes to the plugs is clean before running the length of rope down the cylinder, for reference I was able to get about 4m of 8mm ski rope down a cylinder. 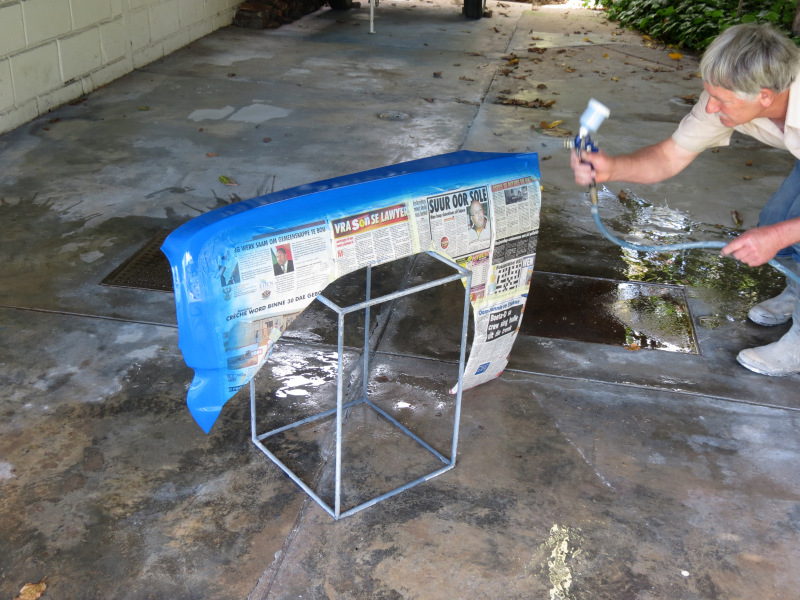 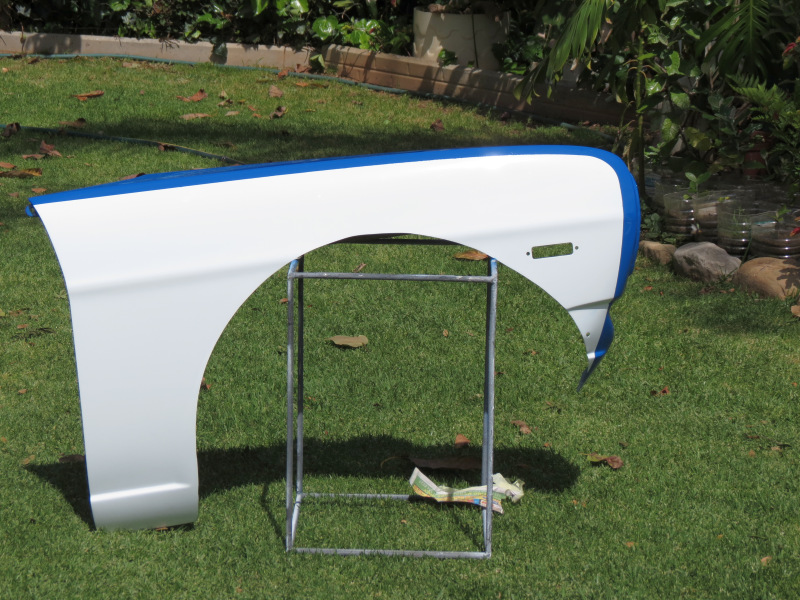 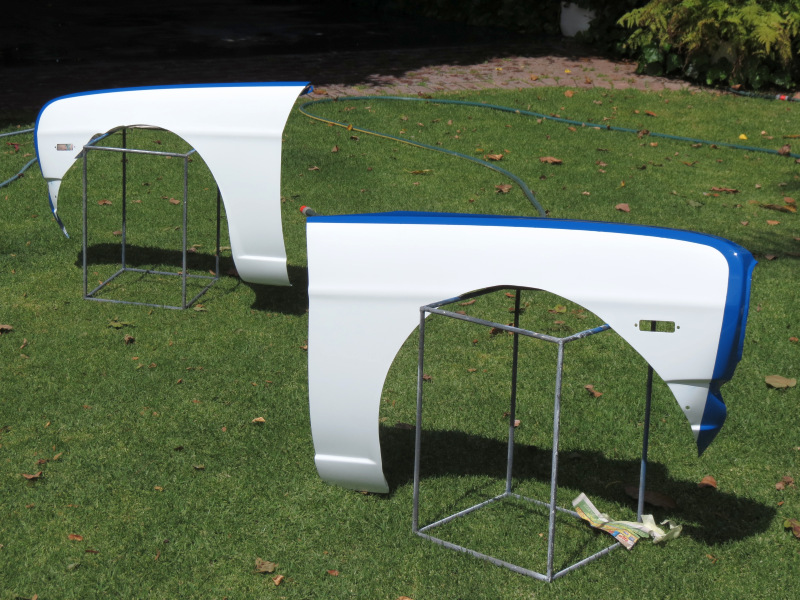 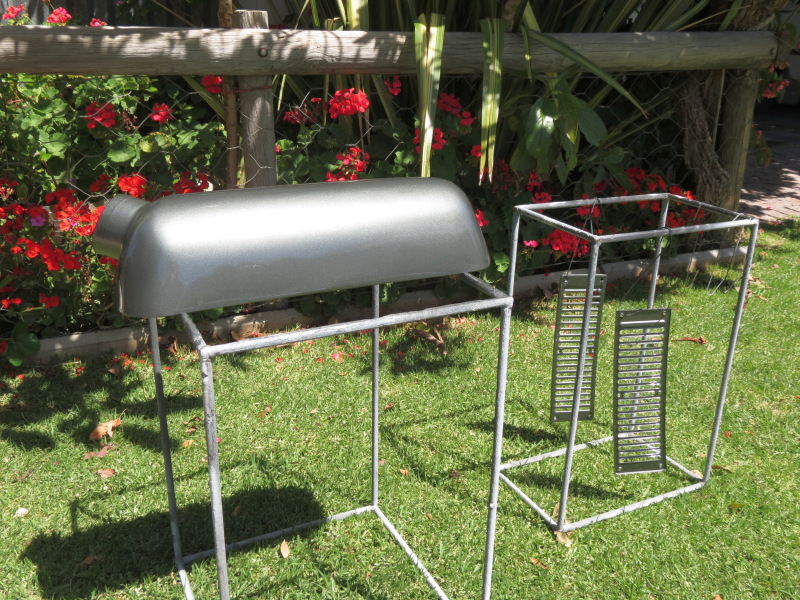 I was lucky enough to be invited to help do some work on a lattice mast just above my parents home, this provided me with the ideal opportunity to get the front fenders sprayed, while I was there I spend some time on the airbox to get it smoother and decided to spray it a dark grey metallic. It came out good, not 100% but good enough to make sure it is working. 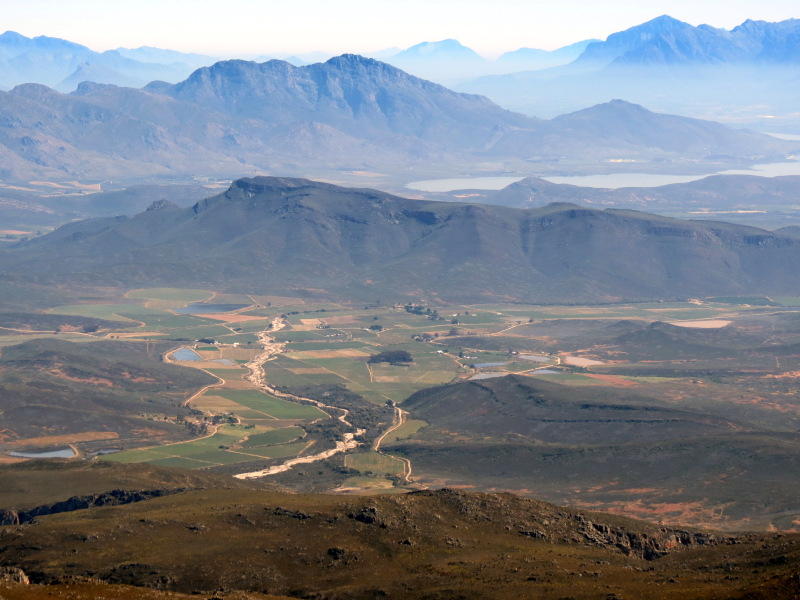 Here is a view from the mountain above my parents home and the valley where I grew up. 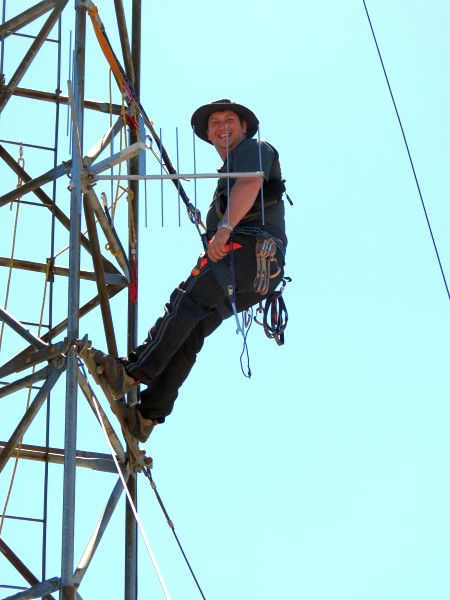 Smiling for the camera while relaxing.  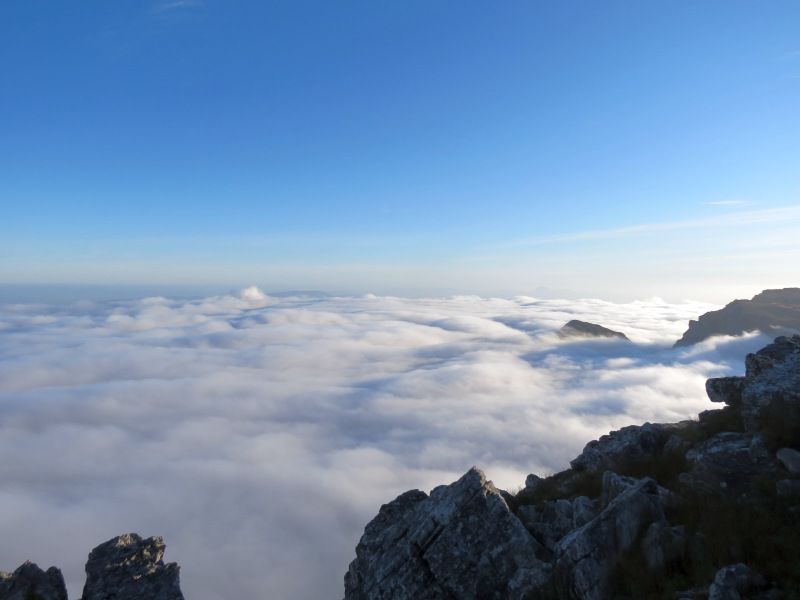 A view above the clouds. This is exactly the reason why I do volunteer work, not to many people will have the opportunity in their lifes to experience this view.
Posted on: 2012/11/6 8:55
Edited by racetech on 2013/12/23 11:45:03
|
|
|
|
|
Re: racetech's 1200 SR20VE Project |
|
Home away from home Joined:
2009/4/16 10:37
From Cape Town, South Africa
Group:
Registered Users
|
November 2012 - Flares CompletedSeeing that November 2012 is a distant memory, at least I was able to complete the flares, let me add some detail. 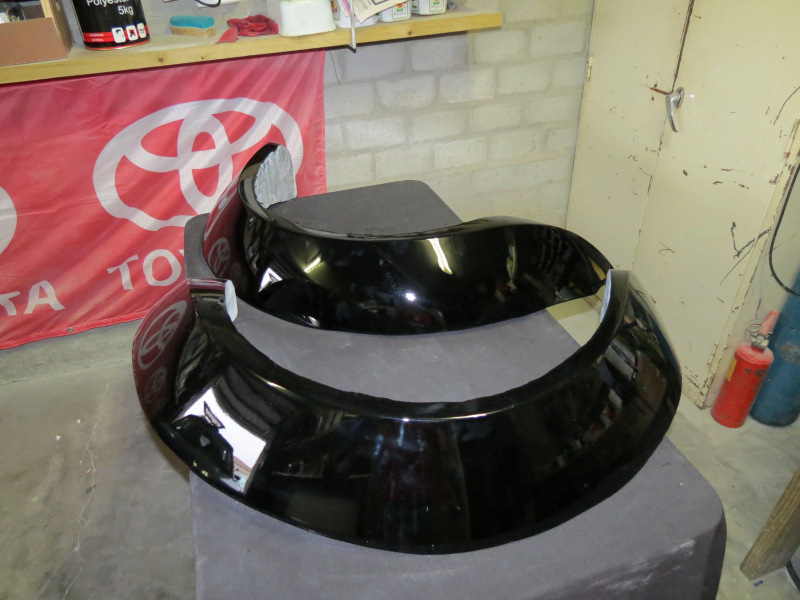 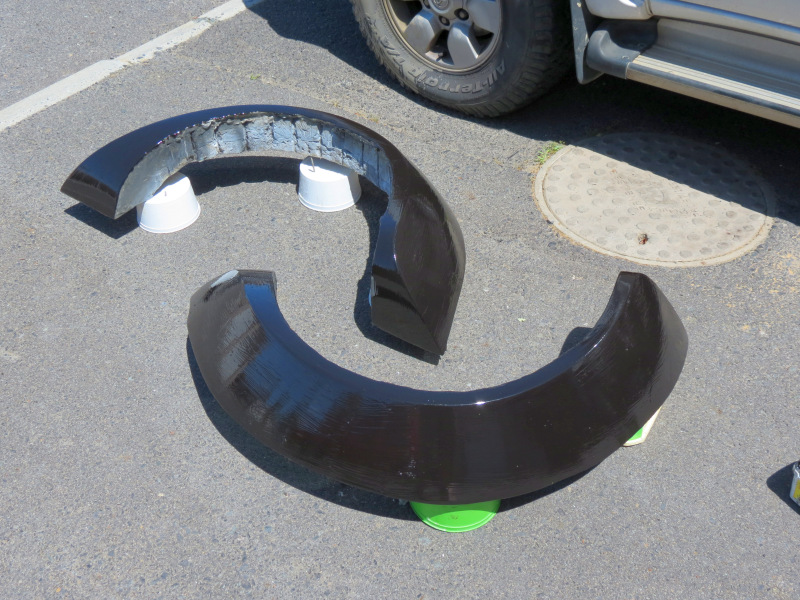 I got the rear plugs back first, they looked good, but the body shop did take their sweet time in getting them done. Seeing that I prepped a few weeks earlier to make the molds I had the majority of components ready. First the initial prep work was done, wax and gel coat, then the fun started with the first mold. From day one I wanted to hide any fasteners and due to the shape of the flares, I had to make to molds per flare, this was necessary to get the end product out of the mold. 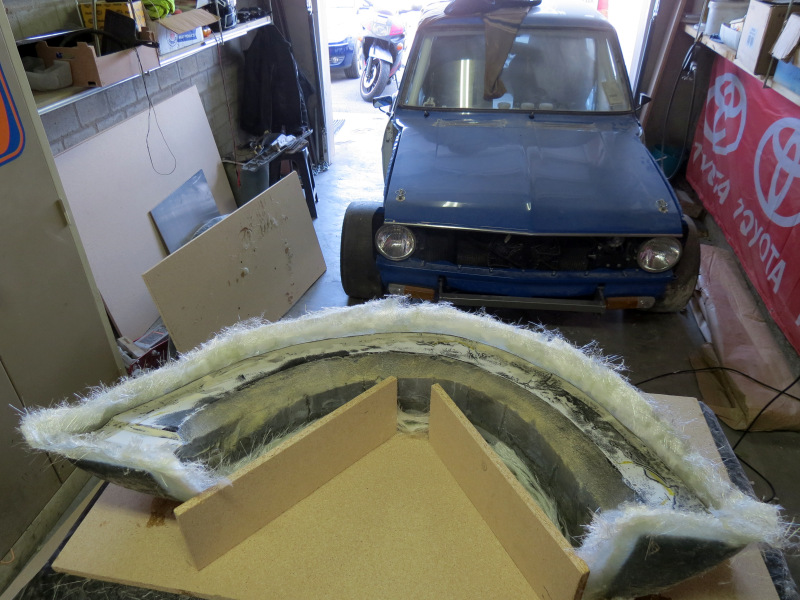  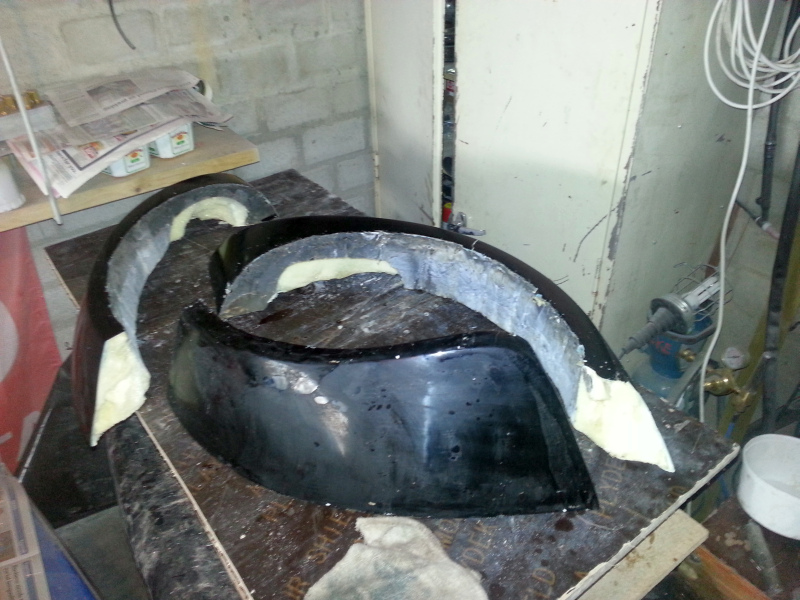 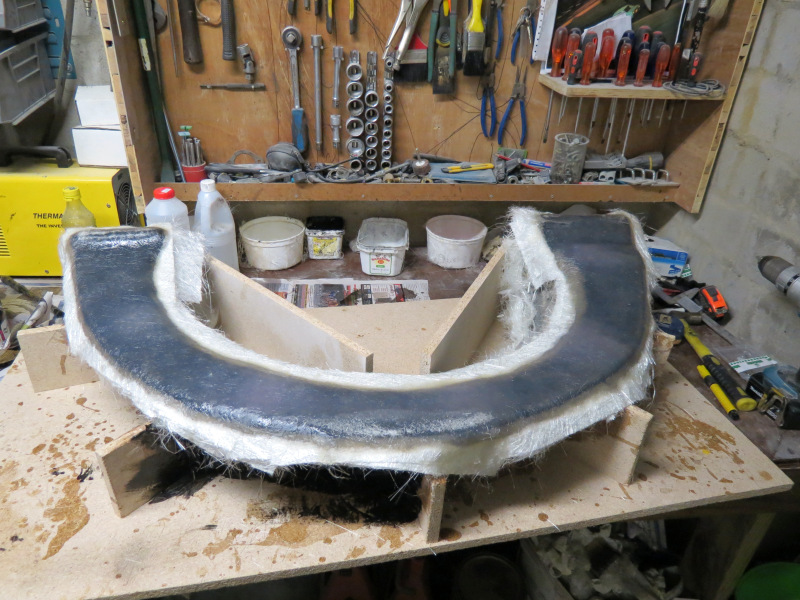 First off I started with the outside part of the flares, 6 layers of 450g fibre glass and 3 hours later the first one was done, later on when it hardened to some extend I turned it around on the main wood support and bonded it to the wood. Then I decided to add some extra support to make the mold that bit stronger seeing that remaking the mold will be a no no as I was pretty sure the plugs will come out in pieces. The next day the other side received the same treatment, a day later I removed all the excess material by cutting on the outside rim of the mold with a very flexible 1 mm cutting disc. 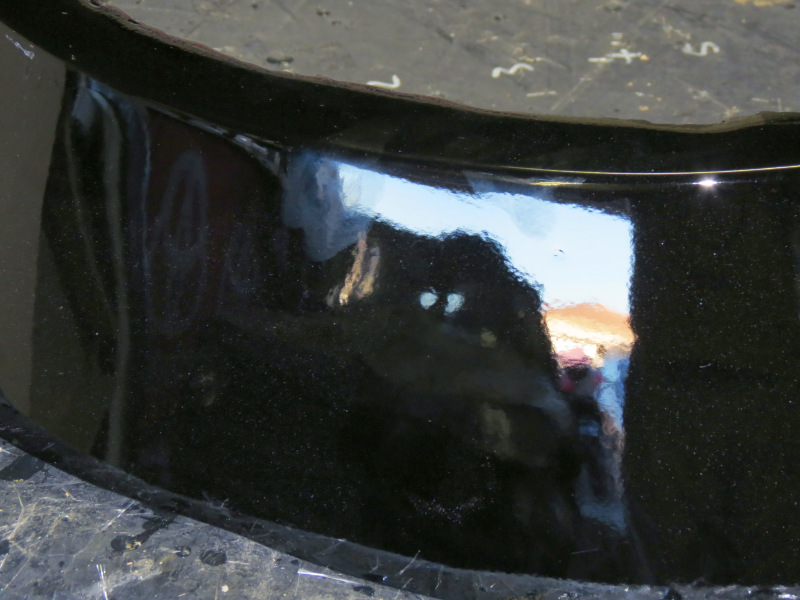 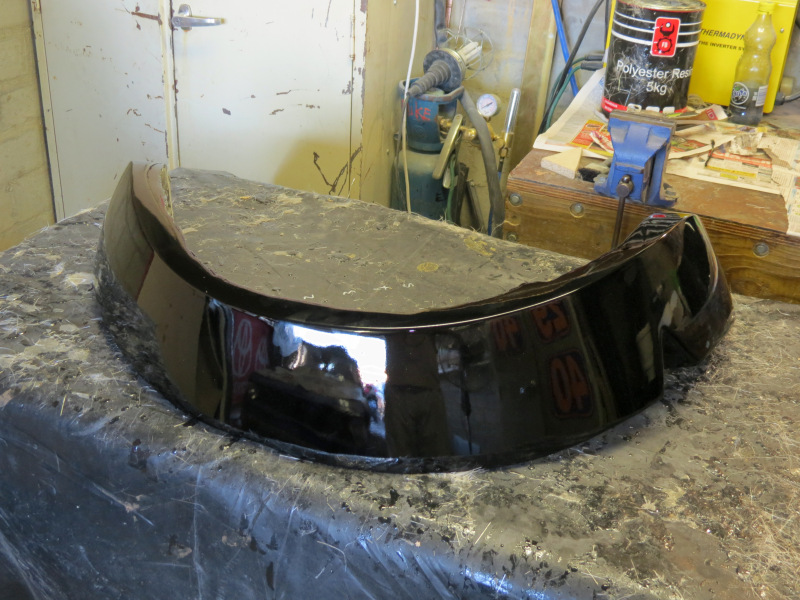 In the meantime the front plugs arrived, they also looked very good and I was quite amped to start with them, seeing that I learned a few tricks with the rears the fronts went a lot easier, but at this point it was quite apparent that my hands aren't built for this sort of thing or the latex gloves combined with the sweat and prolonged time without oxygen my fingers were starting to develop some issues. Well this was not going to stop me, I just had to buy some time and by that I mean a day or two without any fibre glass work. During this time I prepped a second set of supporting boards for the flanges and removed the plugs, well more or less destroyed them in the process, then proceeded to remove the excess material and start prepping the molds for the first set of flares, I opted to apply 6 coats of ram wax per mold, even this process I managed to save a lot of time by placing a fan on the molds or placing the molds in the sun to get the wax to dry faster. 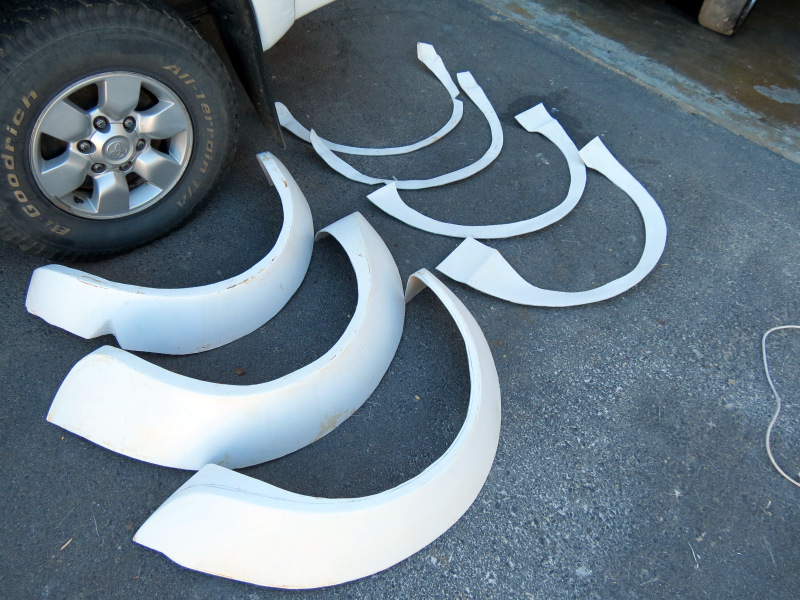 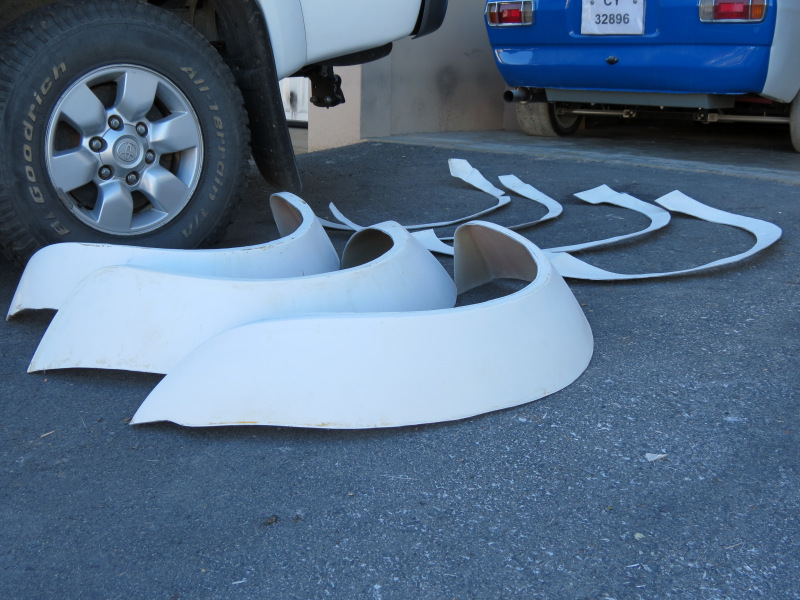 The part that I waited for ages seemed to be upon me, I started with the first components of the flares, this would also be the part that finally stretched my hands to their limits, my right hand thumb and index finger had blisters under a blister and quite sensitive, but strangely bearable when they are dry, but after a prolonged period in the latex gloves they became unbearable, after a day of soaking my hands in all sort of things and calling in the help of my favorite brand of dark rum I formed a new plan to continue, every 45 minutes I'll take a quick 10 min break, dry my hands and replace the gloves with a dry set, this worked at the end of the day like a charm. To this day, my fingers shredded two layers of skin and I still don't have finger prints on them, only a week or two ago the feeling started to come back. 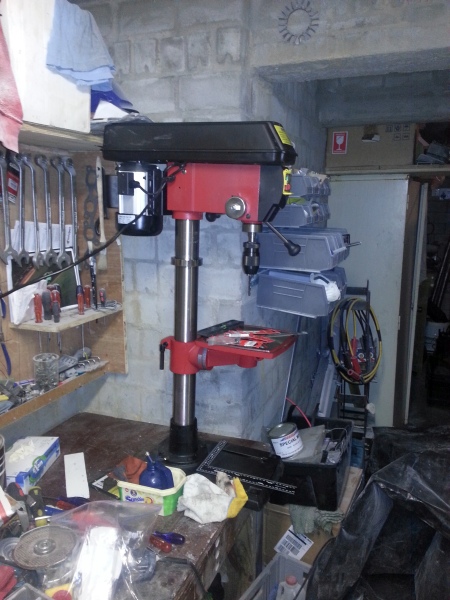 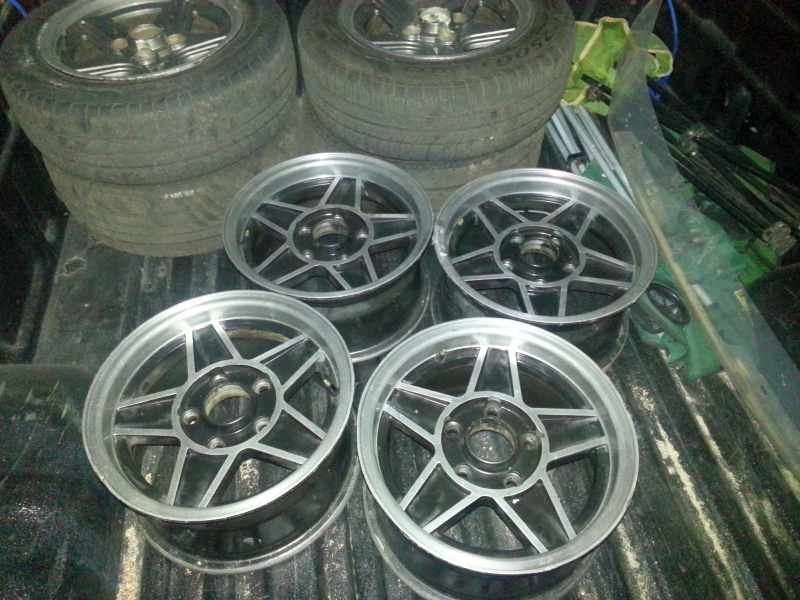 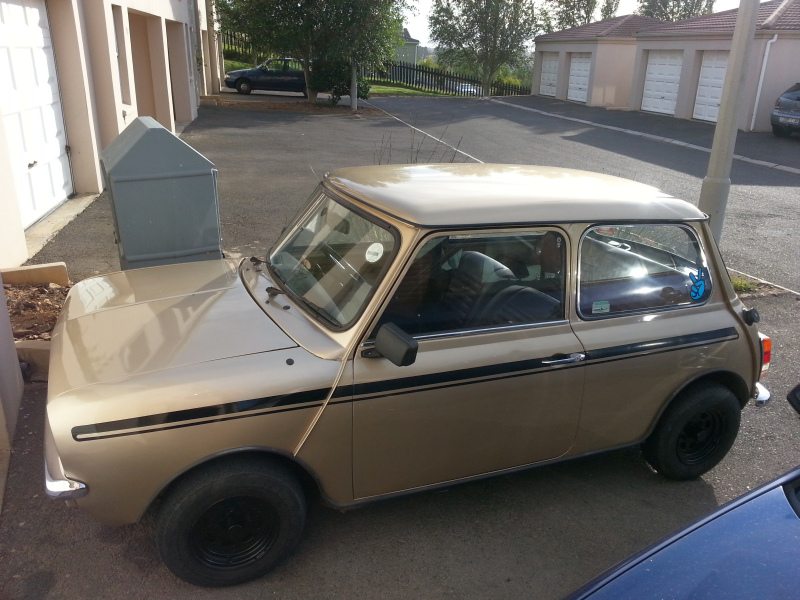 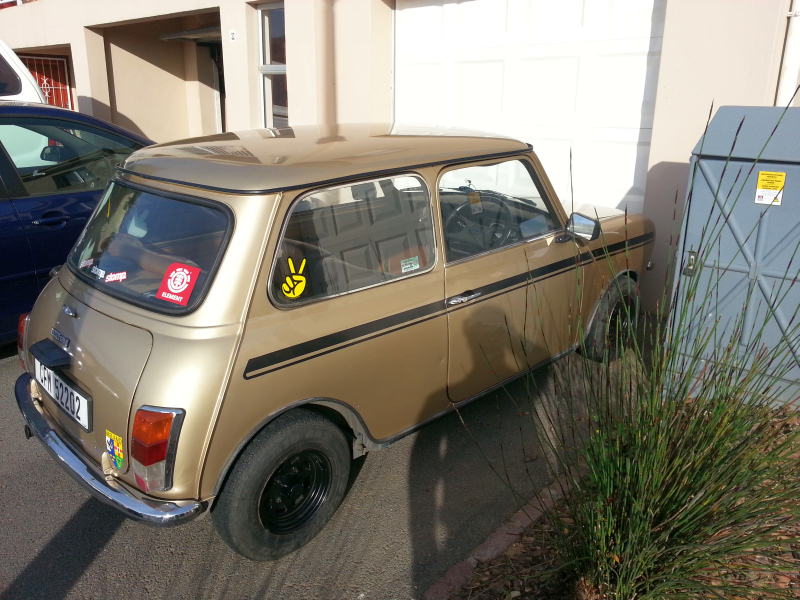 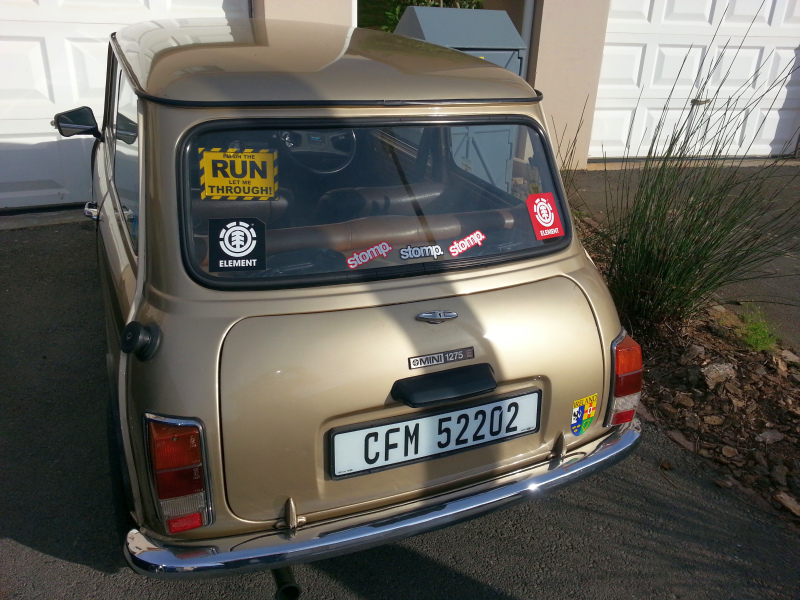 But I was a happy man since all my outers and flanges was done, seeing that I got the opportunity to buy myself a decent drill press for future work did help, but that's not all, I even found a decent set of 15" wheels for Datto, I hate a big wheel on an old car, but seeing that 15" rally tires are very common here, it just makes sense to make all necessary alterations to be able to use 15" rubber for rallies. Even if that wasn't enough to distract me, my brother decided to acquire this little thing and hog more space on the driveway, I love the "I'm on the run, let me through" sticker. I hope he decides to do a detailed build thread on this one, as I think it is going to be very interesting and a crap load of fun. I must say his timing is quite good, seeing that my car is almost done. 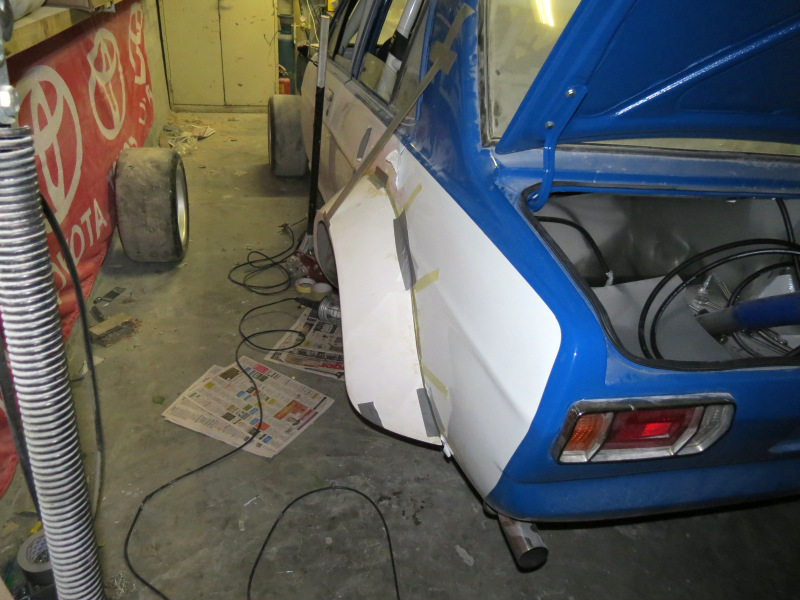 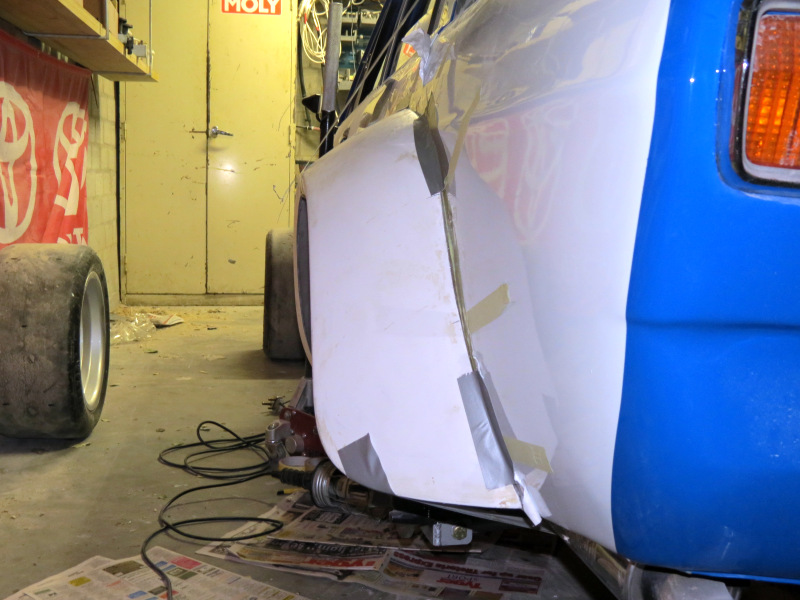 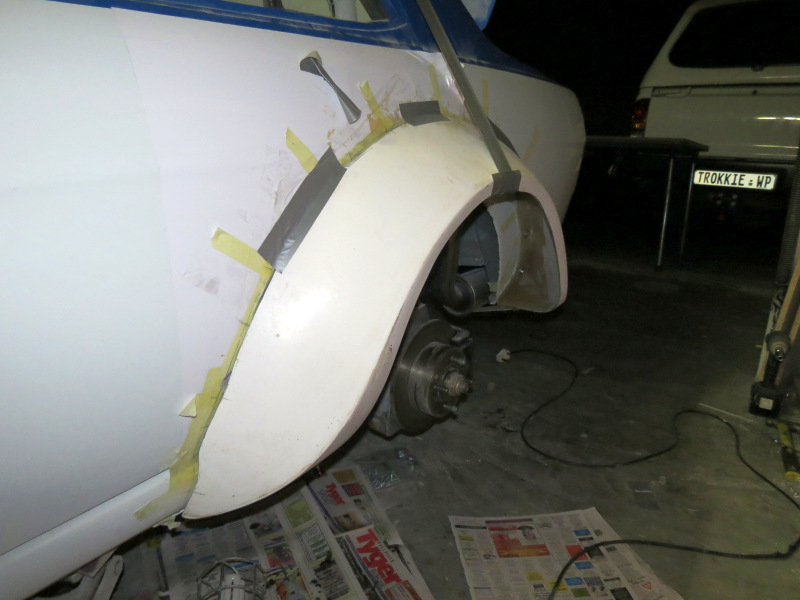 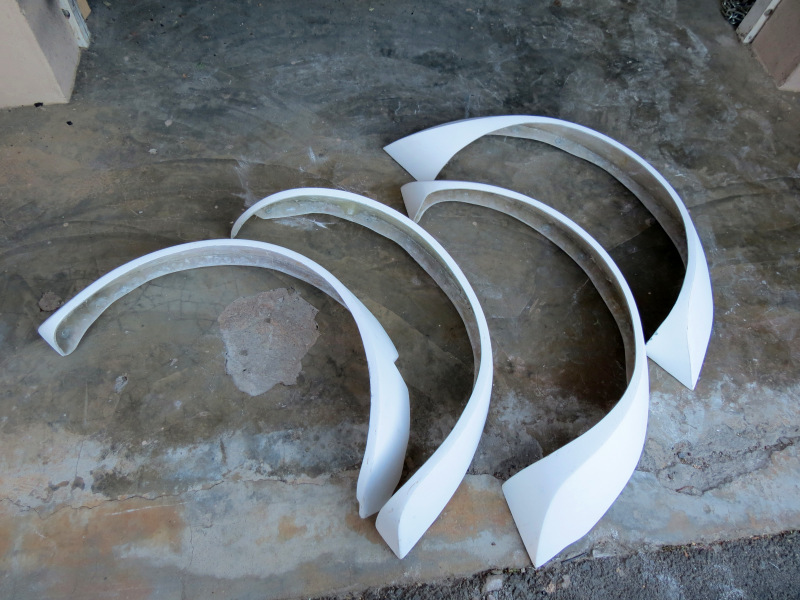 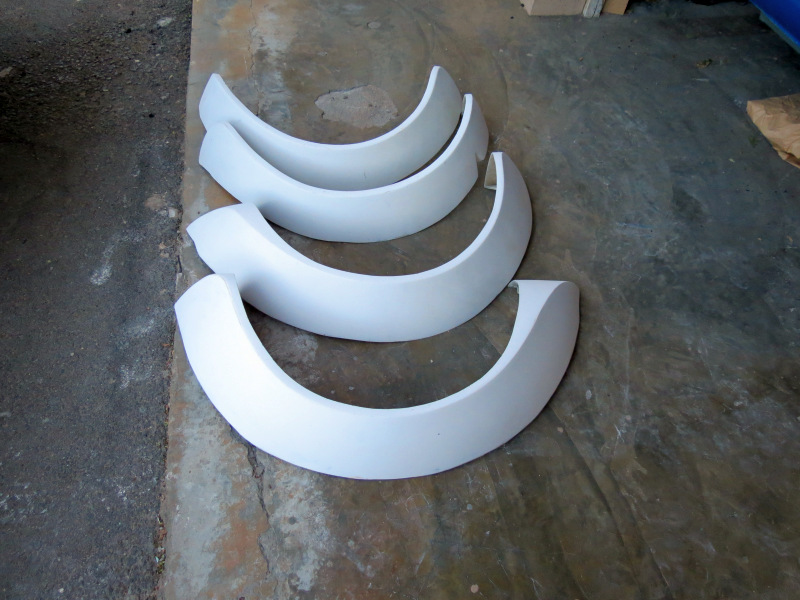 I spend a evening or two looking like Casper the smiling ghost while I trimmed the components off all excessive material, the next few evenings and weekend was used fasten the flanges to the body followed by making a few minor changes to the outers to fit nicely on the flanges and to follow the body nicely. Then I bonded the two pieces together on the inside with fibre glass and gave them a quick sand before taking them to the body shop for some final prep work and a few coats of paint. 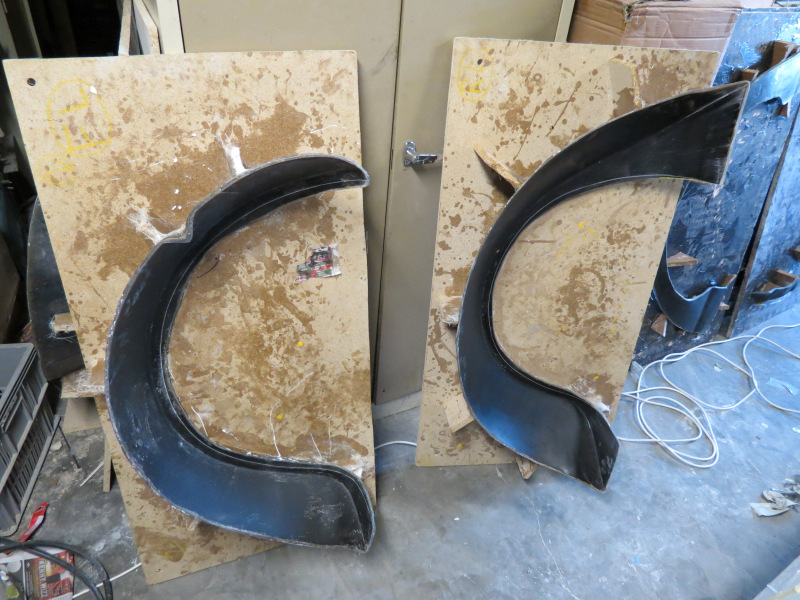 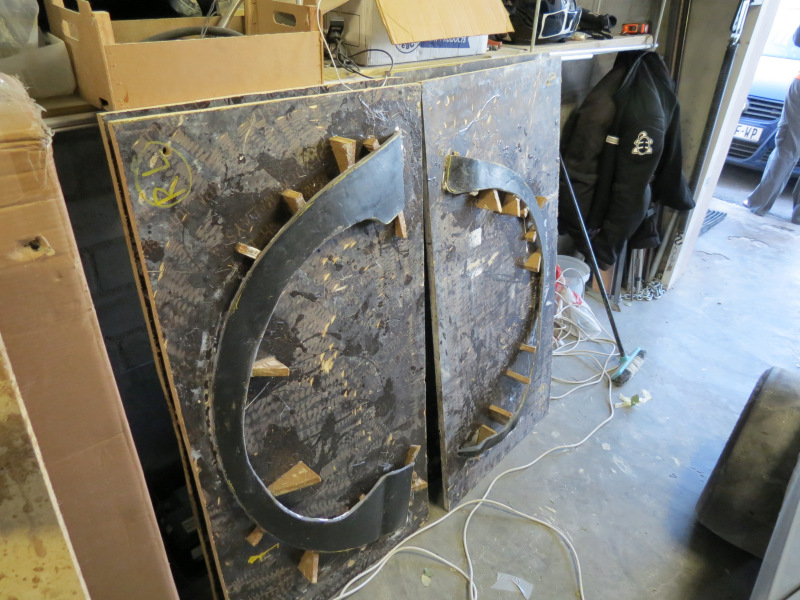 While I waited for the flares to be painted I had to make space in the garage, this was accomplished by moving the molds all 8 of them to storage as I hope to not use them that often. Once I had some room to move, it took about 2 evenings to get the garage clean, well cleaner than before, some of the dust will never come out of the poor thing. Afterwards I decided to lift the car, I managed to lift the car about 120 mm, it does look quite weird but much more practical for Police Clearance and Roadworthy, this will also help with measurements for the new set of shocks for gravel rallies. 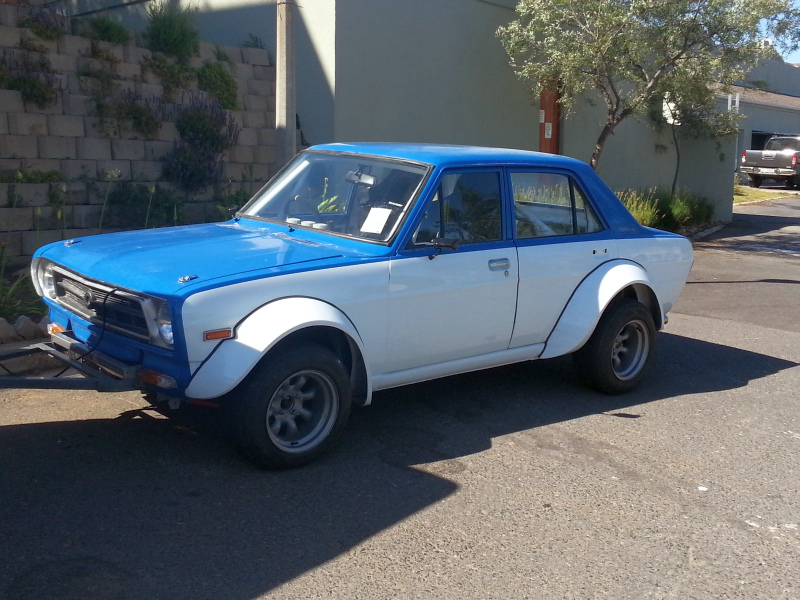  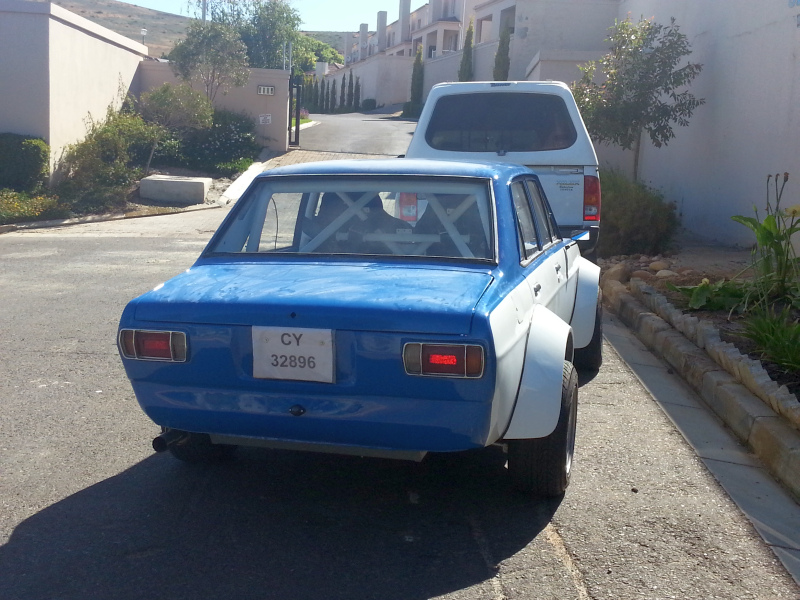 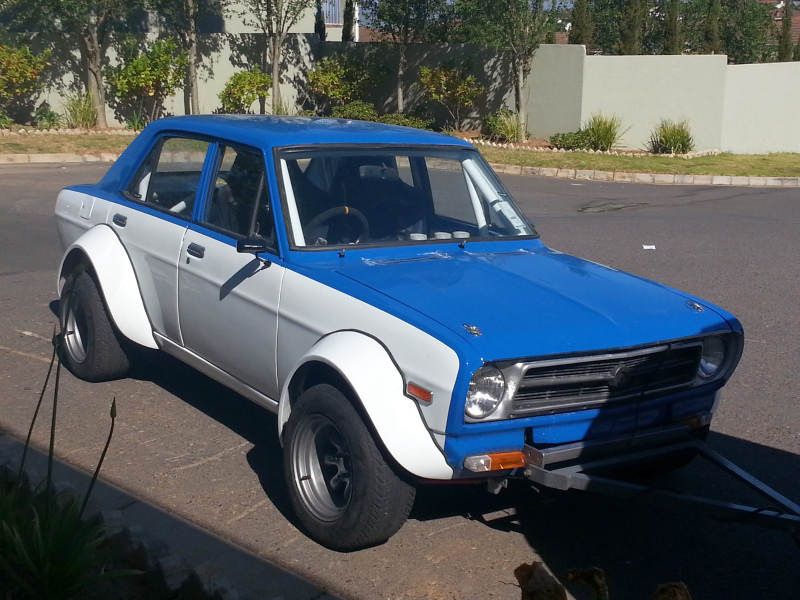 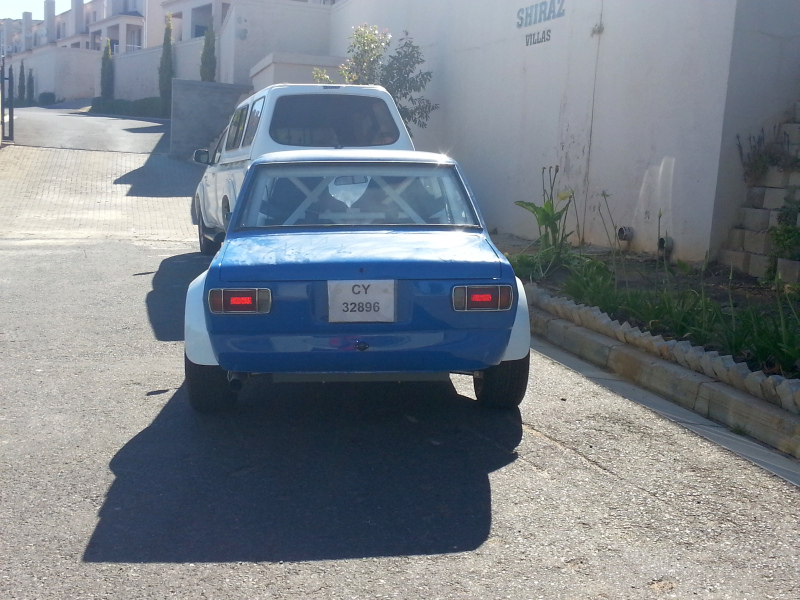 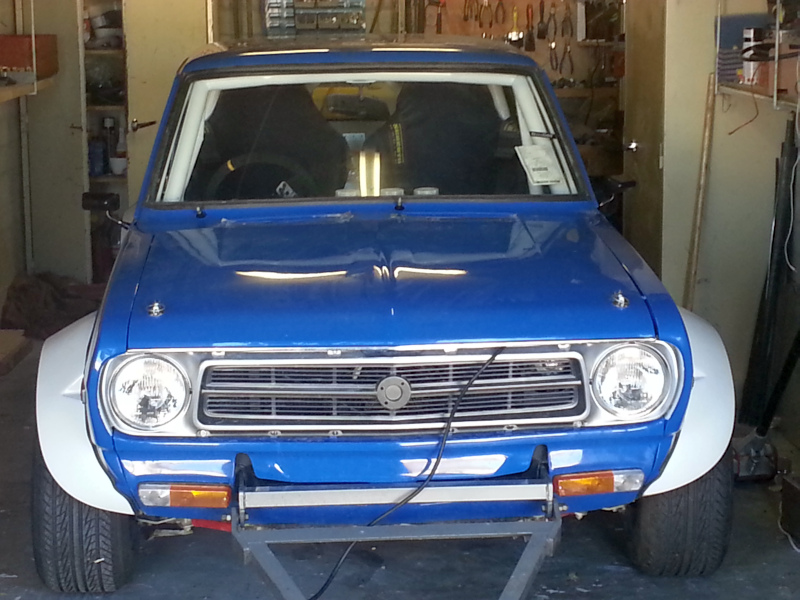 I got the flares back from the body shop, but I wasn't at all a happy man, so unhappy that I indicated to them that I will only pay for the work once I bring them back and they redo there work to my standards, at least they look ok for now, on closer inspection they look worse than a backyard job, anyways, enough of that. It took me and my fiance yes you read correct, I got engaged at the end of November, the whole evening to stick the rubber strip to the flares and fastened them, I'm quite happy with the end results, a few things I'm not 100% happy with, but if I build up the courage one day I'll fix some of them. I took the car for Police Clearance, now I just have to get the final parts assembled and then I'll be off to Roadworthy.
Posted on: 2012/12/13 10:04
Edited by racetech on 2013/12/23 11:43:47
|
|
|
|
|
Re: racetech's 1200 SR20VE Project |
|
|
Guest_
|
I hope your marrying your car.... Nothing can be that much more consuming  Congrats And congrats on clearance. Then lower, it again, looks too high now. Great work.
Posted on: 2012/12/13 12:23
|
|
|
|
|
Re: racetech's 1200 SR20VE Project |
|
Home away from home Joined:
2009/4/16 10:37
From Cape Town, South Africa
Group:
Registered Users
|
Thx unfamilia,
But the car will stay like that for a while, I need to do a few measurements around requirements for the gravel shocks.
Last night removed the 3.63:1 LS Diff, will replace it with the 4.45:1 LS over the weekend.
Posted on: 2012/12/14 8:47
|
|
|
You can view topic.
You cannot start a new topic.
You cannot reply to posts.
You cannot edit your posts.
You cannot delete your posts.
You cannot add new polls.
You cannot vote in polls.
You cannot attach files to posts.
You cannot post without approval.
|


;)
;)
;)
;)
;)
;)
;)
;)
;)
;)
;)
;)
;)
;)
;)
;)
;)
;)
 Transfer

;)
;)
;)
;)
;)
;)
;)
;)
;)
;)
;)
;)
;)
;)
;)
;)
;)
;)
;)
;)
;)
;)
;)
;)
;)
;)
;)
;)
;)
;)
;)
;)
;)
;)
;)
;)
;)
;)
;)
;)
;)
;)
;)
;)
;)
;)
;)
;)
;)
;)
;)
;)
;)
;)
;)
;)
;)
;)
;)
;)
;)
;)
;)
;)
;)
;)
;)
;)
;)
;)
;)
;)
;)
;)
;)
;)
;)
;)
;)
;)
;)
;)
;)
;)
;)
;)
;)
;)
;)
;)
;)
;)
;)
;)
;)
;)
;)
;)
;)
;)
;)
;)
;)
;)
;)
