![[Datsun 1200 encyclopedia]](/wiki/upload/wiki.png)
After shortening struts, or when fitting coilovers, you will need to securely fasten the lower spring perch to the strut tube. It's easy and can be done with or without welding. The same procedures can be used with stock spring perches or with thread collars for coilovers.
Contents |
Overview
You can carefully cut the lower spring perch and position it lower or higher.
METHOD 1: The perch can be re-welded in the new position.
METHOD 2: The perch can use commercial-grade shaft collars to fix it in place.
Instead of a fixed bottom perch, threaded sleeves can be fitted to the strut tube, along with a threaded ring. The spring perch is placed above the ring. This can be adjusted after installation to suit height. Sleeves can be welded or placed above a collar just like a fixed perch.
Traditionally, spring seats (or threaded collars) are welded to the strut body. However more and more have been using a Shaft Collar instead of welding the bottom perch. Works a treat, even some racers and a few commercial spring companies use this method. Some have run them in race cars for years with no problems. Either method will work.
Stock 1200 Spring Seat
If using stock 1200 springs or other same diameter spring (like 280ZX rear springs), just reuse the stock spring seat. You can carefully grind the welds off the strut housing, and presto! you have a movable spring seat. Move it to a new position and fasten securely.
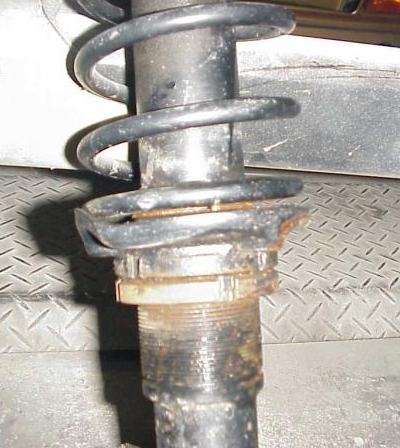
Using stock coilover springs (factory 1200 springs) with adjustable fasteners will give you the best ride, and allow you to lower it too. You can use threaded collars or a collar clamp (see below).
Fix the spring cup at appropriate position (use B110 strut as a guide).
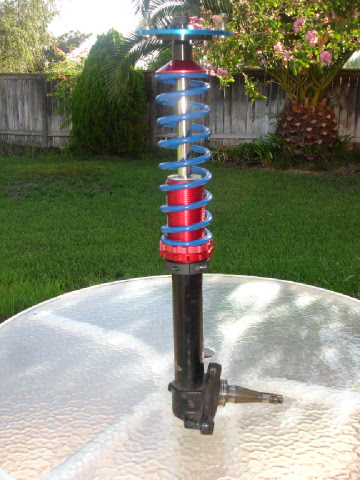
Coilover Seats
Coilover seats are suitable for the small diameter springs. most use a threaded collar which slips over the strut tube. This is the part to be fastened to the tube. But simpler stop seats are available too which don't use a threaded collar.
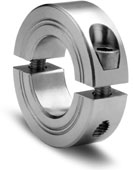
Shaft Collar Method
Shaft Collar on S310 Strut
- Use a two-piece shaft collar
- Do *not* use a set-screw collar
- Get the kind with cap screws, not set screws. They are double the holding power
- cut/grind the stock Datsun spring cup off the strut housing
- fit the clamp to the strut tube and tighten
- When installing a split collar, it is important that a small gap remain between the two halves of the collar.
- You must use a torque wrench for safe installation
- put the spring cup over the tube, it sits on top of the collar
This is adjustable, like the more common threaded collars except instead of being welded, it is clamped to the strut tube. Instead of threading the seat up/down, loosen and move the collar.
45mm Collar (1.77 inch): For Datsun 1200 and 120Y
- 45mm bore
- 73mm O.D
- 19mm thick
- Weight Steel: 12.5 oz
- Price: Aluminum: About $27 USD, Steel: $23
2" Collar (50.8 mm): For most Datsuns (including 280ZX and B310)
- 2" bore
- 3" O.D
- 11/16 inch thick.
- Weight Aluminum: 4.4 oz
- Weight Steel: 11.0 oz
- Price: About $15 USD for steel
Shaft Clamp
Some people use a standard muffler clamp instead of a Shaft Collar. That sounds less secure than a Shaft Collar. They use two of the half-circle parts with straight bolts. This is basically a sheet-metal shaft collar.
Is this methods safe? Some feel it is not. Others report good success. Use at your own risk.
Welding Method
Welding the spring seat to the strut body is the generally accepting fitting method. Options include:
- Seat welded directly to strut body. This is how the factory did it
- A seat stop is welded to the strut body
- Hybrid: a seat stop is welded to the seat, then that assembly welded to the strut body
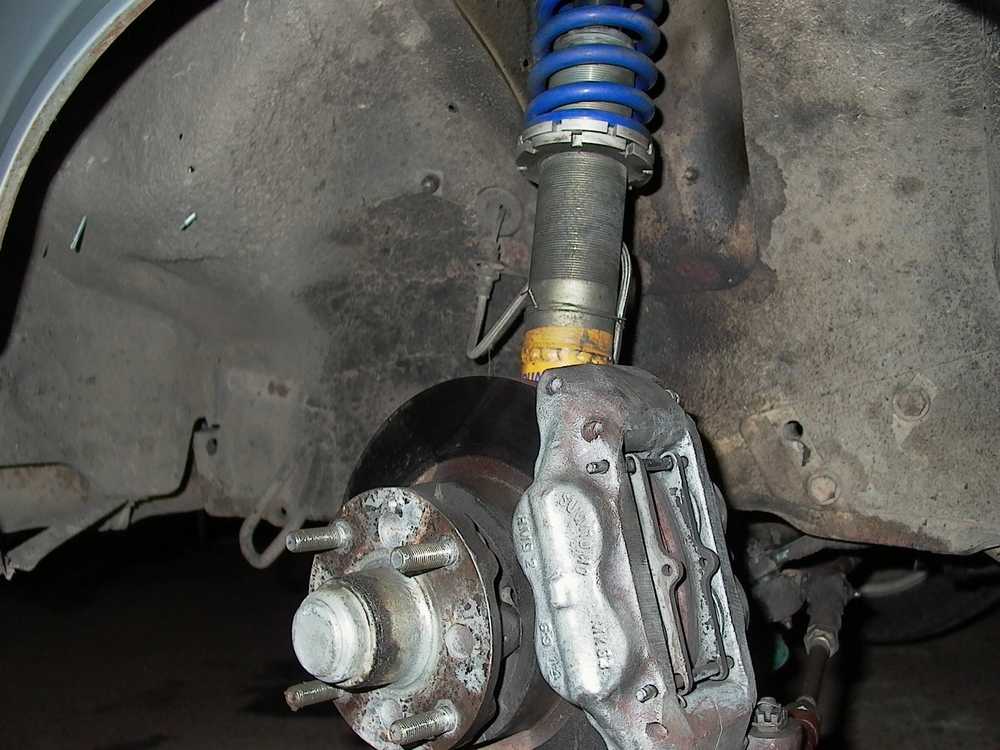
Notice the secure welds in this photo, at the bottom of the threaded sleeve:
- Disassemble strut, including removing cartridge or guts
- Cut spring cup off the strut
- Weld the spring perch/spring cup at appropriate position (use B110 strut as a guide)
- Re-fit inserts
- re-assemble using stock B110 spring and top hat