|
|
|
|
Re: racetech's 1200 SR20VE Project |
|
Home away from home  
Joined:
2009/4/16 10:37
From Cape Town, South Africa
Group:
Registered Users
|
March 2014 CCMCC Klipdale Rally First things first, let's look at the facts: Klipdale is not just a name someone thought off, this little farming community got its name from the terrain just like the name suggest, Klipdale, this place is littered with stone banks that attempts to rattle the fillings out of your teeth on every pass. Every time we went over a series of these stone banks the only thing you can hear on the intercom: "Eina, eina eina" and these weren't used to describe my fillings trying to jump from my mouth but my poor old car was taking a beating. Then there was the event itself, seeing that I'm normally one of the radio marshals (Yes, for those that wondered, I'm a Radio Ham) in the background, I must admit that the event was well organised and I did not encounter any problems. Thanks to the community, farmers, organizers, marshals and everyone that I missed for making this a very special day. Let's start with the week leading up to the event: Ruan and I just finished doing a complete bolt check on the car and in the process we made a complete list of spanners needed for each critical part on the car; and by critical we categorized everything that could come lose and help us into a ditch, this list also ended up being the items that we wanted checked during the service breaks. I had to replace all the CV bolts, inner and outer with new units and heavy duty spring washers as they came lose on our practise, also all the bolts on the steering rack were replaced with new units and seeing that the sump guard covers them, I locked them in place with spring washers and Nylock nuts. I always said you can lose your brakes but not the ability to steer. Then it was onto all the small things, window washer bottle, tow strap, jack, spare wheel had to be mounted, well the list did not stop, it is all these small things taking all the time. Tuesday was set aside for Rally School, yea you can laugh, well we did laugh our arse off for ourselves attending rally school days before the rally. From what we learned from Patrick Vermaak it was quite clear we were ok on the car building and preparing side, but the rally side was something else, he basically had to teach us what rally was really about, time controls (TCs), dead time, Penalties, lateness etc. the list goes on, the biggest things to remember never reverse in a control area and time has never been so important in your life. The weirdest thing about rally is the fact that it is probably the only place in the world that it is better to be late than early as the penalty for being early is greater than being late. We completed a mock rally on paper to teach us how to work out all the times between stages, when and how to TC etc. All the information helped to settle the nerves but it was also such an overload seeing that we now knew about so much more that could go wrong or done incorrectly. Thanks again Patrick for all the help and stressing us out further, well more Ruan as I had so much on my plate, I did not have the time to think about this. Wednesday evening was used to get some of the smaller stuff done and then I spend the rest of the evening laying on Ruan's couch while I watched the Pace Notes DVD and him navigating us through the stages with me constantly stopping him to make some changes. On our events a set of instructions called tulips are included in the entry fee, this is a very basic set of instruction just highlighting the major instructions on the route, luckily for us we can purchase a separate set of instructions called Pace Notes, this include a booklet with very detailed instructions and a DVD showing you the actual route. Some people would argue that pace notes is the wrong way of learning rally as it can have disastrous outcomes if you just look at what happened on the last WRC Portugal event due to pace note errors, but the key word is WRC, for us we believe it is the new way of doing things and the more information would put us in a better position to be safer on the stages. Thursday I just had to call in some help in the form of Nico Botha to take the bakkie for a new set of rubber and later the evening to help me load the car on the trailer. Thanks Nico. One thing I noticed while strapping the car down was the fact that I need my own set of ratchet straps as it is quite a pain in the arse to work with a set that is for loading cargo rather than strapping down wheels. The rest of the evening I just packed, well not that easy as it involved sorting out spanners for each part of the car, figuring out what spare parts and materials I'm going to take with in case of emergency fixes. Friday morning early up to pack for another 2 hours before work, 8 hours sleep an evening became a statistic at this stage of the fight. Seeing that we were also going camping did not easy the packing effort at all, to make matters worse I forgot to fetch the tent from the garage as we normally sleep in the bakkie, but seeing that it will be filled with tools and parts it was out of the question. As it was a the start of the Easter School Holiday we were very happy that we could be over Sir Lowrys Pass before the traffic started picking up, we had a nice leisurely drive to Riviersonderend to fill-up with enough fuel to get the car and service vehicle back to Cape Town. Only a handful of kilometres backwards we arrived at Khomeesdrif Camping Resort, all ready, relaxed and amped to pitch the tent and relax for the rest of the evening after the huge effort to get to this point in time. For a few moments we did worry about getting stuck with the super low profile trailer of Car, Boat & Truck. In true Ruan fashion he managed once again to have his timing 100% perfectly timed to arrive just when we wanted to sit down at the camp fire. We spend the next few minutes helping him pitch his tent before we could relax.   Saturday Saturday morning, up nice and early, strapped the headlight to my head and went searching for the showers in the pitch dark mist covered ski. For some strange feeling we weren't that hungry, I managed to force a sandwich down with a cup of coffee, must probably have been the nerves. Filled out travel mugs with another cuppa and left for Rally HQ. On arrival we quickly got a nice secluded spot to setup our service area. A few minutes later we were joined by friends and very importantly my father and brother that were going to help in the service area. After documentation we quickly washed the car, finished a few smaller things on the car like making sure the cameras is working etc. Took the car to the scrutineers, my biggest concern, luckily for us we passed that test with flying colours and received a lot of attention due to the car as everyone loved the amount of attention to detail and the neatness. Finished the car and took it to Parc Ferme.  The nerves started building as all our friends started talking about leaving to see the first cars at the spectator points, thru my mind all sorts of thoughts flew by, the start of this whole new rally thing is about to become real, ready or not. After drivers briefing we discovered a very empty pit area, we went thru the starting list again, seeing that we are new, we were seeded last, just as we wanted it. Our nerves were shot by this time, especially due to the fact that we started last and the wait was quite long, during this time we looked at what the other competitors were doing while entering the first time control, just to easy ourselves a little, it did not help, next time I'll take a chair and a book to keep my mind occupied.   Stage 1 - Antoinette Stage 1 - AntoinetteStanding outside parc ferme, hands shaking.....all of a sudden Ruan gives the command, zip up the racing suite, enter the time control 10 minutes before starting time, walked to the car, made sure the bonnet clips is secured (all the weirdest things were popping up in my mind) balaclava on, helmet on the roof, get in car, grab helmet, Leatt on followed by helmet, strap the harnesses in correctly, Ruan speaking, can't hear a thing, in actual fact it was very quiet in my helmet besides the huffing and puffing from my racing breath, kept on going, stressed some more about how much time is left before TC, had a glimpse upwards and noticed 3 competitors before us, what a relief, we still had some time, finished with the harness, plugged the helmet in, still no Ruan, went into a mild panic, had to look to my left to make sure he is still there, luckily for me he was also trying to get himself settled, but still the deafening silence, I can hear Ruan talking, but can't hear him. What know I can't hear him and he were the one with all the answers, a bright idea popped up, start the car, turned the ignition ON and all of a sudden Ruan was with me, started the car and realised that the intercom only works with the ignition turned on. As our competitors left the TC area we inched forward and on Ruan's command entered, the go ahead was given and Ruan instructed me to leave, we took what we would call a leisurely drive to the stage start, just to realise half way there we need to get a move on. As we sat in the car waiting our time to enter the TC area, it seemed that Ruan knew what he think he had to do, I was relaxed, we were given the command approached the start line, stopped and sat waiting, Ruan's clever watch started beeping, selected 1st gear, hand on the hand brake, nerves building and waited what seems like an eternity. Ruan counted down in 10 sec and all of a sudden the watch beeped on every second and Ruan counted down the seconds.  This is it, seconds from our first rally start and no freak in way we are getting out if this, only way out is thru the stage, marshal, Ruan and watch all start screaming in my ears, the natural thing to do was release the clutch, control the wheel spin to gain as much traction as quick as possible to get rid of this noises coming from all corners. As we drove up the hill Ruan gave a Right 7 call if I remember correctly, as we went over the crest the turn was in front of us. All I could think of was is this how a right 7 looks, my life flashed twice in front of me, managed to get thru the first corner a live, the next section was downhill followed by a left 2 up hill, not trusting anything I even managed to nervously tap the brake pedal before entering the corner and just as we went thru it think to myself that, that was unnecessary.  As we approached the approached a right hand corner Ruan instructed something like 150 flying finish, I was so relieved at the words "flying finish" as we were about to finish our first stage, that once I excited the corner I waited for the Flying finish board to appear, once I saw it I realised that there was very little road between it and the stop board, in true fashion I worked out the best plan to get this car stopped before the stop board but still fly over the flying finish board. Once across the board, I was very hard on the brakes, down shifting with the rear moving from side to side, I was so determined not to mess up our first stage and getting all the marshals angry, got the car under control in second ready to stop and all of a sudden Ruan shouted go go go 5m in front of the end board, which turned out to be the flying finish board as we previously passed the flying finish board. We had quite a good laugh about it with the end marshals.  A very indescribable feeling went thru me, the car was in one piece, we were in one piece, we knew it was slow but did not care, we just finished our first gravel rally stage and in a position to tackle the next one. Ruan did the math and told me we had x amount of time to get back to the following TC which would be a service, again our drive was to leisurely as we made it just in time.  Service 1 Service 1It's hot in the car while sitting with a helmet, balaclava, 2 layer race suit, shoes gloves, closed windows and waiting to enter the service area. Once in proceeded to our area, parked the car as my brother instructed. One thing you must realise, even thou I worked 4 years on this car and .would like to believe I'm the boss of it, once you enter the service park for the first time, you realise that you are just the driver that could feed some information back to the crew, but that is about it, they are in control. Ruan gives the commands being when to stop where and when, the command to proceed etc. and very importantly read the pace notes. He is also the one giving the service crew specific instructions what to do and point them to the attention areas as I instructed him during the open section back to the service area. The service team you just have to trust, part of their job is to do a bolt check, once you leave the service area, you can't be wondering did they fasten that bolt or that one. This is very much a confidence sport, you have to have confidence in the person next to you (the co-driver has one big list of duties to take care off, not to mention the responsibilities), those in the service part making sure the wheels stay on, your family and friends at the spectator points having the confidence in you to safely drive the car thru the stages in order to go home after the event and start planning the next one, all this must be done to the second. I like to call this Timed Chaos. 20 Minute service time, 0sec go, pull away, drive to the service crew, stop, while the first member opens the bonnet, the other readys the jack, we get out while remembering the sequence ( pull harness straps to release tension on the belts, unplug helmet from intercom (keep in mind, know your co -driver can't hear you anymore), release harness, open the door, unbuckle helmet, remove helmet and neck brace and place it on the roof, remove steering wheel, get out of the car, remove balaclava, feel the ground beneath you). We decided to keep the car full of fuel, one less thing to worry about while on stage, thus we need to refuel, Mike gets under the car and start checking bolts, especially the CV bolts, my father helped Ruan with the fuel, I'm under the car, up again, checking that, doing that, finally settling to check the engine bay, oil is good, the rest looks good. All of a sudden Ruan gives the command to get ready and in the car. Hell, I have not even rested or had anything to drink, grabbed a bottle of water, had a few sips, suit on, in the car, helmet on, 3minutes before our TC out time, I can feel the car being lowered, started the car, got the OK from Mike to leave the service area, reversed and proceeded to the TC. 18 minutes gone. What just happened, apparently this is what they call servicing, I was supposed to catch my breath and relax, in the meantime I'm overheating in the mid-day sun with 5 stages to go and another 4 of these chaotic services to go.  Stage 2 - Geskenk Stage 2 - GeskenkWe will repeat this 13.8km stage later the day, on the open section we decided to drive a little faster on the open section 14km long, we arrived a little before time and had some time to sit still and relax, most definitely the way to do things. This time around we felt a little more at ease with the whole timing side of things as Ruan managed to get us into another stage without any penalties. Being the first time we were on this stage, we took it gentle, but the biggest thing about this stage was the stone banks, it was littered with them, every time we went over one it felt as if someone was trying to tear my heart apart, the poor car. Probably one of the reason why we will never be super-fast, I will never be able to drive this car to the limit as I have too much feelings for the poor thing.  A very nice stage, a little more technical than the previous one. Ruan especially enjoyed this stage seeing that he had less time to look around, it seems that he likes to be kept busy, I'll think of something to add to his list to do. We had a few issues with the notes not being read fast enough, but purely because we changed them due to watching the DVD it seemed that you had more time, but that bit us, if the calls is underlined it is done so for a reason. Well seeing that our speed is still slow enough we managed to make it and learn from our mistakes. This time around as I heard the call coming over the intercom for flying finish I knew to attack the second board and then brake to stop before end control marshals.   Service 2 Service 2As we did coming to the stage, we drove faster than 60km/h back to Klipdale co-op 18km away, due to the fact that we do not have an ODO in the car, we almost took the wrong turn off. Once we arrived at the service area we were about 7 minutes early, got out of the car, removed the helmets, opened the suites and relaxed, all this while we had the time to have a nice chat about what just happened and what needs to be done in service. This is the way to do things, I even managed to use the wiper blade as a clothing drying line to dry a little. Proceeded through the TC and stopped in our service area, all relaxed, told the crew what we wanted done. Mike proceeded at jacking (we need to get rid of the wooden spacer on the jack) the car up while I inserted the stands, Ruan and my father started the refuelling process, Mike started checking bolts and I made sure everything under the bonnet is in order. Once Ruan and I were done with our duties we had time to stand around, have some cold refreshments and relax. Once Ruan gave the 5 minute call we got in the car, started strapping on and in, in a much more relaxed way, 3 minutes before we had to be at the TC the car was on its wheels and we proceeded out. A much more relaxed way of doing things, as we were waiting in the line to enter the TC I realised that we need to buy more time in the service area.  Stage 3 - Antoinette Stage 3 - AntoinetteWe were starting to feel more at easy, but I still did not trust these gravel tires and struggled with forming the pictures from what is ahead by listening to the notes, or it was just matter of I just drove on what I saw and did not listen to Ruan, seeing that I'm a master at pretending to listen and only remember certain keywords to make enough sense when caught out (did I just say that out loud). This was also the stage that we nearly soiled our suits, we went down a hill, the road opened and you could probably see the road for 1km ahead, we entered an easy right, I had the car positioned on the inside line and all off a sudden I saw a ditch on my line that must have washed out during the previous weeks rain, I changed my line successfully missing the ditch which looked like it could remove the front right wheel, but as I tried to bring it back to the racing line the rear stepped out, we left the road and ended on the grass doing +-100km/h, managed to keep it next to the fence trying my best to get the car back on the road, Ruan looks up and is just like: get it back on the road, get it back on the road. I did not say anything but were thinking to myself, what is he thinking I'm trying to do. Being about 1.5km to the end, I actually hoped the flying finish is in sight.   Service 3 Service 3Again we had time to relax before entering the TC, this time around I checked the tyre pressures, not realising that they are still hot, I deflated the left rear wheel too much, quickly told Ruan to phone Mike to get the compressor going in order for us to inflate the tyre, my bad. Arrived in the service area, we all did our thing, if I remember correctly my father was still out spectating, but this time around one of the crew members of the team next to us came around with an air hose in hand, started pumping the tyre, damn this is some good service and sportsmanship. As we were getting ready to leave my brother informed me that the portable compressor were in the bakkie with my fiancée spectating, another big fail on my part, I need to add it to the packing list, the other thing we realised is that we need a quick way of communicating with the service crews.    Stage 4 - Hermanusheuwel Stage 4 - HermanusheuwelExact same stage as Antoinette, just in reverse. This stage went great, a little less nervous braking before crests and corners, better lines with the whole stage just feeling like it flowed better and started to form a picture of what the pace notes tried to describe. The rhythm was better, LOL, Mike you will understand.  Service 4 Service 4Everyone knew what they had to do, even though we decided to only do a visual check over of the suspension parts and bolts. Checked the engine bay, filled the fuel tank and placed some newer rubber on the front and moved the front rubber to the rear due to rubbing.   Stage 5 - Geskenk Stage 5 - GeskenkNo words to describe the mix of feelings and emotions, one thing is for sure, taking a blind crest flat foot without knowing what is on the other side is not easy, yet we still managed to brake before it.  Service 5 Service 5After the stage we decided to be as quick as possible in the service area to allow Mike some time to get out to the spectator point and at least see why he was slaving away in the service area, he could also see for himself that we are not trying to break the car. As we stopped before the TC, we got out, I started check the fluids under the bonnet, once done we relaxed. Again, would have been great to communicate with the service crew to inform them beforehand what we wanted done. Stopped in the service area, instructed Mike the engine bay is done, only a visual inspection, no fuel and leave as quick as possible to get to the spectator point, we will finish. After they left, we realised that the fender lost a bolt and that the door was hitting the fender as a spacer was lost on stage.    Stage 6 - Hermanusheuwel Stage 6 - HermanusheuwelThe rhythm was good, the confidence building but still severely lacking. The best part of the stage was the fact that I was confined to force myself to flat foot a crest as by this time I knew what was on the other side, nothing. As we approached the one crest, a long uphill section Ruan gave read the note as something like crest 380, I went for it, this one I'm going over flat foot, as we neared the top Ruan again read the note, this time he sounded different, but still I was on my way to flat foot this crest, no matter what is wrong with him. We approached and as determined as I were, I just had to lift partially, what a weird nauseas feeling linked with a very big amount of adrenalin, we will practise this one, apparently it takes years. After the stage Ruan told me he read the note and could see I was going for it and wondered for a second if it really is straight on the other side with enough road to be safe, this was the reason why he sounded strange.   Parc Ferme Parc FermeAs you can see, the car and us made it in one piece on our own steam into parc ferme. Video footage of Stage 4http://www.youtube.com/embed/HdkHcqYaiw8Sorry but I did not record any GPS data, next time hopefully the new logging system will take care of that. You will hear rear tyres hitting the arches, the bump stop rubbers I have in place is obviously not enough, there is more than the cars weight going through the rear wheels on compression. Something I was unable to simulate with only the cars weight on a jack and no spring on the shock.</span> Worst thing of it all, the main GoPro died after this stage, and I'm so sad I do not have footage of SS 5-6 as we really started rallying in those stages. I'm currently waiting on connectors and mounts and stuff to make this video system better as I want to input audio, power and trigger the camera from a logger, this way I can have one button to press before a stage to log ECU, GPS and video. Stage TimesSS1 Antoinette 9.9km: 8:07 SS2 Geskenk 13.4km: 10:31 SS3 Antoinette 9.9km: 7:31 SS4 Hermanusheuwel 9.9km (Antoinette in reverse): 7:20 SS5 Geskenk 13.4km: 9:53 SS6 Hermanusheuwel 9.9km (Antoinette in reverse): 7:06 As you can see the times came down as we grew the ability to shift enough brain cells aside to form a picture of what is ahead and the confidence build in the tyres etc. We identified a few issues, especially in the service area that will get immediate attention as we need to settle things a little there as time is very limited and I need the time to think about what happened and what could be done to improve. For us to finish without any time penalties and a car in one piece without the need if speedy repairs, is a major win, the speed will come with years of experience. We ended the day 12th out of 17 starters. Thanks to Selina Botes, Mike Mathee & Patrick Johnson for the photos, I find it a little hard to take stills and drive the car, without you this update would have been rather dull. Car Boat Truck Mechanical & Bodyworks for the work on the body and providing us with a trailer, luckily we did not cause to much work. Thanks to everyone behind the scenes organizing the event, the farmers, community, family and friends that made this possible, even the uncle at the prize giving that tried to drown me in wit blitz & local beer when (thanks brother) Mike told him it is my birthday and first rally. Thanks to everyone that encouraged Ruan and I to pursue this sport, just to name a few, Pierre vd Westhuizen, Patrick Vermaak and Johan Zulch.    Selina thanks for standing by me and for the very special cake. Selina thanks for standing by me and for the very special cake.
Posted on: 2014/4/15 14:00
|
|
|
|
|
Re: racetech's 1200 SR20VE Project |
|
Home away from home Joined:
2009/4/16 10:37
From Cape Town, South Africa
Group:
Registered Users
|
HP figures I do not now, enough for wheel spin on gravel in 4th especially with cams activating.
Will take it to dyno in the next month or two, car was road mapped.
Rallying is a very strange feeling, the driving is only one aspect of it, the timed chaos is something else. Taking a blind crest flat out is a very weird feeling.
Posted on: 2014/4/14 8:51
|
|
|
|
|
Re: racetech's 1200 SR20VE Project |
|
Home away from home Joined:
2009/4/16 10:37
From Cape Town, South Africa
Group:
Registered Users
|
March 2014 Rally Practise Three weeks before our first rally we secured a venue to test the car on gravel, Friday 14th March we loaded the car and enough tools to rebuild the car if the need arose. Saturday early morning, Ruan (co-driver) and I, poured ourselves another cup of coffee and headed out for Porterville for some testing. Stopped at the fuel station next to the road and filled the fuel containers, one thing that we wanted out of this session as to gauge the fuel usage of the car. We knew the route was short and extremely rough as we inspected the venue end of last year, but at least this could count in our favour, the one thing we did not take into account was the surface as it turned out to be extremely lose, more of this later.   As we turned off the main tarmac roads and started travelling on the gravel we immediately started making a list of thing to do and remember as we realized that in the future we need to over the nose of the car with some blankets as the entire engine bay was being filled with dust, not even to mention the stray rocks that hit whatever in came in their path. Turned off the main gravel road onto the narrow road leading to the farm house, we were concern that the trailer being very low would get stuck going through the holes and dips, to our amusement the back only scrapped once. It took us quite a while to get the car off the trailer and ready to tackle the road. Seeing that the whole process is new, we made quite a few notes to improve the process.   Once all the car was ready, we proceeded to make some pace notes of the route. Let me just say for a team without any knowledge regarding pace notes, this turned out to be quite some fun with Ruan writing whatever I told him while paging back and forth looking for the short cuts. We made some notes going up and down the route and returned to put our helmets on. I don't know what we were afraid of the most, damaging the car two weeks before an event or trusting our own notes.     As we counted ourselves down, pulled away and shifted to second to keep wheel spin to a minimum, a quick thought went through my mind that this is why I have spent the last 4 years building the car, a very big moment. This thought soon disappeared as we hit 5200rpm and the cams activated and immediately the rear stepped out, shifted to third and the same thing, wow and oh #OOPS# was all I could process for the moment. The first part of the route went OK with Ruan making all sorts of noises over the intercom, but in my mind he was speaking to himself as I was trying to keep this car on the road. As we approached a very bumpy hairpin I shifted down and all of a sudden the rear stepped out and it took more than 10 brain cells to keep the car on the road while trying to recover, after this all I could process was "mofo". As we entered a dip followed by a crest I had no idea what is after the crest and all of a sudden everything went quit in my helmet and then the annoying voice on the intercom broke the silence and repeated a call stating left 3 opens into right 4. All of a sudden I realised what his role next to me is, not just to annoy me, but he is the boss and I just need to drive, he will give me instructions to follow and tell me when I have time to visit the toilet.  The day went on and we did about 35km of testing, I started to relax a little and drive around the violent power curve change of the cams and down shifted a little later to not lock up the rear seeing that the car has a 2 way limited slip differential. All in all we now did enough kilometres to work out an average fuel consumption and the only problems besides dust was the loss of one mud flap and the rear wheels rubbing.   The following days the car was cleaned and the dust problem isolated to one of the rear shock covers, someone forgot to close it up. We did a complete bolt check on the car and found the outer cv bolts loose and the steering rack. These were all replaced with new bolts and heavy duty spring washers. The rear shocks were removed and another bump stop rubber added.   Only days from our first event and I think Ruan and myself went into shock seeing that we had a lot to do, still had to attend Rally School, pack, plan etc. Luckily for me I was so busy planning and packing, reality still had to kick in.
Posted on: 2014/4/11 12:20
|
|
|
|
|
Re: racetech's 1200 SR20VE Project |
|
Home away from home Joined:
2009/4/16 10:37
From Cape Town, South Africa
Group:
Registered Users
|
DATTOS FIRST TRACK DAYSaturday we took Datto to Killarney racetrack for it's very first test session during one of their Track days. We probably could not have chosen a better day to do testing especially if the goal of the testing was to make sure all temperatures stayed within the limits while driving the car hard. The weather reports stated it was 34°, all I know it was 30° that evening at 12 o'clock. It was extremely hot and seeing that one of the things that we wanted to test was our safety equipment. 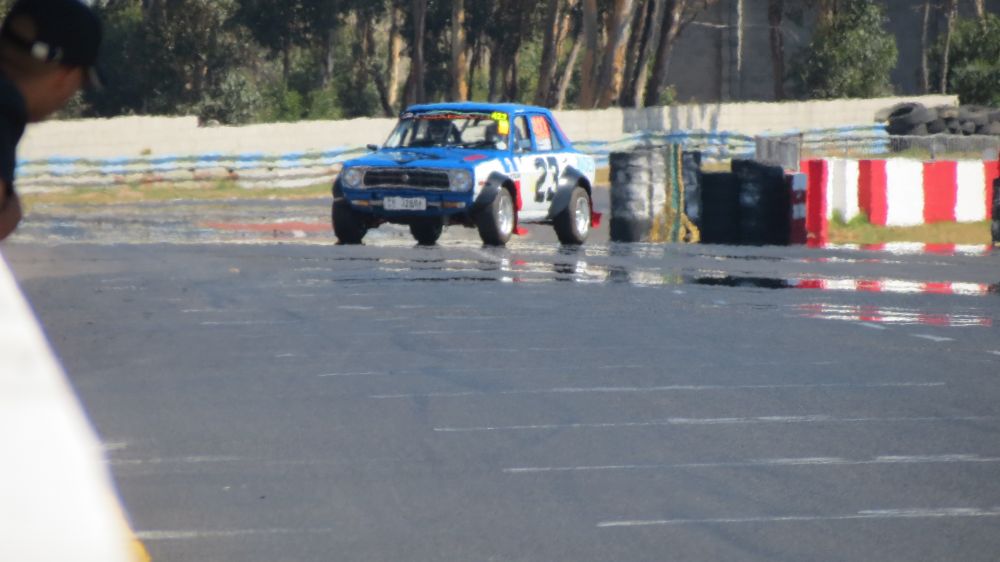 A two layer race suit, Nomex balaclava, racing shoes, gloves and helmet does create a oven like feeling when sitting still in the car while not moving, once you are moving along and shifting up and down thru the gears, the heat is non existent, check for clothing being comfortable, just need to figure out a way to get out of the suit. 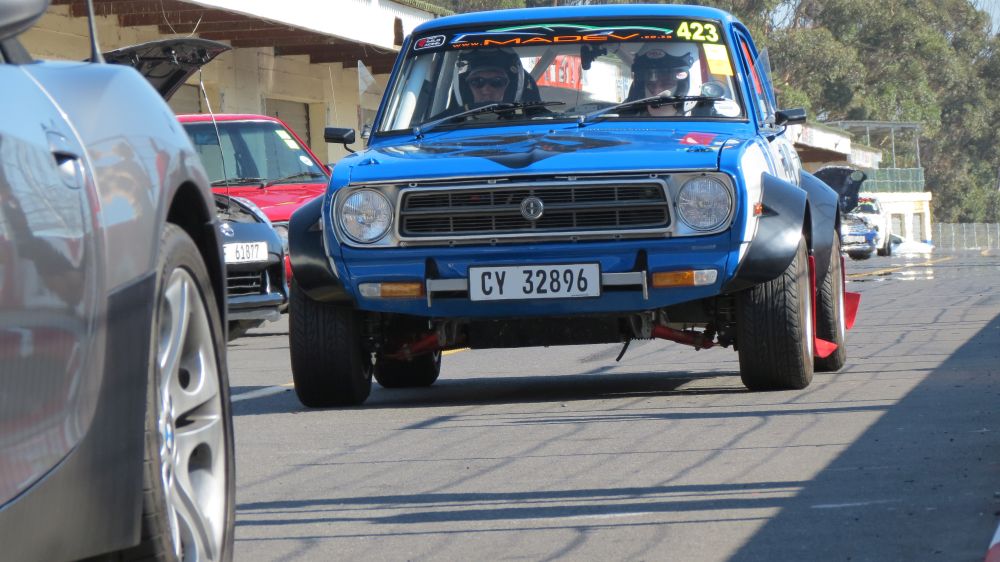 The mechanical side of the car performed perfectly. No vibrations, no strange noises besides the high pitch sound when the cams is activated, just for the record, I hate this sounds the SR20VE motor makes with the activated sound, probably the reason why they did not fit this motor to allot of every day cars, luckily for us we had helmets on a the sound of a decent in helmet intercom distracting us from the sound. We had no issues with water, oil or powers steering fluid ending on the outside of their intended containers. The temperatures stayed with in limits and quite low in my opinion, I could just consider fitting a thermostat with a lower opening temperature rating.  Highest Readings: Oil Temp: 98° Engine Coolant Temp: 87° Intake Air Temp: 37° 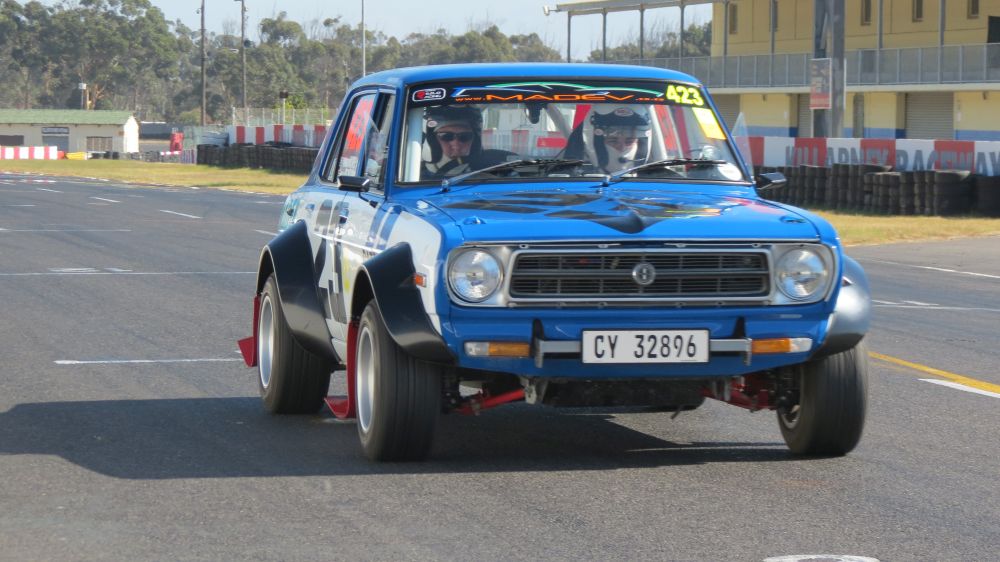 Brakes, besides the sound these Wilwood Polymatrix E compound makes, brakes are very strong with the ability to out brake a few cars. The squeal on these things is terrible, before the track day, they only squealed while applying the brakes very softly, like coming to a stop at a robot, but after a few heat cycles on the track they squeal permanently, especially under hard and soft braking but not at moderate braking, as they want to tell you navigator when you aren't hard on the brakes.  The suspension felt good, I was able to quickly gain confidence in the handling and start pushing into corners, in the high speed corners the car felt great, even when pulling the handbrake thru Malmesbury corner ( a high speed combination of two corners that is driven as one, seeing they follow each other closely), once you feel the back break loose just apply a small amount of counter steer and feed in the power and the slide is easily controlled, needles to say my navigator was caught by surprise as his instruction to me was take the corner I felt the most at ease with, he did not realize that was my favored corner.  The only problem was what we expect to be a bad Lambda sensor which in turn provides the management with bad data resulting in a lean air/fuel mixture while using more than half throttle for longer than 2-3 seconds. The strange part to it is the fact that the injector duty cycle seems normal for the amount of load on the motor. All in all I'm very satisfied with the overall reliability of the car, it seems that the car could go for hours on a end, the only sad part is the fact that I could nor drive the car full throttle as I would have liked, but the time will come. It is a nice feeling to stop the car in the pits after the last round, get out of the race suit and drive the car home. Now that I'm happy with the reliability, it time to sort the small issues and hit the gravel for some real fun and games.
Posted on: 2014/4/11 8:52
|
|
|
|
|
Re: racetech's 1200 SR20VE Project |
|
Home away from home Joined:
2009/4/16 10:37
From Cape Town, South Africa
Group:
Registered Users
|
FEBRUARY 2014 RALLY PREP IIIn this update the car is transformed into what actually looks like a racing car and not a very wide arched road car with a roll cage. I don't know about you, but this thing looks damn good and I'm quite proud to be the owner of it and privileged to look at it every time I open the garage door, even thou there is still a million things I'm not happy with, at least it is in a state I can start to enjoy it and that is on the gravel fighting the forces to keep it in a straight line once I need a break from the forces trying to dirty my pants, let us forget about the new dictionary of swear words I learned during the build of the car and start wagging the tail around.</span> Sill Stands & Brackets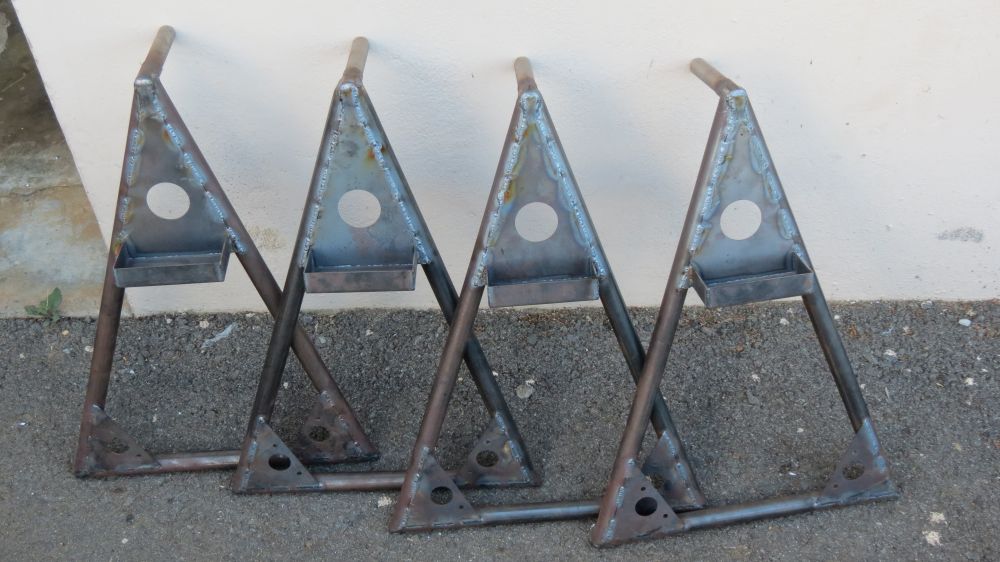 This being phase II of the sill stands due to the fact that I shortened the original stands as they were stupidly high and no jack in the Cape Town surrounds could lift it that high. In order to make it more practical but still at a comfortable height to work under the car they were shortened by 100mm. The bottom sill height from the ground once they sit on the new shorter stands is still +- 500mm, which make working on the car quite nice. 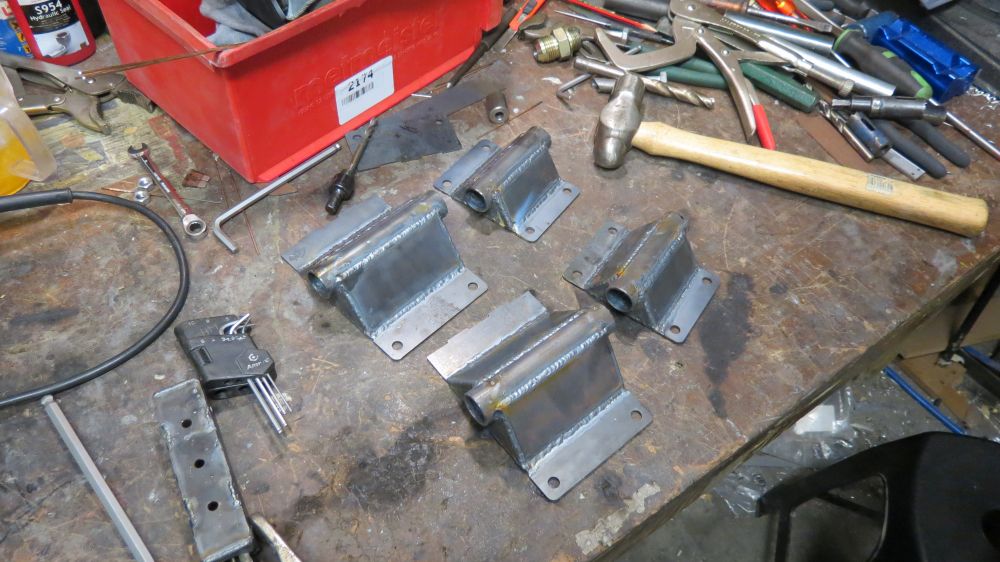 You will notice all the supports in the final product, first thing you notice is the top plate with the big hole, this piece also incorporates a little bucket to store wheel nuts out of the gravel once removed. The bottom part is strengthen with a plate on both sides, then the pin is supported with two pieces of plate to aid with the weight distribution. Keep in mind these stands must be able to support at least 300-400kg depending on how even the ground is. I have tested them with the full weight of the car plus driver with only 3 stands touching the ground.  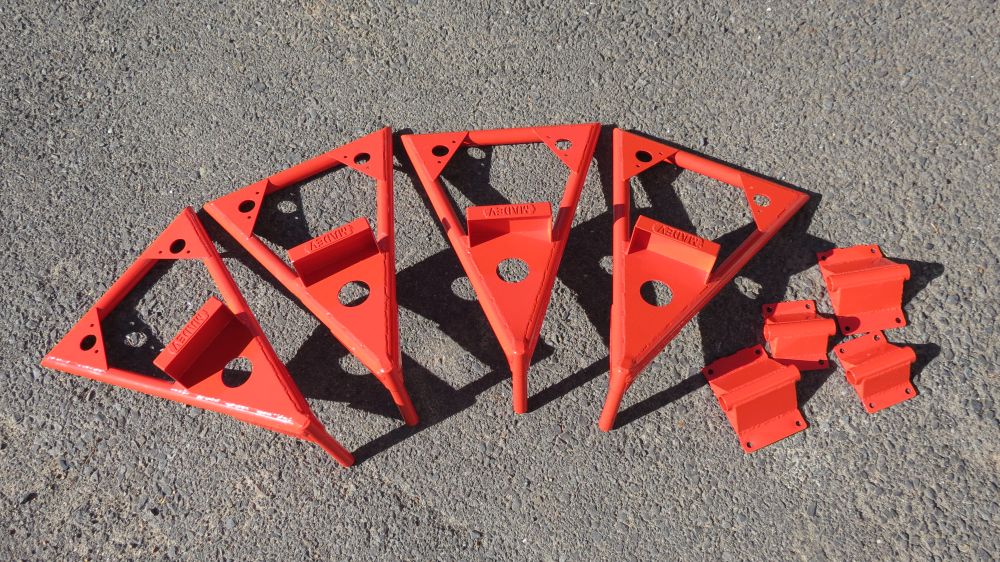 While all this was going on a set of brackets was also finished to bolt to the underside of the car, as I did not add these brackets while building the original car, I was not willing to weld on the sills, thus the brackets. All of the parts was epoxy coated by Metalseal Coatings in Parow with the same red as the front suspension parts. Since working with these will never again build my own racing cars without the ability to use these, no more crawling under the car to position trestles just to re adjust them as you lower the car. These you jack the car, stand next to the car while inserting the stands, yes you stand, lower the car, jack the rear, insert stands and lower, no more laying on the ground while looking lowering the car. Strut Brace    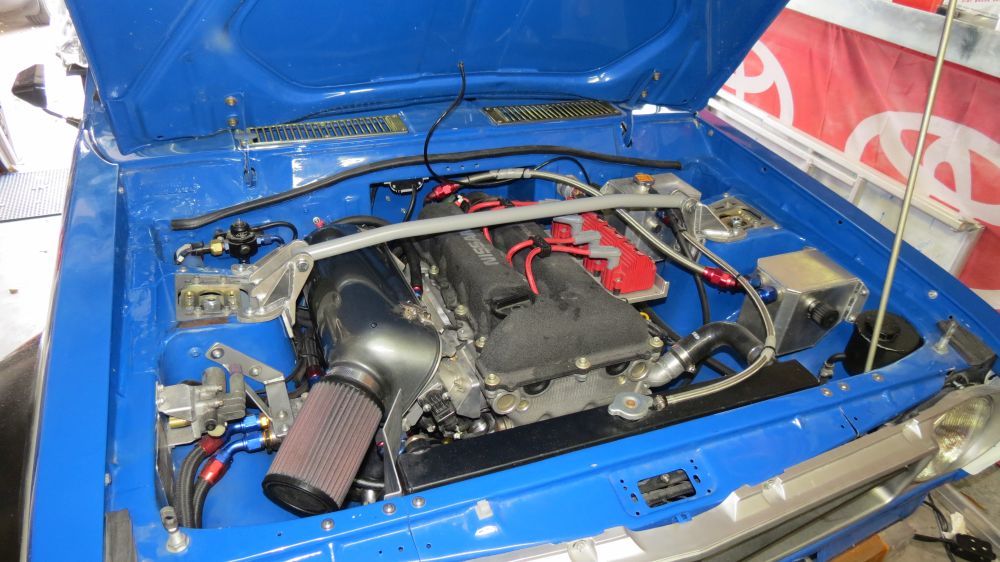 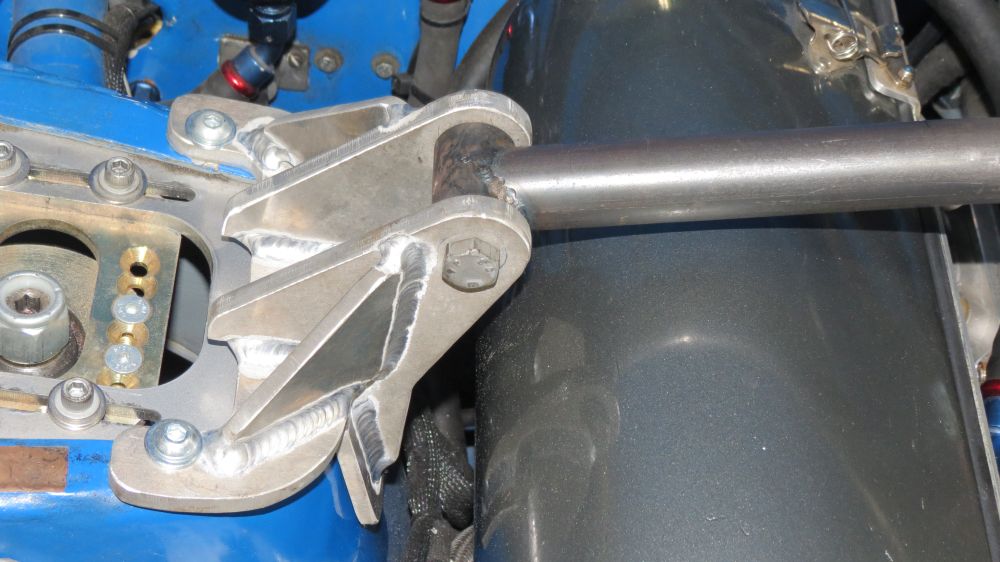  After spending almost an hour waiting for these strut mountings too cool down after the welder finished with them I could mount them and start planning the strut brace. Since we acquired our license for the popular Bend-Tech software, I was quite amped to test it on some in the real world but still simple enough to not waste a lot of steel, and the brace was the perfect job to test how accurate the software is, with confidence I can state that this software is and will be an assist in our garage for years to come. After everything was measured and designed in the application, it was a matter of marking the tube and bend as instructed by the software, once the tube left the bender the application provides the profile for the mitre. In my case the brace were to mate with a 25mm bush on the mounts, whipped out a whole saw and completed the mitres on the mill as the application instructed. The fit is perfect, I would recommend the software for anyone willing to learn something new to make their projects more accurate and easier. Brilliant piece of kit. Mud Flap Chains  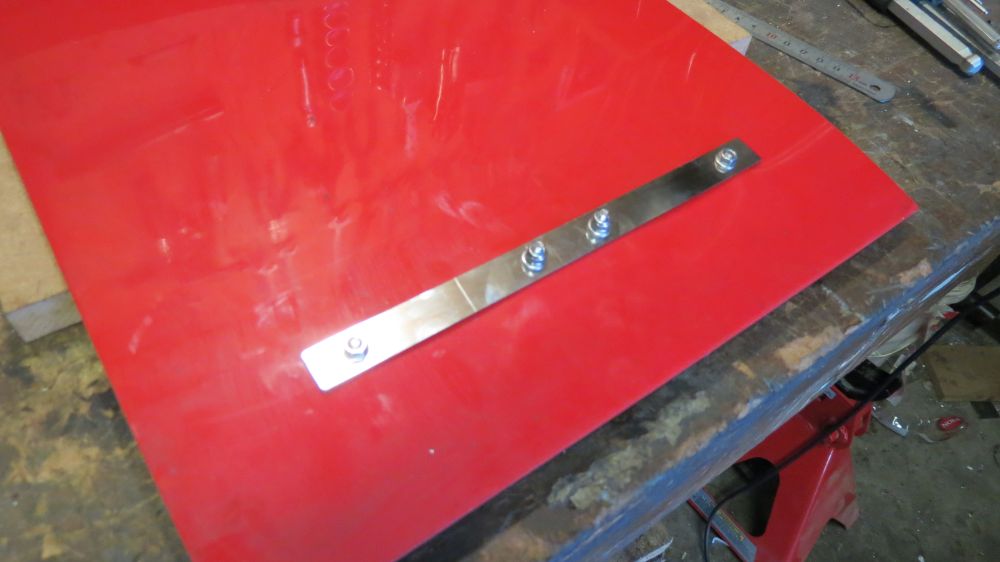  Seeing that the mud flaps were mounted with rally tires in mind, I had to make some sort of plan to raise them when using normal street tyres on the car. Eventually I settled on some small brackets I had cut and after welding, electro polished for a clean look. I used some 2mm cable and small snap hooks to attach to the brackets, raising the flaps enough to stay away from the wheels when reversing. Wheel Arches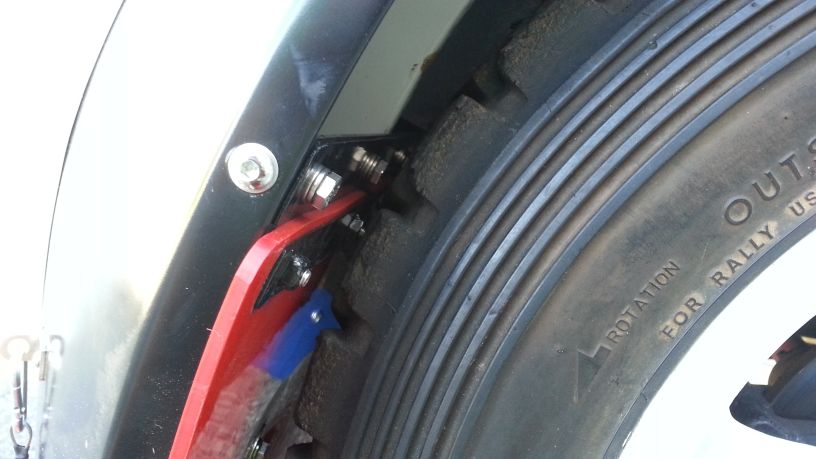 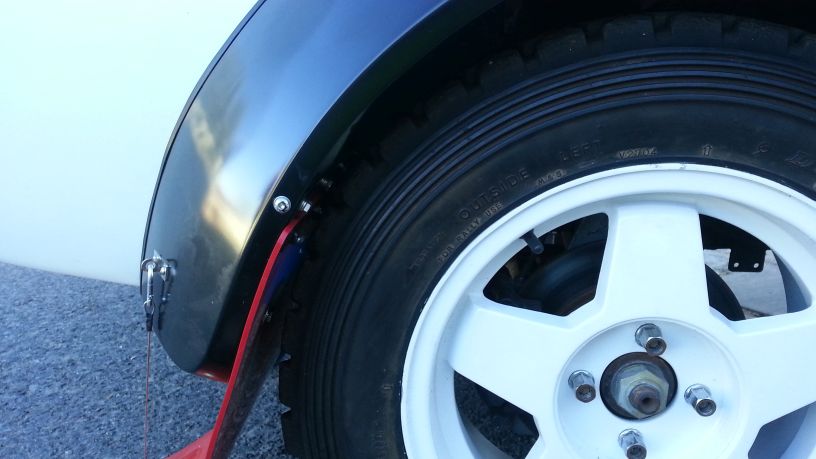 What an epic fail. Let me explain, as I was fitting the mud flap chains, all I could think of was taking the car for a spin on rally tyres for the first time, for me this was a big thing, well this big thing turned into a nightmare as I was driving down the driveway and the wheels caught the mud flap mountings and barely missing the front part of the inner arch. I was so focused on making space for the wheels to turn in front that I did not spend enough time on the back. This ended up in stripping the coil overs, marking the arches and removing up to 30mm of bodywork just to move the mud flap brackets backwards. Redesigned the mounting slightly and replaced all the normal bolts with button head Allen caps, all this for more clearance. The flare was also moved back by about 25mm. Once all this was done I had to make new pieces of flare that would be attached to the flares to fill the 25mm wide gap. This job was given to Car Boat Truck Mechanical & Bodyworks, they also managed to clean up the arches. Off-road Jack Build 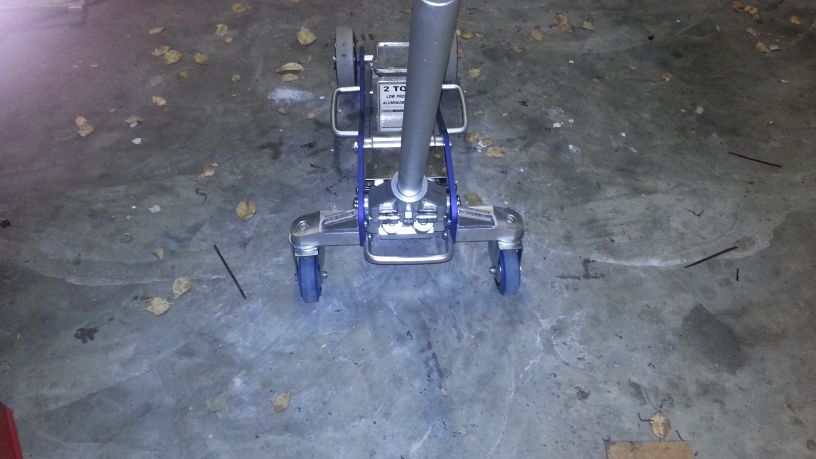 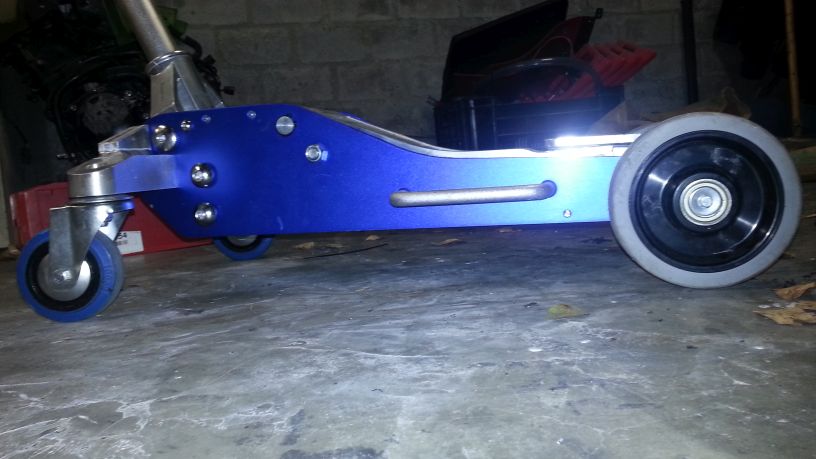 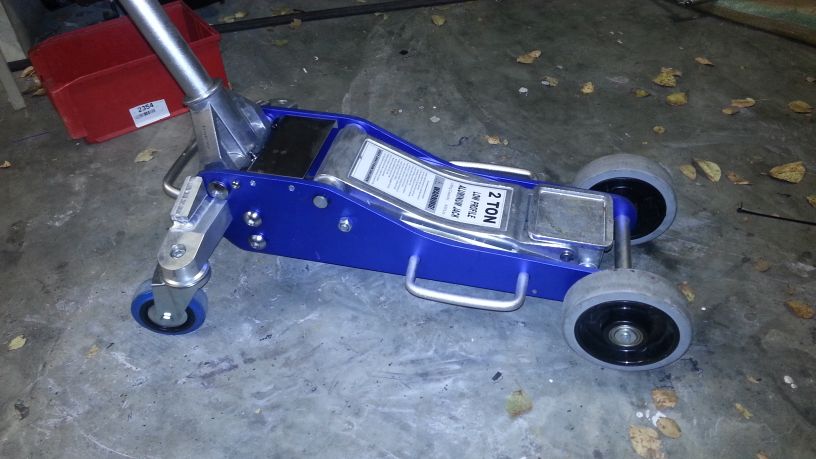   Seeing that my old aluminium jack wasn't up to the task to lift the car high enough to insert the sill stands, I had to purchase a new jack with a longer stroke. Since seeing my first 4x4 jack at one of the Adenco 400 off-road rallies I just knew I had to add the <a href=" http://www.madev.co.za" target="_blank">Madev.co.za</a> touch to this one as the standard wheels was just not good enough, well I ended with a set of front wheels rolling on two bearings each, the rear units was package for me in order to have a smaller mounting but still keep the bearing wheel. A few bushes further and the front wheels were mounted. The rear wheels was not that easy as I needed new mountings as the wheels was hitting the body of the jack when swivelling. I made some new mounts and had some extra supports welded on. The jack works very nice on all sorts of surfaces and is supper quite, only problem is the fact that you have to keep an eye on it, if you do not park it really good it will literally run away without you knowing it. Next steps for it is to make some lifting shoes with rubber that is the correct height to avoid using spacers between the jack and the body of the car. Decals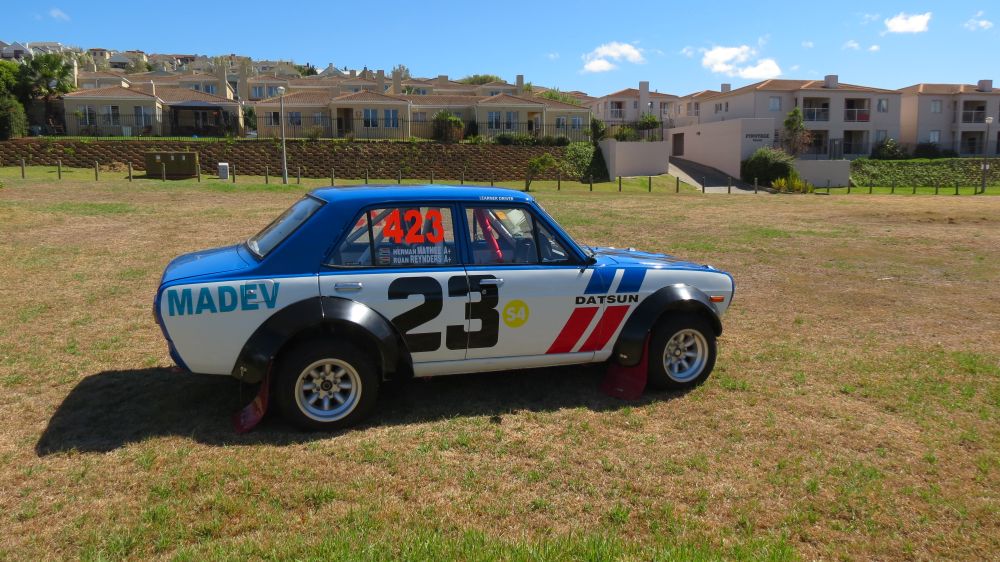 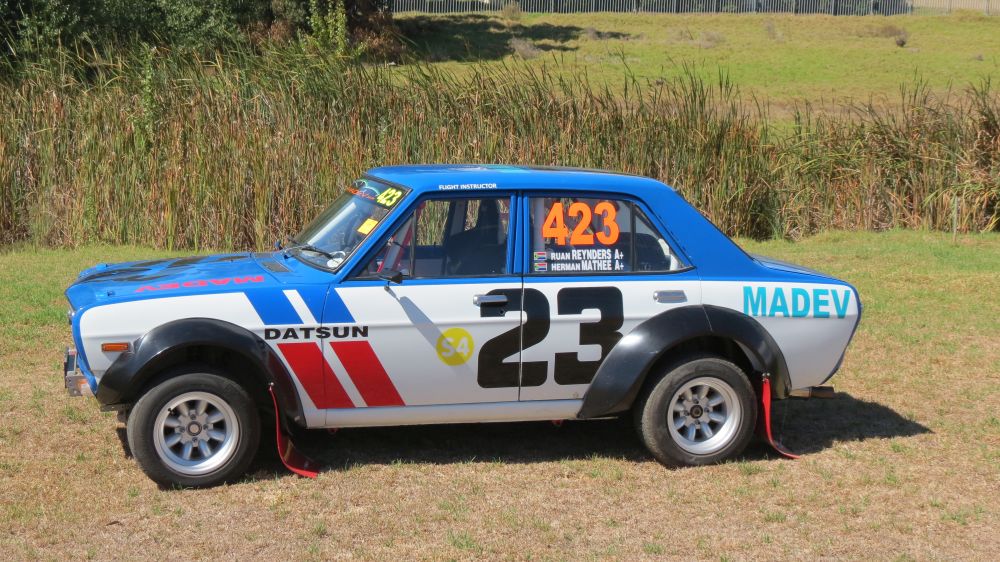  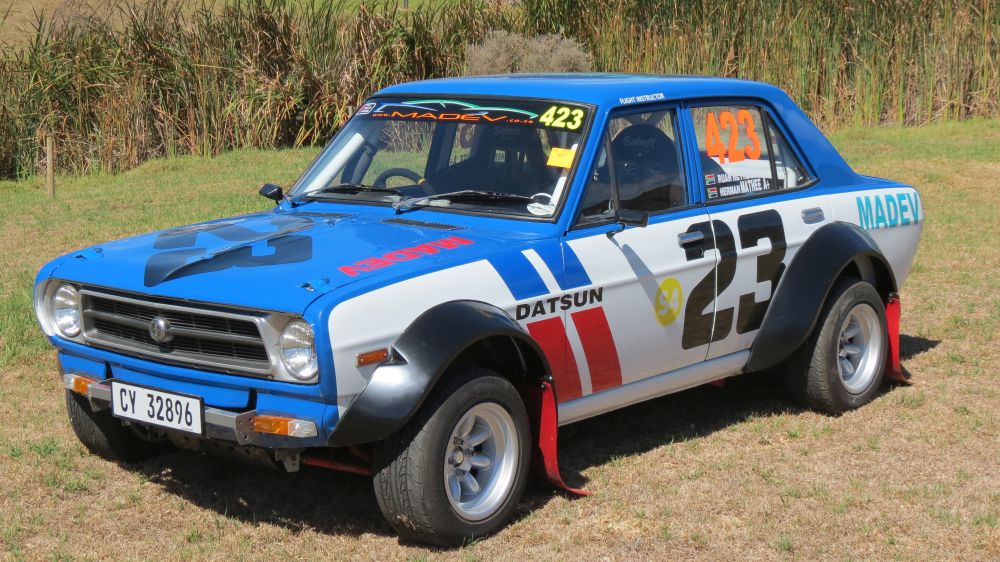  Since the beginning of the car the paint scheme was set as being something in the line of the old BRE Datsuns, seeing that I like blue much more than red, going with a blue roof was a no brainer. Having completed the majority of the mechanical work it was time to start with the stickers. As I'm not that creative, my brother helped a lot with the vinyl. Sizes was a very important thing as we started looking around a little and noticed way to much small high detail work on other cars that just disappear with distance and speed, we opted for the simple and big approach for the stripes and numbers, the smaller stuff will be visible at speed and distance but not readable, for that I invite you to come a little closer. A few smaller changes will be made when time allows as white pin striping around the black numbers and a few smaller support stickers. Odds and Ends Dimple Dies Dimple Dies, don't you just love the way a few dimple dies in a project can set it aside from others, I just had to start playing with making my own as I do not know a place in the country selling them. A little more changes and I'll have the math all worked out and be able to make a full set. 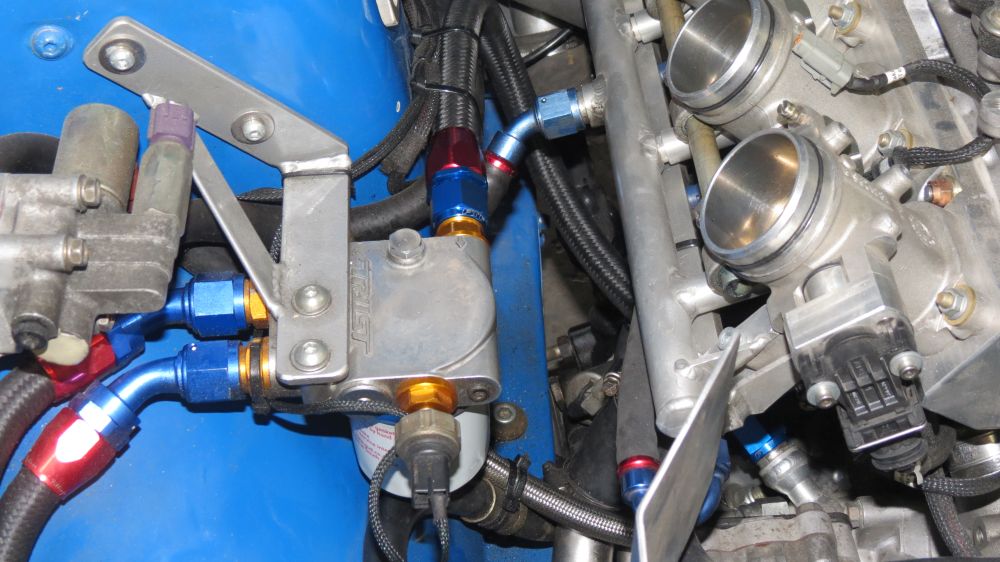 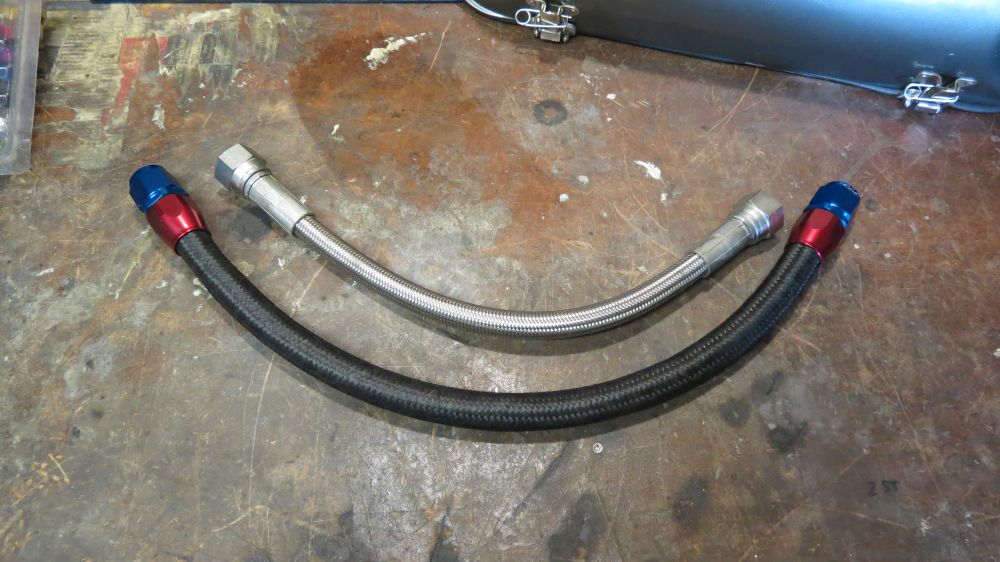 Oil Pipe Oil Pipe, since helping a client with his racing cars plumbing, I ordered a few more fittings and replaced the oil feed from motor to remote filter with a lightweight nylon braided pipe.  Suspension Limiters Suspension Limiters, as I have so much suspension travel I have to limit the travel in order to not damage the CV joints and rack ends, as a temporary answer I crimped some 2mm cable to keep things from travelling to much. I'm well aware that this is a temporary answer and will have to be replaced with something more robust.  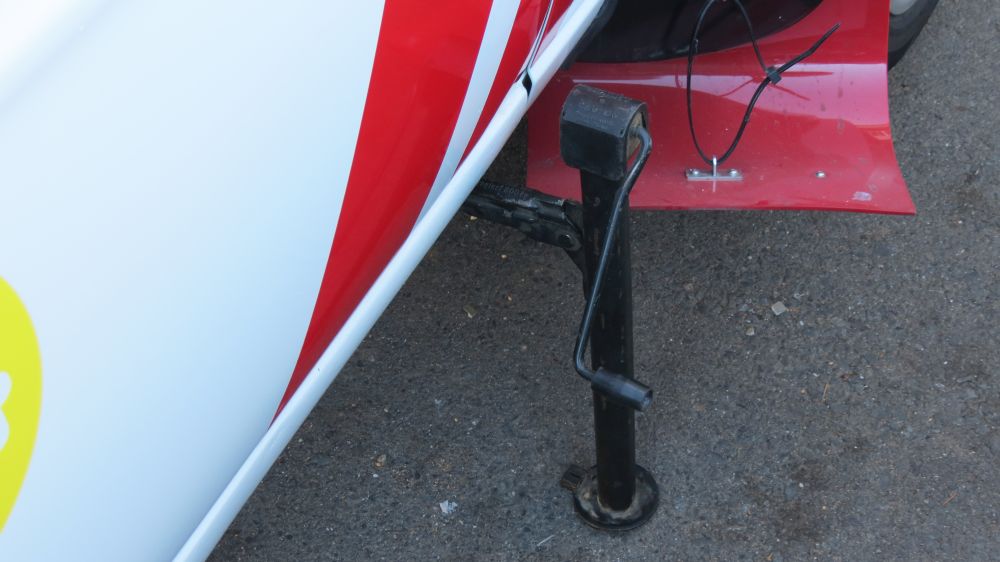 Rally Jack Rally Jack, seeing that I now have sill stand brackets in place on the car, I have a wider scope for sourcing a OEM type of jack with a huge stroke to lift the car in rally configuration in one go, the answer came in the form of a BMW E36 unit that needed only slight changes to fit my brackets. As you can see here it works nicely with the 13" wheels, only time will tell if it will work on the 15" rally wheels. Polycarbonate Windows, all the polycarbonate needed to replace the side and rear glass arrived, even the polycarbonate air vents arrived from the UK that will help keep us cool and also aid in pressurizing the cabin to keep the dust at bay. This will only happen the upcoming months as time is limited. All this will mean I need to redo the stickers on the rear windows. But seeing the ProSigns that originally done the current ones are too good to answer emails or phone calls. I think they should rather close their doors or learn to read emails. Probably filthy rich as they don't need business. The owner of Sticker King in Durbanville agreed to help me out with the new stickers as he heard I was struggling with the likes of ProSigns, thanks a lot Lourens. Whats next: the first rally event will be at the end of March on my birthday, how lucky can I be, hopefully we will be able to do some testing on the track and on some actual gravel before that.
Posted on: 2014/4/11 8:51
|
|
|
|
|
Re: racetech's 1200 SR20VE Project |
|
Home away from home Joined:
2009/4/16 10:37
From Cape Town, South Africa
Group:
Registered Users
|
December 2013 Rally PrepSince the car returned from Rezlo in Port Elizabeth, I'm pretty sure the fuel pump circulated more fuel between the two tanks than through the fuel rail. Which is actually quite a pity as the car is so nice to drive, but there is work to be done which take priority over driving. Fuel TankThe last month or two I was quite busy with a few things, one being the fuel tank which received a complete redesign. First the top cover was completely cut off to expose the internals, which was nothing more than a piece of foam. With the current worked planned for the tank there were 3 things important that needs attention namely: 1. Fix the leaking remote filler flange that is welded to the tank - this was an easy one, it just needed some welding on the inside which was previously inaccessible. 2. Design and install an internal surge tank, which will eliminate the need for the noisy low pressure pump. 3. Install a separate fuel level tube which will enable me to have more accurate fuel level readings 4. Then slow down the movement of fuel by installing baffles. 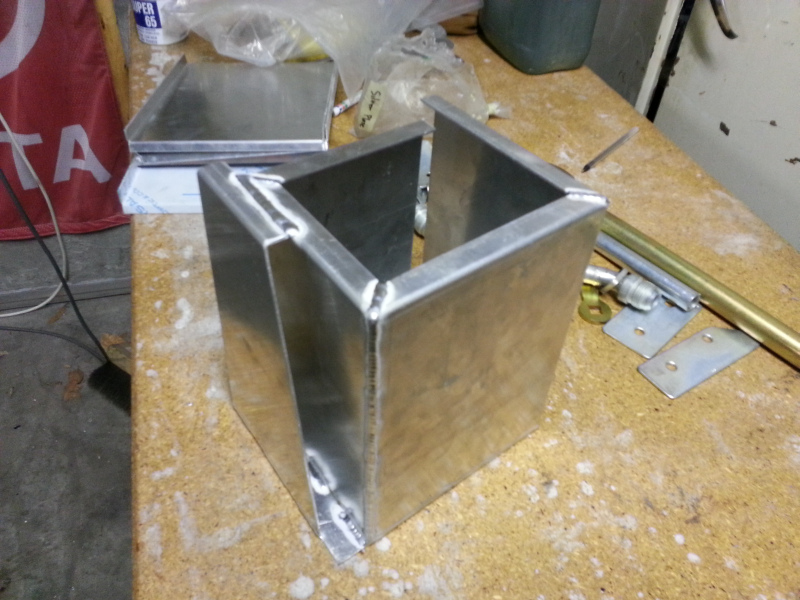   The idea for the internal surge tank came from the LocostUSA Forum one of their members stumbled across the idea after seeing the inside of a Honda S2000 fuel tank, it is basically a maze were the fuel can enter but not exit without following the maze outwards. 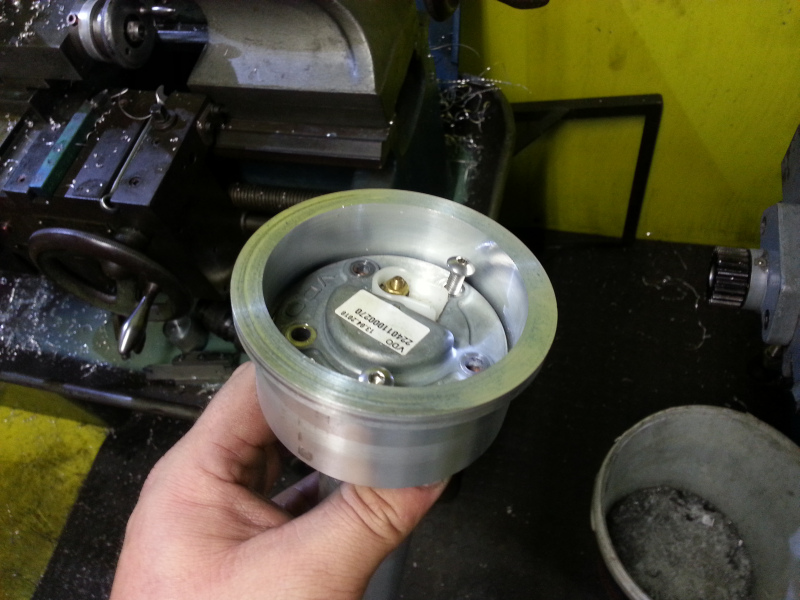 While I was at it, I also decided to remount the fuel sender lower in the tank to read more accurate low levels than full and fit a baffle tube around the sensor with a small hole to be slightly more accurate while the fuel is moving around. 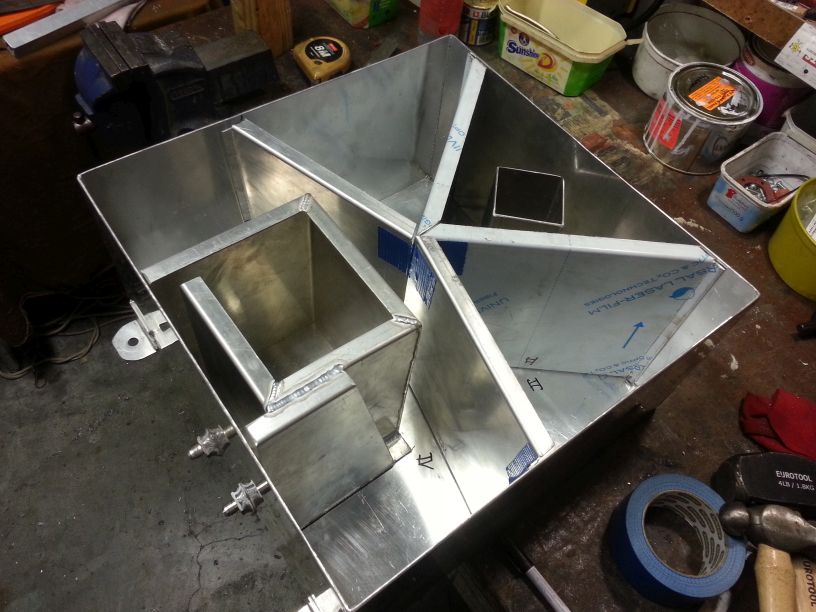 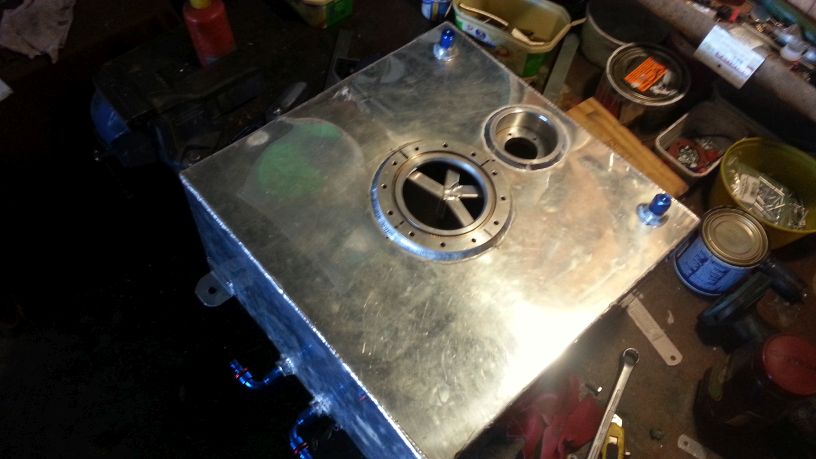 Since the tank was open, I opted to add a few baffles to slow down the fuel movement in the tank. 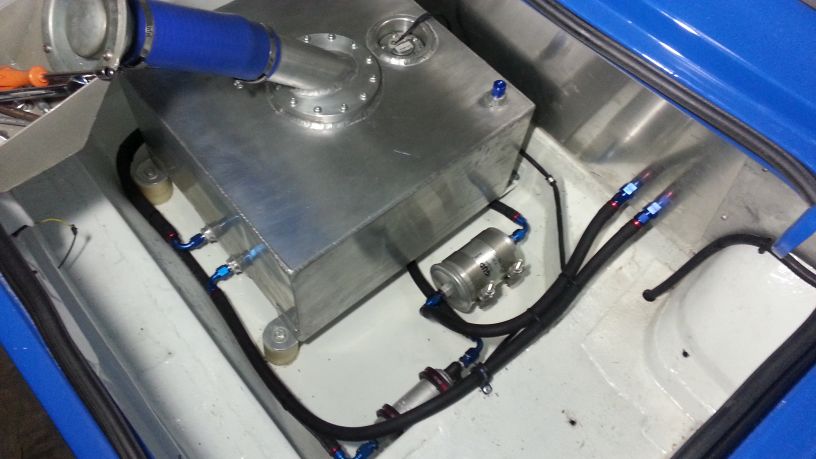  Since the surge tank is now located within the tank, the low pressure pump was removed and the pipes had to be redone, this time around all in AN push lock fittings and pipe. Boy I love these AN fittings, but they do have the tendency to ruin the amount of spending money left. I do like the look of the new design, very clean and tidy. Hopefully the tanks works well when the fuel is on the low side, otherwise it will be back to the drawing board or re installing the surge tank. Strut Brace 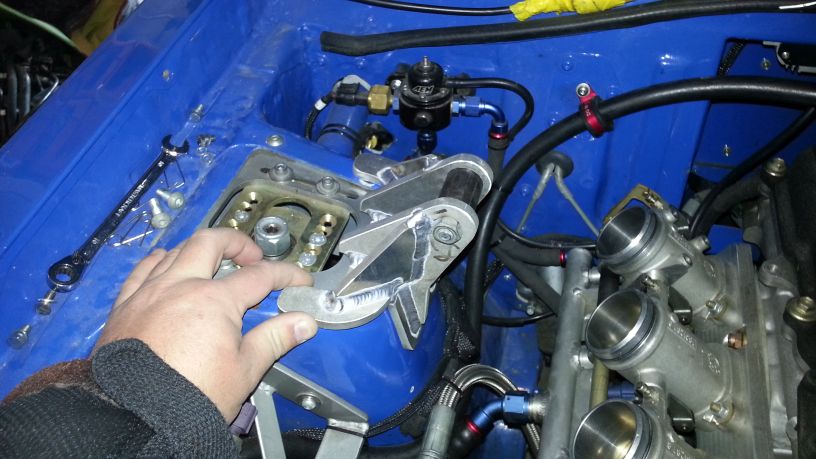 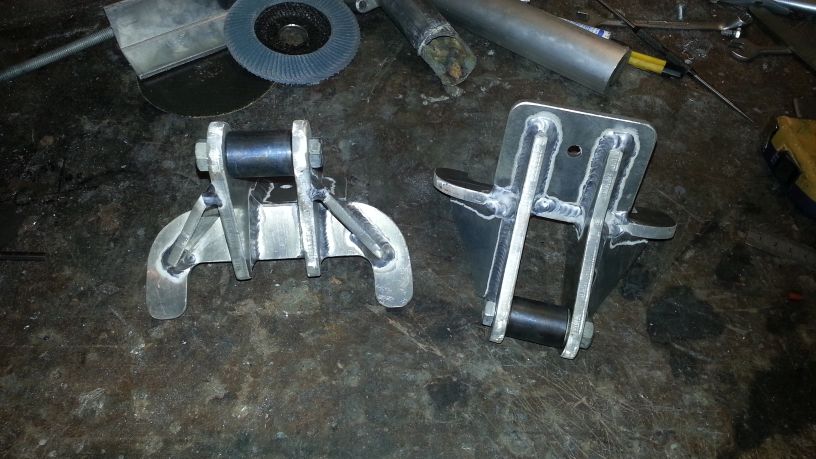 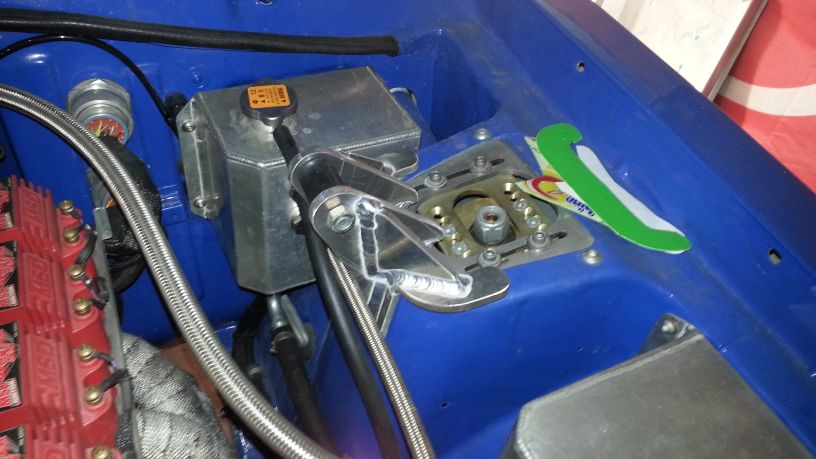 During the design of the fuel tank, I also included the drawings for the strut brace mountings. Quite allot of plastic and paper sheets was sacrificed to get to the final design that would clear the air box and plumbing. The next best thing after billet parts is parts that is welded by an expert and not covered or smoothed away, these are some of them. Some would say they are overkill, but I think they would do the job. Mud Flaps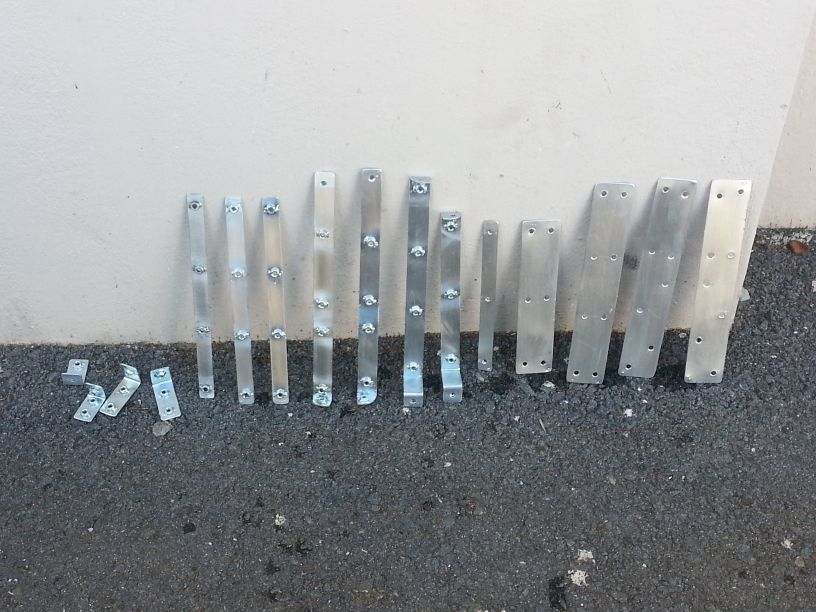  The mud flaps being the most important item on the to do list before rallying the car, work had to start. First I stumbled around with a few ideas of mounting them, had some strips metal cut, and obviously once I started everything changed. At the end f the day I settled for a very simple but effective way of mounting these, I just hope it does not destroy the arches, only time will tell. First I made a bracket that fastens to the arches on the one side and the other on the inside of the wheel arch. 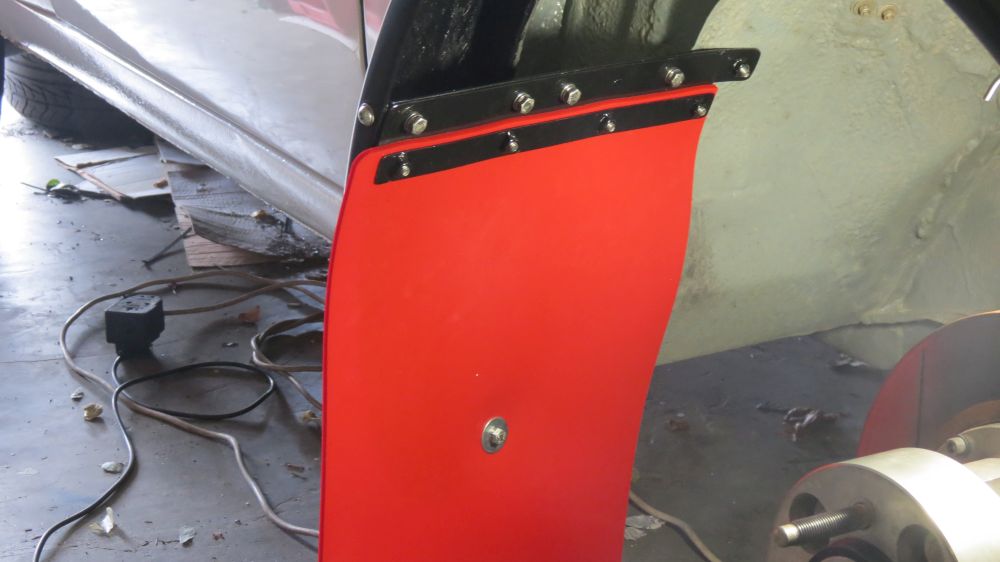   On the mud flap itself I made a mounting bracket to hold on to the flap and then fastens to the bracket a<span style="line-height: 1.5;ttached to the vehicle. This way I can adjust the height of the flaps by just making a new back plate. Then the flap is pulled away from the wheel with a single bolt to not damage them. This is probably going to be the headache area, but we first need to use the car before I can judge.</span> A few small things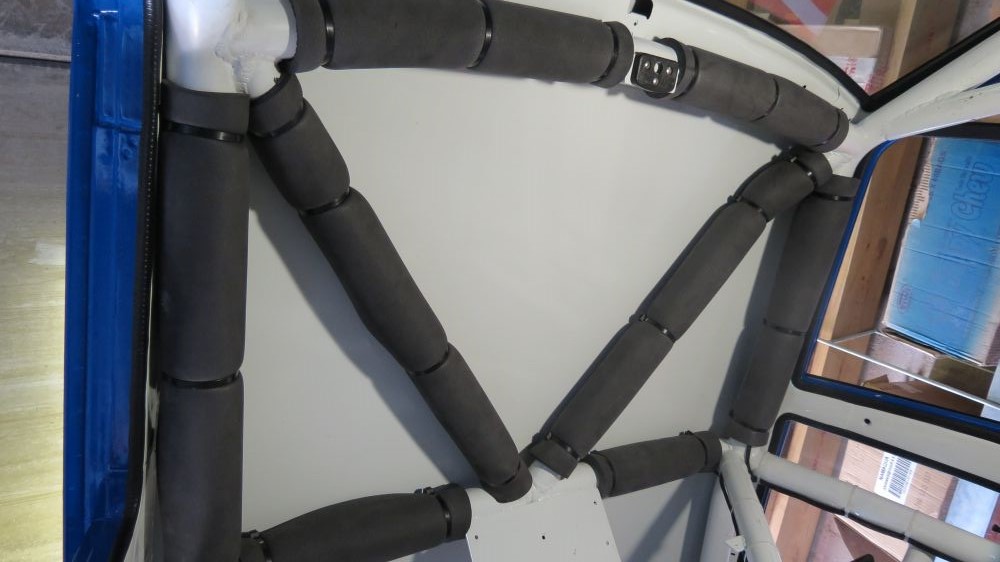 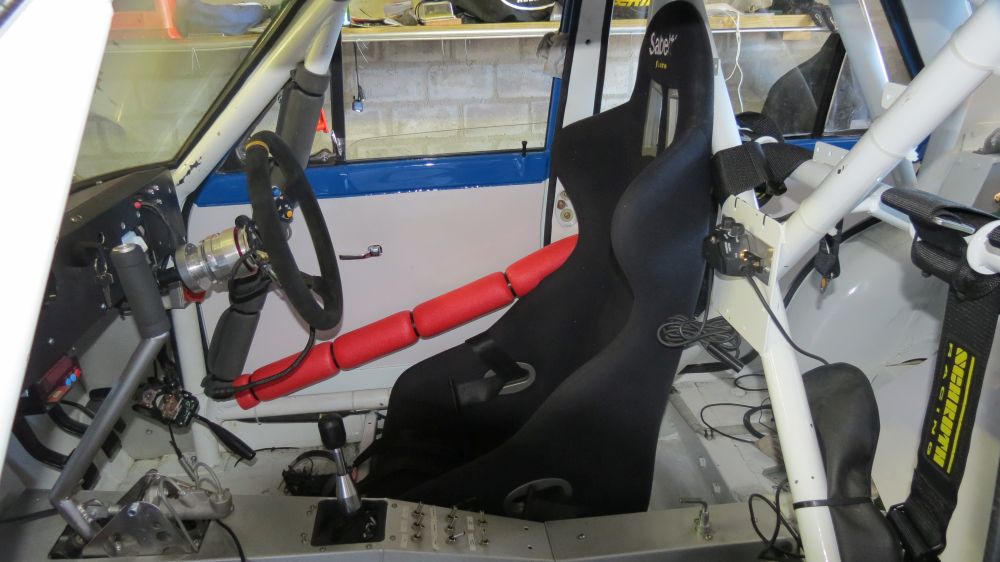 Since head room is a issue, but since the seats are mounted lower it is better, but I'm still not willing to waste space, I found some older roll bar foam which is thinner than the newer designs, these were used everywhere above the head. Finally the rest of the roll cage that could come in contact with body in a accident was covered with the newer design padding. 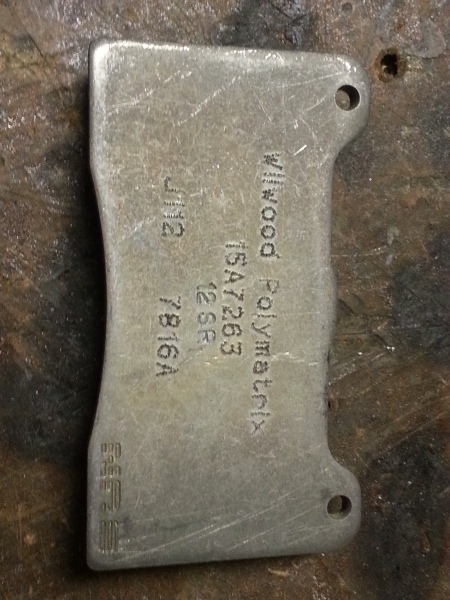 A set of Wilwood Polymatrix A compound racing pads found their way into my hands. Changing pads on these callipers is a joke, it takes longer removing the wheel than swapping the pads. These pads are magic, very good low temperature friction and good high temperature friction with minimal fade, just have a look at the comparison chart from Wilwood: http://www.wilwood.com/BrakePads/Brak ... x?compound=PolyMatrix%20AWARNING: I do need to warn everyone considering using these stuff, it is a nice pad, but I would not suggest these for non-motorsport use or any usage were a helmet and balaclava is not used as they squeal very badly, so bad you will not know when they are worn out as it sounds like metal on metal constantly while braking. Imagine you stand on a train platform and the train stop, take that squeal, times x 3 and you have an idea how bad these are. Maybe another way of bedding them in will help, but I'm not convinced.   I also had a navigators footrest bend, this piece would have a double purpose, one being to provide my navigator with a nice even surface to keep his feet on and the other to form the basis to mount a cover over the fuse/relay box. But from the pictures I can see that the right support is going to become a challenge. 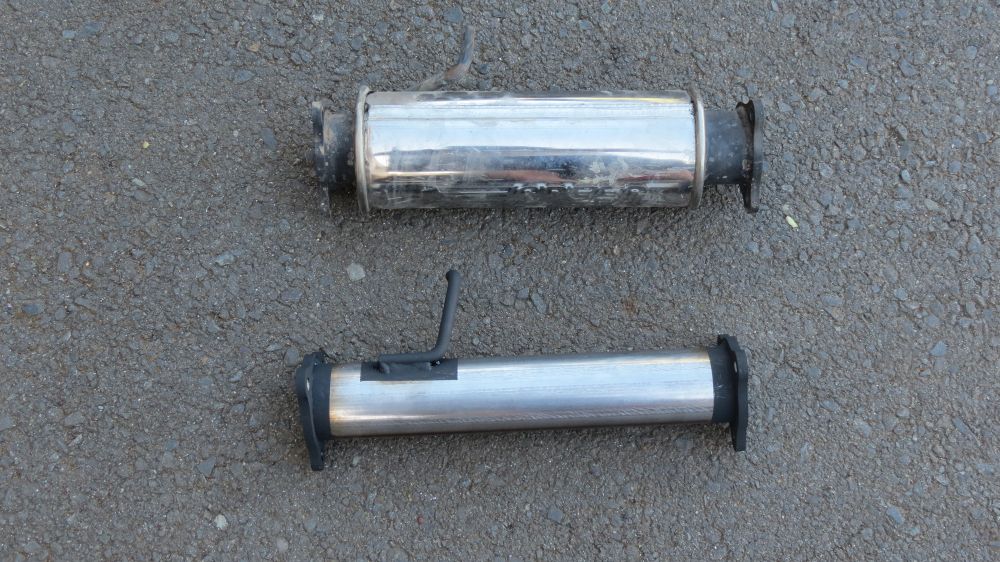 My brother also told me the one day that the car is way too soft. I decided to remove one of the 3 exhaust boxes, since I had spare flanges cut a while ago it was just a matter of removing the box and make a pipe up that replicated the old box. I must say, even with this box removed the car is still very soft.  I also managed to mount the tow hooks for that difficult situations.
Posted on: 2014/3/13 10:55
|
|
|
|
|
Re: racetech's 1200 SR20VE Project |
|
Home away from home Joined:
2009/4/16 10:37
From Cape Town, South Africa
Group:
Registered Users
|
Datto Build - November 2013 - Wings and Wheels 2013What a busy time of the year, or is it just me, maybe, but the last few months was crazy, fixing the fueling issues, trying to get the car ready for its first official public debut at the 2013 Wings and Wheels Air show and fixing my biggest fail on the car to date, not that it was any easier last year, last year I was trying to get the car ready for roadworthy. Let me share with you the last few months, as you would remember the car returned from Port Elizabeth with a fueling problem that was diagnosed with the help of decent management. Fuel Tank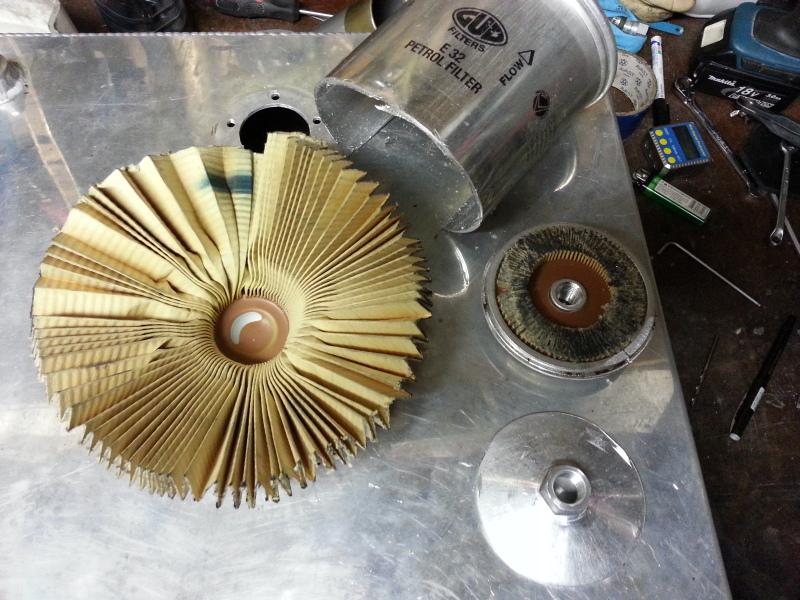 While I knew exactly what the cause for the fuel starvation was, I had to figure out how far the small pieces of rubber traveled, I basically took the whole fuel system a part washing and flushing everything out, luckily for me I did not find any pieces of rubber on the outlet side of the first filter. I even went so far as to cut the whole filter open to make sure this thing did its job.</span>   After a quick visit to the local metal shop I walked out with two disc and a piece of round bar as pipe is only sold in this country in 6m lengths, which meant I was going to make a pipe out of a solid bar of aluminium, coming to think of it, quite retarded, but this is Africa and we should make do with what is available. The plan with these were to turn two flanges that will seal on top of each other with a nitrile O-ring between them, seeing that nitrile O-rings is not unobtanium, this should be a good solution. Once all the work was done on the lathe, I drilled the holes to be tapped with M6 thread and this is where I made my first mistake as I would discover later on, which also led to a total redesign of the fuel tank. Everything was welded by my trusted aluminium welder called Gerrie, this man is probably going on holiday with all the money I have so kindly donated to his power bill over the last 2 years. Once everything was assembled I could at last enjoy the car, well until I filled the tank for the first time to capacity and noticed that the fuel is still leaking past the bolts this time, you remember what I said earlier, well this is it, I opted to drill the holes thru the bottom flange for tapping, because the flange was just welded on the outside fuel was able to seep thru the holes as they were on the outside of the O-ring, well just another fail moment that I learned from. All in all this only meant I have some more thinking to do, not fill the tank and finally enjoy the car, I would just like to say, thanks Ian from RAW for all the patience and the mapping of the car, what a joy it is to switch on the ignition, check that the neutral light is on, turn the key and it fires to life, idle control making sure idling is spot on without human intervention. Now to get rid of the crappy induction sound when the VVL is activated, it sounds bad, maybe it sounds better on the outside, but in the car I'll rather listen to the navigator telling me how he is going to get rid of the oil leaks on his Ford. Rims  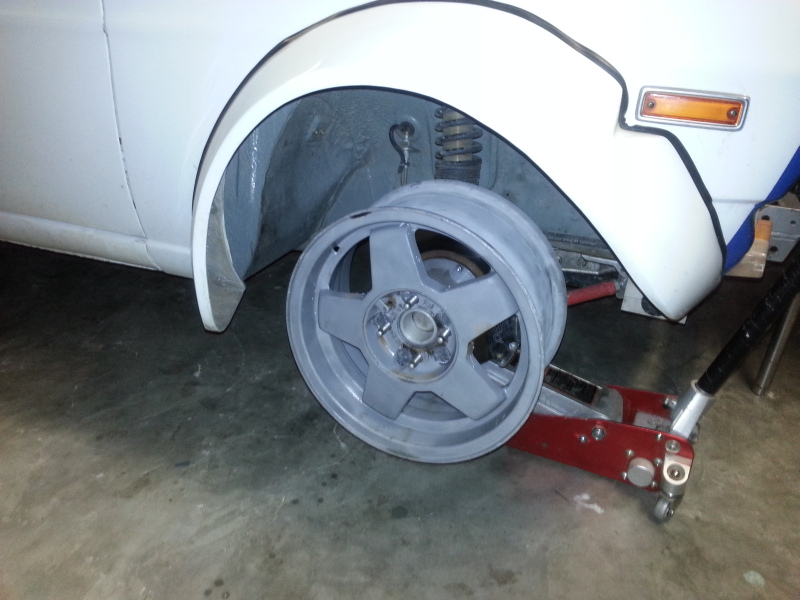 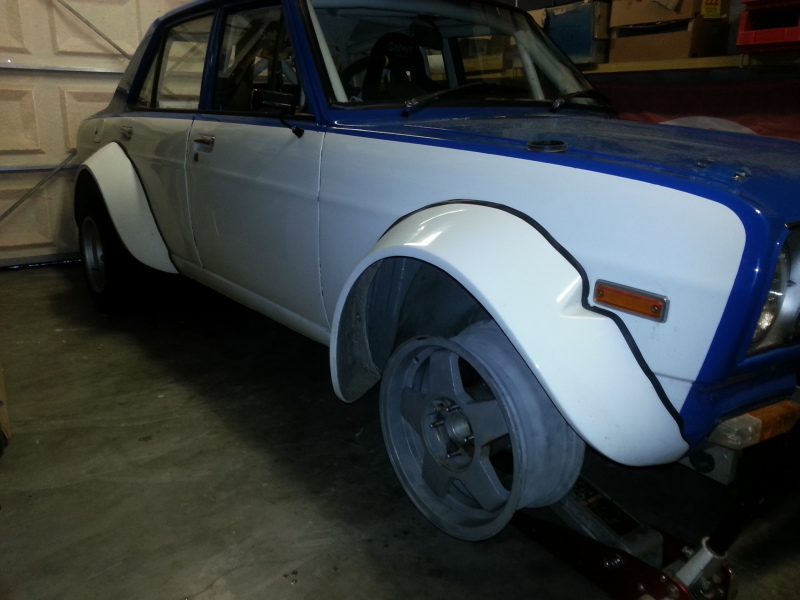 Seeing that second hand 15" Dunlop Rally rubber is available and also more or less the only second hand parts filtering down from the National competitors, it is the obvious choice to use these if you want to keep running cost to the minimum. I opted to use genuine Volkswagen Microbus rims as there offset is good and they somehow looks the part as an old school rally rim. Yes and yes I hear all the critics going but they are 5 hole xyz PCD and it will cost a lot of money getting them converted to 4 / 100pcd, you could rather buy a set of rims of rims at the local "mag" dealer and it would be cheaper. First off all, in total I need about 16 of these rims so the proper Speedline/Compomotive rims are a big no no, secondly I'll rather use steel rims than buy these fong kong wannebe reps for xyz just to say I have rims. These rims are very well made and there construction is strong enough that I believe they will survive rally at my level. First they were send to Worcester to be sandblasted and then off to the "Aluminium Welder", again I could have spent halve the amount of money I so kindly donated to his holiday budget at a other place, but what is the use spending the time, money and effort searching for a strong rim and then throwing all away trying to save a few bucks, only the best welding on the old holes would be good enough. Seeing that we have bought all the necessary equipment to drill the holes, I decided that will be the way to go, even if I needed to make some decent extensions to allow the rim to fit the rotary table. Afterwards they were send to the "Wheel guy" for some TLC and a coat of white paint.</span> Seats    You may be wondering what I'm about to do to the seats as they are already mounted etc., well the mounting part is the issue, get ready for this as all my friends are still laughing there arses off about this, but heck, how else will you learn. What did the oke with the clever words say; "It's not about how hard you fall, but how fast you can stand up.", well that is exactly what I did. Let me tell you what I like to call the biggest fail on this whole project so far. A while ago I was sitting in the car and my brother is like, "have you sat in the seat with a helmet on, seeing that there is not a lot of space between your head and the roof/roll cage". This prompted me the other day to get the helmet out of the cupboard, and get in the seat, well I was actually very upset once I learned this is a death trap and I started to make plans to get the seats mounted lower. 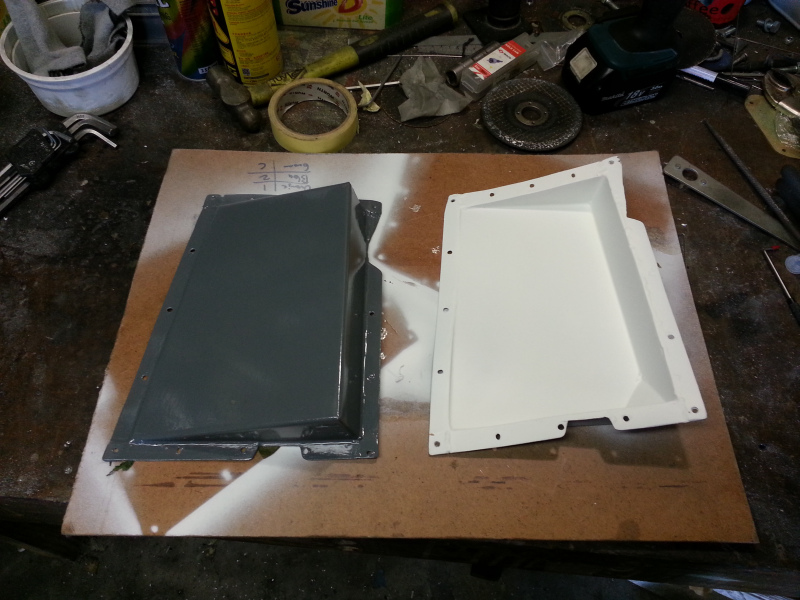  First off all I had to remove everything in the car that could be damaged by the sparks that was about to fly from the grinder. Once everything was marked off the sparks flew, once the dust settled and everything cleaned, I measured the sizes of the holes and had some buckets cut & bend to make the hole job easier. A few months ago I imported a set of glecko and finally this was the opportunity to really use them and see if they are worth all the fuzz being made about them in the rest of the world, and yes they are worth every cent spend on them. Some strips of sheet metal was cut and drilled to form the basis to fasten the buckets to the gearbox tunnel. First they were tack welded in place, then fully welded on the bench, removed all the excess material, prepped, painted and finally installed, the one even needed a relieve for the exhaust as I wanted the most amount of space to get the seats lowered.  Finally I made some quick high adjustable feet in order to measure each brackets height exactly as the cars floor is not the same height. After taking refitting each seat probably 15 times all the brackets was done, with only one of the 4 brackets per seat being mounted permanently, you will also notice 5 holes 12mm apart, they were just added for possibilities, currently I have the navigator seat installed at the lowest possible setting and the driver seat at the second hole from the bottom as the extra 12mm does help with visibility all this sitting very low in a car is very new to me. All in all the seats ended being 80-100mm lower than previously, this means about 30-40mm clearance with a helmet and roll bar padding sitting very upright, a lot of work further, but I'm happy. FAIL eliminated. Steering Wheel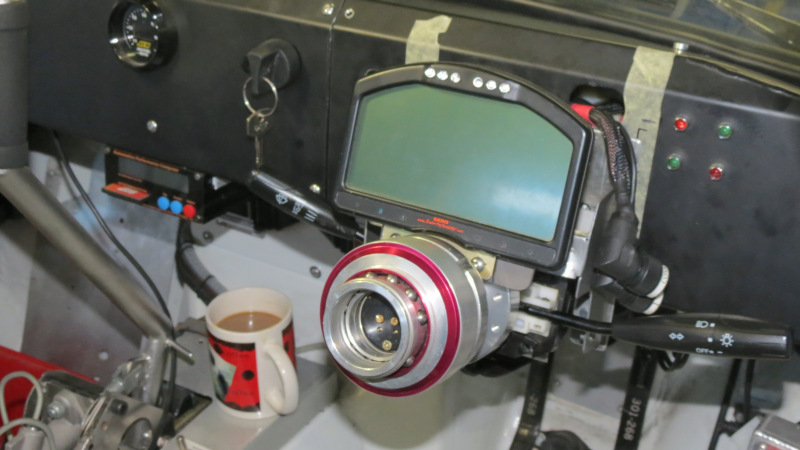 Obviously by lowering the drivers seat by almost 100mm will have a few knock on effects in regards to the steering wheel location and then the steering column switches and then the digital dash and then the cover for the dash. How does the saying go: Life is a journey, well lowering seats is also a journey. I'm not going into huge detail on his, but I basically turned up some aluminium spacers, milled them to the correct angle in order for the steering wheel to sit low enough but also at the correct angle.</span>   Once this was done, it was time to move the bracket holding the screen and switches in place lower, this was done by adding an intermediary mounting plate between the dash and bracket, cut away some metal, made new screen mounts and went to work making a template for the cover over the screen, it was then traced down on a piece of paper and proceeded in making a CAD drawing of it. The cover was plasma cut out of 1.5mm aluminium and sprayed matt black to blend in with the rest of the dash.</span> Flares  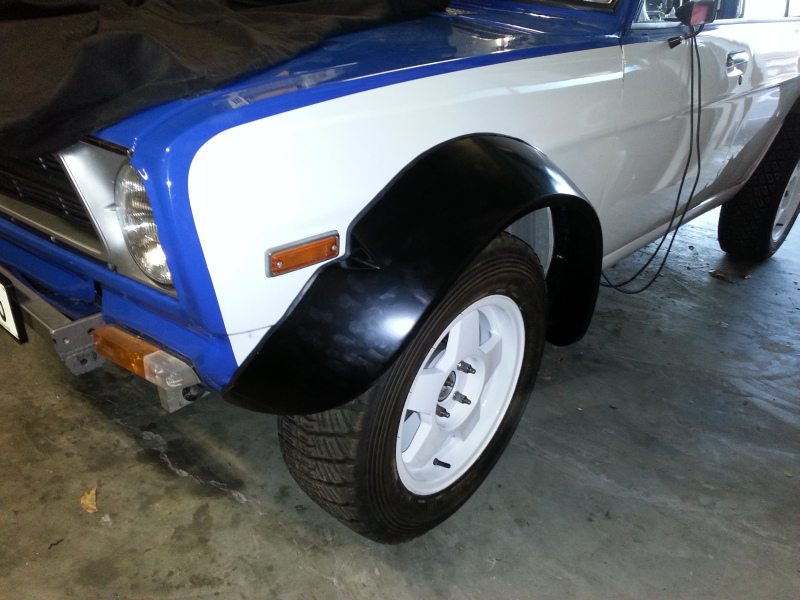 Just after I picked the car up after mapping my father and brother took a few pictures of the car from behind as this was the first time that one of us was looking the car from behind while on the road and the white flares stuck out like a sore point. Since the last update Car, Boat & Truck Mechanical & Bodyworks came on board as a bodywork sponsor, they will keep their eye on all bodywork to keep Datto looking neat. The flares was removed cleaned and dropped at the owner Chris Gillomee, Chris quickly knew exactly what I had in mind and jumped at the opportunity to mix up a special batch of Matt Black, a few days later the paint was cured and on first site I was very happy, the relationship between matt and a slight sheen was perfect, thanks Chris and the whole team from Car, Boat & Truck Mechanical & Bodyworks out in Triangle Farm that made this possible. Please give Chris Gillomee a call if you need any bodywork or mechanical work done on 021 945 4105. While youre at the shop ask Chris to show you his pet project Tiger 1. I must admit, I'm very happy I took the plunged and changed the colour on these, the matt looks at home. Wings and Wheels 2013   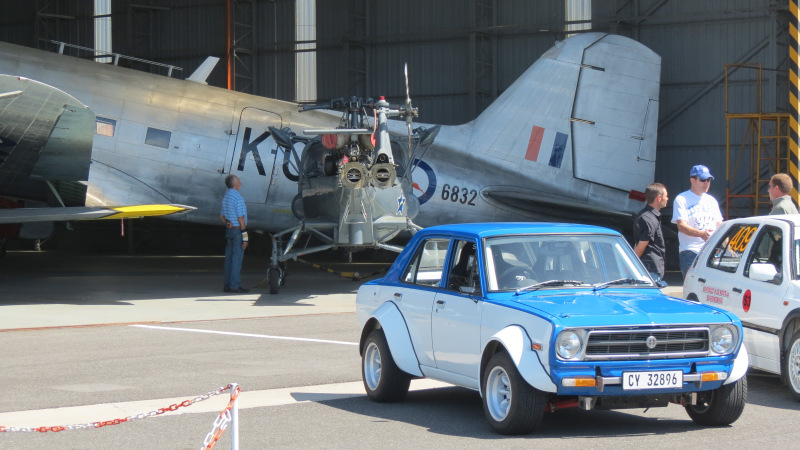 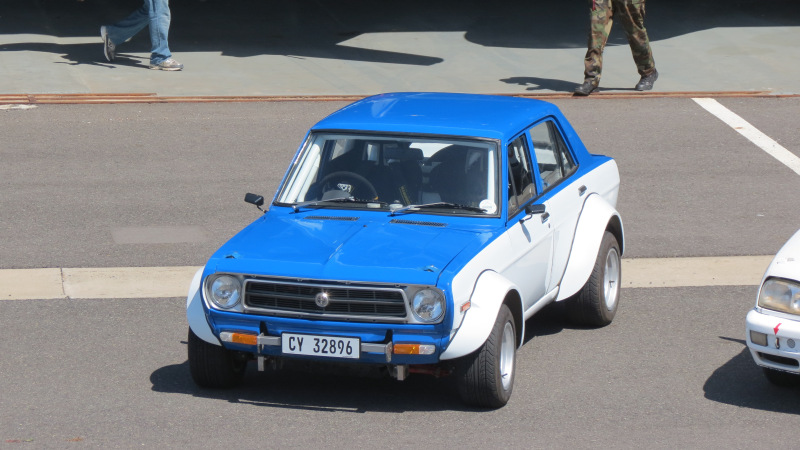  Well well, what can I say, while all the above was going on I was invited to display the car at this years Wings and Wheels air show, for me this was quite an invitation as someone out there is recognizing the time and effort that is going into this little car, needless to say I even went so far to re install the old seat mountings just to attend a pre shoe photo shoot, about 4 hours of work just to get the car roadworthy, cleaned and able to drive there. The car even performed better than the Golf's, as you can see in the photos, the one group tried jump starting the one no less than 3 times, the other group tried keeping the oil between the sump and Spidermans feet. All in all a very fun day. Seeing that this would have been the cars first public appearance in front of thousands of people I worked my arse off to get everything as I wanted it, this meant after work each day at least 4 hours, every Saturday and Sunday, it felt like work, the fun was removed, just job after job and no joy. ..........................................and then the xxxx hit the fan, the event was cancelled, at first I wanted to shoot some wise ass politicians plane out of the sky, as the word on the street was that the show was cancelled due to political reasons, well to this day it is still not officially known why the event was cancelled. My heart goes out to all that helped organize the event to the point (a week or two before the event) where it was cancelled, what a slap in the face. Thanks for the invite Patrick Vermaak, next time.
Posted on: 2013/12/20 11:01
|
|
|
|
|
Re: racetech's 1200 SR20VE Project |
|
Home away from home Joined:
2009/4/16 10:37
From Cape Town, South Africa
Group:
Registered Users
|
unfamilia, I do agree with that statement, but I see it as a learning curve, everything I redo I try to make more accessible and easier to work on in the future.
Currently the fuel tank is in pieces waiting for some attention.
I'll be the slow one at the back trying not to bend the car on it's first outing.
Posted on: 2013/11/12 9:53
|
|
|
|
|
Re: racetech's 1200 SR20VE Project |
|
Home away from home Joined:
2009/4/16 10:37
From Cape Town, South Africa
Group:
Registered Users
|
[quote="townie"]But I don't get what slipped in your post?????
I do not understand what you mean with slipped in your post.
Posted on: 2013/10/29 13:03
|
|
|
|
|
Re: racetech's 1200 SR20VE Project |
|
Home away from home Joined:
2009/4/16 10:37
From Cape Town, South Africa
Group:
Registered Users
|
It's been a long road to get the car to the state that it currently is in, especially the last few months was tough, everything started feeling like work, but that is the case with so many things in life. Luckily for me the list of things to do was starting to shrink, well I was hoping for it, as one thing was finished the next one came up. Do not get me started on wheel speed probes. Radiator Air Deflector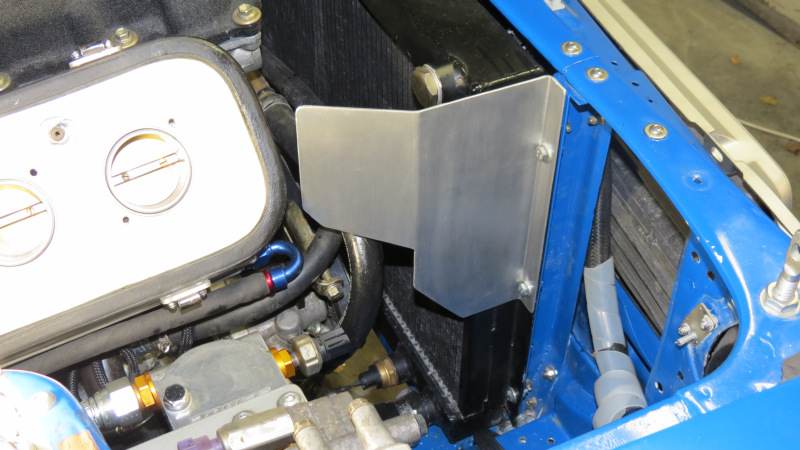   Seeing that Air Temps was quite high the previous time the car was at RAW, I had to bring these down to acceptable numbers, something in the region of 2-5 degrees Celsius hotter than ambient when traveling. Previously the biggest issue causing the high intake air temps was due to the location of the oil cooler directly in front of the air filter. First things first, I moved the troublemaker away from the air filter for obvious reasons, I'm quit limit with options for mounting the filter. Seeing that I had some space next to the electrical fan in front of the radiator, this was the obvious location. To further provide the air filter with cold air, a deflector plate was made to bolt to the radiator in order to divert hot air from the oil cooler and radiator away from the air filter. Up till now looking at the logged data from the ECU the results are quit good and the temps stay at +-3degrees from ambient. Steering Stops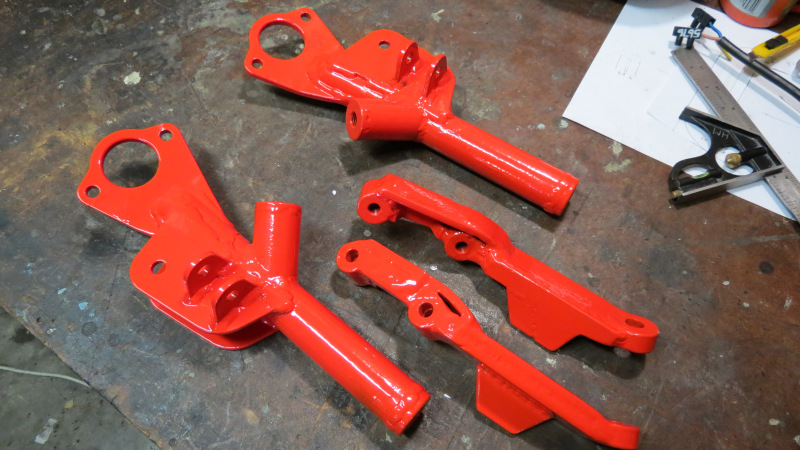  After the first few drives with the new front suspension it became very obvious that I will need to install some sort of steering stops to limit the amount of steering angle as wheels were starting to rub. This was quite easily taken care of with some lathe work and a few pieces of flat iron and tube with a threaded insert to adjust a bolt. Potential Mud flap Positions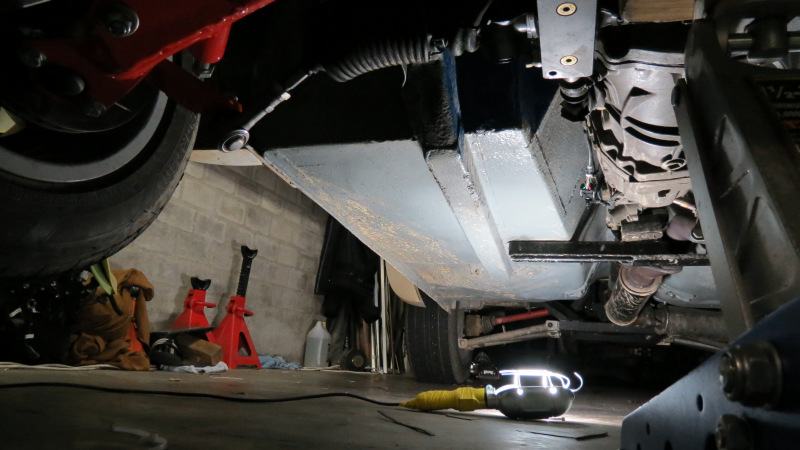 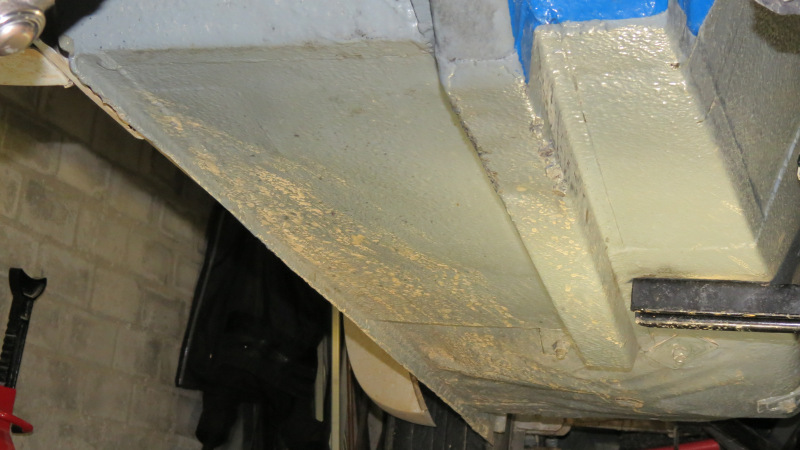 During one of my first drives with the new suspension I decided to drive the car to my parents place about 110km away on a Sunday morning, this would allow the various parts to start settling and provide me with the opportunity to test a few things on the gravel road leading to their home. An added bonus was the fact that it rained the previous evening which left the gravel road with some wet spots which made for the best way to figure out where to fit mud guards in the future as the mud was thrown by the front wheels. Velocity Stacks  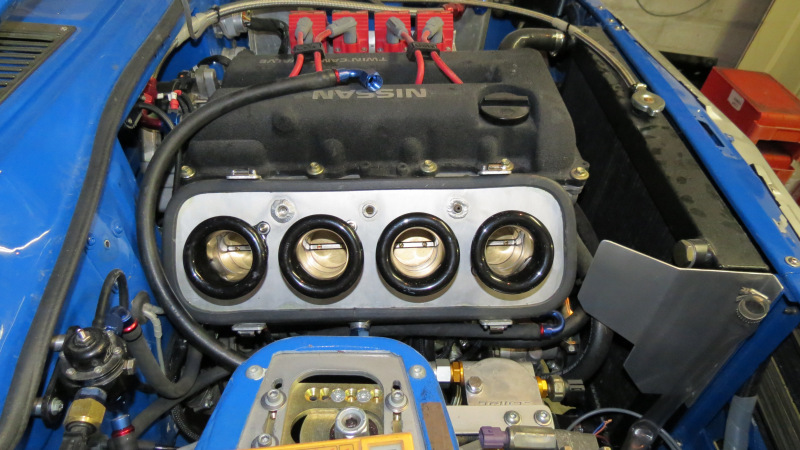  At long last I managed to finish for of these, I either made a mess of the fibreglass work, or destroyed them in the lathe trying to get them supper smooth and the finish perfect, after destroying 2 in a matter of minutes I decided lets go with the operational finish rather that the display finish, at the end of the day they turned out quite nice. After they were bonded to the aluminium backing plates, I took the opportunity to make some retaining clips from thin Stainless Tig wire to keep the air box nicely secured to the backing plate and keep the dust on the outside. Dash Board & Electronics Since I had to make some changes to the wiring to add additional switches for the motorsport functions like launch control/traction control and flat foot shifting, it was decided to cut the dash in 3 pieces to make future work allot easier. With the old one piece design it was fine removing the dash, but reinstalling was a nightmare to say the least. Everything was marked and masked before cutting commenced, a piece of aluminium was shaped to act as a big washer behind the dash pieces to hold the rif nuts in place. This new 3 piece design allows me to decide which part I want to re move in order to work behind it, what a joy. 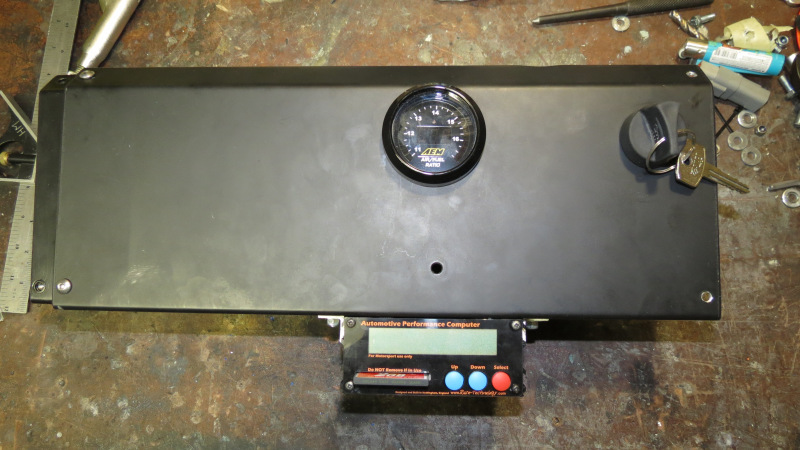 Once the dashboard was done I picked a fight with the sheet metal that fastened below the dash that houses the igniter modules. These were mounted out of view as I hate looking at lights that is not warning me of something dangerous, but reality got the better of me and I decided to ditch the plate completely and mount them on the firewall box cover. In their new location they are slightly in view if you look down, which you should not do when having fun and trying to keep the nose going forward. 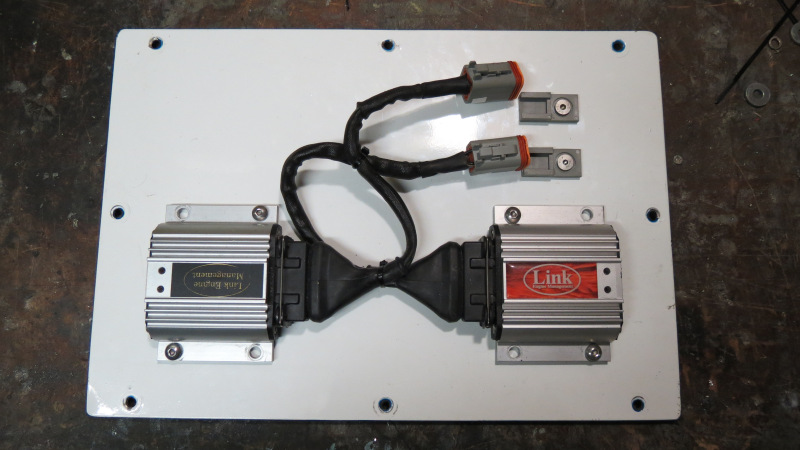 Since my madevnology AX22 was laying in the cupboard gathering dust, I decided this would be the ideal time to mount it, just maybe Rezlo from RAW wants to use it for mapping purposes, the AX22 is quite a nifty GPS logger at a very affordable price for what you get, go look at the specifications on the manufacturers site. Another part proudly supplied by RAW. Coming to think of it, the majority of imported parts on this car was sourced and supplied by Rezlo from RAW (Rezlo Auto Works). Brake Bias Adjuster While the dash was out, it allowed me to remove the pedal box to install a smaller 0.625" master cylinder on the rear brakes. The old 0.750" unit was removed due to the weight distribution of the car dictated that more pressure is needed on the rear. Once this was done, I started installing the brake bias adjuster and finish the job off by cutting the adjuster cable to the new length. Once I played with the adjuster I learned with a shock that the car until then only braked on th rear wheels, once the adjuster was set to a a few clicks towards the front the pedal softened slightly and the brakes felt much stronger and balanced. I'm still not happy with the brakes and see a set of 4 pot Wilwoods replacing the current VW units. Trip to PE to visit RAW 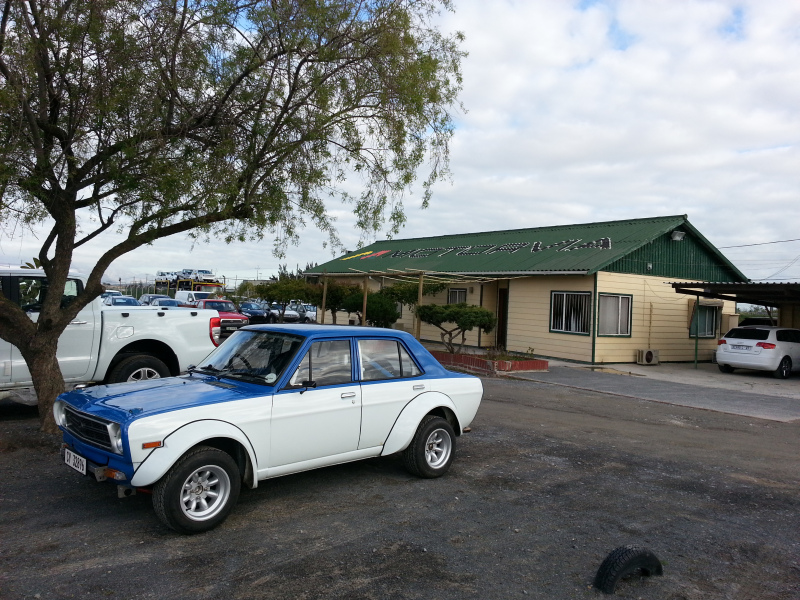 After a few gruelling weeks slaving away on the car to get it ready for its visit to RAW, it was quite a strange feeling of turning my back on the car and walking away from it at the Auto Carriers depot. Besides the exhaust, the car was never too far from me or a close family members eye. This time around it was going to be driven, loaded and transported by a complete stranger. You can imagine the joy when Rezlo phoned me stating the car arrived safely, but then he blew my bubble by stating that the Dash does not showing oil pressure. Luckily I installed an idiot light for this exact purpose as I still need to setup the dash completely. At this stage some people may wonder why I would send my car 800km up the road to be mapped by Rezlo, first off because of the ECU chosen for the application, I opted for something that would take care of all the decisions for me, if the oil pressure drops, go into limp mode or cut the motor completely. Let's look at fuel pressure, if for some odd reason the pressure drops completly I want the motor to be switches off completely as a fuel pipe could have burst and could be feeding a fire with fuel. All this sort of things the ECU should control and not me, coupled that to the mans incredible talent and understanding of car tuning the 800km seems irrelevant, just another challenge and some logistics. 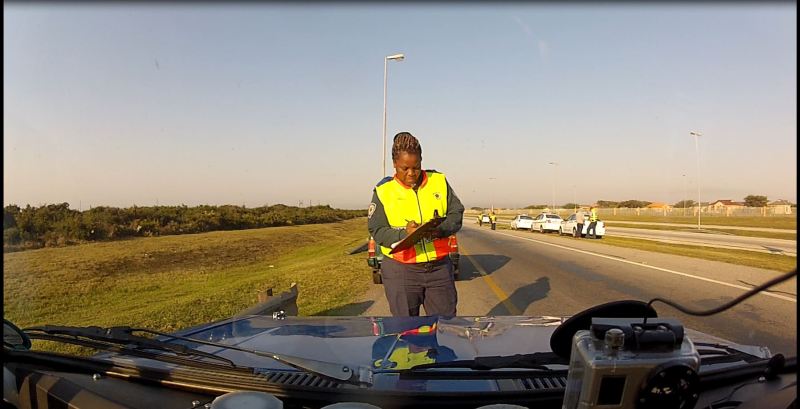  During the whole mapping process I believe Rezlo mapped on a daily bases on the car, even went over and above and did some work at night time and some track work to make 100% sure everything is spot on. During this time Rezlo managed to send me a few photos of the friendly Metro Police letting him continue on his journey and one or two YouTube vids showing the progress. The car spend a total of twee weeks in PE and received all the attention it deserved. We were actually quite luckily timing wise, seeing that the weekend we went to collect the car there was some Regional racing on Aldo Scribante were Rezlo competed, at long last I can see his race car in action, and boy is this combination fast. We drove up to PE the Friday, arrived at Rezlo premises and marvelled at his projects and kept him out of work for a while. The first experience I had with the car was when Rezlo showed me how it starts, this is something wanted from day one, a racing car that starts like a factory car, ignition on, wait for the pumps to prime, make sure the neutral light is ON, turn the key and it starts, all this while standing outside, no throttle pumping or funnies here, just a decent ECU and an operator behind the laptop. We said our goodbyes and off we went, filled the car with some fuel and headed off to our accommodation, one off the first things that I noticed was the behaviour of the ITB's, I didn't need to throttle the car on pull away, not like a lot of people tried warning me "50mm ITBs on a 2 litre is not going to work, you will lose too much torque and will need to rev the motor to pull away, etc" non-off that. Just comes to show what decent ECU with proper mapping can do to the way a motor delivers power.  I must say I enjoyed every minute off it, after 3 years I think I'm allowed to have some fun, and boy did I until the motor just lost power on a downhill just before Colchester. Seeing that I decided not to back a laptop I was quite stuck, managed to drive the car to the nights accommodation. The next morning my mood was quite shattered, but life goes on, I tried driving the car to Aldo Scribante, managed to get a few kilometres out of Colchester and then the car just started leaning out, stopped next to the road. By this time I was quit shattered and not in the mood to struggle with something I need to take apart to find a problem, hooked the car up to the A Frame an towed it to the track, after exploring the track and watching a few races, Rezlo even tried his magic, but it was definitely not plug related.  After all this I was done, asked my brother and father that accompanied me on the trip if we could leave for Jeffreys Bay as I was in desperate need of some rum and coke. The next morning we left for Cape Town and as lady luck would have it, again we had issues at the Toll Plaza just before Port Elizabeth, they are too shallow to interpret laws issues by the government, they rather follow their own set.   Once home it took us less than an hour to find the problem. Can I just say thank you for onboard Data Logging and in this case LinkECU, if was not for logging I would not have seen that the fuel pressure constantly dropped, until nothing, then it climbs again and starts dropping off again, suggesting some sort of fuel delivery issue. First things first, get the 30 litres off fuel out of the tank in order to strip the system to find the culprit, now the easiest way of doing this is by removing the pipe that returns to the main tank out of the surge tank. Once loosened it is placed in a container and the low pressure pump switched on to drain the main tank, but in this particular case nothing came out. Luckily for me this narrowed down the possible location of the issue. Removed the pipe between the main tank and Holley pump and all that came out was a small trickle of fuel, which is not correct. Looking at the fuel coming out I noticed some black particles, removed the tank and drained it via a pipe thru a piece of cloth and found all sorts of black particles. Still not 100% sure what the cause was, my brain was starting to put the puzzle together, after collecting the car I filled the tank and noticed the new neoprene gasket between the filler and tank was pushed out more than usual. 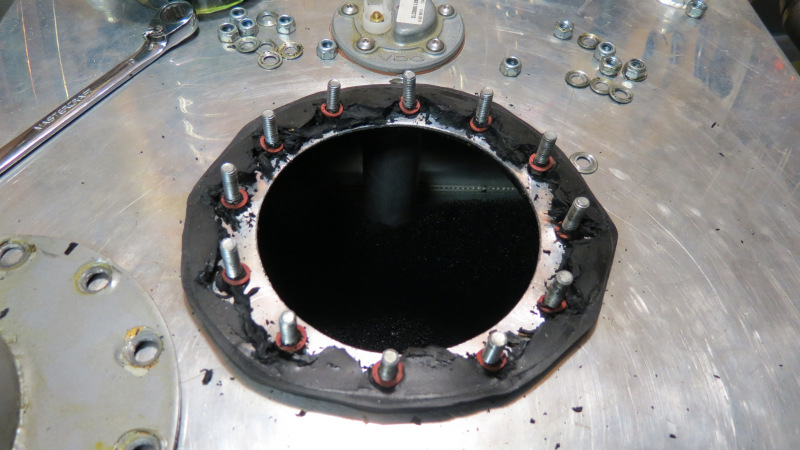  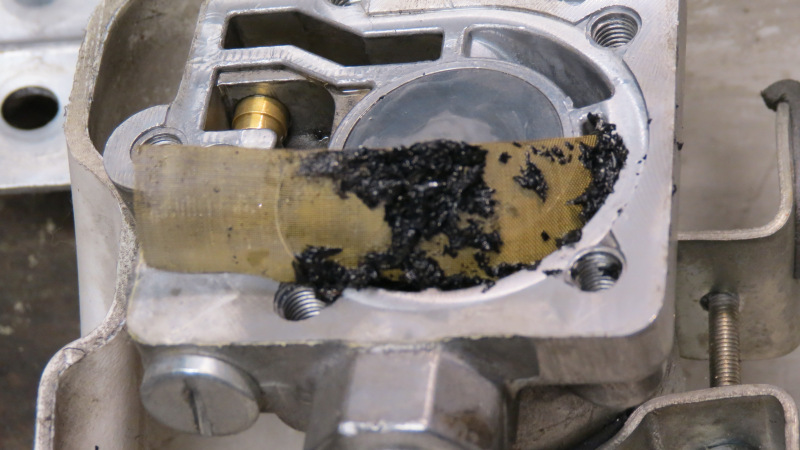  Once I removed the filler the cause was quite obvious, what was sold to me as neoprene was most definitely not, as the fuel attacked this rubber and started breaking it up and smaller chunks and even dissolved some of it. All of a sudden the puzzle feel in place, strange how the mind works, on our way back from PE the previous day I deceived a plan to fix the filler to tank issue by turning flanges that seals with a o ring, and here I was standing and that plans seems like the only thing needed to solve the issue, besides new filters and a complete flush of the fuel system.
Posted on: 2013/10/29 12:59
Edited by racetech on 2013/12/23 11:22:40
|
|
|
|
 All Posts (racetech)


;)
;)
;)
;)
;)
;)
;)
;)
;)
;)
;)
;)
;)
;)
;)
;)
;)
;)
;)
;)
;)
;)
;)
;)
;)
;)
;)
;)
;)
;)
;)
;)
 Transfer

;)
;)
;)
;)
;)
;)
;)
;)
;)
;)
;)
;)
;)
;)
;)
;)
;)
;)
;)
;)
;)
;)
;)
;)
;)
;)
;)
;)
;)
;)
;)
;)
;)
;)
;)
;)
;)
;)
;)
;)
;)
;)
;)
;)
;)
;)
;)
;)
;)
;)
;)
;)
;)
;)
;)
;)
;)
;)
;)
;)
;)
;)
;)
;)
;)
;)
;)
;)
;)
;)
;)
;)
;)
;)
;)
;)
;)
;)
;)
;)
;)
;)
;)
;)
;)
;)
;)
;)
;)
;)
;)
;)
;)
;)
;)
;)
;)
;)
;)
;)
;)
;)
;)
;)
;)
;)
;)
;)
;)
;)
;)
;)
;)
;)
;)
;)
;)
;)
;)
;)
;)
;)
;)
;)
;)
;)
;)
;)
;)
;)
;)
