User Login    
 + Register
  • Main navigation
Login
Username:

Password:


Lost Password?

Register now!
Fast Search
Slow Search
Google Ad


Browsing this Thread:   1 Anonymous Users


« 1 (2) 3 »


Re: project 1200 sedan (with pics)
Home away from home
Joined:
2006/8/13 14:03
From perf
Group:
Registered Users
Posts: 383
Offline
looks good mate ! i have 2 suggestions for you;

when you cut rust out in an open area, eg on the door or c pillar, avoid right angle cuts. the reason is that when you weld it it pulls and distorts the metal.

secondly, you need to weld all the way around your new peices of metal. if you don't when water gets in the back in will come through and rust again.

Posted on: 2007/2/26 8:29
Transfer the post to other applications Transfer


Re: project 1200 sedan (with pics)
Home away from home
Joined:
2003/2/25 7:08
From adelaide
Group:
Registered Users
Posts: 466
Offline
Cheers for the info Picko, so instead of right angle do you mean 45degrees ish or just try and avoid any sharp corners? What i was planning with the door was to use filler over it as its slightly lower in a section, which would stick into the gaps and treat and paint it from behind, or do you think i should attempt welding it all the way first, its just im finding it hard to not blow holes or distort metal?

Posted on: 2007/2/26 8:37
_________________
1200 restoration project moving slower than it actually is
Transfer the post to other applications Transfer


Re: project 1200 sedan (with pics)
Home away from home
Joined:
2003/2/25 7:08
From adelaide
Group:
Registered Users
Posts: 466
Offline
It took me all day just to finish the inner quarter off, prep and paint it and tack in the new rear quarter! It did warp a little bit near the wheel arch and there is a low spot which will need nocking out and then filling etc.

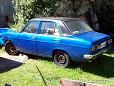
Here is the result of a days work, finally tacked into position

Open in new window


Another view of it

Open in new window


This is the inner rear quarter repair, the whole lower section was cut out and i bent up and welded in new steel. Note that its welded properally just slapped silicone over the top so it looks neeter and extra protection! Ive found that you can use the tailgate of a trailer to bend small 1.6mm steel by pushing the steel through the gap and bending up Ive also left a decent gap between inner and outer quarters so #### dosnt collect again and rust out

Open in new window


Another angle of the inner quarter, needs finishing with protector/paint

Open in new window


Soon i will be up to the time consuming task of using filler to make everything run together smoothly

Posted on: 2007/2/27 20:58
_________________
1200 restoration project moving slower than it actually is
Transfer the post to other applications Transfer


Re: project 1200 sedan (with pics)
Home away from home
Joined:
2006/8/13 14:03
From perf
Group:
Registered Users
Posts: 383
Offline
looks good!

45 degrees can work or round the corners. no pointy bits is best but sometimes unavoidable.

to weld it you do it in sections. so tack it in place then you run a 3cm weld, what they call a stich weld in various places until it is all done. dont do the welds next to each other but do it, for eg on your quarter panel section there i would put a weld on the wheel arch, then in the corner near the bumper recess, then down the bottom... then go back and put one in the middle of the first 2, then in the lower corner. understand?

to control the heat you don't run the welder continuosly during the stich weld. you start/stop as to control the weld pool and heat. then you wipe it with a wet rap to suck the heat out of it. does this make sense?

i know this is longer and drawn out but it is hard to explain in writting.

hope this helps

Posted on: 2007/2/27 21:45
Transfer the post to other applications Transfer


Re: project 1200 sedan (with pics)
Home away from home
Joined:
2003/2/25 7:08
From adelaide
Group:
Registered Users
Posts: 466
Offline
year thanks mate that made perfect sense, its a damn challange not blowing holes though, i need more practice. Also i got new wire which is goog cig brand and its much easier now!

Posted on: 2007/2/27 21:53
_________________
1200 restoration project moving slower than it actually is
Transfer the post to other applications Transfer


Re: project 1200 sedan (with pics)
Home away from home
Joined:
2003/3/21 0:15
From Tamworth, NSW
Group:
Registered Users
Posts: 850
Offline
Good on ya.
I was to scared to do mine myself but i am all inspired for my next project after seeing your pic's

Posted on: 2007/2/27 22:48
_________________
Project coupe:
Just drive it
Transfer the post to other applications Transfer


Re: project 1200 sedan (with pics)
No life (a.k.a. DattoMaster)
Joined:
2006/3/4 12:07
From Adelaide
Group:
Registered Users
Posts: 1274
Offline
Well done mate...

bloody good job on the mig welding, i would be to scared to do that.. lol

hope it all goes well and keep up on the updates :P

cheers, im in adelaide.. might have to cum down for a look when my 1200 ute is finished at the painters..


Posted on: 2007/2/27 23:28
Transfer the post to other applications Transfer


Re: project 1200 sedan (with pics)
Home away from home
Joined:
2003/9/21 8:22
From sydney
Group:
Registered Users
Posts: 542
Offline
how much are those welders worth???

Posted on: 2007/2/27 23:33
Transfer the post to other applications Transfer


Re: project 1200 sedan (with pics)
Home away from home
Joined:
2003/3/21 0:15
From Tamworth, NSW
Group:
Registered Users
Posts: 850
Offline
Quote:
The $300 MIG, works great for thin stuff!

Posted on: 2007/2/27 23:47
_________________
Project coupe:
Just drive it
Transfer the post to other applications Transfer


Re: project 1200 sedan (with pics)
No life (a.k.a. DattoMaster)
Joined:
2002/9/23 10:45
Group:
Registered Users
Posts: 2809
Offline
Looks good. I agree you should always 100% weld the join. Bog will still crack if its just tacked like your pics. (unless the bog is thick).
Can you not turn your welder down or turn your wire speed up?
I would never run a weld on thin sheet for 3cm. It will still warp. Tac after tac is the way to do it. but you have to move the tacs around.
Below are pics of my old wags when i welded the querters after i chopped the roof.
I tac it every inch like you have, and then i go back and tac right next to the first tack and then and inch over beside the next tac. It takes time, but its better to take time now, than to spend hours later doing heat shrinks. Flat panels you should cool every tac with air blowgun or wet rag ( some people argue, but I use both ). But when there is a fold that gives strength, you can not worry about the heat as much.

Open in new window

Tac every inch.
Open in new window

Thousands of tacs later.

Posted on: 2007/2/28 8:54
Transfer the post to other applications Transfer


« 1 (2) 3 »


You can view topic.
You cannot start a new topic.
You cannot reply to posts.
You cannot edit your posts.
You cannot delete your posts.
You cannot add new polls.
You cannot vote in polls.
You cannot attach files to posts.
You cannot post without approval.

[Advanced Search]