|
|
Browsing this Thread:
1 Anonymous Users
|
|
Re: DEMAC's 1200 UTE |
|
No life (a.k.a. DattoMaster)  
Joined:
2007/6/15 10:47
From MOOROODUC. Victoria
Group:
Registered Users
|
Cheered myself up this arvo.
Found a Bluebird with good rear discs at the local wrecker so bought the whole diff and handbrake for $100
With a little work we'll have rear disc brakes on the ute!
Posted on: 2011/9/2 8:58
|
|
_________________
Red 1200 Coupe (Build: DEMAC's 1200 Coupe)
Blue 1200 Ute, CA18DE Auto (Build: DEMAC's 1200 Ute)
Green 1200 Sedan (Build: Kermit the beat up sedan)
Green Sedan #2 (Current build: DEMAC's 1200 Sedan)
|
|
|
Re: DEMAC's 1200 UTE |
|
|
Just popping in

Joined:
2010/12/24 9:42
From GREENBANK, Brisbane, QLD
Group:
Registered Users
|
Hello,
I have just read your step by step and loving it, a few more Monty quotes would be cool.
I am looking forward to the next few steps and hopefully a full clearance for the road.
As I'm only new to this whole car building game I need as much info as possible. I thought I would start easy and bought my son his(to be) first car, a datsun 1000 ute. The car is pretty straight but been sitting for some time under a tarp, hence the great price, 3 hung. So with that in mind I woul like to know what the difference is between the 1200 and 1000 as far as parts are considered. Also should I start my own tread for these sort of questions.
Posted on: 2011/9/3 1:58
|
|
_________________
Cheers
Rowbro
Rebuilding a dato1000ute
|
|
|
Re: DEMAC's 1200 UTE |
|
No life (a.k.a. DattoMaster) 
Joined:
2002/10/28 6:49
From under the Firmament LOL no twiglight effect BS
Group:
Registered Users
|
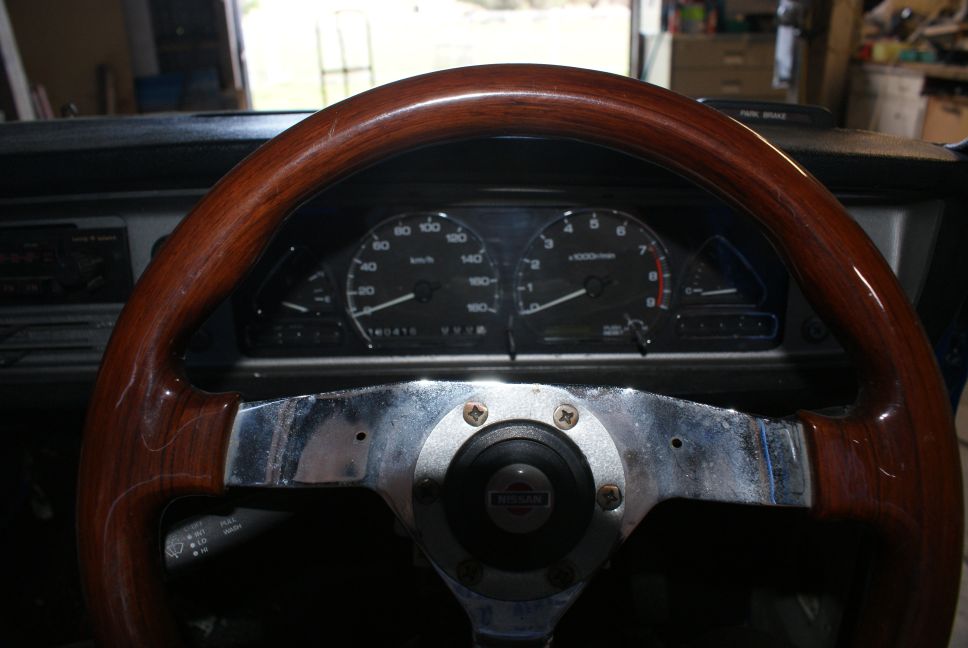
some good engineering here, love the dash, colour and fuel tank
does the panel beater/welder do home jobs usually for tunnels
elsewhere? Its a very cheap service.
Posted on: 2011/9/3 6:02
|
|
_________________
"Australia" is formed by all its geographically listed territories "including" Norfolk, Christmas & Cocos Islands. The word include excludes all else before it therefore you have no legal rights.
|
|
|
Re: DEMAC's 1200 UTE |
|
No life (a.k.a. DattoMaster) Joined:
2007/6/15 10:47
From MOOROODUC. Victoria
Group:
Registered Users
|
A bit more done today
Dash installed
Front guards on
passenger seat in
hand brake - attached a switch and moved its location a little now that I don't have the silvia console to take into account :(
Pics tomorrow - hopefully
Answers: Rowbro: Thanks for the comments. I have had 4 1600's and now have 2 1200's i suppose I am moving in the right direction for a 1000 but never owned one - yet
D: The panelbeater was in Mornington and I took it to him, he had done work on a couple of crashes for me where I was hit from behind so we were already on first name basis. Now that I have my own MIG I think that I would try doing one myself if there is a next time.
cheers David
Posted on: 2011/9/3 9:44
|
|
_________________
Red 1200 Coupe (Build: DEMAC's 1200 Coupe)
Blue 1200 Ute, CA18DE Auto (Build: DEMAC's 1200 Ute)
Green 1200 Sedan (Build: Kermit the beat up sedan)
Green Sedan #2 (Current build: DEMAC's 1200 Sedan)
|
|
|
Re: DEMAC's 1200 UTE |
|
No life (a.k.a. DattoMaster) Joined:
2007/6/15 10:47
From MOOROODUC. Victoria
Group:
Registered Users
|
Put fuel in yesterday and turned the key .... not all the way as i have not bought oils.
why did my fuel gauge go DOWN ?? - another wiring challenge!
Posted on: 2011/9/4 23:48
|
|
_________________
Red 1200 Coupe (Build: DEMAC's 1200 Coupe)
Blue 1200 Ute, CA18DE Auto (Build: DEMAC's 1200 Ute)
Green 1200 Sedan (Build: Kermit the beat up sedan)
Green Sedan #2 (Current build: DEMAC's 1200 Sedan)
|
|
|
Re: DEMAC's 1200 UTE |
|
No life (a.k.a. DattoMaster) Joined:
2007/6/15 10:47
From MOOROODUC. Victoria
Group:
Registered Users
|
documented this while it is still fresh in my mind ... hope this helps the next person.....
If you see any glaring mistakes or omitions pls PM me and I will fix it
Buying and fitting Bluebird Rear discs
Part 1 - BLUEBIRD DIFF ASSEMBLY
1. Find a suitable Bluebird
1.1. TRX or Series II but must have full diff/axle
1.2. Take a veneer caliper to the wreckers and check that you have at least 10mm of meat on the disc. 9.5mm is still legal but new discs are expensive ($160 AU each side)
1.3. Just buy the whole axle, diff and all. It will probably cost less than buying the bits
2. Take it home and strip it down
2.1. Remove calipers , put them aside for a cleanup or a recondition as you see fit
2.2. Remove discs , give them a quick cleanup and paint if desired
2.3. Remove the splash plates large thin plates that protect the discs from mud etc
2.4. Dismantle the brake shoes, inspect and replace shoes if required
2.4.1. dont lose anything
2.4.2. remember which way the shoes and the retaining springs go (they will only go one way but at least you know for sure)
2.5. Remove the handbrake cable by taking out the pins at the ends
3. Remove the individual axles from the main body
3.1. Remove the four bolts that are at the end of the main body into the axle/brake area. These will have nylock nuts on the ends
3.2. Pull out the axle. This should come out easily but you may have to jiggle the diff where it connects to the tail shaft to loosen the spline. If all else fails the use a slide hammer and connect it to the axle where the wheel lugs are.
Ok - check point BLUEBIRD STUFF
You have two axles right and left, dont mix up the backing plates they only go one way
All the brake bits and the discs
4. Remove the backing plates off the axles
4.1. You will need a coal chisel, an anvil of some description, a big hammer. Also if you have an angle grinder with a small cutting disc and an air hammer
4.2. Both the retaining collar and the race bearing need to be removed first
4.2.1. Basically use the coal chisel and or the angle grinder to cut the retaining collar off dont worry about damaging the axle as you wont use it on the 1200
4.2.2. Neither of these items (collar or bearing) can be reused so just use brute force to break them apart
4.2.3. Dont use the backing plate for any leverage they are only cast and can break (this backing plate is precious to you)
4.3. After the collar and bearing are removed there will also be a thin washer to remove, it should just slide off and then the backing plate is right to come off
5. Make sure you mark right from left and keep the following bits from the bluebird diff
5.1. Backing plates
5.2. Brake assemblies, both handbrake assemblies and disc brake assemblies.
5.3. Flexible brake lines for the disc calipers
5.4. All bolts, nuts, washers, clips mostly so you have spares
5.5. IMPORTANT keep the fittings that hook up the fixed brake lines to the flexible lines. The 1200 does not have these on the diff and you will need to weld them onto the 1200 diff
5.6. Also keep the Diff centre- it will be a H165 probably and is a good upgrade to your H145 diff
6. Give everything a nice cleanup and then start on the 1200 diff assembly
Part 2 - DATSUN 1200 DIFF DISSASSEMBLY you could do all the work with the diff assembly still in the car but I took the opportunity to clean the diff up and give it a new lick of paint. Plus I dont like welding so close to the fuel tank (I have an R31 tank where the spare wheel goes in my Ute)
1. Take it out of the car and strip it down
1.1. Disengage from tail shaft
1.2. Disengage hand brake cable from the adjustment block near the front of the diff
1.3. Drain the diff oil
1.4. Disengage the brake line from in front of the diff
1.5. Remove drums , keep them as boat anchors (for very small boats)
1.6. Dismantle the brake shoes, put them in your spares drawer (dont lose anything especially springs and things you may want later.)
1.7. Remove the handbrake cable by taking out the pins at the ends
1.8. Remove the U bolts that hold the axle main body to the springs
1.9. Take out the whole thing and clean it up
2. Remove the individual axles from the main body
2.1. Remove the four bolts that are at the end of the main body into the axle/brake area. These will have nylock nuts on the ends
2.2. Pull out the axle. This should come out easily but you may have to jiggle the diff where it connects to the tail shaft to loosen the spline. If all else fails the use a slide hammer and connect it to the axle where the wheel lugs are.
2.3. Remove the seal just inside the axle that sits behind the bearing
Ok - check point 1200 STUFF
YOU HAVE:
..Two axles right and left, mark them to back on their original sides
..Brake backing plates flopping around on the axles held on by the bearing and collar like the Bluebird ones.
YOU NEED:
Two bearing kits (one for each side) including new bearing, collar and seal
3. Remove the backing plates off the axles
3.1. You will need a coal chisel, an anvil of some description, a big hammer. Also if you have an angle grinder with a small cutting disc and an air hammer
3.2. Both the retaining collar and the race bearing need to be removed first
3.2.1. Basically use the coal chisel and or the angle grinder to cut the retaining collar off THIS TIME WORRY about damaging the axle as you will need it on the 1200
3.2.2. Neither of these items (collar or bearing) can be reused so just use brute force to break them apart
3.2.3. Dont use the backing plate for any leverage whilst you wont need to reuse it there is no point in wrecking it either.
3.3. After the collar and bearing are removed there will also be a thin washer to remove, it should just slide off and then the backing plate is right to come off
3.4. IMPORTANT!!! Note which way this comes off as you will need to put it back on the same way when you re assemble everything
4. Make sure you mark right from left and keep the following bits from the 1200 diff
4.1. Axles
4.2. All bolts, nuts, washers, clips mostly so you have spares
4.3. Brake lines and handbrake assembly
4.4. Shims that go between the bearing and the backing plate
Part 3 - DATSUN 1200 DIFF ASSEMBLY so here is where we put the stuff we need off the bluebird on to the 1200 diff body.
1. Put the 1200 thin washer on the axle the same way it came off
2. Put the bluebird backing plate on the 1200 axle make sure that it is on the right way (shoe mechanism facing out)
3. Press the bearing back on to the axle
3.1. Easier said than done
3.1.1. Either get them done professionally (for the cost of a few dollars its done right)
3.1.2. Or get a big tube of the right diameter of the collar and bash it on without damaging the wheel lugs or the bearing.
4. Press the retaining collar on to the axle (as above)
5. Put the new seal into the axles main body
6. Put the shim in behind the bearing dont bend it too much
7. Insert the axles into the main body (make sure you have the right side in the right side)
8. You will need to line up the spline into the diff centre and gently persuade the axle into place
9. Bolt it up
10. Reassemble the hand brake shoes and mechanisms
IMPORTANT: DO NOT put the discs on or attach the handbrake cables yet
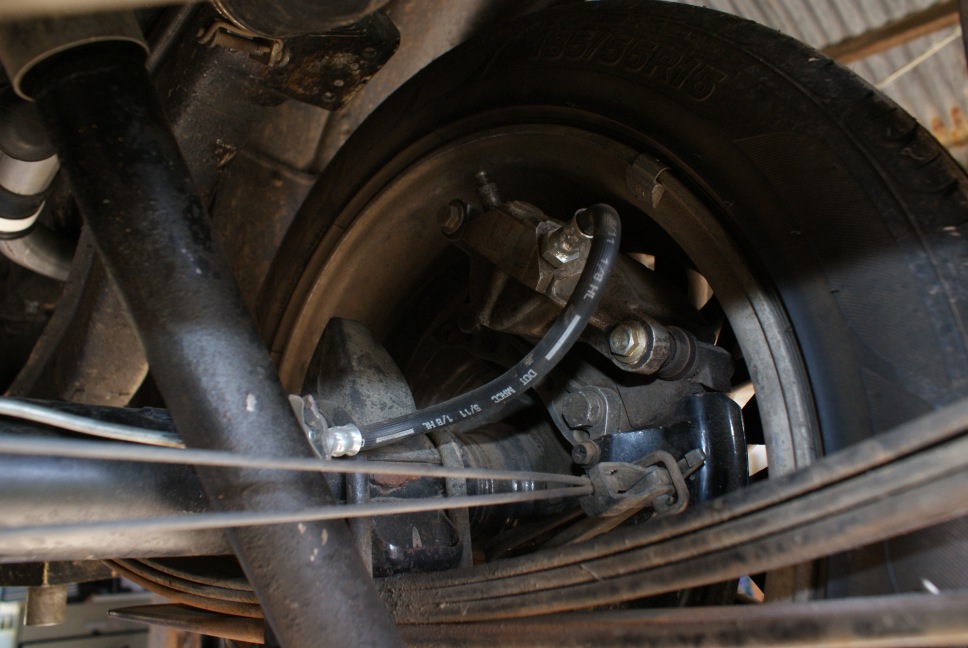
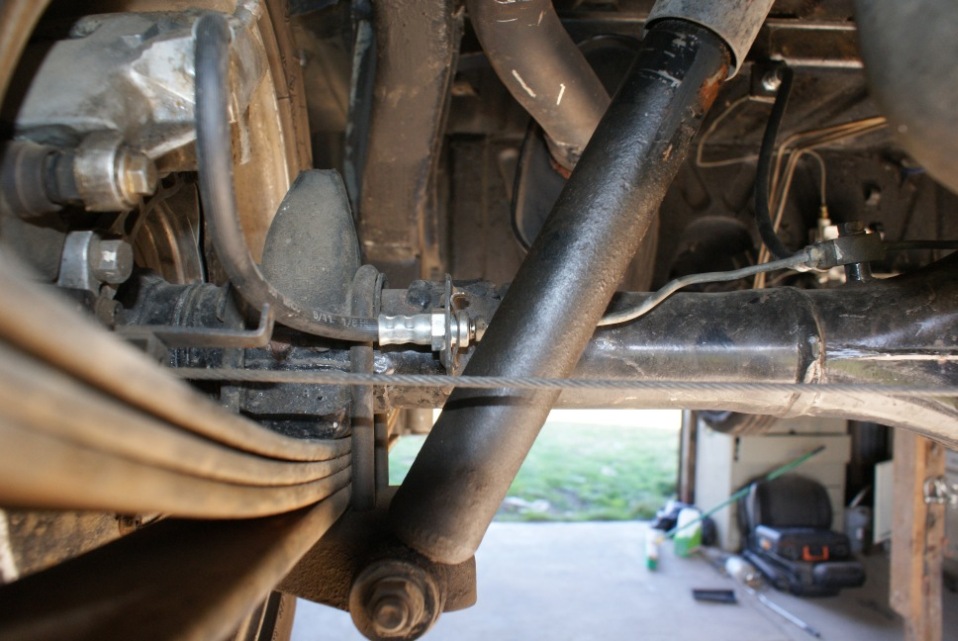
11. We need to weld on the tabs that will hold the flexible brake lines to the main body.
11.1. Find the tabs from the bluebird main body they were bolted on to the bluebird but we do not have anywhere to bolt it on to the 1200 so I welded mine.
11.2. Weld on to the main body approx 6 inches from the edge you need to clear the bump stop and just get inside the little tabs that hold the metal brake lines (also weld them on the side of the axle not top or bottom as they may bottom out
12. You may also want to shorten the metal brake lines as they no longer need to go all the way to the backing plates
13. Refit the main body into the car Attach suspension and bump stops with the U bolts
14. Hook up all the handbrake cables
15. Fit the discs and calipers (do this step after the diff is back into the car as there may not be room to fit the discs between the spring and the underneath of the car).
16. Hook up the hydraulic brakes
17. Adjust the handbrake shoes
Posted on: 2011/9/14 8:05
Edited by demacoz on 2011/9/14 8:44:35
Edited by demacoz on 2011/9/17 22:32:25
Edited by demacoz on 2013/4/27 7:46:50
|
|
_________________
Red 1200 Coupe (Build: DEMAC's 1200 Coupe)
Blue 1200 Ute, CA18DE Auto (Build: DEMAC's 1200 Ute)
Green 1200 Sedan (Build: Kermit the beat up sedan)
Green Sedan #2 (Current build: DEMAC's 1200 Sedan)
|
|
|
Re: DEMAC's 1200 UTE |
|
|
Guest_
|
nice write up- pics would be good too see too but nice work
Posted on: 2011/9/14 10:56
|
|
|
|
|
Re: DEMAC's 1200 UTE |
|
No life (a.k.a. DattoMaster) Joined:
2007/6/15 10:47
From MOOROODUC. Victoria
Group:
Registered Users
|
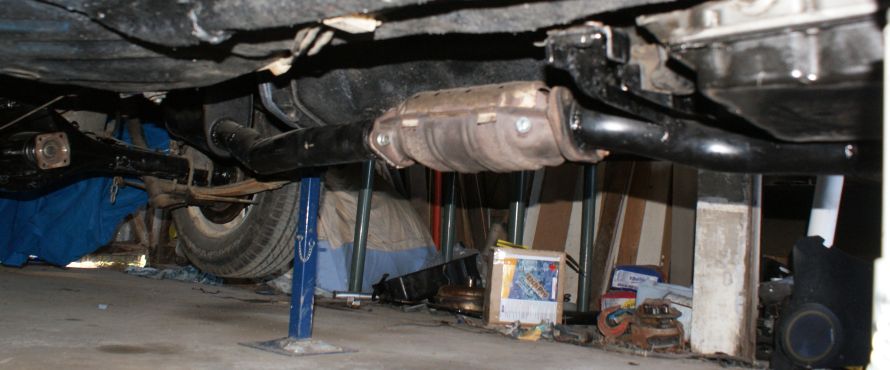
It be talk like a Pirate day so here be sum Photographs of previous stuff before I write up the next bit..... arrrrr
Edit: the tabs actually now are on the side of the diff not on top ... seems that i could have done some damage if I bottomed out if mounted as shown
Posted on: 2011/9/18 23:17
Edited by demacoz on 2011/9/19 4:04:55
Edited by demacoz on 2013/4/14 4:42:48
Edited by demacoz on 2013/4/27 7:44:30
|
|
_________________
Red 1200 Coupe (Build: DEMAC's 1200 Coupe)
Blue 1200 Ute, CA18DE Auto (Build: DEMAC's 1200 Ute)
Green 1200 Sedan (Build: Kermit the beat up sedan)
Green Sedan #2 (Current build: DEMAC's 1200 Sedan)
|
|
|
Re: DEMAC's 1200 UTE |
|
No life (a.k.a. DattoMaster) Joined:
2007/6/15 10:47
From MOOROODUC. Victoria
Group:
Registered Users
|
Two weeks and some progress!
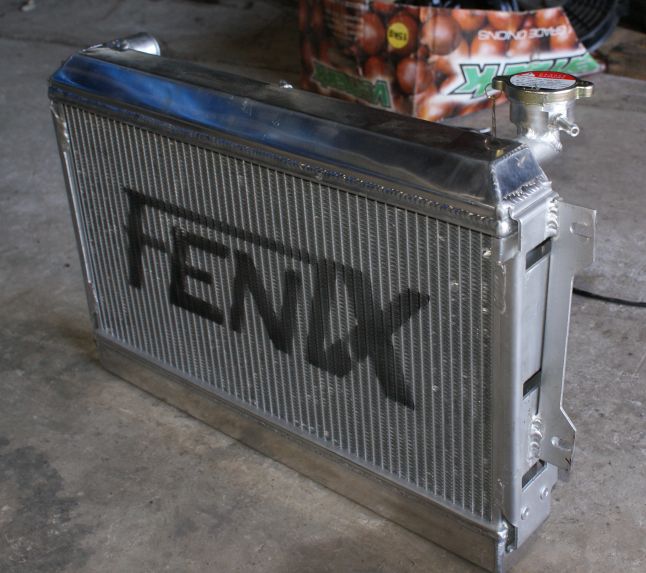
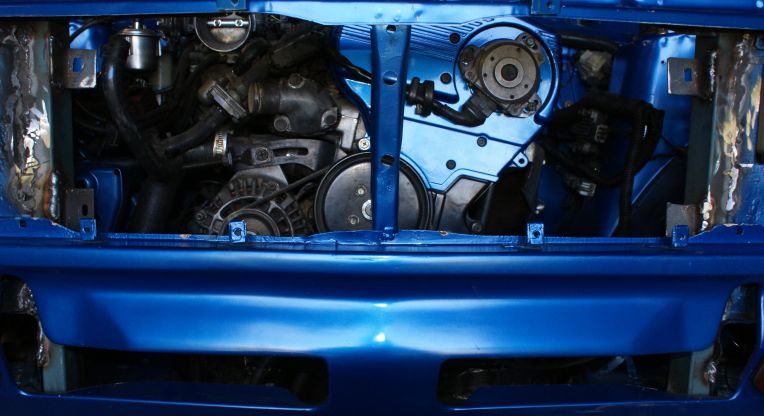
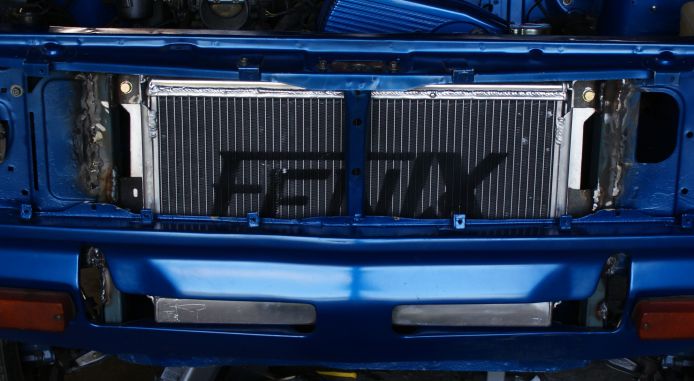
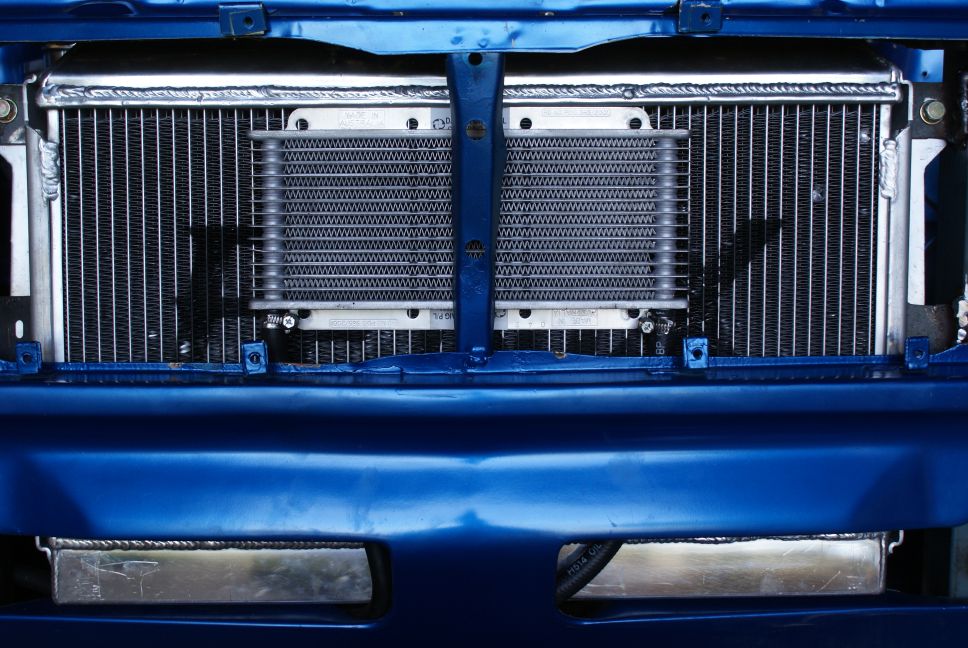
I got my radiator from FENIX and measured up the gap between (measure twice cut once). OK it is a smaller radiator than the EXA but it has more than one core. And the inlet/outlet/filler are all in the right locations ... its a RX3/4/5/6/7 RACE1215 and was $260 delivered. Turns out that the gap needed is smaller than I had catered for and I have welded 2 x 1 down the insides of the original square tubes. So this will make the engineering simple as thats what he wanted in the first place AND I have the extra next to it. See Pic
Posted on: 2011/9/19 7:00
|
|
_________________
Red 1200 Coupe (Build: DEMAC's 1200 Coupe)
Blue 1200 Ute, CA18DE Auto (Build: DEMAC's 1200 Ute)
Green 1200 Sedan (Build: Kermit the beat up sedan)
Green Sedan #2 (Current build: DEMAC's 1200 Sedan)
|
|
|
Re: DEMAC's 1200 UTE |
|
|
Guest_
|
Yeah i looked at them too. Quality looks ok on them and the bottom hose points upeatds slightly too I think. Could have spaced it up slightly. Nice fit. If can cool a rotor can cool anything I figure.
The ae86 ones look good too but the Toyota mount system sucks.
Nice buy, post up how it seals etc. Any idea on size of hose it takes? Same as ca?
Posted on: 2011/9/19 9:43
|
|
|
You can view topic.
You cannot start a new topic.
You cannot reply to posts.
You cannot edit your posts.
You cannot delete your posts.
You cannot add new polls.
You cannot vote in polls.
You cannot attach files to posts.
You cannot post without approval.
|


 Transfer

 DASH4.jpg (115.71 KB)