User Login    
 + Register
  • Main navigation
Login
Username:

Password:


Lost Password?

Register now!
Fast Search
Slow Search
Google Ad


Browsing this Thread:   2 Anonymous Users


« 1 ... 7 8 9 (10) 11 12 13 ... 30 »


Re: racetech's 1200 SR20VE Project
Home away from home
Joined:
2009/4/16 10:37
From Cape Town, South Africa
Group:
Registered Users
Posts: 803
Offline
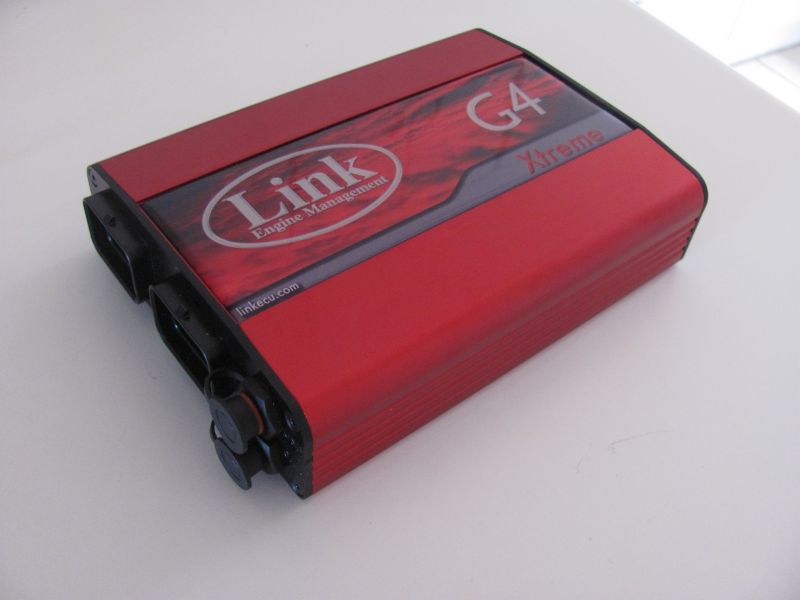
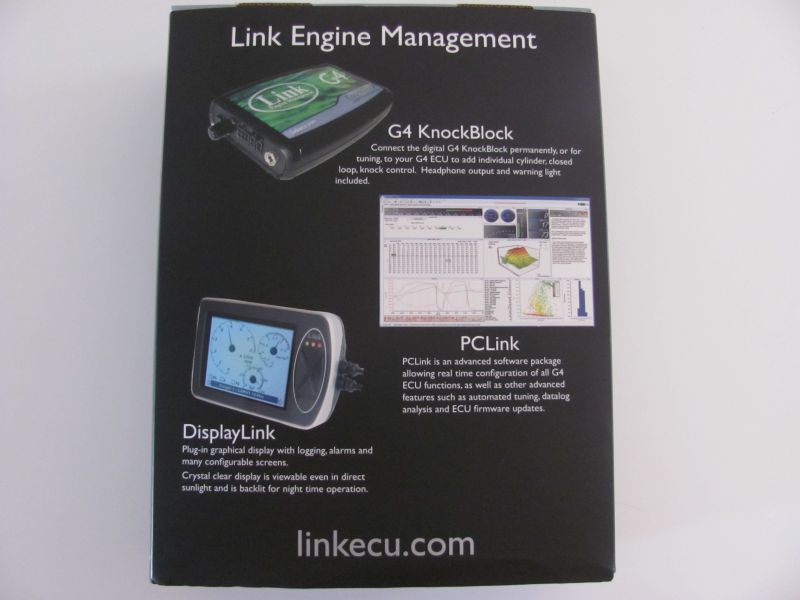
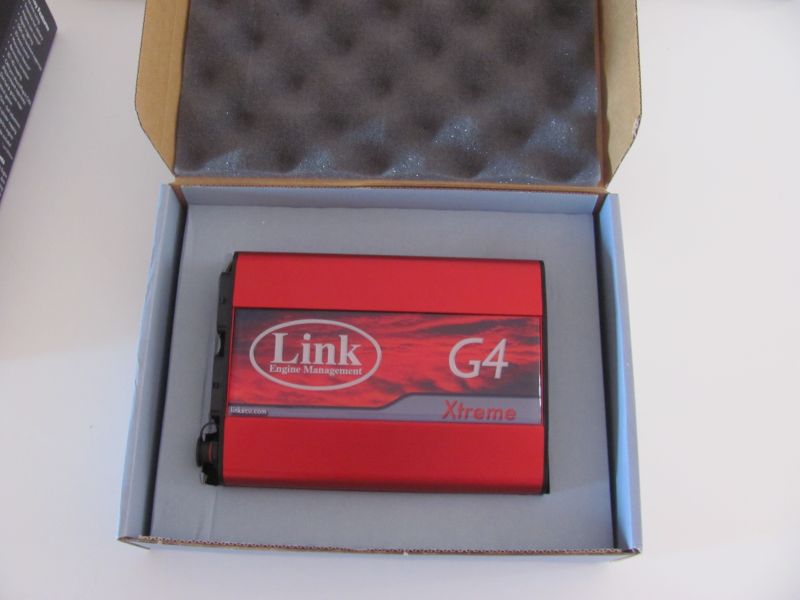
8 February 2011 – LinkECU Xtreme – Engine Management

Open in new window


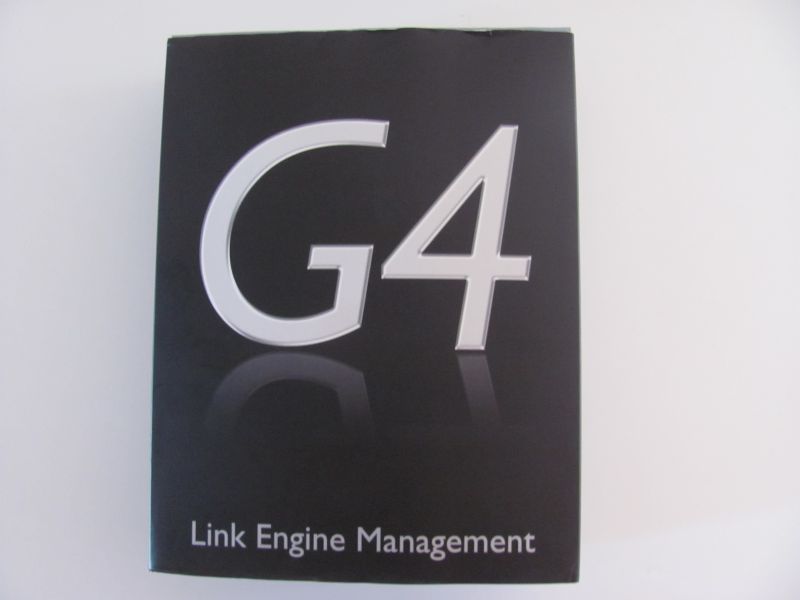
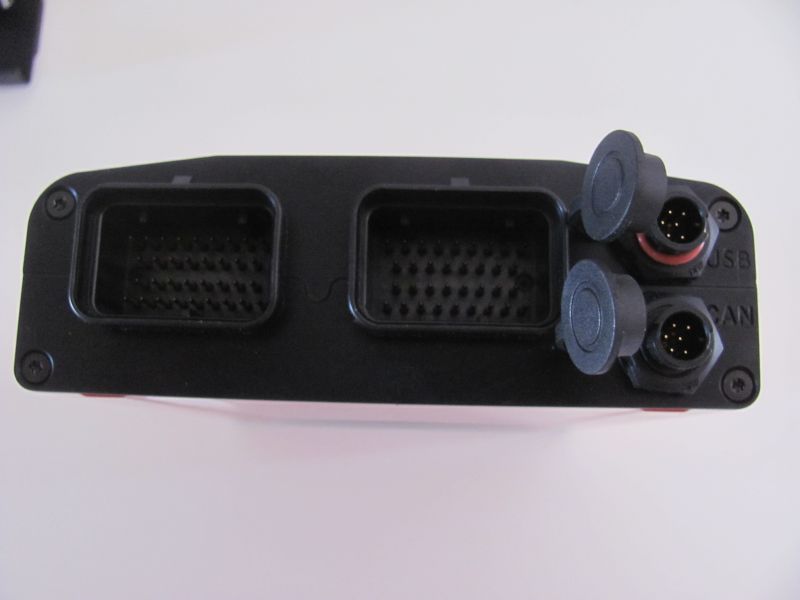
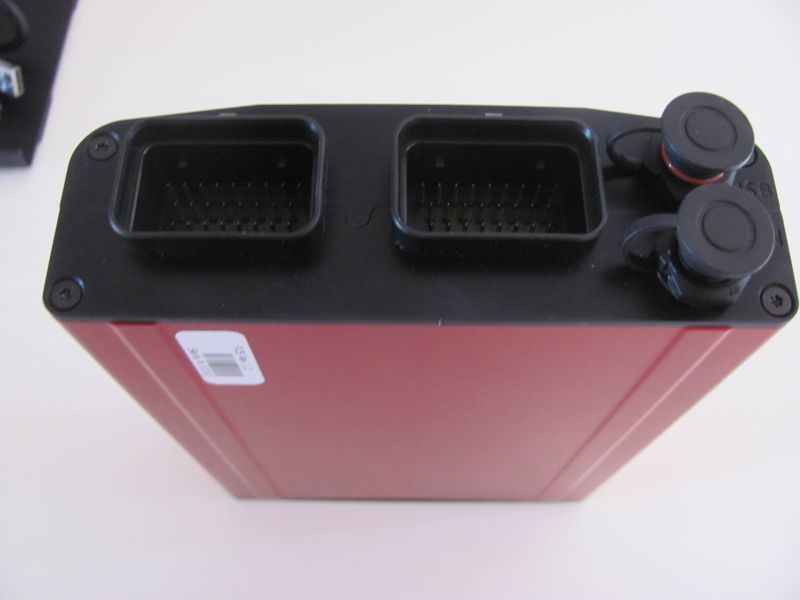
Engine Management; this is one of those subjects that have more questions than answers, it took me more than six months to decide on which make and model of management I would use for Datto. One of the biggest questions always is who will do the mapping, because from experience a particular form of management is only as good as the tuner. You can have the best system under the sun, but if the person developing the map for a particular car is not up to standard, the poor management always gets the bad name or the owner of the vehicle is only prepared to pay for a full throttle map and afterwards states that system XYZ is heavy on fuel. Developing a map takes more than an hour or two, especially if you want good performance, drive ability, reliability and good fuel consumption.

Well I made a list of different management systems that is locally available and internationally made, then started listing available tuners, features, intend of use that the systems was designed for and then price. This took me quite a while because I had to look in the future to what will be needed and the consequences if the system does not have support for it. After some bold spots on my head from scratching, LinkECU came out the winner. This particular unit is by no means the cheapest option at more or less 3-6 times more expensive than locally available systems.

Open in new window

Open in new window

Open in new window

Open in new window

Open in new window

Open in new window

Open in new window


I had a look at the specifications and it became very apparent that this is the unit that will satisfy my current and future needs for a while to come. One of the biggest things that caught my eyes in the specification list was the ability of the unit to communicate via the CAN protocol. I had a look at the prices on decent gauges and was literally shocked at the outcome, CAN would allow me to use a LCD display instead of gauges, at the end of the day, I do not think I will save allot of money, but at least have one place to focus when needing some data. The benefit of the Xtreme model from LinkECU is that all decisions can be made on ECU level if all the relevant input signals is provided, then the data can be output to a display via CAN for a visual picture, while the driver concentrate on the task at hand not worry about temperatures and pre ignition etc.

Open in new window

Open in new window

Open in new window

Open in new window

Open in new window


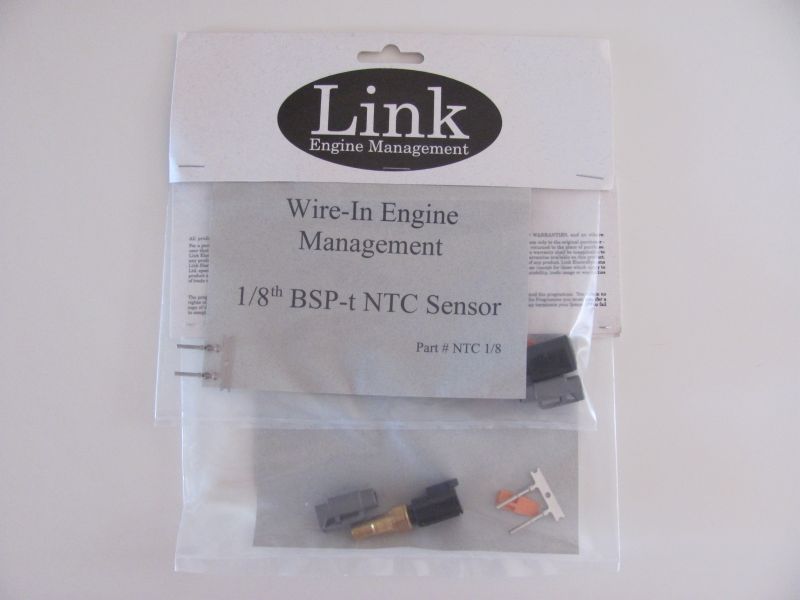
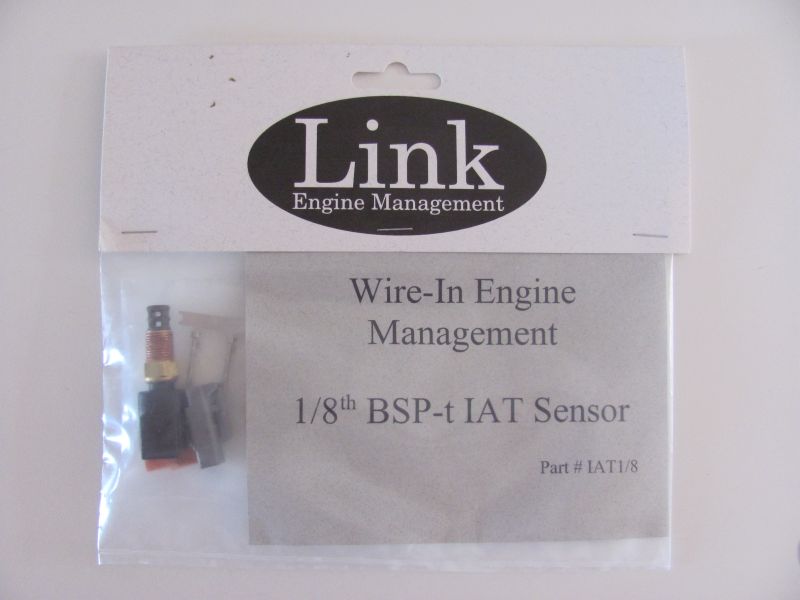
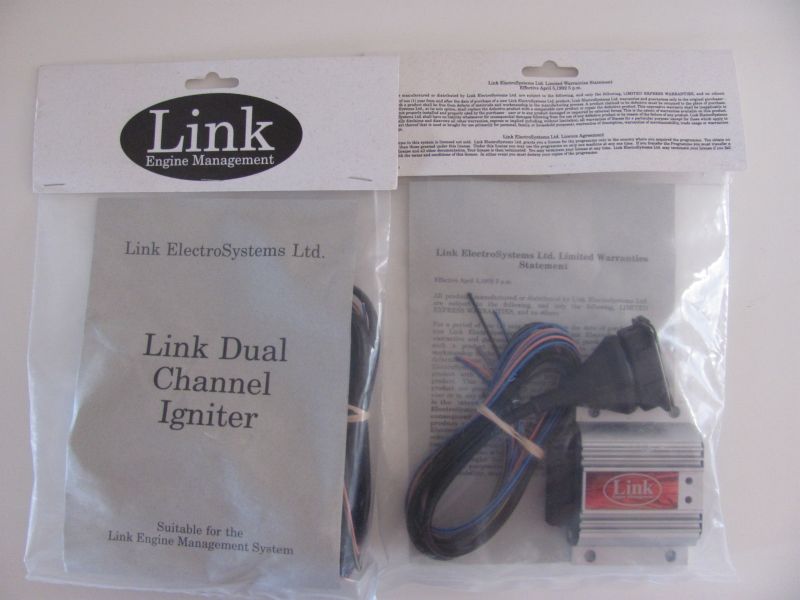
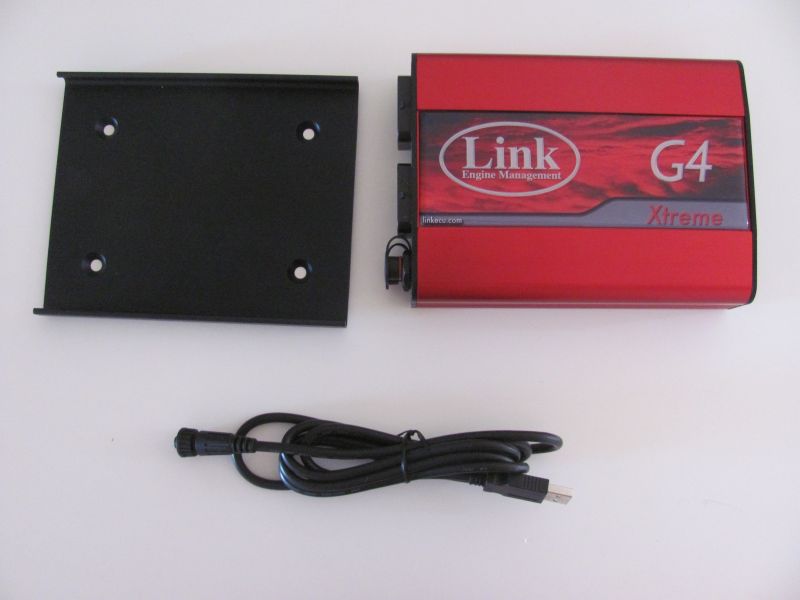
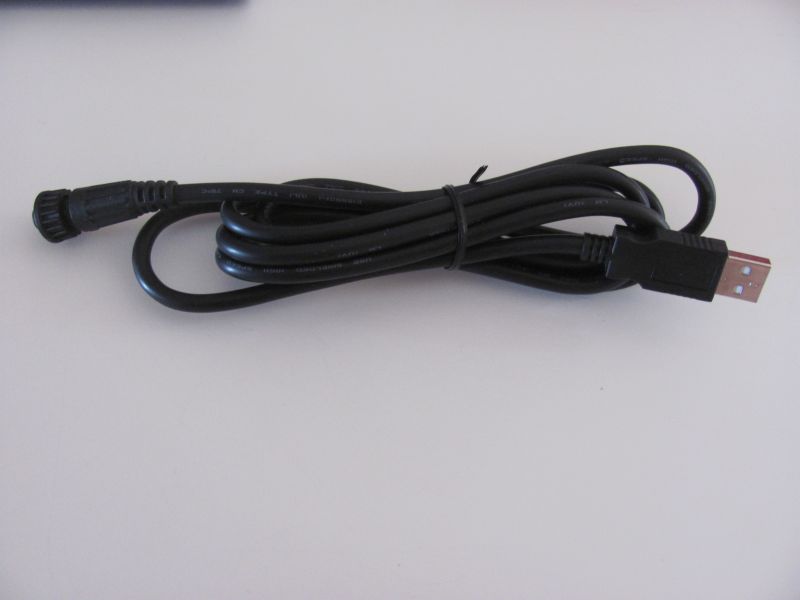
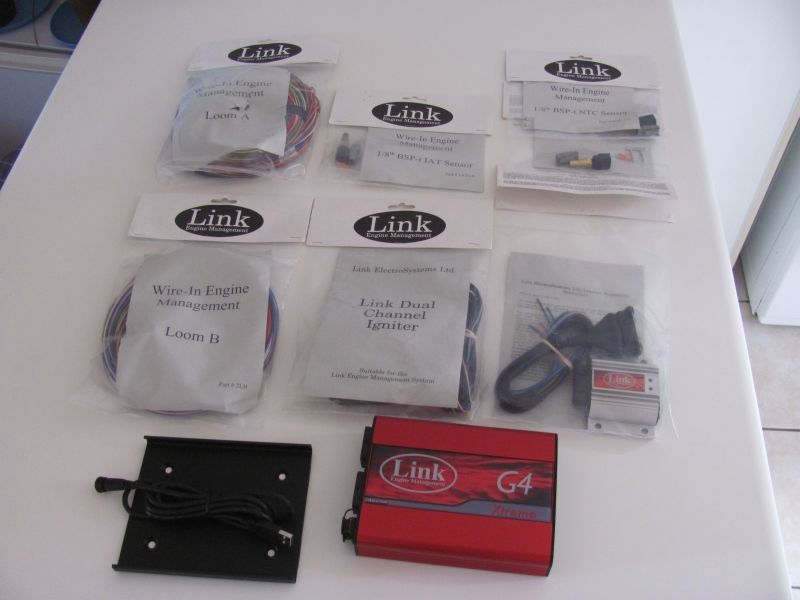
It took me a while to get over the price of the unit and the accessories, but after collecting my package from RAW (Rezlo Auto Works), which sourced and couriered it to me, it became very apparent why you pay the extra money. Everything is just on a much higher standard than we are used to in South Africa. Packaging is great, even accessories like the ignitors come with their own pre made wiring harness, air and temperature sensors are packed with their connectors and necessary pins to allow the user to connect his own wires to the provided water proof connectors.

Open in new window


I opted for the Xtreme model and their own calibrated Intake Air Temperature and Temperature Sensors, then also 2 of their Dual channel ignitors to allow me to run my 4 cylinder engine with direct spark.

Currently this is my most expensive paperweight I own, as I'm still far away from wiring the car, but I can't wait for the day to start.

Posted on: 2011/3/17 6:34

Edited by racetech on 2013/12/23 12:45:35
_________________
Project Build: http://datsun1200.com/modules/newbb/viewtopic.php?topic_id=45104&forum=9

Don't find a problem, find a solution!!!!
www.race-tech.co.za
Transfer the post to other applications Transfer


Re: racetech's 1200 SR20VE Project
Home away from home
Joined:
2009/7/1 9:29
From Vanderbijlpark, South Africa
Group:
Registered Users
Posts: 161
Offline
this project is really looking good, can't wait to see the end product, it's going to be one of a kind. good work racetech

Posted on: 2011/3/17 9:21
_________________
93' Nissan 1400 a15 60a (daily)
82' Datsun 1400 ute (sold)
73' Datsun 1200gx Coupe (sold)
Transfer the post to other applications Transfer


Re: racetech's 1200 SR20VE Project
Home away from home
Joined:
2009/4/16 10:37
From Cape Town, South Africa
Group:
Registered Users
Posts: 803
Offline
Thanks for the kind words.

We are starting to see the light in the tunnel regarding the mechanical work, every time I visit the car I get the feeling that we are getting closer.

Mayor work still to be done:
1. Finnish roll cage
2. Built new Front Suspension
3. Cut and weld fenders for some huge flares, otherwise I can enter the car in the open wheel class
4. Built sump, surge tank, breather system, expansion tank etc.
5. All the small stuff that emerge

Then spray job.

Posted on: 2011/3/17 10:13
_________________
Project Build: http://datsun1200.com/modules/newbb/viewtopic.php?topic_id=45104&forum=9

Don't find a problem, find a solution!!!!
www.race-tech.co.za
Transfer the post to other applications Transfer


Re: racetech's 1200 SR20VE Project
Home away from home
Joined:
2009/4/16 10:37
From Cape Town, South Africa
Group:
Registered Users
Posts: 803
Offline
5 March 2011- Steering Column & Pedal Box

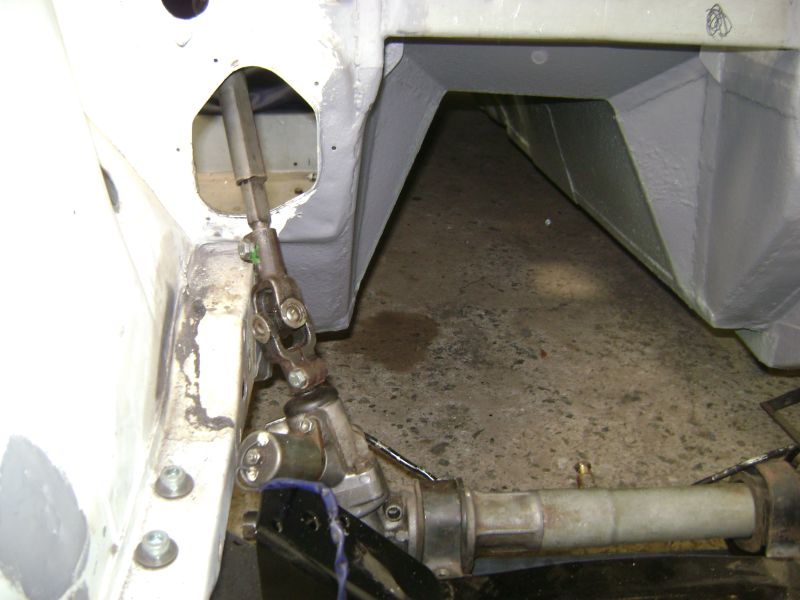
Next on our list of priorities to finish was the steering column and pedals, this would allow us to finish with the roll cage as we have a problem with the driver’s side windscreen pillar reinforcement. The particular work was done over 3 visits to the car as we started with planning which resulted in some machining that had to be done before we could continue.

Open in new window

Open in new window

Open in new window

Open in new window

Open in new window


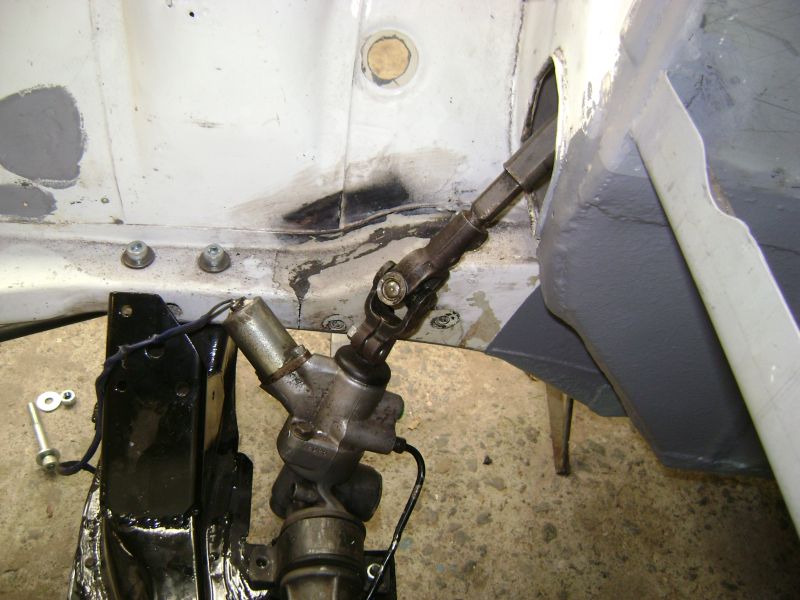
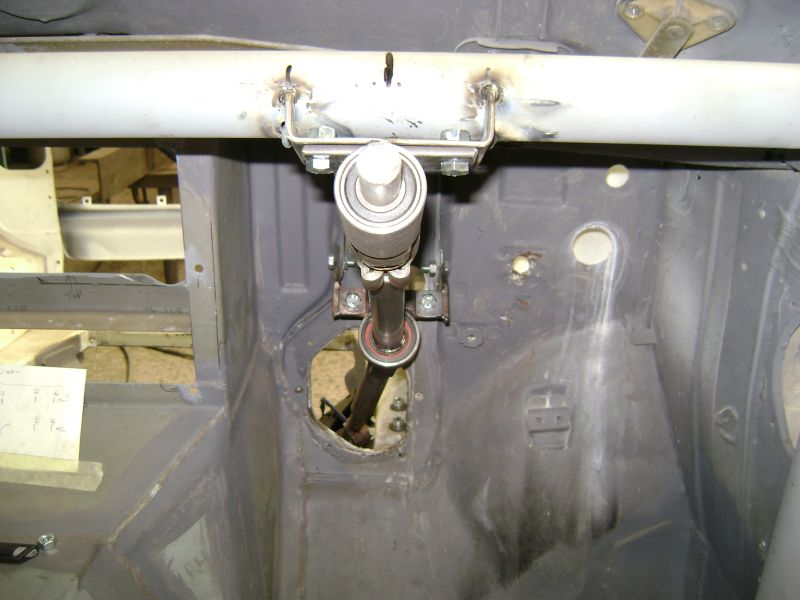
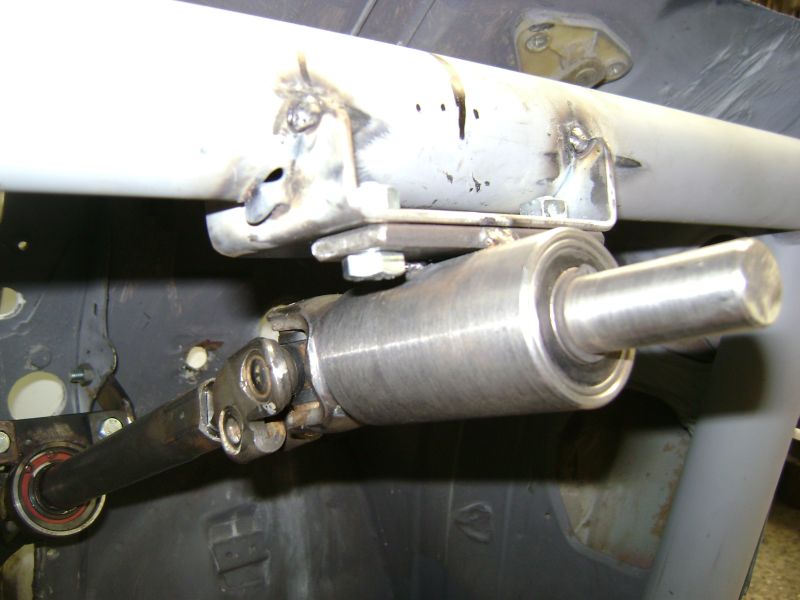
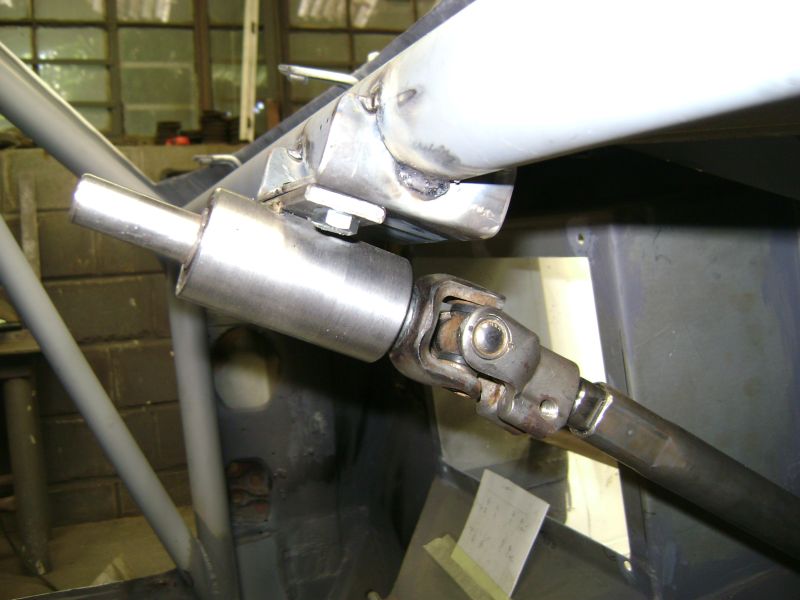
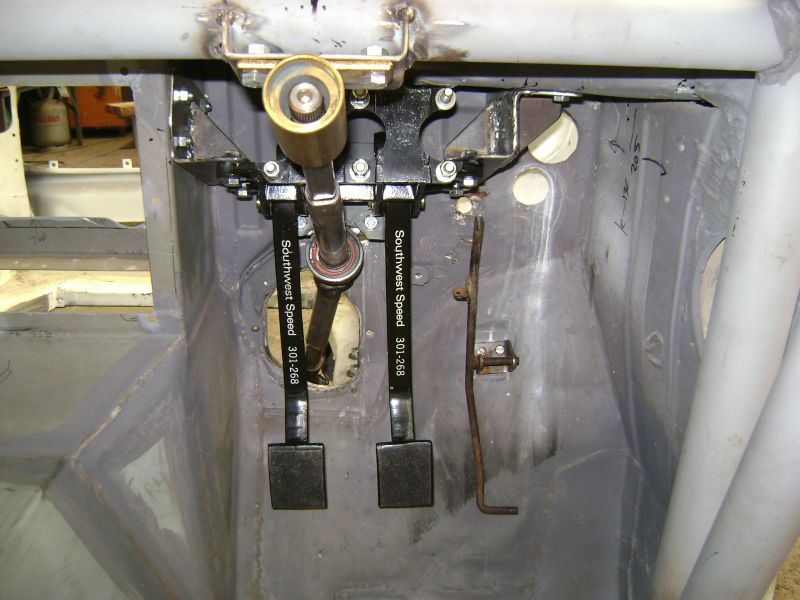
I started with installing the power steering rack to enable us to get the correct position for the steering shafts. The particular steering column that I decided in using was turning out to be the correct choice as we basically had 2 mounting points to make to get the steering wheel just as we would want it. The first mounting point consists of a bearing within a holder with two circlips to keep the bearing in place that we had machined, this mounting point is just on the inside of the car, next is a holder that we had machined that uses two common sized bearings, this particular holder mounts to the front transversal member of the roll cage on the bottom as per FIA rules.

Open in new window

Open in new window

Open in new window

Open in new window


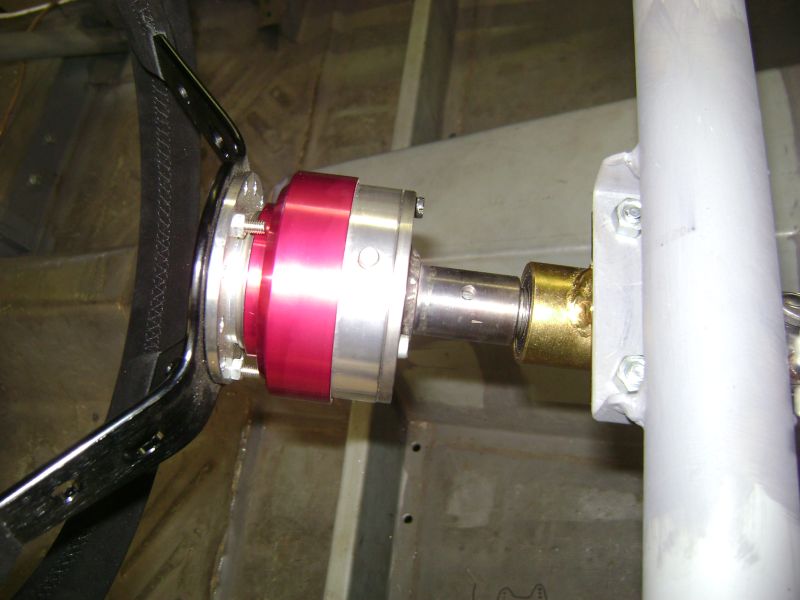
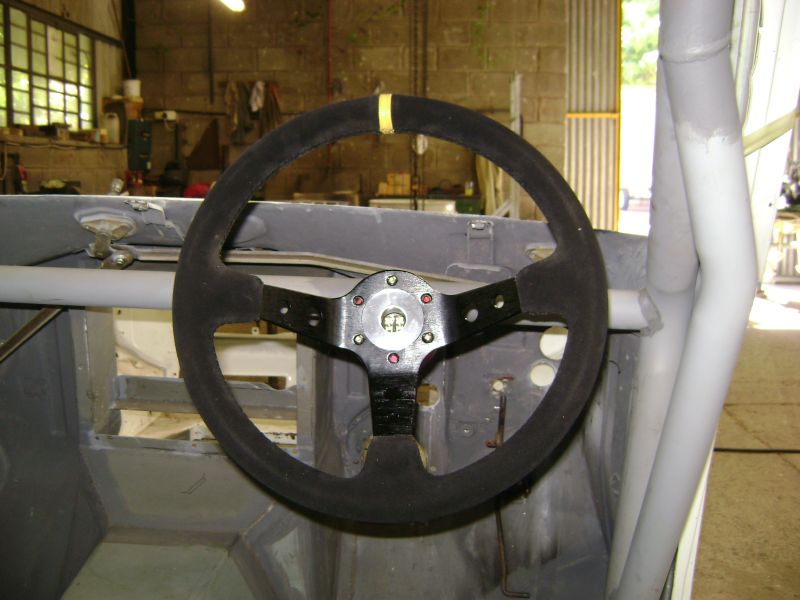
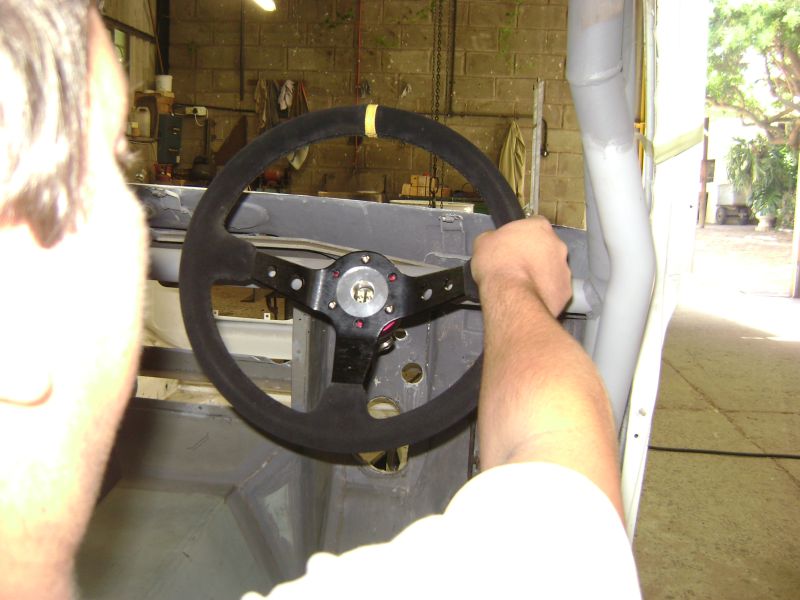
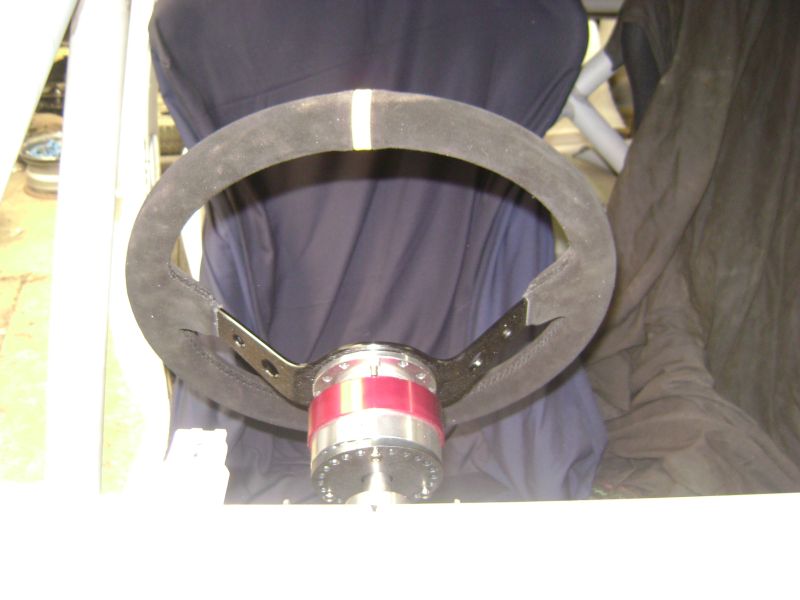
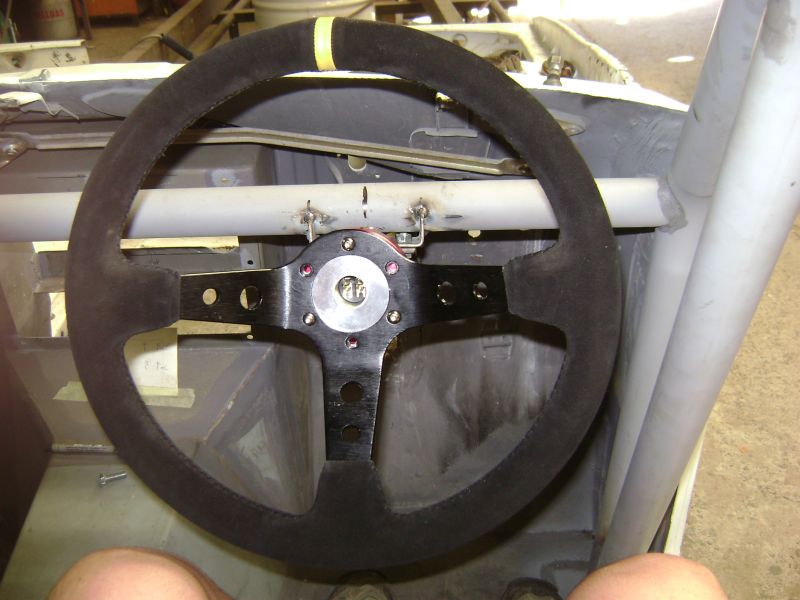
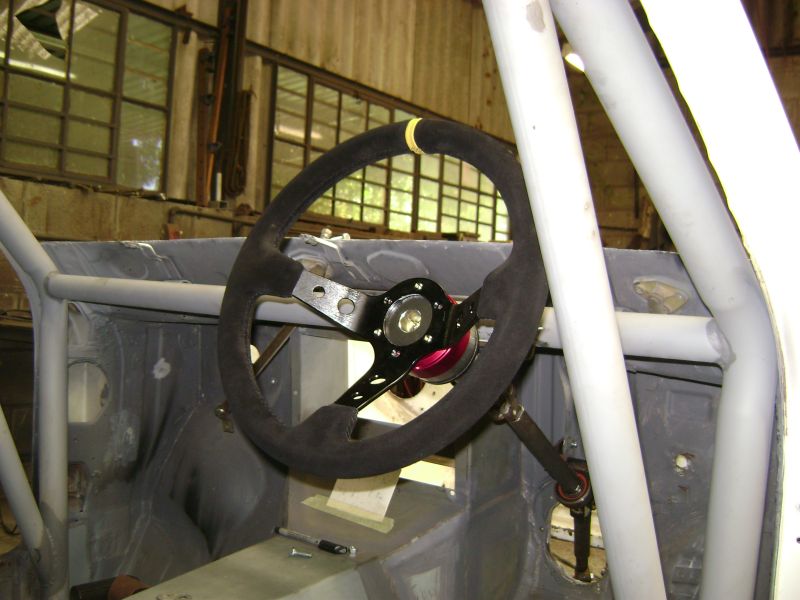
In order for us to get the steering column short enough; we had to enlarge the flat on the bottom splines in order to move the unit lower and shorten the top slide. The column is mounted in such a way that the universal angles are kept to a minimum as not to add unnecessary friction and wear when turning the steering wheel. Afterwards I made a quick mock install of the steering wheel and quick release unit. Two things became apparent, for one I will need to make or use a commercially available spacer to get the wheel exactly in position; luckily with this configuration I can adjust it as needed. Secondly our worst fears regarding the windscreen pillar reinforcements came true, it is directly next to the position where I feel comfortable with the steering wheel position, we will have to remove it and make a new with a bend in it to get some space between your hand and the reinforcement, luckily for us, under the FIA rules this is allowed.

Open in new window

Open in new window

Open in new window

Open in new window


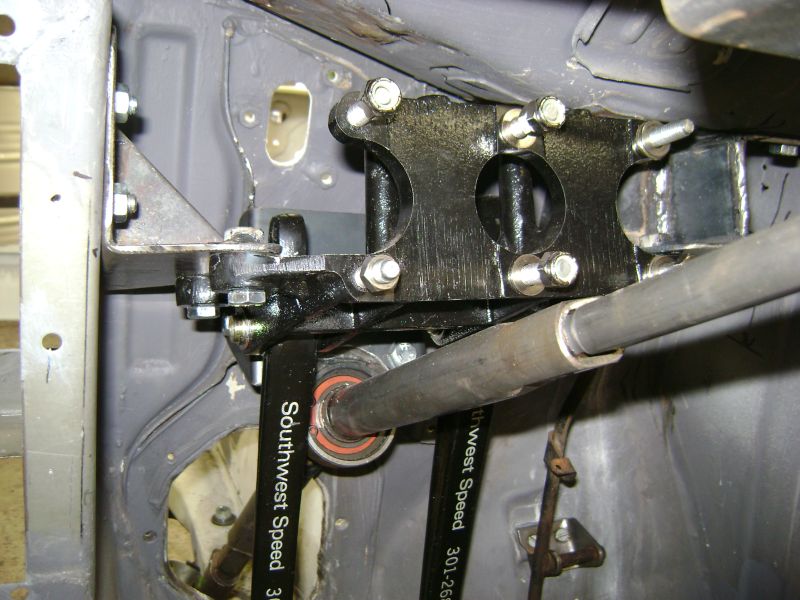
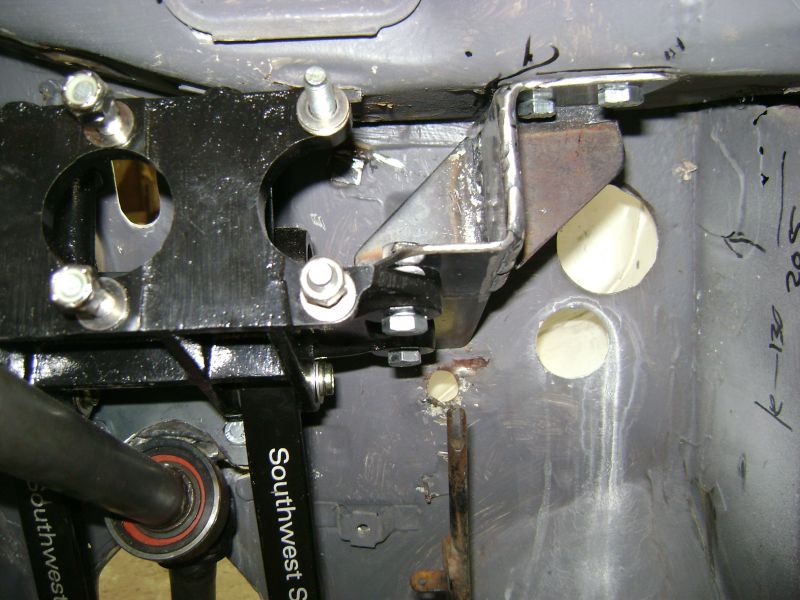
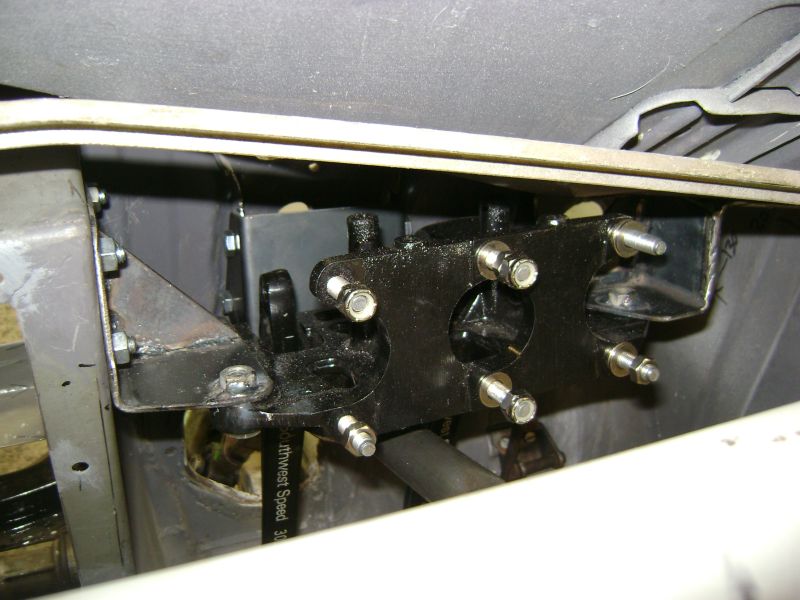
On my next visit we tackled the pedal box, not such a vital component to finish in order to complete the roll cage, but just one of those things that you want to be done with due to the awkward working position. We started with the left hand bracket, it was decided to mount this to the firewall box that we fitted, knowing that it is very strong and would act as a good mounting point for pedals that very high forces are applied to. The pedal box was clamped in place with the necessary spacers between the steering column and manufacturing started on the bracket, we cut it to the desired shape and fixed it in place and moved on to the right hand side bracket. With the pedal box in place it was allot easier to manufacture the particular bracket due to a very awkward working position. After the initial bracket was manufactured we added some needed gussets and reinforcements plates on the mounting surfaces of the brackets.

Open in new window

Open in new window


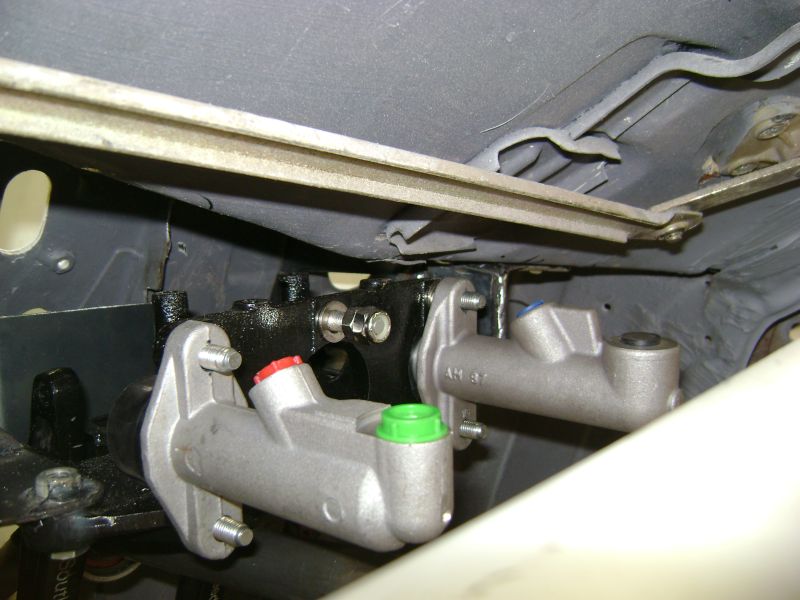
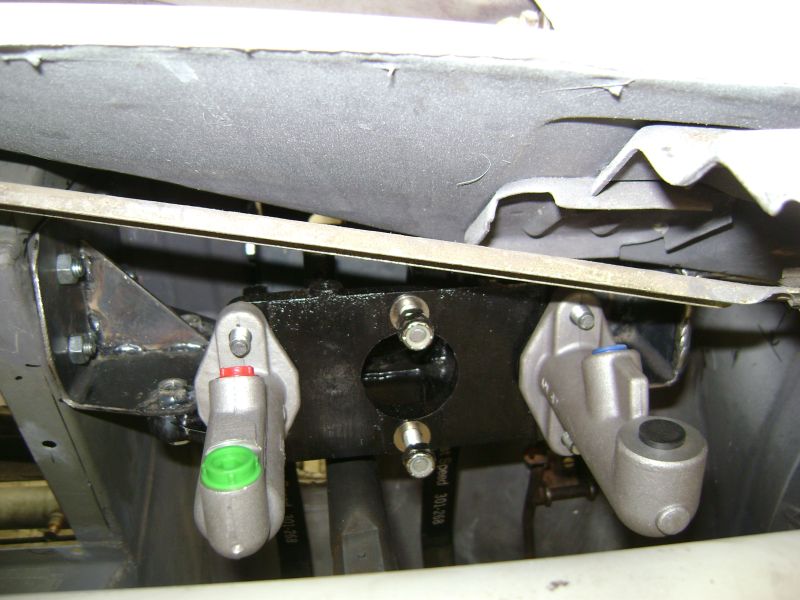
I fitted the master cylinders and it was very apparent that I will have to mount the brake fluid reservoirs remotely due to the space constraints, personally I don't even think hose barbs with flexible rubber hose will work, the only option will be to use some sort of banjo fitting on the masters. With the seats, steering and pedal box in place, we reached a critical milestone for all the mechanical work required on the car, this lifted our spirits and we continued with roll cage extensions to the front strut towers, we measured out the location for the holes, used a hole saw to cut them and also made the plates that will be fixed to the towers. The roll cage extensions will then be foxed to these, allowing a bigger area to apply a force on.

Open in new window

Open in new window

Open in new window


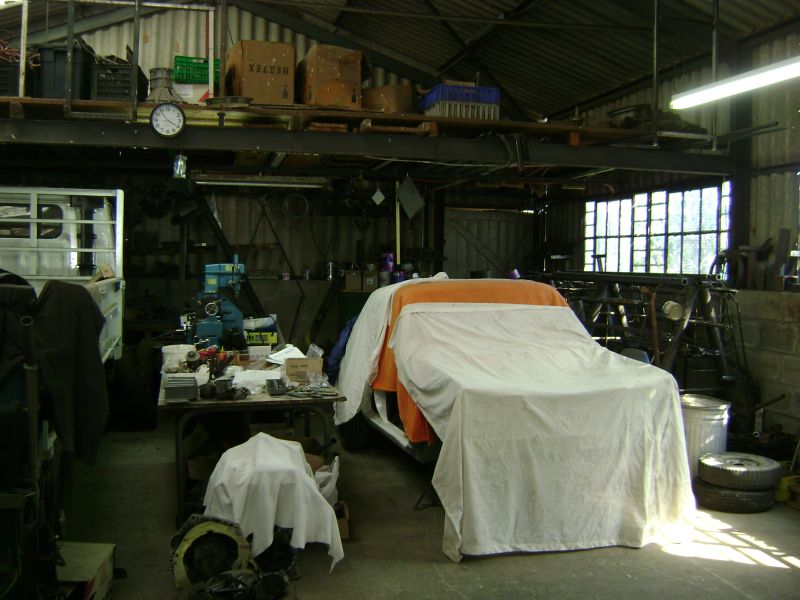
Unfortunately due to other commitments I had to wrap the Datto tightly and put to rest for a four week period. Work will continue on the roll cage during the next visit.

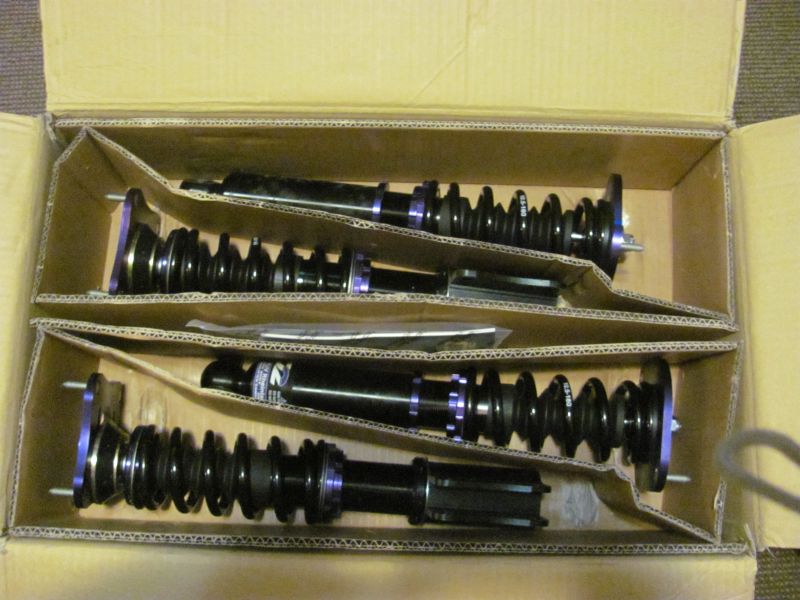
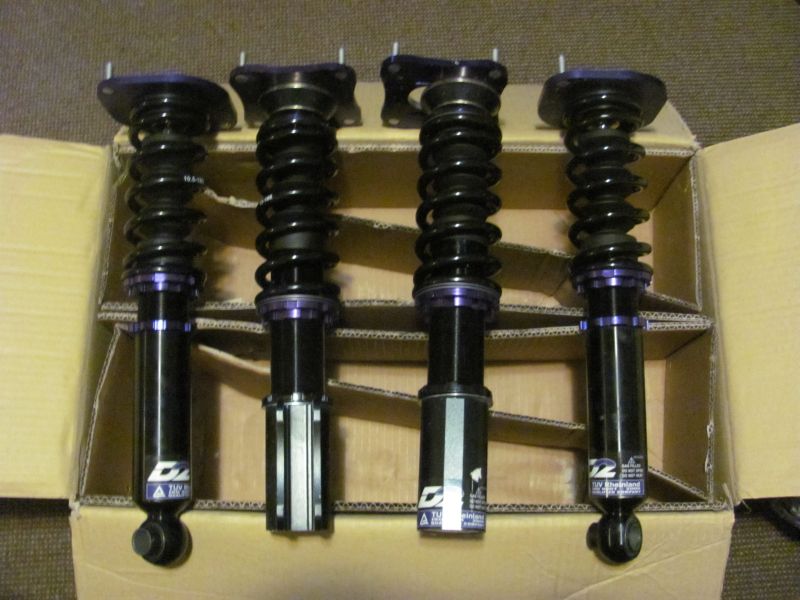
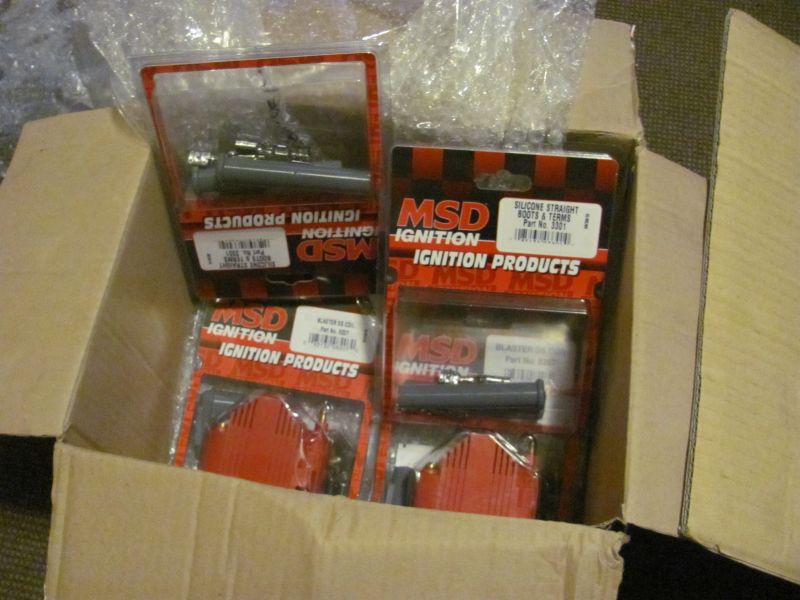
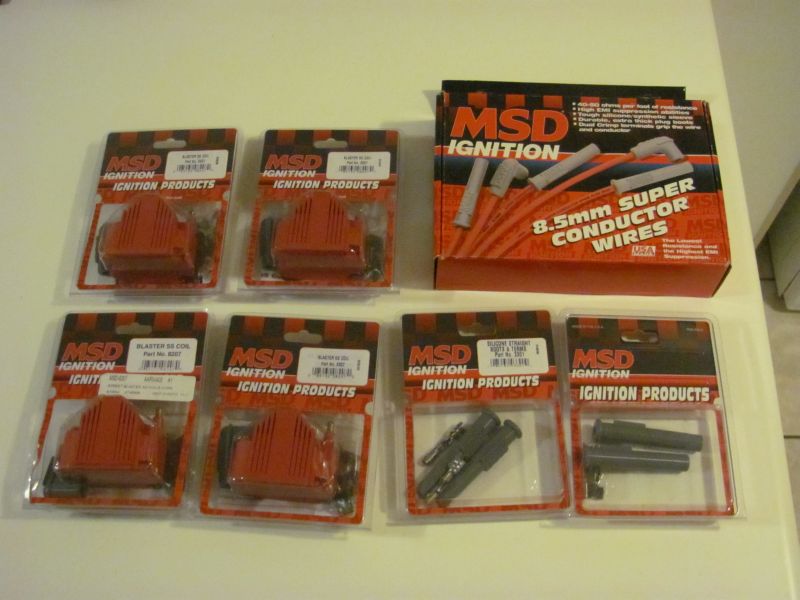
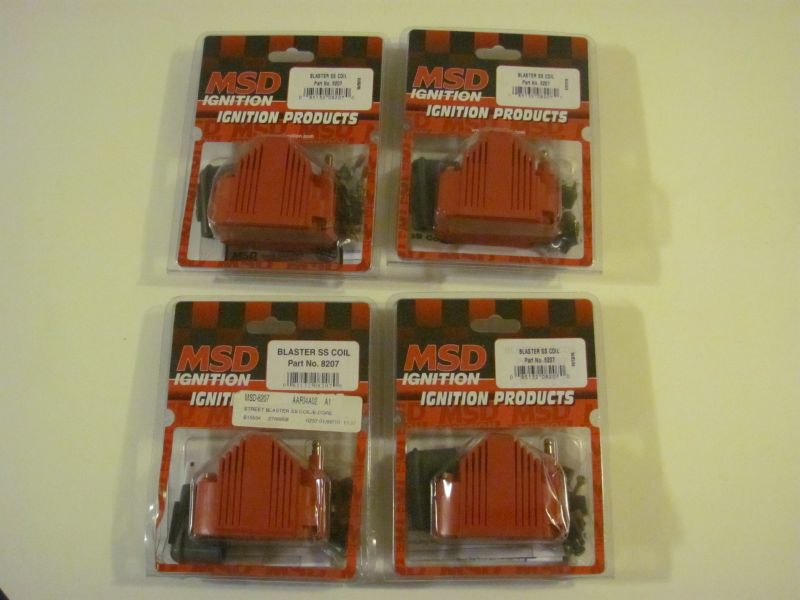
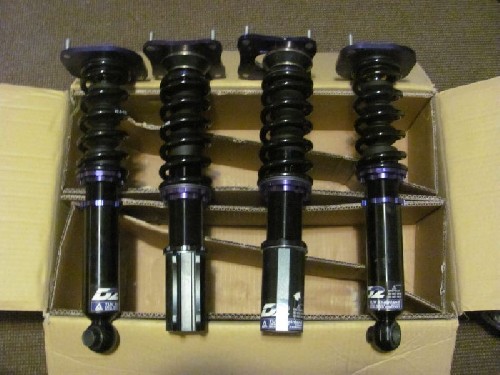
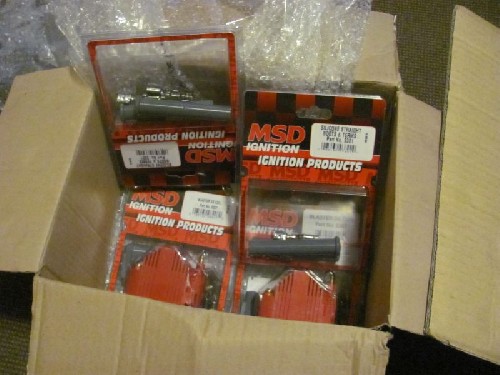
Luckily for me a box or two landed from [img]http://shop.rezlo.com/SA/index.php">RAW - Rezlo Auto Works</a>

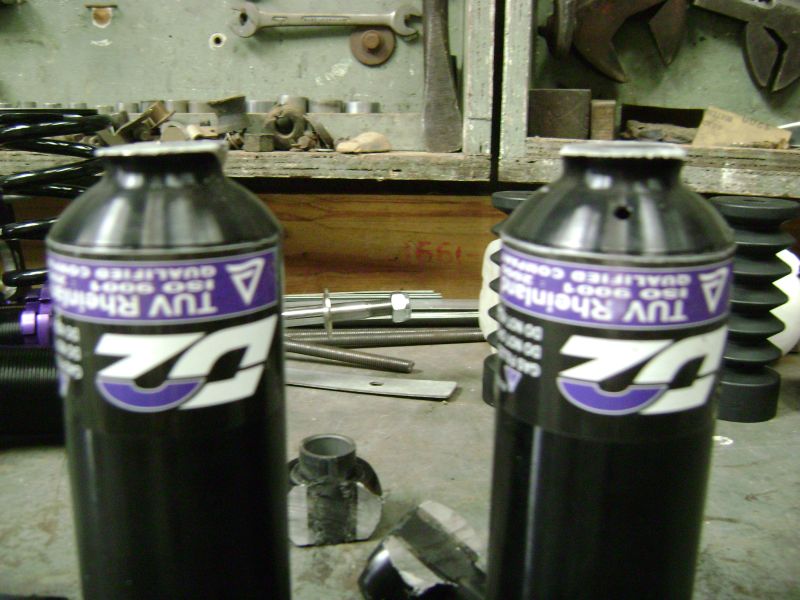
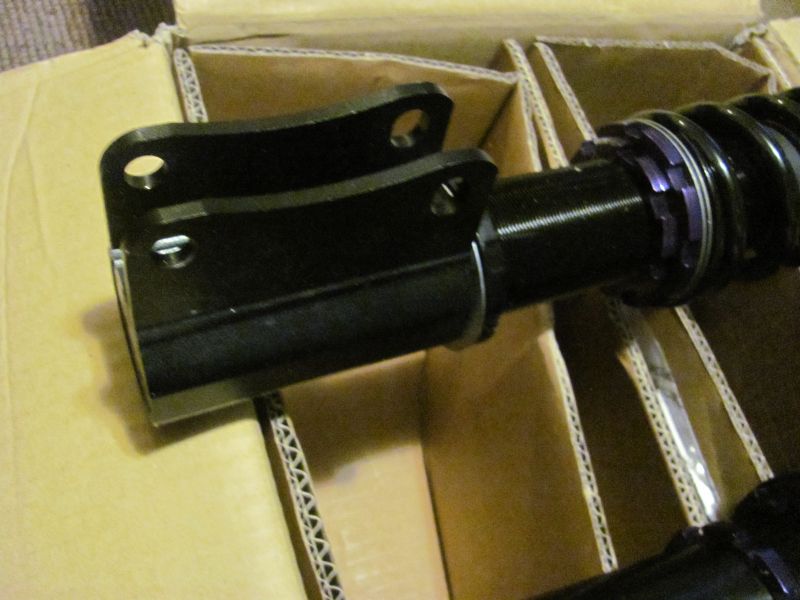
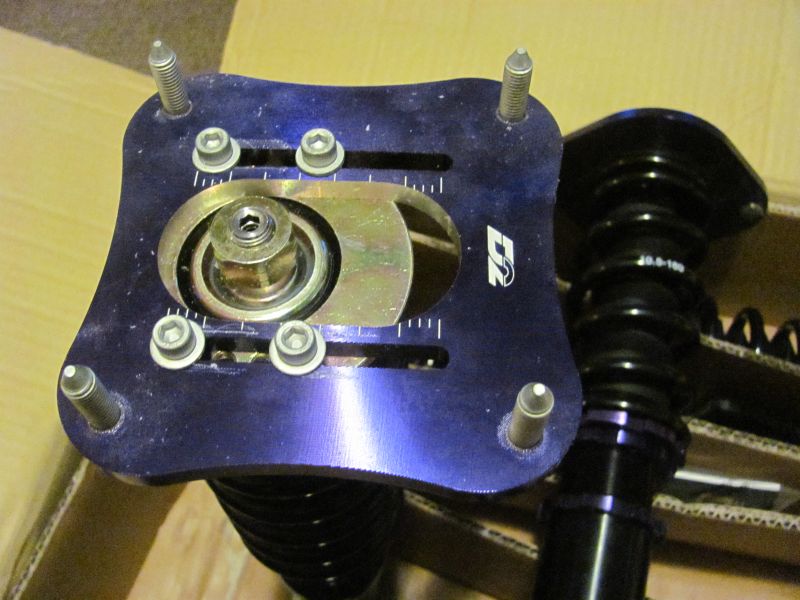
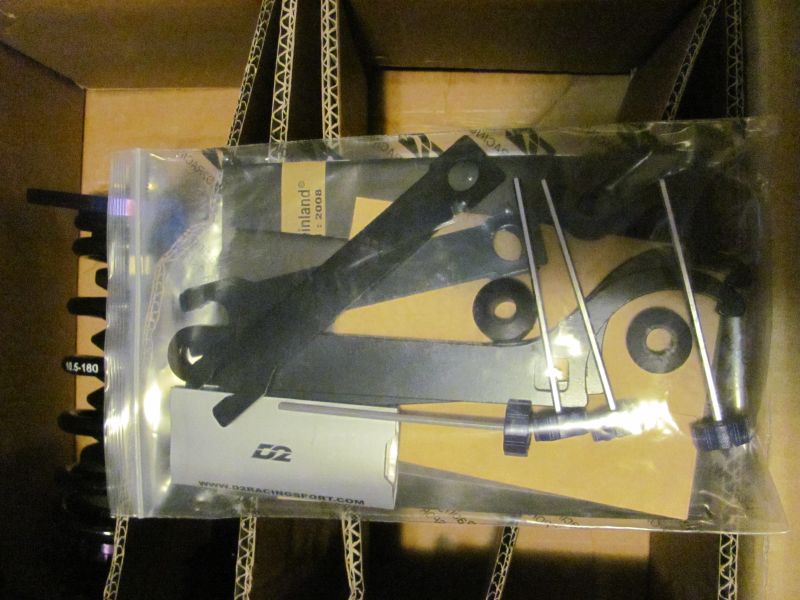
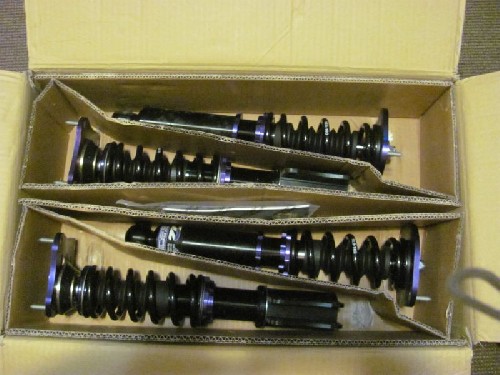
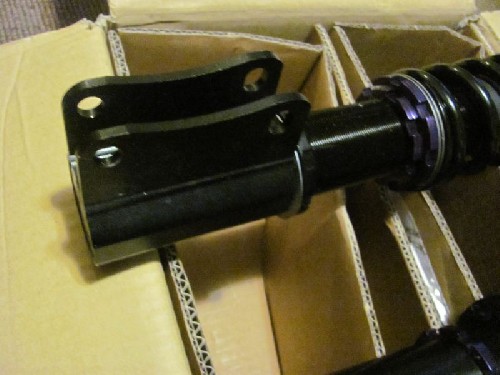
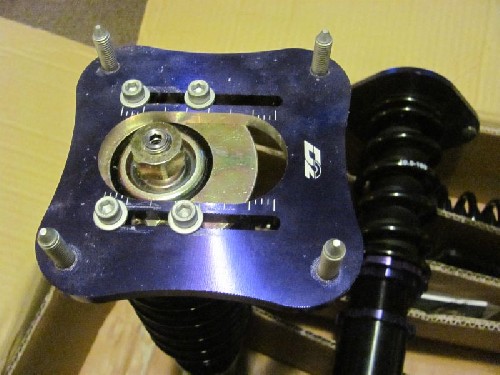
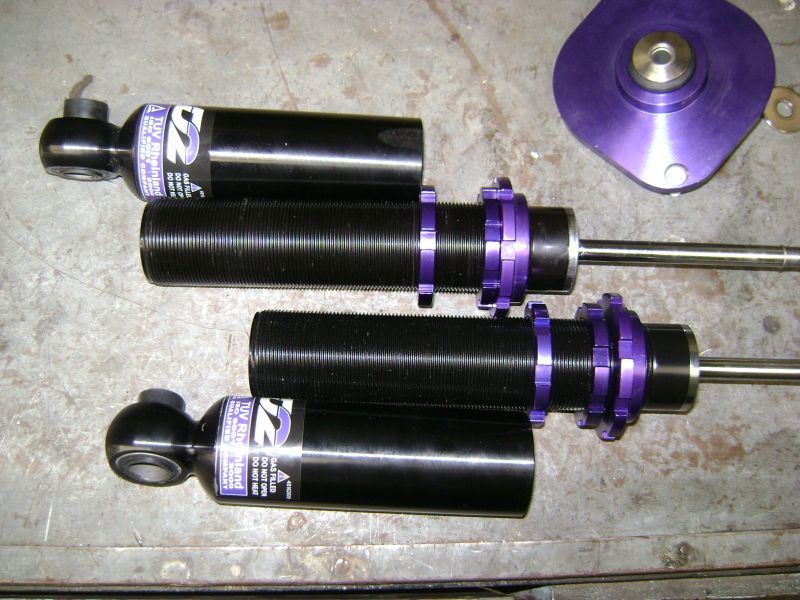
D2 RX7 Coil Overs - These will be made to fit the Datsun Stub Axles

Open in new window

Open in new window

Open in new window

Open in new window

Open in new window


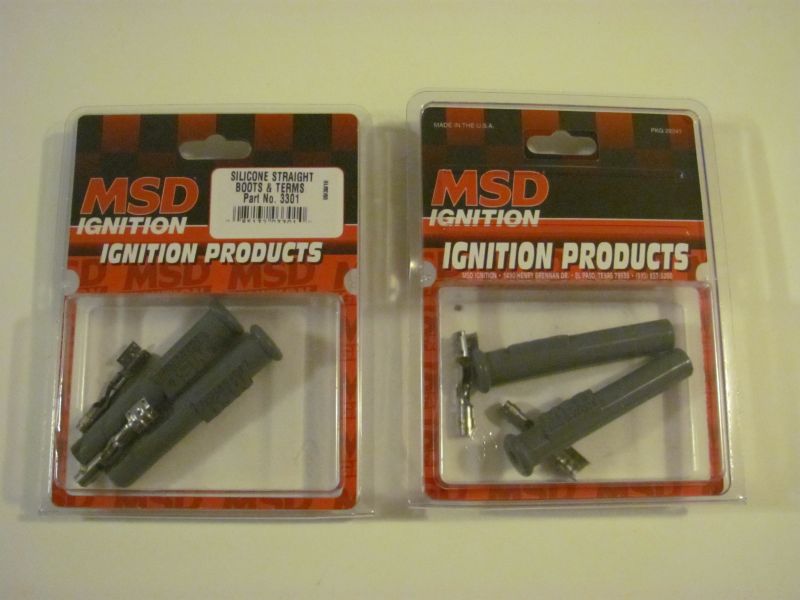
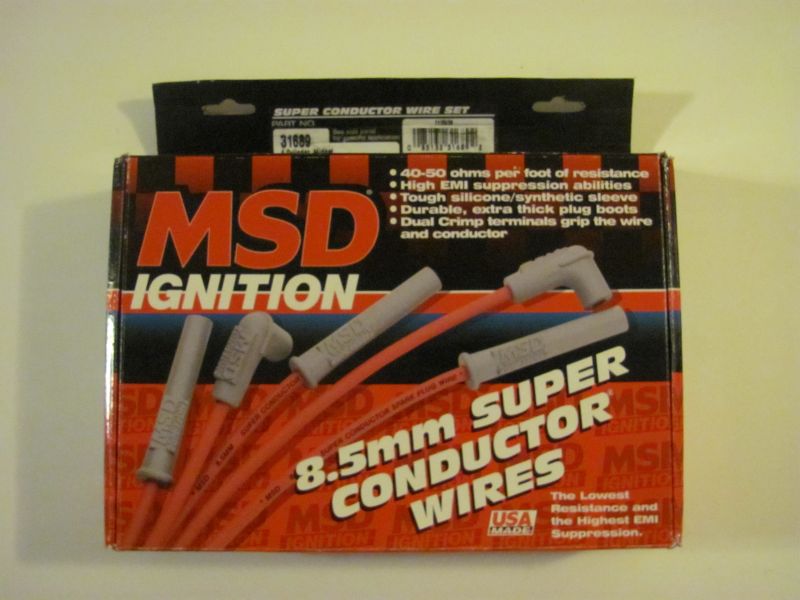
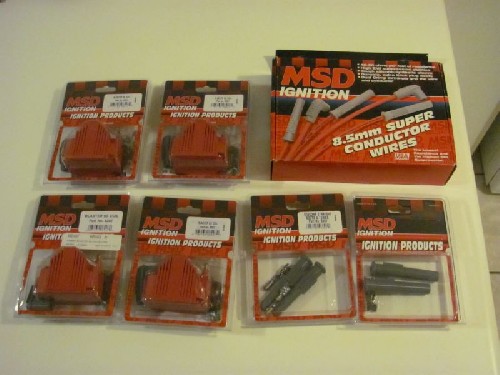
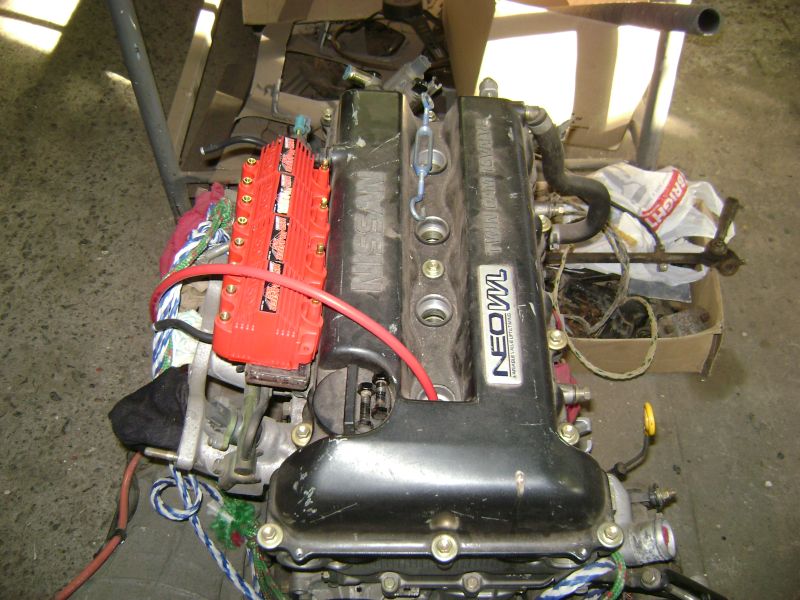
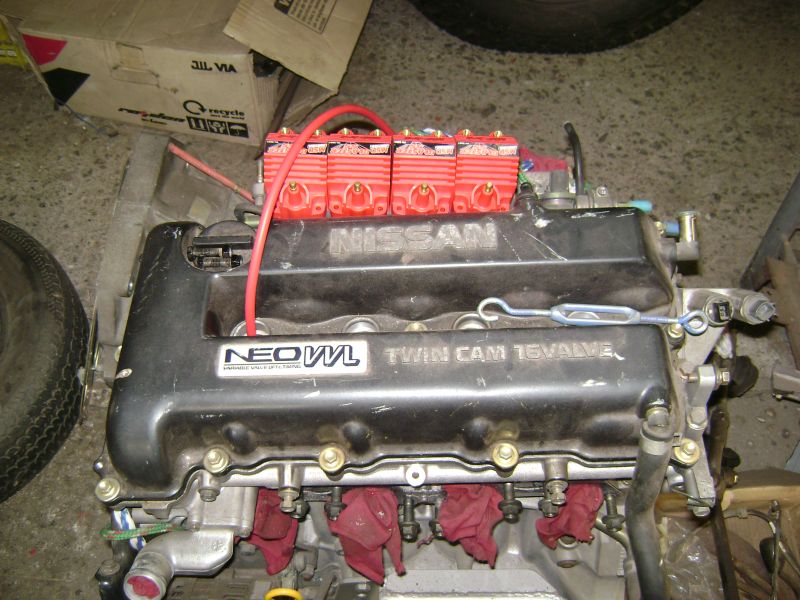
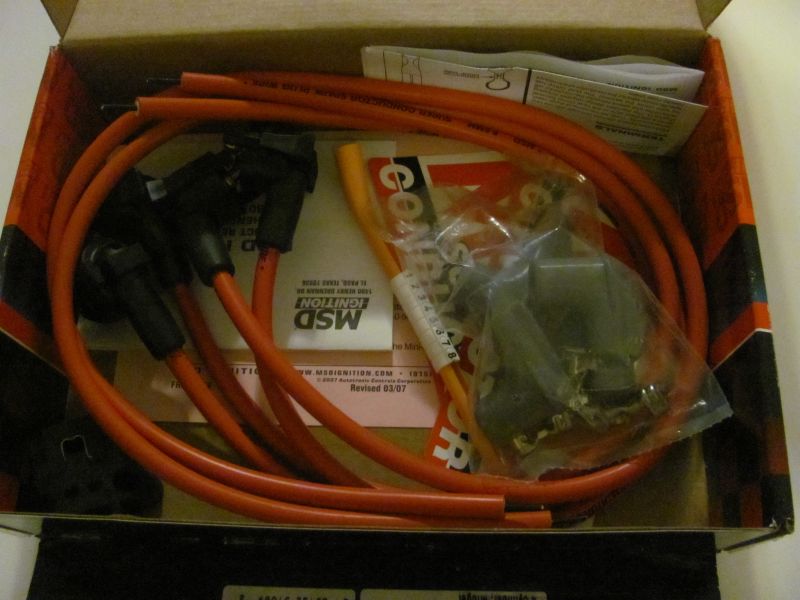
MSD Ignition Blaster SS Coils, 8.5mm Super Conductor Wires, Silicone Straight Boots

Open in new window

Open in new window

Open in new window

Open in new window

Open in new window

Open in new window

Posted on: 2011/3/18 8:54

Edited by racetech on 2013/12/23 12:44:21
_________________
Project Build: http://datsun1200.com/modules/newbb/viewtopic.php?topic_id=45104&forum=9

Don't find a problem, find a solution!!!!
www.race-tech.co.za
Transfer the post to other applications Transfer


Re: racetech's 1200 SR20VE Project
Home away from home
Joined:
2009/4/16 10:37
From Cape Town, South Africa
Group:
Registered Users
Posts: 803
Offline
While the car is parked until this weekend after a no work period of 3weeks in a row, I was able to source some parts.

Some D2 goodies, originally for the Mazda RX7, but will work a tread on the Datto with a few measurements and lazercut pieces combined with a few strategically placed welds.

The Datto will run nice with these flaming throwing coils. I'm almost done with the ignition side of things.

Attach file:


jpg  Datto14March02.jpg (86.70 KB)
11688_4d9187685dafb.jpg 800X600 px

jpg  Datto14March04.jpg (69.67 KB)
11688_4d9187776e15c.jpg 800X600 px

jpg  Datto14March05.jpg (81.01 KB)
11688_4d91877d0cb23.jpg 800X600 px

jpg  Datto14March11.jpg (81.15 KB)
11688_4d91879c7fb24.jpg 800X600 px

jpg  Datto14March13.jpg (77.56 KB)
11688_4d9187aceaeef.jpg 800X600 px

jpg  Datto14March14.jpg (72.91 KB)
11688_4d9187ba68e8c.jpg 800X600 px

Posted on: 2011/3/29 8:18
_________________
Project Build: http://datsun1200.com/modules/newbb/viewtopic.php?topic_id=45104&forum=9

Don't find a problem, find a solution!!!!
www.race-tech.co.za
Transfer the post to other applications Transfer


Re: racetech's 1200 SR20VE Project
Just can't stay away
Joined:
2008/7/30 6:37
From Trinidad and Tobago, West Indies
Group:
Registered Users
Posts: 94
Offline
awesome stuff as usual mate!
are you going to re drill the strut towers or just swap the camber plates for ones that fit the 3 hole?

Posted on: 2011/3/29 21:56
_________________
My Datsun 1200 blog
Transfer the post to other applications Transfer


Re: racetech's 1200 SR20VE Project
Home away from home
Joined:
2009/4/16 10:37
From Cape Town, South Africa
Group:
Registered Users
Posts: 803
Offline
I'll take the bearings out of the pillow tops and use them in a new pair that I need to design and build which will be Camber/Caster adjustable.

Posted on: 2011/3/30 7:31
_________________
Project Build: http://datsun1200.com/modules/newbb/viewtopic.php?topic_id=45104&forum=9

Don't find a problem, find a solution!!!!
www.race-tech.co.za
Transfer the post to other applications Transfer


Re: racetech's 1200 SR20VE Project
Home away from home
Joined:
2009/4/16 10:37
From Cape Town, South Africa
Group:
Registered Users
Posts: 803
Offline
2 April 2011 – Roll Cage IV & D2 Coil Overs

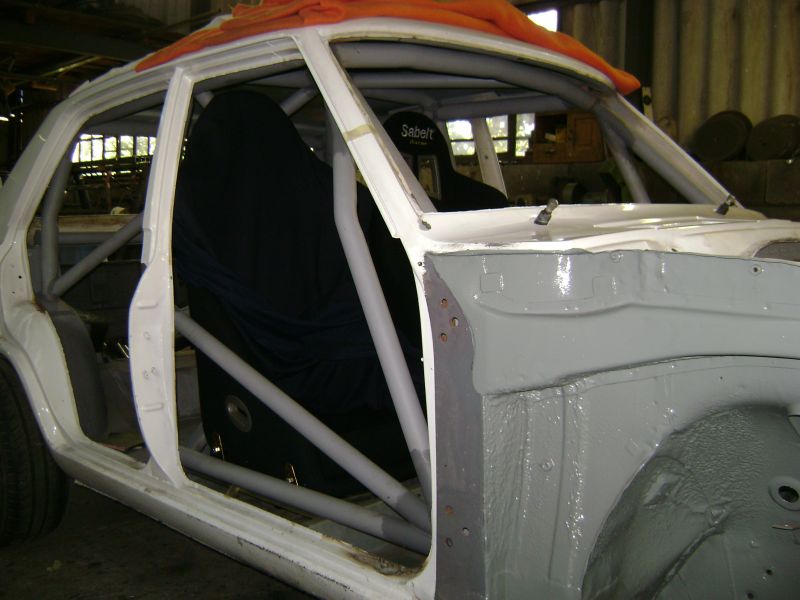
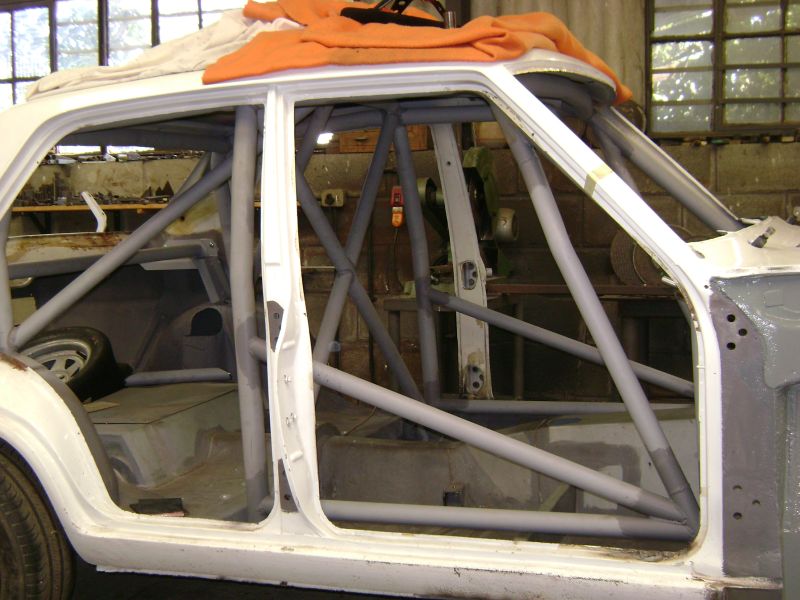
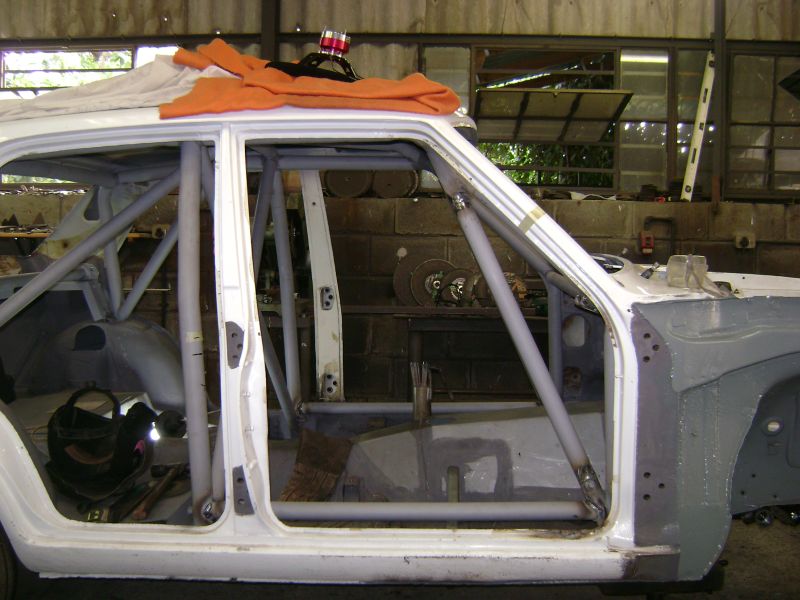
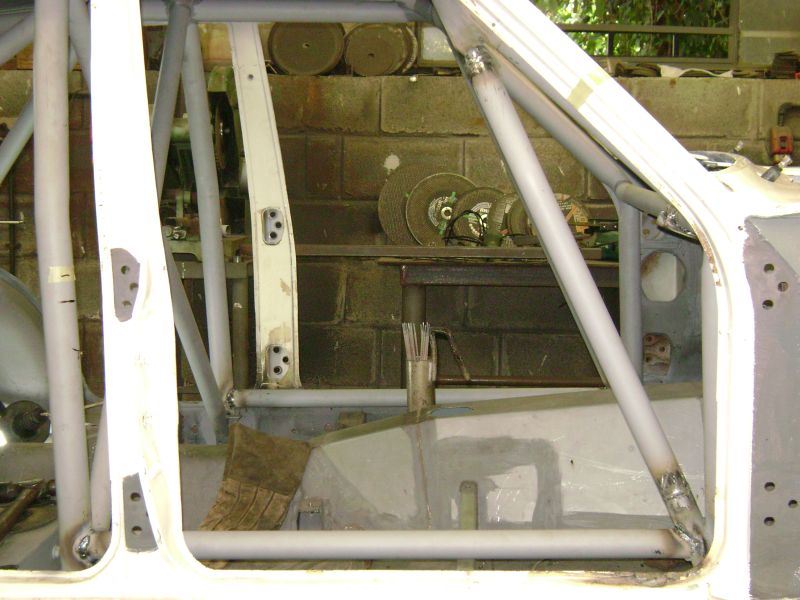
Roll Cage, whenever I walk into the workshop and have to work on the cage I'm always looking around for something better to do, Yes I know this is the most important safety aspect of the car, but I'm tired of it, the sooner this can be done the sooner I'll get my smile back and continue with the nice work, at this stage even sanding and prepping the car for spraying will be better, at least I can see something that is done at the end of the day. The biggest downside to the cage is the fact that I'm only working on it during weekends, If only you can make one pipe per week day fit you would finish this thing within a month, not 5 months like currently. Luckily stuff like the steering column, pedal box and seats have been mounted during this time, otherwise I would have been insane by now.
Open in new window

Open in new window

Open in new window

Open in new window

Open in new window

Open in new window

Open in new window

Open in new window

Open in new window

Open in new window

Open in new window

Open in new window

Open in new window


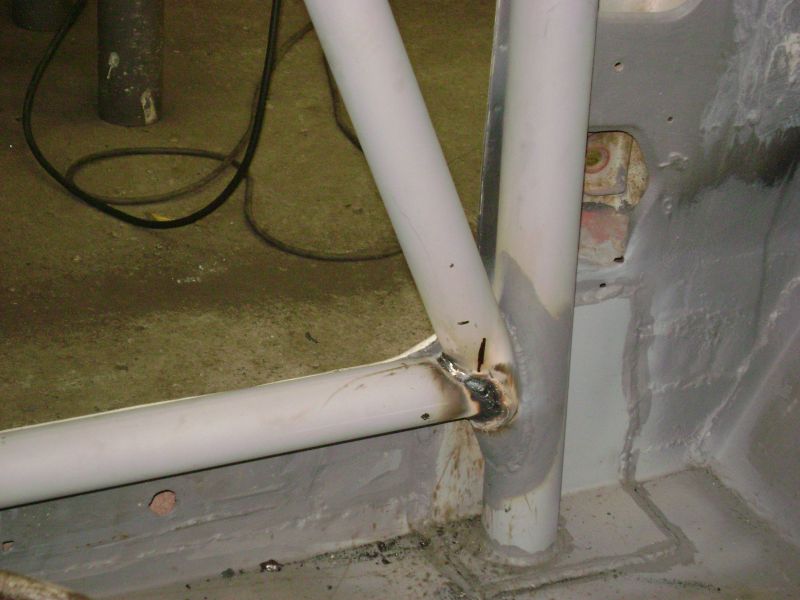
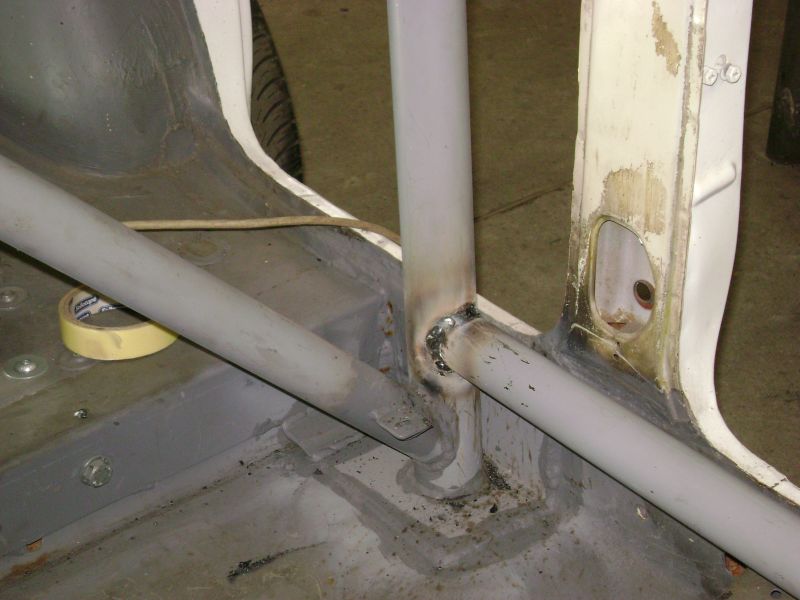
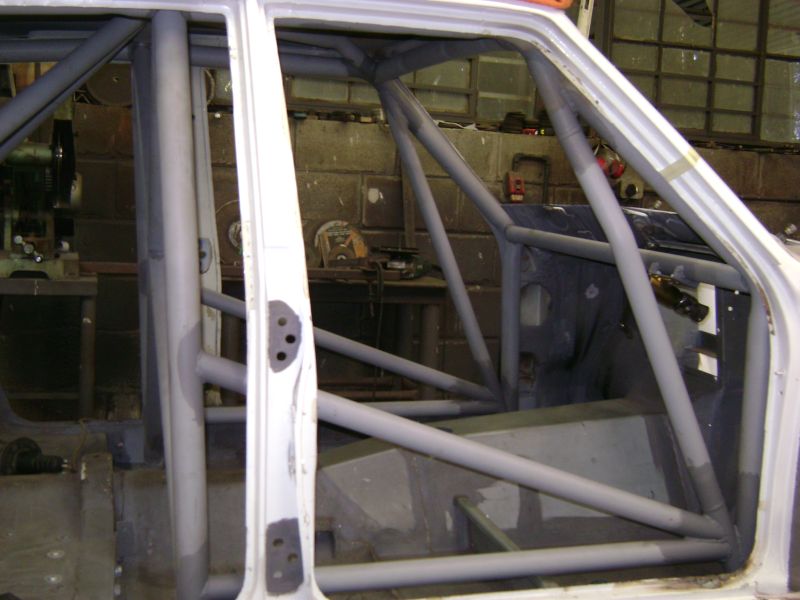
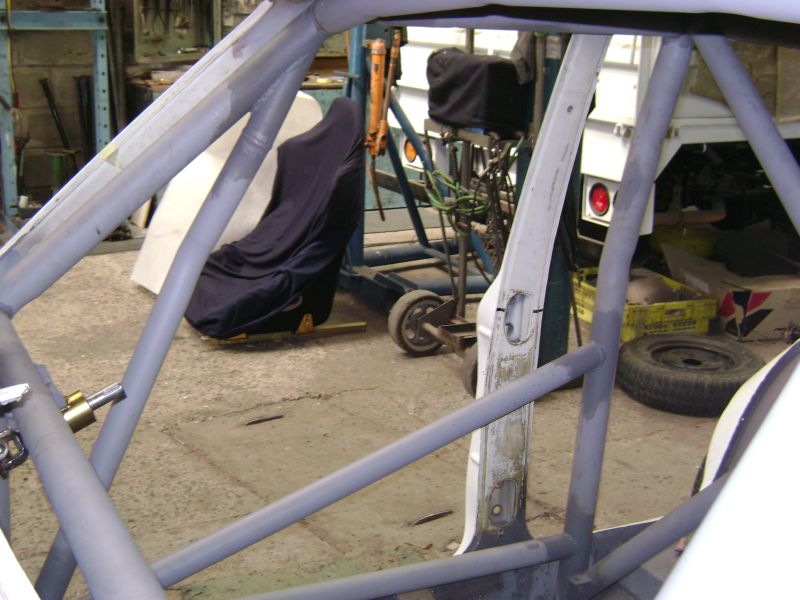
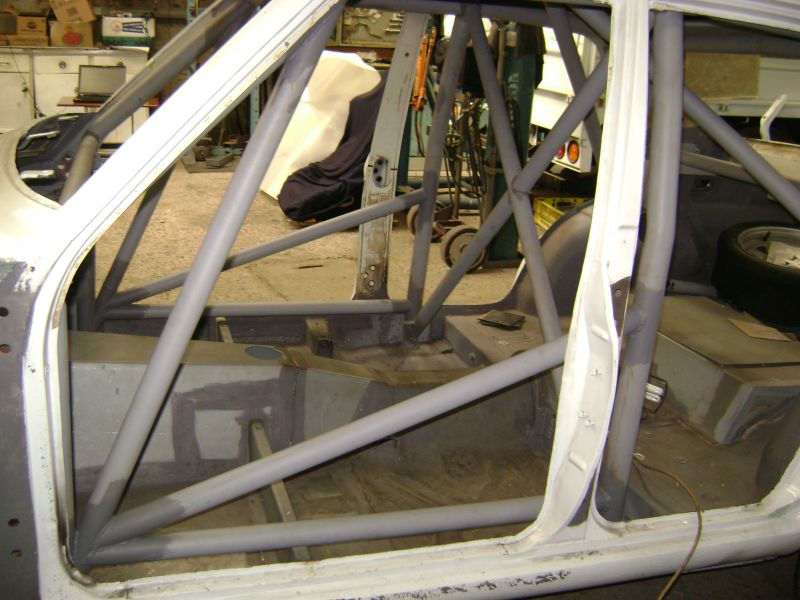
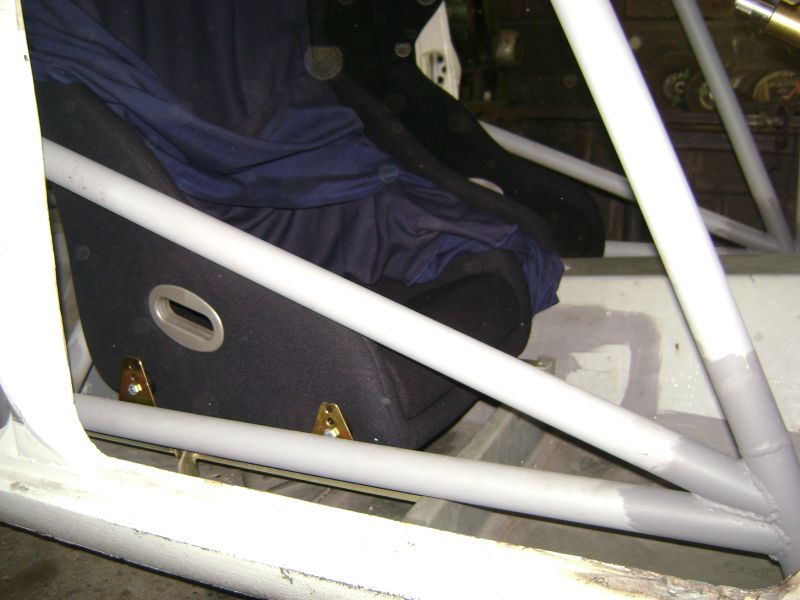
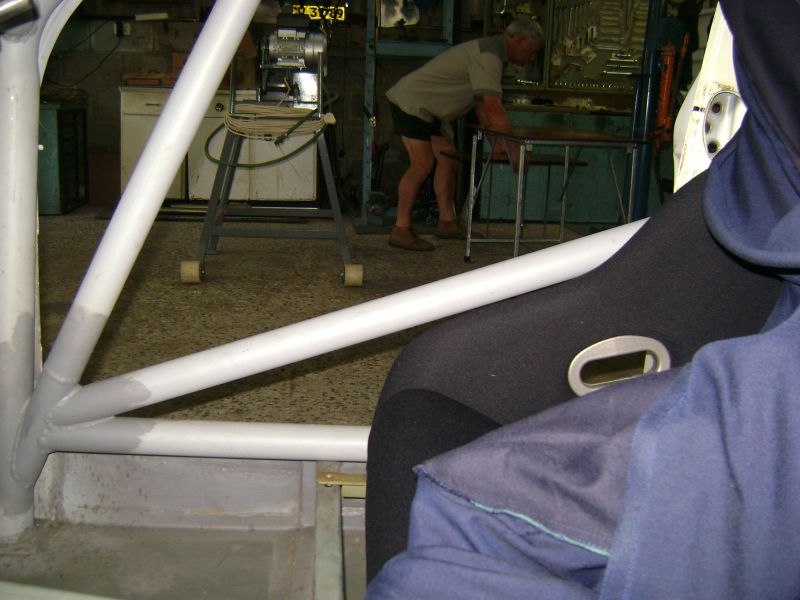
Work started on the right hand side windscreen reinforcement, being a straight pipe from bottom to top, left me with no room to turn the steering wheel, well we had two options, move the steering and be seated in a very awkward position or replace it with a bend pipe and stay within regulations, well we opted for the latter option, but took the easier route out of this situation, we cut the pipe out and welded a new bend piece in, not 100% correct, but seeing that 80% of race cars in RSA doesn't even have these pieces fitted. There was actually no option to remove the old pipe completely as we were unable to get a grinder in the confined space. Once this was finished we could continue with door bars as the top door bar attach to the windscreen reinforcements. The bottom bar went in with ease and a little planning was to be done with the top one, as the FIA states that it must be below half the door opening, I wanted this bar to be as low as possible in the front for easier entry seeing that the 1200 door opening is so small and the rear to be high in order for the total downwards slope to protect the seats from in and out climbing. The seats was installed and the necessary measurements taken in order to achieve the goal. This kept us busy for the majority of the day to get the driver and navigators side done.
Open in new window


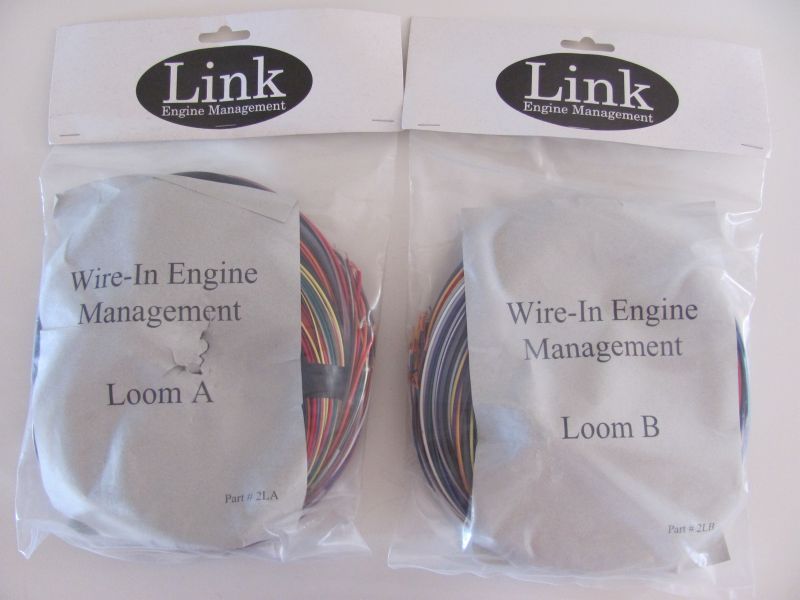
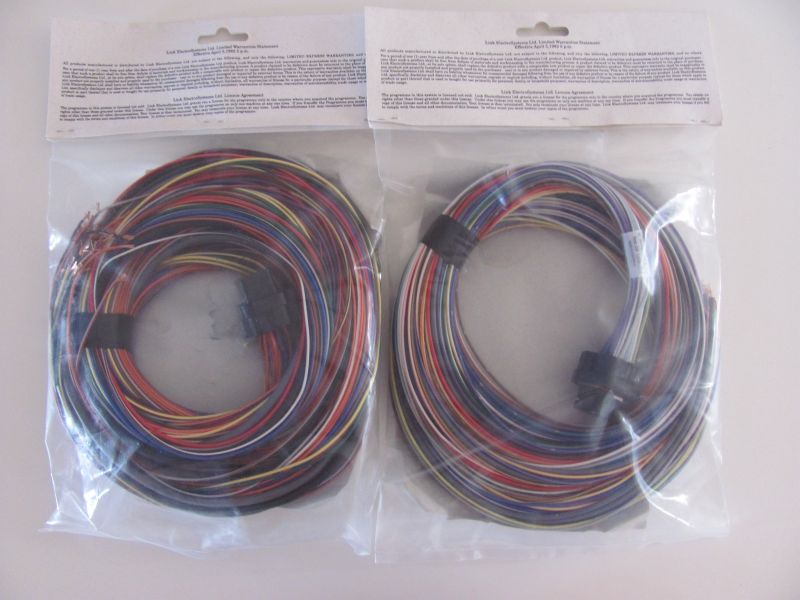
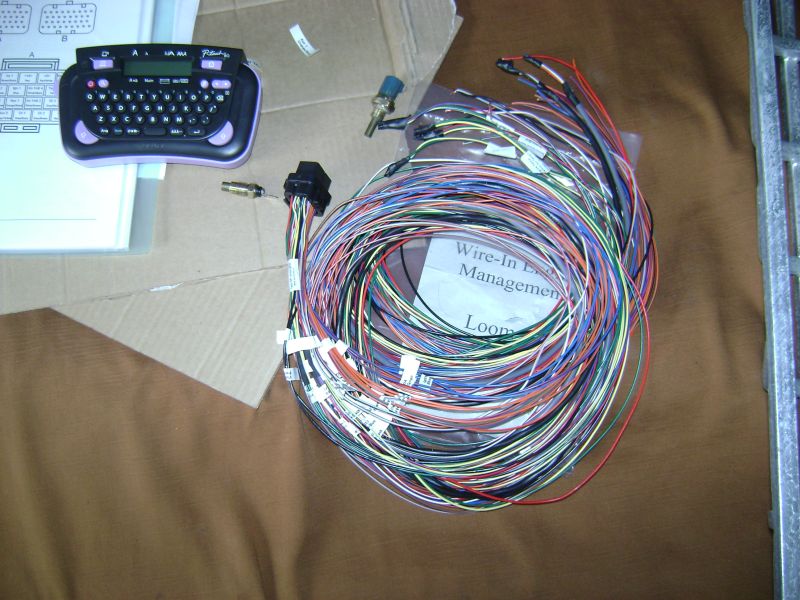
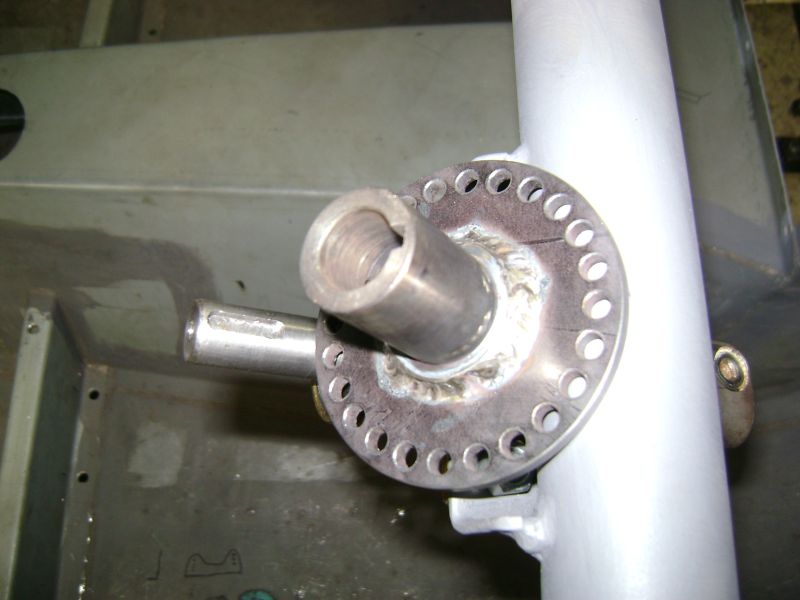
During the construction of the door bars I found some time to finish labelling the one loom of the LinkECU G4 Xtreme engine management and start with the planning of the coil overs.
Open in new window

Open in new window

Open in new window

Open in new window

Open in new window

Open in new window

Open in new window

Open in new window


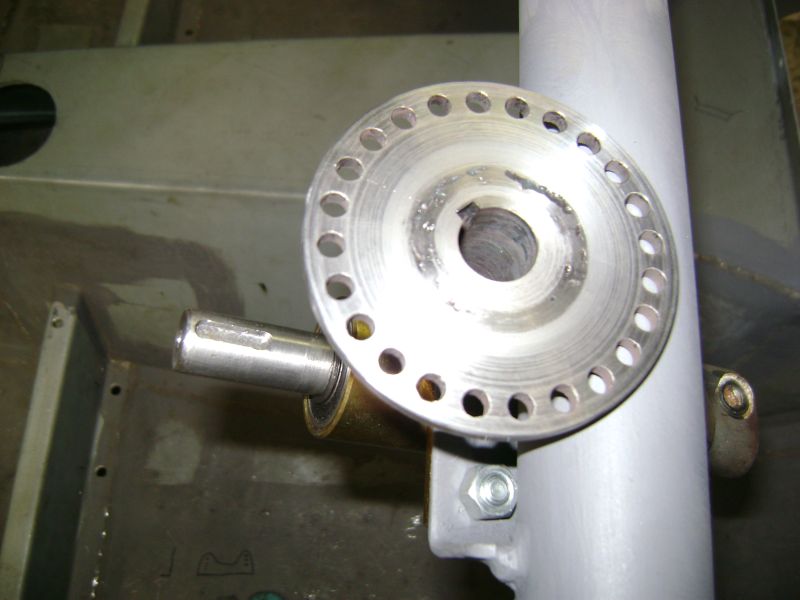
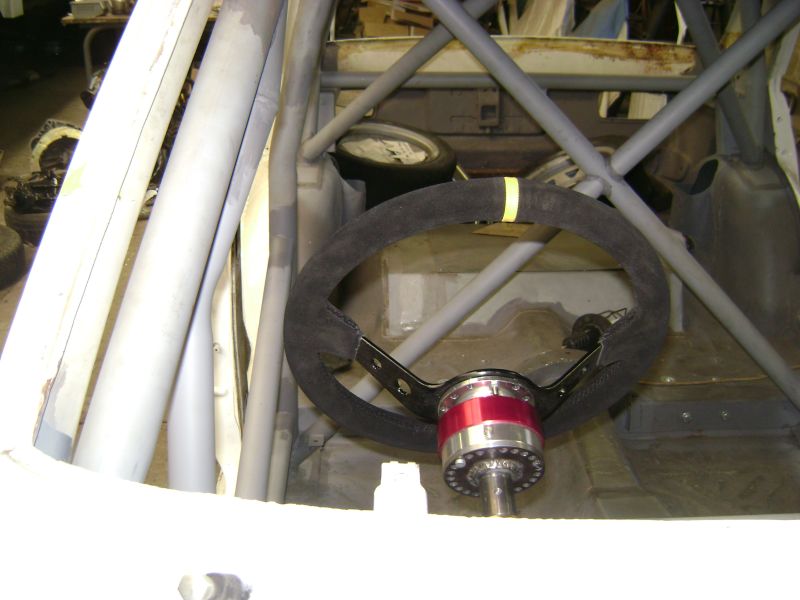
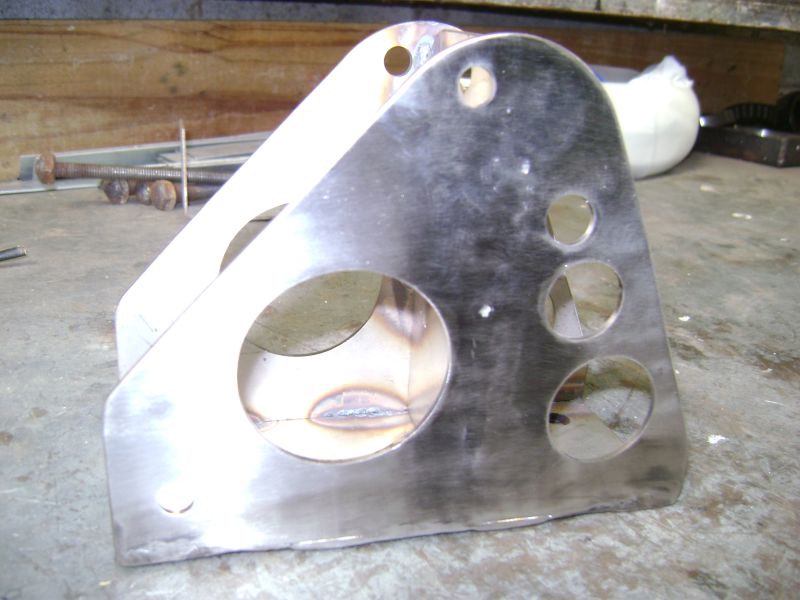
After the door bars was fitted we had some time to complete the steering adaptor between the column shaft and quick release/spacer. This was quickly fitted to check for hand movement between roll cage and steering wheel, the clearance is much better and if needed I can move the steering wheel 10-20mm inwards if this is a problem later on. The one thing that became apparent out of this exercise was the need for a spacer as the wheel is way too far frontwards, another item added to the list. I'm also not 100% convinced with the red anodizing on the quick release, maybe it is time to put it in the lathe and get rid of this ricer colour. We also Tig welded the hydraulic handbrake base together, this is the 2nd variant as the first one was too bulky and not to my liking, the new one is from Stainless Steel and currently send for electro polishing, just hope the results is to my liking, if it is to shinny afterwards I'll just take some water sanding paper to it to get rid of the shine.

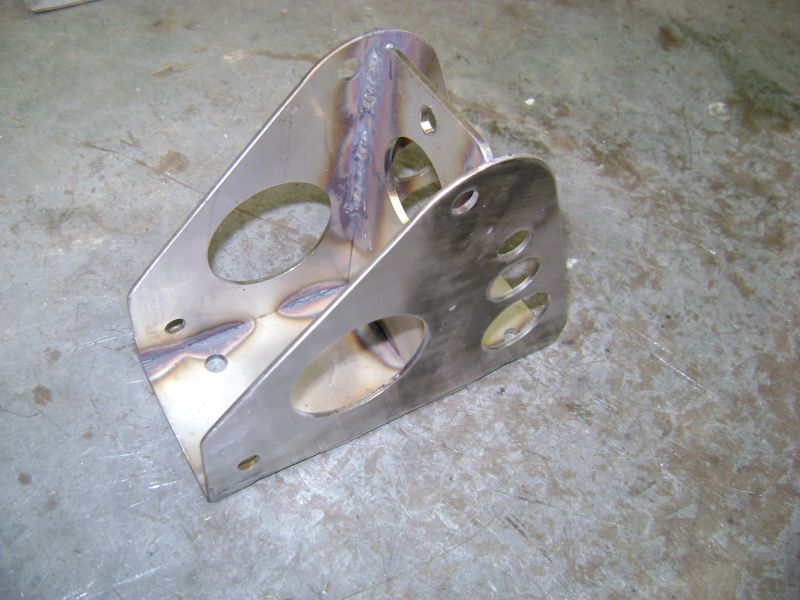
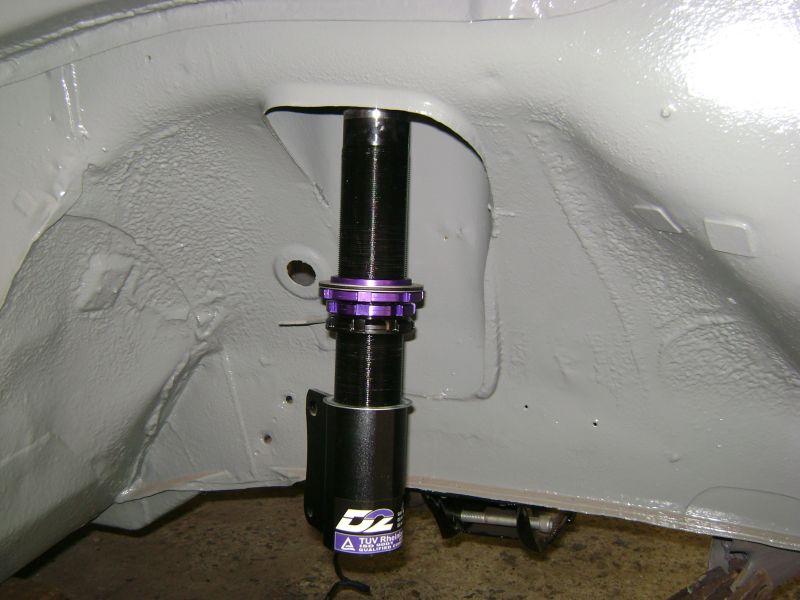
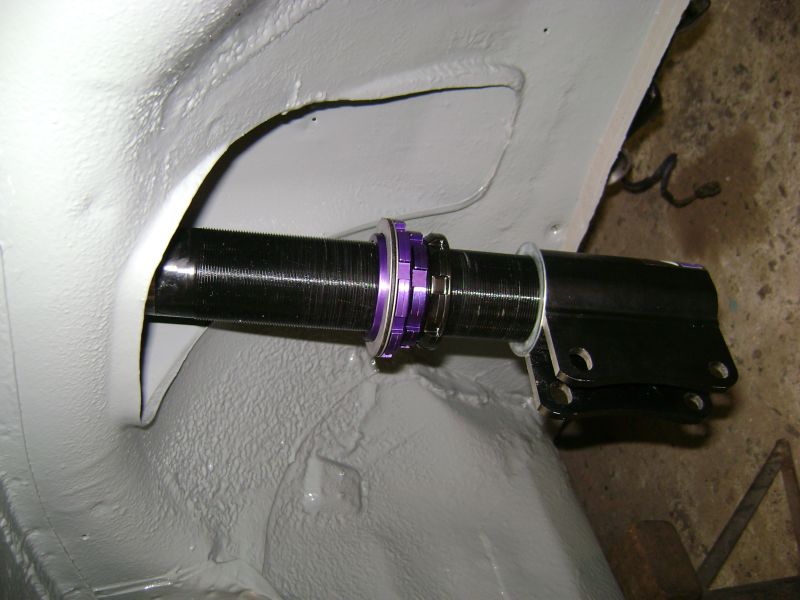
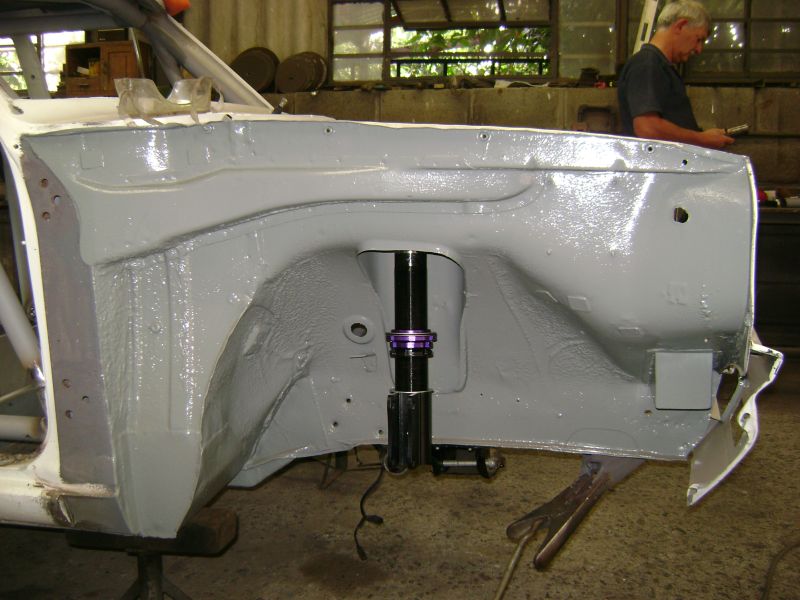
Sunday morning started with planning on getting the coil overs to work in the "Datto". Seeing that these D2 coil overs is Mazda RX7 units this modification is no drop in solution and a lot of time will need to be spend to make them work in the car. Seeing as this conversion is only in the initial planning phase, this is the way I'm leaning towards to get these units to work.
Open in new window

Open in new window

Open in new window


Front: Need to find out if the 1200 sedan and 1400 RSA Ute share the same size bearings as I have two sets of 1200 struts, if the bearings is smaller, I will need to purchase a set of 1400 struts. I'll need to purchase 1400 steering arms that bolt to the bottom of the struts seeing as they use a larger ball joint, which will last longer. The strut tube itself will be cut down and two ears with additional supports welded to the tube to make the coil overs fit, there is a few advantages to this configuration. Coil over upper angle will be in a more vertical position once the front track is in position, bigger wheels will fit easier seeing as there is no tube which it could rub against eliminating the need for spacers to clear it and mounting of the Nissan S14 4 pot calipers will be easier as there is more space available. I also decided on going with a rotor hat design for the front brakes, this will be easier to get the correct offset. New Camber/Castor adjustment pillow ball mounts will designed for the top.
Open in new window

Open in new window

Open in new window

Open in new window

Open in new window


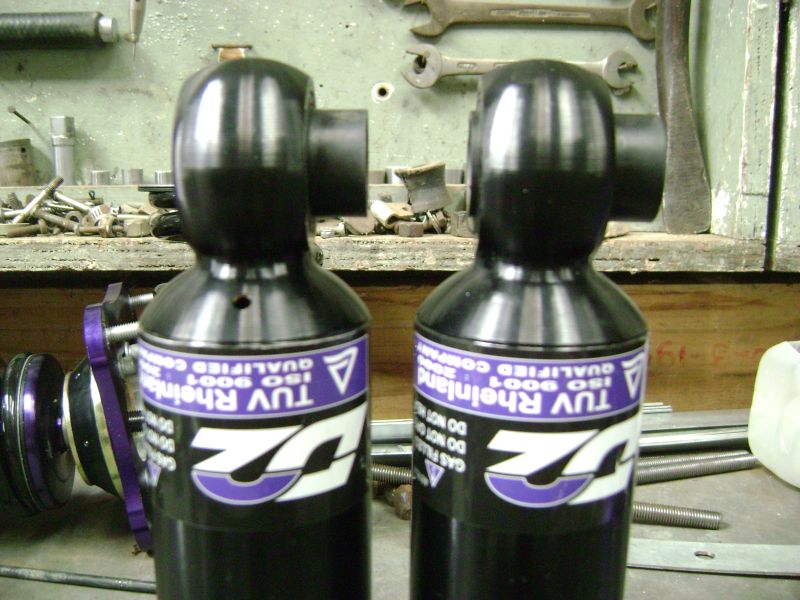
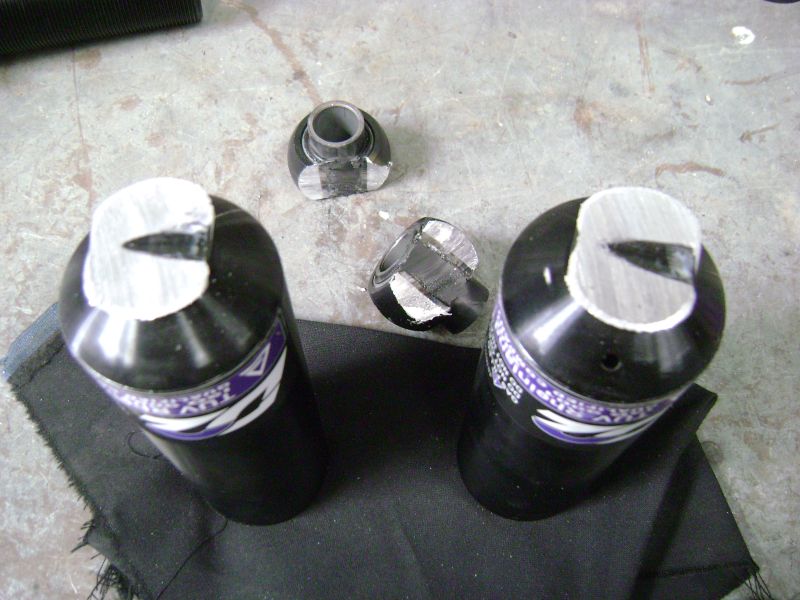
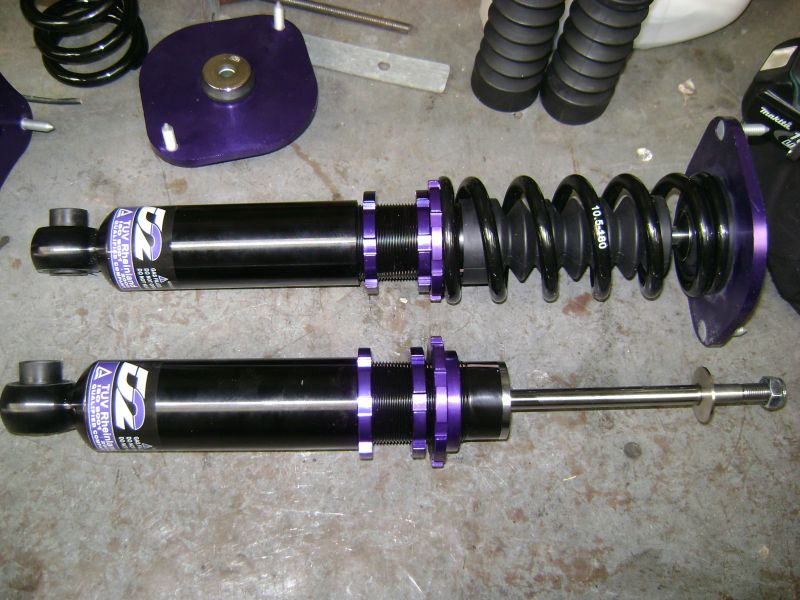
Rear: The rear D2 units came with moulded bush design on the bottom part, due to the slight rearwards angle at which the coil overs will be mounted this was not going to work, the easiest solution that I could came up with was to remove this part and get M16 thread cut in order to utilize a rod end on the bottom. Keep in mind there is method to the madness in cutting a new pair of coil overs. Seeing that the shock adjusters on the D2's is at the top this was the next challenge; as screwing a female rod end on the top would make life very hard in the future as I'll need to strip half of the coil over to adjust the shocks. The solution to this was to design a very small variant of a pillow ball mounting. I'll share the pictures once this done, the only down side to this design is the price of the pillow ball bearings and rod ends, these four units costs almost R1400, but it is one of those solutions that will almost never require replacement.

If anyone is interested in how all the parts of these D2 Mazda RX7 coil overs fit together, have a look here:
D2 Mazda RX7 Coil Overs
Open in new window

Open in new window


Later the afternoon I started mocking around with the placement of the MSD Blaster SS coils, but soon left it for later in the assembly phase as there is too much other stuff to consider. The current idea is to mount the above the intake manifold for heat reasons, but space is the problem, on the exhaust side there is much more space, but then the heat become an issue, if I can find a way around it, this would the ideal location, maybe some heat wrap around the branch and a heat shield under an aluminium mounting plate will do the work.

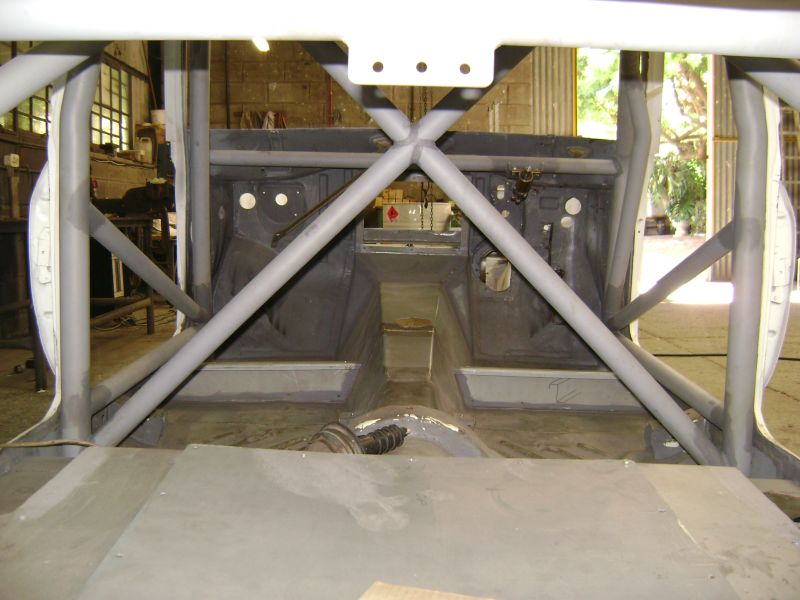
On my next visit we will complete the roll cage which consists of a pipe behind the seats on which the harnesses will mount and supports to the front shock towers, then we will start with the cutting of the rear fenders in order to lower the car to the desired ride height. Luckily for me I have a week’s holiday coming up which will help a lot with the progress on the car.

Posted on: 2011/4/18 12:40

Edited by racetech on 2013/12/23 12:43:23
_________________
Project Build: http://datsun1200.com/modules/newbb/viewtopic.php?topic_id=45104&forum=9

Don't find a problem, find a solution!!!!
www.race-tech.co.za
Transfer the post to other applications Transfer

Re: racetech's 1200 SR20VE Project
Home away from home
Joined:
2009/12/2 3:52
From Central Coast NSW
Group:
Registered Users
Posts: 239
Offline
man i wish i went ve :(

Posted on: 2011/4/18 13:35
Transfer the post to other applications Transfer


Re: racetech's 1200 SR20VE Project
Home away from home
Joined:
2011/3/11 9:43
Group:
Registered Users
Posts: 191
Offline

sweet build mate, great work!

Posted on: 2011/4/18 14:02
Transfer the post to other applications Transfer


« 1 ... 7 8 9 (10) 11 12 13 ... 30 »


You can view topic.
You cannot start a new topic.
You cannot reply to posts.
You cannot edit your posts.
You cannot delete your posts.
You cannot add new polls.
You cannot vote in polls.
You cannot attach files to posts.
You cannot post without approval.

[Advanced Search]