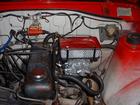
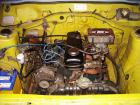
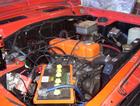
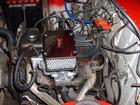
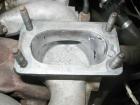
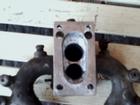
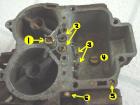
The Weber DGV series is a two-barrel progressive linkage downdraft carburetor. It runs on the smaller venturi for better economy and throttle response until the throttle is pushed down to about half way, at which point the larger throttle starts to open. At full throttle both side are wide open. Italian design. High fuel-economy. Excellent top-end power. Tunable. Available. Easy to work on. Did I mention inexpensive?
Also see these articles: Choosing A Carburetor, Parts Sources
Contents |
Overview
The Weber DGV series is a 2-barrel carburetor from the Italian company of Weber. With all their racing and OEM experience, you know they know how to design carburetors. The 32/36 features progressive throttle design for good economy (with first bore open) and great power when both bores open). Being a down-draft carburetor it is easily adapatable to many stock engines, including Nissan A engines.
Features:
- designed for engines displacing 1200cc-2300cc
- versatility, can be applied to street or racing
- wide adaptability to all kinds of engines
- easy installation, a simple adapter and linkage is only need. Or a installation kit designed just for the A-engine can be purchased from a Weber distributor
- low initial cost, either brand-new or used
- trouble-free maintenance
- excellent drivability due to many circuits (idle, off idle, power valve, etc)
- increased fuel economy
- improved performance
The DGV Series carbs feature models with manual, water or electric choke actuation. The DGV also has a power valve circuit to facilitate low vacuum (full throttle) conditions.
DGxV series name was generated from the Italian:
- Doppio - twin
- G - Right-hand oriented
- V - Verticalle (verticle) or V (power valve-equipped)
x can be either: 1) none - manual choke 2) E - electric choke or 3) A - Aqua (water) choke
There is also a corresponding DFV-series, which are identical except they are a mirror-image of the DGV (for left-hand orientation). In the DFV, the primary and secondary barrel position reversed in the body. The throttle lever in the DFV rotates in a clockwise motion while the DGV rotates anti-clockwise.
Measurements
- Bores: 32/36 (Primary bore/Secondary bore)
- Venturis: different sizes
- Bore spacing: 43mm
- Stud spacing: 47mm x 93mm
Choosing between 32/36 and 38/38
For even more performance at a slight penalty in fuel economy see, the Weber DGAS carburetor synchronous opening model (both throttles open simultaneously). This is a high performance alternative to most any DGV applications.
quote:
The 32/36 DGV progressive carburetor as used in any Redline Weber kit is pre-calibrated and set to run on most normal standard and stock engines and provide a performance and fuel economy improvement. If that engine has been upgraded or improved with other performance items there will be a need to recalibrate or rejet the carburetor in some situations. There is a performance jet kit just for the Jeep applications Pt No. 701-DGV.The 38 DGAS synchronous carburetor when supplied in kit form from Redline Weber is also pre-calibrated for use on stock or slightly modified motors and will not be over carbureted. It also provides the best starting point for engines that are ultimately going to be upgraded with additional performance Items with performance over fuel economy being the ultimate goal.
For more details on choosing between DGV and DGAS series, see www.redlineweber.com
Weber DGV Models
They are available in different venturi sizes:
- ?? - 330 CFM
- 26/27 - 26mm primary venturi: 270 CFM
- 23/27 - 23mm primary venturi: 235 CFM (1979-82 Fords)
- 23/29 - 1979-up Chevrolet Chevette
Curent Weber Part Numbers:
- 22680-033B DGEV electric choke (E = electric)
- 22680-051 DGAV water choke (A = aqua)
- 22680-056 DFEV
- 22680-070 DFAV
| DGV | manual choke |
| DGEV | automatic (electric) choke |
| DGAV | automatic (water heated) choke |
| DFEV/DFAV | mirror-image to DGV series |
| Holley 180 | Australian licensed version of Weber 32/36 |
| Holley 5200 | US licensed version of Weber 32/36 |
Holley G180/Holley 5200 Series
In 1970 the Holley carburetor company licensed the DGV design from Weber. Inside the carb it actually says "Weber", but outside there is a different brand name. Holley's first version was the Holley 5200, fitted to the 2-liter German Ford OHC ("Cologne") engine in the 1971 Ford Pinto.
5200 was used on:
- All Ford 2.3 liter carbureted engines
- USA models with 2.8 V6 carbureted engines
- Ford Pinto/Mercury Bobcat 2.0 and 2.3
- Mercury Capri German-made Capri circa 1974
- Mustang II (1974-1978)
- Fox-body Fords (1978-1986): Mustang/Capri, Fairmont/Zephyr, LTD/Marquis, Granada, Thunderbird
- 1979-1982 Ford Courier pickup 2-liter engine (Isuzu truck)
The Holley 5210 variation was designed for the Chevrolet Vega 2.3 liter engine and first used in 1973. The main difference is a built-in GM-style fuel filter in the top casting.
5210 was used on
- 1973-1977 Chevrolet Vega
- 1977 Pontiac Astre
- Pontiac "Iron Duke"
- Chevette
- 2-liter Audi engine (Porsche 924 engine) in the AMC Gremlin
5220 variation of 5210 was used on:
- Dodge Omni and its twin Plymouth Horizon 1.7 liter Volkswagen engine in the
- Chrysler 1.7, 1.6 & 2.2 engines
In Australia, the G180 is a licensed version of the Weber 32/36 and fitted to:
- 2-liter Ford Escort
- 2-liter Ford Cortina
All these Holley models are nearly identical. There are small differences between each model and between the Webers.
NOTE: Some Holley 5200/G180 carbs have only a primary idle system, while others have both primary and secondary idle system.
Go to the library and get this book: "Holley Carburetor Systems 5200 Series" by Mike Urich, HPBooks. Or just $8 from Amazon.com
Reference: "Holley 5200 Carburetor Handbook" by Mike Urich, HPBooks
Airflow, CFM
5200 series carbs are mostly fitted with 26mm primary and 27 mm secondary venturis, giving 270 CFM @ 3 inches mercury (note that this is equivalent to a 4-barrel type rating of 193 CFM -- 4-barrel carbs are rated at 1.5 inch mercury).
- 270 CFM: 26/27 venturis (193 CFM equivalent to 4-bbl style rating)
- 235 CFM: 23/27 (some, starting in 1978)
- 245 CFM: 23/29 (1979 up Chevette)
The 245 CFM model sounds like a good candidate for a 1200cc engine as compared to the stock Hitachi carb's 20/26 venturis.
Identification
Holley carbs can be identified by a metal tag attached to a top screw, or by a stamping on the side of the carb base plate.
- 1st number: Engineering/List number, as noted in some parts listings
- 2nd number (if present): List revision
- Last number: Date. First three digits are day of year (0=Jan 1, 356 =Dec 31), last digit is the year (0=1970, 9=1979)
Variations
Some 52xx carbs have:
- External Fuel bowl vent. Most have internal venting. Some have emission style venting which is connected to a charcoal cannister (you can connect it to the air cleaner -- inside the filter portion)
- External Fuel bowl vent with solenoid control. As above, but you need to wire the solenoid to 12V. Failure to do so will cause running problems
- Idle-cutoff solenoid (Anti-dieseling solenoid), identified by a wiring connector. You need to wire the solenoid to 12V. Failure to do so will cause failure to idle. The carb will run good except it won't idle. See Carburetor_Adjustment#Anti-dieseling_solenoid_valve
- Fuel return fitting. A/C cars sometimes have this. Datsun 1200s do not have a fuel return line. Block this line.
- Secondary idle system. Most 5200s only have a primary idle.
- Screw-in vs Press-in idle circuit restrictors (don't worry about these, they are not normal tuning items). Some newer ones have a restriction in the circuit well (installed from carb top rather than on the side)
- Mixture screw restrictor cap (idle limiter). Remove this unless local laws require them
- Idle transfer circuit: holes vs narrow slot vs wide slot. The slots apparently are better, but you can't modify this so don't worry about it.
- Double-venturi is used on some newer versions for better driveability and fuel economy. This is preferred unless you have a drag racer in which case the single-venturi is better (at about 7% better airflow).
Choke:
- Water-heated
- Water-heated with electric assist
- Electric
- Deceleration valve fitting. Some models have this just under the air cleaner flanged by the choke. Plug this fitting.
Tuning
It is recommended to change the main jets only. However when swapping carbs to different engines, changing the air jets may be called for. See a Holley tuning book for more details.
Spacers in the power valve. Little plastic rings can be fitted or removed to chage the vacuum point of the power valve. Most open when vacuum drops to 6 inch mercury (Hg). This affects the primary side only (secondary side is enriched by restriction in the top cover).
Accelerator Pump cam: varies. In addition, most have a three position lever which can be used for tuning. Using the lowest hole increases the amount of fuel pumped. For low-RPM wide open throttle you can drill out the pump nozzle (and lower the level pin to compensate).
Jets: 1970-1975 models used brass jets marked with the bore size, for example 150 means 1.50 mm. These are not flow checked and so a 145 and a 150 may actually flow the same. 1975 and newer green jets are tested and marked for actual flow rather than hole size.
Holley 6500
The Holley 6200/6500 is a feedback version of the 5200 carburetor, an electronically controlled jet system. Early models used a vacuum switch while newer models used an O2 sensor (Lambda sensor).
Holley previously sold an electronic "dial a jet" package that would plug into the 6500, bypassing the oxygen sensor and letting you control the amount of fuel through a dial on the dashboard. This was the "Holley Electronic Carburetor" system with a 11-position controller module, that varied mixture about 12 jet sizes just by turning the dial. A "computer" was optional and monitored fuel economy and other factors.
reference: Aaron
The 6500 used a modified power valve assembly. Instead of a simple open/closed valve, this is a metred valve. It is controlled by a needle raised/lowered by a solenoid on the carb.
Components needed are:
- Carb
- Lambda (Oxygen) sensor (for 6510/6520 models)
- Control box
- Solenoid and Vacuum Control Valve
- Wiring
The 6500 Vacuum Feedback model (no O2-sensor) was used on:
- 1978-1980 Ford 2.3 liter California market
- 1981-up Ford 2.3 liter USA Federal + California markets
The 65xx Electronic Feedback model (with O2-sensor) was used on:
- 6510: 1980 Chevette, California market
- 6510: 1981 Chevette, Federal + California markets
- 6520: 1980 Dodge Omni/Plymouth Horizon, California market
- 6520: 1981 Dodge Omni/Plymouth Horizon, Federal + California markets
Buying a Used Weber
Used Webers run around $50 for a bare carb to $200 for a pristine used kit.
If you buy a used one, unless it came from an A-series engine plan on making or buying the linkage and adapter.
Be sure the used DGV does not have this common defect:
- Worn throttle shafts. Try to move the shaft side-to-side. It should not. If it moves even a little bit, pass on it. It will require drilling and rebushing to fix this
Progressive vs. Non-Progressive Carburetors
For a discussion of the progressive 32/36 vs. the synchronous 38/38, the IDF (Solex 40 style) and the DCOE racing series see Which Weber is right for me?.
The 38mm DGAS carb should be the only consideration if the engine is in the future or currently going to have any level of additional engine modification. Such as headers, free flowing exhaust, a cam, or rebuilt engine. Usually these motors will be improved over stock with oversize pistons and towing cam. The 38 will enhance the improvements of any of these items ... It will provide considerably more initial torque and acceleration but the top end performance will not be significantly improved over the 32/36 when used on a stock [4.2 liter] motor.
Note, that is better torque -- but not better throttle response. The 32/36 should be smoother than the 38/37 for a small street-going motor like the A14.
Electric Choke?
The DGV electric choke works great and hooks up the stock Datsun electric wire. Take the choke off and make sure the spring still has "springiness" to it. If not, replace it. To test it, the choke should just barely close the throttle in the coldest of mornings. After several minutes of running the engine, the spring should heat up and fully open the choke. If it's weak, just get a new one. The Holley chokes fits the Weber carb. Electric chokes come on the Chryslers and Chevrolet Chevette, so should be readily available from any parts store.
DGAV - Automatic choke, water heated
DGEV - Electric choke
DGV - manual choke
Does your 32/36 have a non-adjustable electric choke? Simply drill the face off the rivet, push them through and add screws (it's probably already threaded). Now you have an adjustable choke.
Fords and Vegas had a water heated choke which could be used instead of an electric choke.
The electric choke on the 1200 (1972 and up have electric choke) has power supplied from the ignition switch circuit. However, this is switch on/off by the choke relay from a signal put out by the alternator/regulator "N" wire. This means the choke only gets power when the ignition is ON and the alternator is putting out power (engine running). Other makers use an oil pressure switch for the same purpose. For a 1971 car, you could simply hook it up directly, the downside would be if you let the car sit with IGN on for a while before starting the choke would open up, even if it is cold outside, possibly preventing the engine from starting.
See: Wiring
Throttle linkage
If you have the money to spare, get a Weber DGV installation kit for the A-series engine. It will looks professional and work great.
On the other hand, if you want to save money, you can make your own linking.
- Take the throttle wheel of the stock Datsun Hitachi carburetor, then fit it to the DGV throttle shaft. Create a mount for the cable.
- ddgonzal used the stock Datsun throttle cable, but modified the Weber linkage which was for another type of engine and used some thin strap steel to make a bracket
This is by far the hardest part of fitting a DGV to your A engine.
Book and manuals
Where to buy?
Carbs
- http://www.redlineweber.com - US distributor
- Google search for Weber 32/36
- Junkyard, eBay or friends
Parts Suppliers
- http://www.racetep.com/weber.html
- http://www.carbs.net/Weber/weber.htm
- http://www.carbs.net/Weber/weberpartscarb.asp
Weber "Kit "
Kits run around $250-$350 USD and include:
- New carb
- adapter for your existing inlet manifold
- air filter
- throttle linkage
- all necessary gaskets
You can get a kit for your specific application, or a generic one with "universal" throttle linkage and other parts.
Performance Jetting kits
You will need this. A selection of jets to fine tune your power and fuel efficiency. You don't want to be one of the yahoos driving around belching black smoke all the while feeling proud that your car actually runs -- you can have power and economy both with a little bit of effort.
Adapters
You can make a DGV-compatible intake:
But most of us use an adapter plate.
Adapters for many models are available for sale, but I made my own adapter for the Nissan A12 engine out of a block of aluminum.
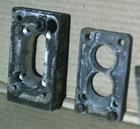
Custom machined adapter (left) and kit-provided cast adapter]
- Dimensions: 1 x 2.75 x 5 inches (minimum would be approximately 10 x 6.7 x 11.4 mm)
- Using a Nissan gasket as a template on one side, and the Weber gasket on the other, mark the holes.
- Drill two bores ~30mm and 27mm to match the intake manifold. You might have a machine shop do this; I had access to a lathe with a large bit chuck into it.
- Drill and Countersink holes for stock Nissan pattern using a drill press to get them straight.
- Thread holes for Weber pattern
- Use a round rasp file to smooth out the transition from the small Nissan bore holes to the larger Weber holes you drew from the template
Carburetor Tuning
Float setting notes
- Fuel pressure is critical to float spillage. Redline recommends 2.5 to 3 lbs
- For aggressive off-road float drop should be limited to 44 .5 mm max drop
Reference: http://www.redlineweber.com parts_breakdown
Carburetor set-up and lean best idle adjustment
Baseline settings (to get your engine started)
- Speed Screw 1 to 11/2 turns
- Mixture Screw 2 turns
See http://www.redlineweber.com/html/Tech/carburetor_set_up_and_lean_best_.htm
How to hook up the crankcase breather?
See discussion engine question?? in the main forum.
Jetting
Tuning is a Must If you buy a kit for your specific engine, it will run fairly good out of the box, but should still be tuned to match your engine. If you obtain one second-hand, count on swapping jets, emulsions tube and other tuning parts to make your engine run right. Black smoke, smelly exhaust, jerky acceleration and poor fuel economy is what you get before you tune it. It may "feel powerful", but you can make it run even better with some patience and the right parts. You can get the tuning parts from Redline:
- Jets
- emulsion tubes
- throttle pump nozzles
For proper tuning, it is important to evaluate all of these:
Top-End Performance of Hollywood sells Redline Weber kits. Here is the jetting they list for the performance 32/36 kit for A-series engine. Presumbly this is for a stock engine:
Carb: 32/36 DGAV or 32/36 DGEV
Part #: 22680.033B
Venturis: 26/27 (compare to Optimum Carburetor Choke Size)
Auxiliary venturis: 3.5/3.5
Main jets: 140/140
Emulsion tubes: F50/F50
Air correction jets: 170/160
Idle jets: 60/50
Jump jet: 50
Needle valve: 2.00
anb008 had his standard A12 with Weber 32/36 carb rejetted and dyno'ed. The jet settings are:
Primary mentioned first, then Sec...
Air Correction: 175/145
Fuel: 120/145
Emulsion Tube: F66/F66
Choke Tube: 3.5/4.5
Idle:
50/55
Weber D**V tuning as a systems engineer
B210sleeper:
I've had a weber dfav ( holley 5200 whatever ) for about a year now, and I thought that the procedures for getting it running right were needlessly obscure. Baselines** these values = +/- one step are a baseline. The car will run like this, not ideally but you could.
main jet 140/145 Air Corrector 165/175 E-Tube f6/f6 Idle jet .45/.50 Idle Air 1.50/0.70 idle mixture screw 2 turns CCW from bottom Idle speed ~ 1 1/2 turns from first contact Definitions: I feel that some explaination of the jets would be helpful.
Main Jet: This is in the fuel bowl, it controls the maximum amount of fuel to enter each circuit . It has final control over the mixture at WOT, since if it's too small you will always be lean no matter what you do. Likewise too big and you'll be rich to the point that you can't compensate.
Air Corrector: This controls how much air flow it takes to activate a circuit. Means if you should keep changing these down till you develop a flat spot in the throttle. there can be as many as 3 distinct flat spots, you'll probably only ever experience 2, the first caused in the primary at about 80% throttle and extending to lower percentages as it gets exceedingly larger. The second is in the secondary the remaining % of throttle range starting at WOT and extending down as it continues larger. The third is caused by those idle air correctors, but those should never be messed with, you can't even order them. But if you had a pesky idle problem, you might want to find them and make sure they're installed, not blocked, etc... A flat spot around 2000 rpm would be idle jets too small.
E-Tube: Misunderstood emulsion tube, it's a complicated part that regulates the A/F ratio. The number of holes and where they occur, work it's magic. They are found directly under the air correctors and shouldn't be mucked with. Make sure they're baseline.
Idle jet: It's the idle jet which controls how much fuel is delivered at idle. It won't significantly effect the AF ratios for driving. Fix idle problems here. One thing... If you've reached a very small idle jet you might want to use larger ones and lean down the main jets ( tiny idles plug easily and that would be annoying ) A flat spot around 2000 rpm would be idle jets too small.
Idle Air Corrector: Suppose your car just won't idle but otherwise ran fine, this would be why. It also might be responsible for cars that idle at 2000 rpm and can't be slowed, because it's missing or plugged. You shouldn't need to touch these.
So now you understand what the parts do.
Setup priorities:
- eliminate vacuum leaks <li>install a secondary fuel filter of some kind to capture tiny particles that seem to end up in the carb no matter what. <li>set advance. Webers seem to like lots of advance, so give it all you can ( don't detonate, don't give it 30 deg static, be reasonable, I have 7 static and it's pretty good, as much as 12 ) <li>make sure you're using ported vacuum (off the carb body ) if you're not using it understand why. <li>Set idle mixture screw = 2 turns out <li>set idle speed 1 1/2 turns out <li>try to start the car <li>let the car warm up... a challenge perhaps, but it needs to be warmed up <li>if it runs turn idle mixture screw clockwise till the car runs worse, then turn counter clockwise till the idle speed picks up, somewhere in there will be a point that sounds best. If that point is making it idle super fast turn the idle speed down, you should be able to get the idle down ( if not that's a symptom of something. )Don't worry too much about how much in or out the screw is, the sharpness of the point at the end of it has changed over the years, so if it's more than 2 1/2 turns out it may not be as bad as it once was. If the car is making a noise like sucking the bottom of a cup with a straw, then your fuel bowl level is too high, either the needle valve is stuck, or it's leaking or someone didn't tighten everything down, but it'll be running too rich and the gasket will probably be wet when you take it apart. <li>so you've made it past idle setup, now blip the throttle a bit in neutral, do it slow and mind your rpm, does it gain rpm smoothly and not bog or have other issues up to 1/4 throttle? If so then you can try to drive it, don't go far, don't go in traffic, go down the block, take notice of how the car responds from a dead stop, you probably wont get past 1/2 throttle, any flat spots? if the flat spot is idle - 2000 rpm then it's likely that your primary idle jets are too small. if there's a flat spot further up in the range it's the primary air corrector being too large. Don't worry about WOT at this stage. <li>Go back home and make adjustments needed based on that road test, take note of how the car shuts off too. Webers without anti-dieseling solenoids are fussy and tend to run-on. But shouldn't backfire, or afterfire (one is out the carb and the other is out the tail pipe, having a catylitic converter will make this a problem ) <li>Having an EGT ( exhaust gas temperature ) gauge will help with this part, otherwise it's butt dyno or the real dyno. You can also use O2 gauge if you have one [a/f meter]. You've made it this far you're almost there. Now is secondary circuit tuning, you can only do this at WOT, so take that in mind when choosing a place. Your air correctors default value is from a 2 liter engine, so you will need to make them smaller, just keep making them smaller till that WOT flat spot goes away. Your smaller engine needs less fuel than the 2l default values, so you'll want to make the fuel jets smaller too that will make the mixture leaner. If your idle jets are really small, make the fuel jets smaller instead, and bring the idle jets back up a size or 2.</ol>You should now have a car that is quite a bit snappier, it may be very touchy now, i suppose the final call comes out to what you like to drive, but you'll understand how to change things now. At this point you may want to take the car to somewhere with a wide band emissions monitor and a dyno and perfect it, but you'll have a running car in any case.
</blockquote>Fuel Pump Requirement
The 32/36 requires a low-pressure fuel feed (2.5 to 3 lbs). This matches the stock Datsun 1200 pump (2.6 lbs).
If using newer A14/A15 pumps which can go up to 3.6 lbs, or electric fuel pumps, a fuel pressure regulator is recommended. Excessive pressure can cause problems with the float, at the least cause erratic operation due to float spillage and at the worst causing flooding (gasoline overflowing the float chamber).
The flow rate (volume) of the pump depends on how much horsepower your engine puts out. Weber recommends their electric 6 gallon/hour pump for "up to 200 hp". That should satisfy any A12, even a full racing A12. Fortunately the stock B110 pump puts out approximately 6 gallons per hour so it should be sufficient for any A12 with 32/36 carburetor.To be sure your pump meets the specifications, you may perform a Fuel pump pressure test.

![[Datsun 1200 encyclopedia]](/wiki/upload/wiki.png)
