![[Datsun 1200 encyclopedia]](/wiki/upload/wiki.png)
| Revision as of 01:55, 6 September 2013 ddgonzal (Talk | contribs) (->Speedometer Cable) <- Previous diff |
Current revision ddgonzal (Talk | contribs) (->Overview) |
||
| Line 1: | Line 1: | ||
| - | Speedometers were either in kilometers (JDM) or miles (USA). Australia started with mph and then switched to kph. Some speedometers had a trip meter. | + | Speedometers were either in kilometers or miles. Australia started with mph and then switched to kph via sticker overlays. Some speedometers had a trip meter. |
| - | [http://datsun1200.com/modules/myalbum/photo.php?lid=2148 http://datsun1200.com/modules/myalbum/photos/thumbs/2148.jpg] Comparo [http://datsun1200.com/modules/myalbum/photo.php?lid=13742 http://datsun1200.com/modules/myalbum/photos/thumbs/13742.jpg] | + | = Overview = |
| + | {{OwnersManual2x|29368|p1=08|29369|p2=09|Instrument and Controls}} | ||
| - | <blockquote><table border=1 cellspacing=0><tr><td> | + | [[#STD_bar_gauge|#Bar Speedometer]] |
| - | 1972 USA Owners manual (see page 8,9 for Speedometer): | + | <br>{{Album|28385}} |
| - | <br>[http://s297.photobucket.com/albums/mm219/ddgonzal/Datsun%201200/owners_manual/1972 http://s297.photobucket.com/albums/mm219/ddgonzal/Datsun%201200/owners_manual/1972/th_00_cover.jpg] [http://s297.photobucket.com/albums/mm219/ddgonzal/Datsun%201200/owners_manual/1972/08.jpg http://s297.photobucket.com/albums/mm219/ddgonzal/Datsun%201200/owners_manual/1972/th_08.jpg] [http://s297.photobucket.com/albums/mm219/ddgonzal/Datsun%201200/owners_manual/1972/09.jpg http://s297.photobucket.com/albums/mm219/ddgonzal/Datsun%201200/owners_manual/1972/th_09.jpg] <blockquote><hr>Instrument and Controls<hr></blockquote> | + | |
| - | </td></tr></table></blockquote> | + | |
| - | = Variations = | + | [[#Round_gauge|#Round Speedometer]] |
| - | * ?? 100MPH w/o tripmeter (US standard equipment) | + | <br>{{Album|7725}} |
| - | *: [http://datsun1200.com/modules/myalbum/photo.php?lid=10675 http://datsun1200.com/modules/myalbum/photos/thumbs/10675.jpg] | + | |
| - | * ?? 100MPH with tripmeter | + | |
| - | *: [http://datsun1200.com/modules/myalbum/photo.php?lid=571 http://datsun1200.com/modules/myalbum/photos/thumbs/571.gif] | + | |
| - | * 24850-H3400 1200 120MPH SPEEDOMETER Includes tripmeter | + | |
| - | *: [http://datsun1200.com/modules/myalbum/photo.php?lid=6551 http://datsun1200.com/modules/myalbum/photos/thumbs/6551.jpg] | + | |
| - | * [[Facelift]] GX - 180 kph | + | |
| - | *: [http://datsun1200.com/modules/myalbum/photo.php?lid=18701 http://datsun1200.com/modules/myalbum/photos/thumbs/18701.jpg] [http://datsun1200.com/modules/myalbum/photo.php?lid=18702 http://datsun1200.com/modules/myalbum/photos/thumbs/18702.jpg] | + | |
| - | == Part Numbers == | + | {{See|Cluster Gauge}} |
| - | USA | + | {{See|Dashboard}} |
| - | * 24850-H1816 ASSY-SPEEDOMETER 100MILE/H | + | |
| - | * 24850-H7000 ASSY-SPEEDOMETER 100MILE/H From 7/72 [With 10 mph markings] | + | |
| - | JDM Sunny Truck | + | = {{RefNo|Odometer|}} Odograph = |
| - | * 24850-B8600 SPEEDOMETER ASSY -7803 [Rectangle] | + | The odometer has five digits as shown by this 2006 unit: |
| - | * 24850-G1670 SPEEDOMETER ASSY 7804- [Round] | + | <br>{{Album|17172}} |
| - | = Metric-Imperial Conversion = | + | When the count exceeds 99999 it turns back to 00000. |
| - | Sometimes on eBay Australia you can get the vintage conversion stickers. | + | |
| - | [http://datsun1200.com/modules/myalbum/photo.php?lid=923 http://datsun1200.com/modules/myalbum/photos/thumbs/923.jpg] [http://datsun1200.com/modules/myalbum/photo.php?lid=15393 http://datsun1200.com/modules/myalbum/photos/thumbs/15393.jpg] | + | {{Album|23010}} |
| + | = Variations = | ||
| + | == STD bar gauge == | ||
| + | STD speedometer was a rectangular type (GL & GX used round gauges as did all coupes). DX varied: Mostly rectangular, but USA Deluxe had round gauges. | ||
| + | <br>{{Album|1085}} | ||
| - | OR | + | 24850-B8600 B110 ute Speedometer until 1975-1978 |
| + | <br>{{Album|28384}} | ||
| + | <br>24850-B8600 KANTO SEIKI TOKYO 160K km/h with wire for intermittent buzzer | ||
| - | Take the face plate and scan it on the flatbad scanner, then modify it. Finally, print a new one out with the photo printer. You can modify the font, colors, etc. Bolt it to the speedo using the standard screws. | + | {{images|%E3%82%B5%E3%83%8B%E3%83%88%E3%83%A9%E3%83%90%E3%83%BC%E3%83%A1%E3%83%BC%E3%82%BF%E3%83%BC|サニトラバーメーター}} |
| - | [http://datsun1200.com/modules/myalbum/photo.php?lid=5362 http://datsun1200.com/modules/myalbum/photos/thumbs/5362.jpg] [http://datsun1200.com/modules/myalbum/photo.php?lid=1101 http://datsun1200.com/modules/myalbum/photos/thumbs/1101.jpg] | + | == Round gauge == |
| + | Comparo | ||
| + | <br>{{Album|2148}} | ||
| + | For calibration, the MPH speedo is marked in KPH ranges on the very edge, which are partly visible when installed. | ||
| + | <br>{{Album|13742}} | ||
| - | = Speedometer Calibration = | + | [[Meter_Part_Numbers#USA|24850-H1816]] 100MPH w/o tripmeter (AUS/USA standard equipment) |
| - | There are two basic reasons for speedos reading fast or slow: | + | <br>{{Album|10675}} |
| - | # Factory speedometer tolerance is usually 5% fast to 10% slow (this is in general, I don't know what Nissan's specs are) | + | |
| - | #: [http://datsun1200.com/modules/newbb/viewtopic.php?topic_id=13971&forum=1 1200 Top Speed] discusses this. One magazine test noted the 1200 speedometer in the test car was 7% slow. My 1200s have been between 7.5% - 10% slow (with stock running gear include tire size). Also see [http://datsun1200.com/modules/myalbum/photo.php?lid=2028 speedo off] | + | |
| - | # Different size tires than original, changed diff ratio or transmission | + | |
| - | For the latter, there is a mechanical solution of changing to the appropriate speedo-drive gear at the back of the transmission: | + | ?? 100MPH with tripmeter |
| + | <br>{{Album|571|gif}} | ||
| + | 1973 5mph marks | ||
| + | <br>{{Photo!|2028.jpg}} | ||
| + | [[1984_Nissan_Competition_Catalog#Tachometer.2C_Speedometer_and_Exhaust|24850-H3400]] 1200 120MPH SPEEDOMETER Includes tripmeter | ||
| + | <br>{{Album|25954}} {{Photo!|6551.jpg}} {{Album|6551}} | ||
| - | For the former, where you have the "right" size tires, final gear ratio and stock transmission -- the speedometer itself may be calibrated. | + | 140 kph |
| + | <br>{{PhotoPost|1300060168_177086830_11-DATSUN-SADO-.jpg|393690|Datsun%201200/1200AX}} | ||
| - | == Odometer Calibration == | + | 160 kph |
| - | Before messing with the mechanism, make sure the odometer (distance counter) is correct. If it is not, different transmission-to-speedometer cable pinion gears are called for. | + | <br>{{Photo!|15621.jpg}} |
| - | Get on the highway and drive. As you pass the mile markers note the indicated milage. A 10 mile drive is good for accuracy. If the odometer reads 10.0 miles it is perfect. But if it read 11.0 mile it is running 10% off. | + | 160 kph late |
| - | # Change the pinion gear to correct. | + | <br>{{Photo!|2729.jpg}} |
| - | # Or, change tire size (diameter) to correct. | + | |
| - | # Or, use a speedometer adapter [http://www.gaugeguys.com/speedcorrect.htm ratio adapter] at about $150 | + | |
| - | Once you get the odometer reading correctly, then move to confirm the speed needle readings. | + | GX - 180 kph |
| + | <br>{{Photo|d2.jpg}} | ||
| - | == Mechanism Calibration == | + | [[#Facelift GX]] - 180 kph |
| - | Where can you go to get a speedo calibrated? Can it be done at home? | + | <br>{{Photo!|22.jpg|Datsun%201200/GX5}} |
| - | * [http://mgaguru.com/mgtech/dash/st201.htm MGA Guru: Speedometer calibration] | + | |
| - | Assuming your odometer reading is now verified correct, proceed to calibrating the needle reading. | + | [http://www.matsuoka-m.com/web/parts/interior/240km.html Matsuoka] - 240 kph |
| + | <br>{{Album|26445}} | ||
| - | [http://datsun1200.com/modules/myalbum/photo.php?lid=19522 http://datsun1200.com/modules/myalbum/photos/thumbs/19522.jpg] | + | [[B140]] 2008 |
| + | <br>{{Album|26989}} {{UploadPost|174_589e901cb017b.jpg|483841}} | ||
| - | You can: | + | == Facelift GX == |
| + | Gauges changed for the [[Facelift|1972 minor facelift]] in Japan. As before the GX speedometer went to 180km/h instead of the regular 160km/h. As with all 1972s it had the speed warning sensor. | ||
| - | # Change the pointer position. This is good if the speedometer is off by say 2mph at all speeds. | + | {{See|Cluster_Gauge#Facelift}} |
| - | or | + | {{Photo|22.jpg|Datsun%201200/GX5}} {{Album|21084}} {{UploadPost|174_5d61ac9394fe3.jpg|492370}} |
| - | # Change the magnetic tension. This will adjust the scale across the board. Be careful as it is easy to ruin it | + | {{Album|18701}} {{Album|18702}} |
| - | #: For ideas, see: [http://homepage.ntlworld.com/johnstonrh/a30a35/speedot.htm Recalibration of Speedometer] | + | |
| + | = Part Numbers = | ||
| + | == Round == | ||
| + | USA | ||
| + | 24850-H1816 ASSY-SPEEDOMETER 100MILE/H [With 20 mph markings] | ||
| + | 24850-H7000 ASSY-SPEEDOMETER 100MILE/H From 7/72 [With 10 mph markings] | ||
| + | [[1984_Nissan_Competition_Catalog#Tachometer.2C_Speedometer_and_Exhaust|24850-H3400]] 120MPH SPEEDOMETER Includes tripmeter | ||
| - | === Bench Test === | + | JDM Sunny Truck |
| - | You can turn the speedometer cable with an electric drill. As long as you have a way to adjust it to run at a steady speed, you can test it versus the odometer. | + | 24850-G1670 SPEEDOMETER ASSY 7804- [Round] |
| - | http://i297.photobucket.com/albums/mm219/ddgonzal/Datsun%20Misc/temp-5.jpg | + | == Rectangle == |
| + | JDM Sunny Truck | ||
| + | [[Meter_Part_Numbers#Sunny Truck|24850-G1000]] SPEEDOMETER ASS'Y (up to '72-6) | ||
| + | 24850-G1001 SPEEDOMETER ASS'Y (from '72-7 for [[Instrument_Panel_Wiring#Speed Buzzer|speed buzzer]]) > 24850-G1000 | ||
| + | 24850-G1002 SPEEDOMETER ASS'Y (from '72-12 for intermittent buzzer) > 24850-G1001 | ||
| + | 24850-B8600 SPEEDOMETER ASSY 7510-7803 [Rectangle] | ||
| - | Parts needed: | + | JDM Meter Kaku (Bar Gauge) |
| - | # reversible electric drill to drive the speedo cable | + | Through '70 Dec |
| - | # 500W dimmer switch to vary constant drill speed | + | [[Meter_Part_Numbers#1971|24850-H1000]] ASS'Y-SPEEDOMETER Std |
| - | # 60W light bulb (dimmer requires this) | + | 24850-H1100 ASS'Y-SPEEDOMETER S-Dx, VDT [Van Super-Deluxe T] |
| - | # Extension box | + | * with trip meter |
| - | # Outlet plug | + | From '71 Jan |
| - | # Electric wiring | + | 24850-H1001 ASS'Y-SPEEDOMETER S-Std |
| - | NOTE: Danger. Use caution and properly grounded and boxed connections. Do not attempt at home. Use professional equipment. | + | 24850-H1101 ASS'Y-SPEEDOMETER S-Dx |
| + | * with trip meter | ||
| + | 24850-H1410 ASS'Y-SPEEDOMETER VS,VP [Van Standard, Van Deluxe] | ||
| + | 24850-H1401 ASS'Y-SPEEDOMETER VDT | ||
| + | * with trip meter | ||
| - | A typical reversible electric drill may run at 2500 RPM. The speedometer is 50mph=1024 rpm, so turn the Dimmer down about 1/3 from full to start. | + | H10 ? - all red lamps |
| + | <br>{{Album|8400}} | ||
| - | Pull trigger fully to run drill at constant speed. Then vary the dimmer switch to show 60mph. | + | MPH Rectangle - 0-100 Miles Per Hour |
| + | <br>{{Upload|10290_4a2f72d1a2c39.jpg}} | ||
| - | With a stop watch, time exactly 60 seconds. If the odometer moves exactly 1.0 miles it is good. If you are not sure, run for three minutes. If it shows 3.0 miles it is perfect. Otherwise record the reading. | + | B86 - Blue H.B. lamp + yellow/red zones |
| + | <br>{{Album|25031}} | ||
| - | Repeat for 30 mph and 90 mph. | + | KPH+MPH |
| + | <br>{{Upload|277_4c0264d7b3d4a.jpg}} | ||
| - | Calculate the MPH difference at each speed. | + | = Metric-Imperial Conversion = |
| + | Sometimes on eBay Australia you can get the vintage conversion stickers. | ||
| + | <br>{{AlbumH|923}} {{AlbumH|5362}} | ||
| - | === Road Test === | + | OR |
| - | # Compare against roadside radar box | + | |
| - | # Timing test. Go out on highway and drive at steady mph while you time the mileposts. | + | |
| - | ## 10 miles 60 mph should take exactly 10 minutes | + | |
| - | ## 5 miles 30 mph should take exactly 10 minutes | + | |
| - | Compare both a high and low speed. | + | |
| + | print this on plain paper at 125%, for a test fit. If you like it, print on sticker stock then apply to the speedometer | ||
| + | <br>{{Album|1101}} | ||
| - | === Adjustment === | + | OR |
| - | # If all reading are off by a fixed MPH, carefully move the needle to correct it. | + | Take the face plate and scan it on the flatbad scanner, then modify it. Finally, print a new one out with the photo printer. You can modify the font, colors, etc. You might think you can simply bolt it to the speedo using the standard screws, but it will not lay flat. Adhesive paper (sticker paper) will work |
| - | # If the readings get worse the faster it goes, the mechanism needs calibration. | + | <br>{{Album|15393}} |
| - | #: NOTE: haven't tried this yet. Don't know how well it works | + | |
| - | ## Adjust pointer so 30 mph reading is correct | + | |
| - | ## If 90 mph reading is now incorrect, adjust cup drive | + | |
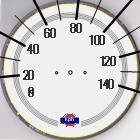
| - | == Changing Scale == | + | = Speedometer Calibration = |
| - | You can easily change the scale to make it read correctly, or to make a 180 kph scale. The downside is that the odometer (distance counter) will be inaccurate. | + | It is normal for the speedometer '''to read fast'''. The specified tolerance is +5% -10%. So at actual 60mph it can read 57 to 66 and still be acceptable. But you can blueprint the speedometer to be closer to the actual speed. |
| - | [http://datsun1200.com/modules/myalbum/photo.php?lid=14098 http://datsun1200.com/modules/myalbum/photos/thumbs/14098.jpg] | + | {{Main|Speedometer Calibration}} |
| - | * Scale Adjusted for low gearing, looks good printed on photo paper and bolted to speedometer. | + | |
| - | * Use a light, removable contact cement. Otherwise if you just tack the edges or a places, the photo will eventually buckle and warp and interfere with the needle movement. | + | |
| - | * I modified mine to change the scale since I didn't want to get under the car and change the plastic speedo gears. | + | |
| - | == Amplifier Speed Switch == | + | = Speed Buzzer = |
| - | USA model from 0772 use an amplifier speed switch. | + | Starting in 1972, all JDM speedometer came with speed switch for warning of excess velocity. |
| - | <br>25035-H7000 ASSY-AMPLIFIER SPEED SWITCH | + | |
| - | <br>[http://datsun1200.com/modules/myalbum/photo.php?lid=23062 http://datsun1200.com/modules/myalbum/photos/thumbs/23062.jpg] | + | |
| - | Australia models also used it, dates unknown. | + | {{Main|Instrument_Panel_Wiring#Speed Buzzer}} |
| - | <br>[http://datsun1200.com/modules/myalbum/photo.php?lid=13695 http://datsun1200.com/modules/myalbum/photos/thumbs/13695.jpg] [http://datsun1200.com/modules/myalbum/photo.php?lid=11981 http://datsun1200.com/modules/myalbum/photos/thumbs/11981.jpg] | + | |
| - | 68800-AM7200 speed sensor | + | = Amplifier Speed Switch = |
| - | <br>[http://i297.photobucket.com/albums/mm219/ddgonzal/Datsun%20Misc/20090615145339DSC07168x.jpg http://i297.photobucket.com/albums/mm219/ddgonzal/Datsun%20Misc/th_20090615145339DSC07168x.jpg] | + | 1972 Japan, Australia late utes and 1973 USA used a speed switch. |
| - | = Custom Faces = | + | {{Main|Instrument_Panel_Wiring#Speed Switch}} |
| - | See [[Custom Dash Faces]] | + | |
| + | {{Album!|13695}} {{Photo!|20090615145339DSC07168x.jpg|Datsun%20Misc}} | ||
| - | 280Z speedometer fits: | + | = Alternatives = |
| - | <br>[http://i866.photobucket.com/albums/ab228/goes2fast/71%201200/001.jpg http://i866.photobucket.com/albums/ab228/goes2fast/71%201200/th_001.jpg] | + | Possible fit: [{{Post|132123}} Smith's guage from a Triumph] |
| - | # Swap the mounting cups as the 280Z unit is deeper | + | <br>{{Album|10754}} |
| - | # Drill a hole for the trip meter shaft through the back | + | |
| - | # The face is to large for the opening in the 1200 housing, so carefully reduce the diameter by 1/8 inch | + | |
| - | = Speedometer Cable = | + | VDO |
| - | See main article: [[Speedometer Cable]] | + | <br>{{Album|11799}} |
| - | = Drive Ratios = | + | 220km/h coversion from Matsuoka-M |
| - | Stock 1200 Speedometer gear ratio: | + | <br>{{UploadPost|174_5ce20bfaa0bb6.jpg|491450}} |
| - | * pinion teeth/worm teeth on trans output shaft | + | |
| - | * 17/5 (3.90 diff) | + | |
| - | * 18/5 for Wagon or Ute (4.11 diff) | + | |
| - | [http://datsun1200.com/modules/myalbum/photo.php?lid=15669 http://datsun1200.com/modules/myalbum/photos/thumbs/15669.jpg] | + | == Custom Faces == |
| + | {{Main|Custom Dash Faces}} | ||
| - | To adjust the speedometer for different diameter tires, change the transmission cable pinion cog. | + | {{Photo!|speedo_x_th.jpg}} |
| - | * If speedo reads too fast, fit a bigger cog | + | == Z Speedometer == |
| - | * If speedo reads too slow, fit a smaller cog | + | [[Fairlady#S30|280Z]] speedometer fits in the 1200 dash cluster. |
| - | Given that stock is a 17 tooth pinion, moving to one more or less tooth is about 6% change. So by changing the pinion you can only get it to ±3 mph accurate. For example, at 100 mph, within 3 mph. Or at the standard 50 mph rating, a reading between 1½ mph (48½ to 51½) is the best you can hope for. For finer tuning the speedometer itself needs calibration. Or you could fit different diameter rear tires. | + | {{Photo2|001.jpg}} |
| + | # Swap the mounting cups as the 280Z unit is deeper | ||
| + | # Drill a hole for the trip meter shaft through the back | ||
| + | # The face is to large for the opening in the 1200 housing, so carefully reduce the diameter by 1/8 inch | ||
| - | EXAMPLE: If you are reading say 60 when you are really going 50 then the speedo cable needs to slow down by about 20% to read more accurately. If the speedo drive has a 17 tooth cog in it try to find a cog that reduces by 20%. 17 X .20 = 3.4 teeth... 17 + 3.4 = 20.4 teeth, the closest is a 20 tooth cog. | + | 350Z speedometer looks a similar size. |
| + | <br>{{Album|14499}} | ||
| - | <table width=50% bordercolor=black border=1> | + | == Electronic Speedometer == |
| - | <tr bgcolor=ccccff><td>Teeth</td><td>% change</td><td>50 mph reading</td></tr> | + | Yes, you can fit an electronic speedometer into a 1200. |
| - | <tr><td>16</td><td>106.25%</td><td>53.1</td></tr> | + | |
| - | <tr><td>17</td><td>100.00%</td><td>50.0</td></tr> | + | |
| - | <tr><td>18</td><td>94.44%</td><td>47.2</td></tr> | + | |
| - | <tr><td>19</td><td>89.47%</td><td>44.7</td></tr> | + | |
| - | </table> | + | |
| + | {{Main|Electronic Speedometer}} | ||
| - | Correction Table, increase Teeth by: | + | {{Album!|7813}} |
| - | <table border=1 cellspacing=0 width=100%> | + | |
| - | <tr bgcolor=ccccff><td> Actual mph</td><td> Desired mph</td><td> Tooth </td></tr> | + | |
| - | <tr><td> 40 </td><td> 50 </td><td> 3+ </td></tr> | + | |
| - | <tr><td> 43 </td><td> 50 </td><td> 2+ </td></tr> | + | |
| - | <tr><td> 47 </td><td> 50 </td><td> 1+ </td></tr> | + | |
| - | <tr><td> 50 </td><td> 50 </td><td> 0+ </td></tr> | + | |
| - | </table> | + | |
| - | Estimated Tire Correction Table (for 3.9 diff) | + | = Speedometer Cable = |
| - | <table border="1"> | + | {{Main|Speedometer Cable}} |
| - | <tr bgcolor="ccccff"><td> Size </td><td> Diameter </td><td> Difference </td><td> Pinion </td><td> ~Error </td></tr> | + | |
| - | <tr><td> 165/55R12 </td><td> 19.1 </td><td> 88% </td><td> 19T </td><td> 0% </td></tr> | + | |
| - | <tr><td> 165/60R12 </td><td> 19.8 </td><td> 91% </td><td> 18T </td><td> -2% </td></tr> | + | |
| - | <tr><td> 165/70R12 </td><td> 21.1 </td><td> 97% </td><td> 17T </td><td> 3% </td></tr> | + | |
| - | <tr><td> 155/80R12 </td><td> 21.8 </td><td> 100% </td><td> 17T </td><td> 0% </td></tr> | + | |
| - | <tr><td> 175/70R13 </td><td> 22.6 </td><td> 104% </td><td> 16T </td><td> 2% </td></tr> | + | |
| - | <tr><td> 195/50R15 </td><td> 22.7 </td><td> 104% </td><td> 16T </td><td> 2% </td></tr> | + | |
| - | <tr><td> 165/70R14 </td><td> 23.1 </td><td> 106% </td><td> 16T </td><td> 0% </td></tr> | + | |
| - | <tr><td> 205/45R17 </td><td> 23.5 </td><td> 108% </td><td> 16T </td><td> -2% </td></tr> | + | |
| - | <tr><td> 185/60R15 </td><td> 23.7 </td><td> 109% </td><td> 16T/15T </td><td> 3% </td></tr> | + | |
| - | <tr><td> 205/40R18 </td><td> 24.5 </td><td> 112% </td><td> 15T </td><td> 0% </td></tr> | + | |
| - | <table> | + | |
| - | == Part Numbers == | + | |
| - | * NOTE: while they are color-coded, order by part number, not by color. For example, 63-series and 56-series cogs (pinion gears) use different color coding. | + | |
| - | * They are easy to replace by removing the roll pin...use your original Cog Body (Sleeve). | + | |
| - | [http://datsun1200.com/modules/myalbum/photo.php?lid=19518 http://datsun1200.com/modules/myalbum/photos/19518.jpg] | + | = Drive Ratios = |
| + | {{Main|Speedometer Gears}} | ||
| - | === 56 & 60 Series === | + | {{Album!|15669}} {{Photo!|19T.jpg}} |
| - | [[56-Series Transmission]] and [[60-Series Transmission]] | + | |
| - | * PINION (32703) | + | |
| - | * 32703-18001 PINION ASSY-SPEEDOMETER (15T) | + | |
| - | * 32703-18000 PINION ASSY-SPEEDOMETER (16T) $10.55 USD | + | |
| - | * 32703-15400 PINION SPEEDOMETER 17T [White] $17.02 USD | + | |
| - | * 32703-H1000 PINION SPEEDOMETER 18T [Blue] $15.67 USD | + | |
| - | * SLEEVE W/PINION ASS'Y (3702) | + | = Photo Index = |
| - | * 32702-15400 ASSY-PINION SPEEDOMETER 17T $17.02 USD | + | {{Main|Standard Dash Photo Index}} |
| - | * 32702-H1000 ASSY-PINION SPEEDOMETER 18T (B120, 1975-1979) | + | {{Main|Round Dash Photo Index}} |
| - | * 32702-H1001 ASSY-PINION SPEEDOMETER 19T (B120, 1980 up) | + | |
| + | {{AlbumH|2192}} {{AlbumH|2729}} {{AlbumH|5043}} {{AlbumH|8881}} {{AlbumH|10934}} {{AlbumH|10935}} {{AlbumH|12944}} {{AlbumH|13092}} | ||
| - | === Automatic Transmission === | + | スピードメーター |
| - | * 32703-P2616 PINION SPEEDOMETER 16T (auto) $23.22 USD | + | |
| - | * 32703-P2617 PINION SPEEDOMETER 17T (auto) $12.78 USD | + | |
| - | * 32703-P2618 PINION SPEEDOMETER 18T (auto) $23.43 USD | + | |
| - | * 32703-P2619 PINION SPEEDOMETER 19T (auto) $12.78 USD | + | |
| - | * 32703-P2620 PINION SPEEDOMETER 20T (auto) $12.83 USD | + | |
| - | * 32703-P2621 PINION SPEEDOMETER 21T (auto) $21.12 USD | + | |
| - | + | [[Category:Body Electrical System]]{{End}} | |
| - | * 32702-P2719 ASSY-PINION SPEEDOMETER 19T (auto) $30.80 USD | + | |
| - | + | ||
| - | + | ||
| - | === 63-Series === | + | |
| - | * 32703-N9016 PINION SPEEDOMETER 16T $13.28 USD | + | |
| - | * 32703-N9017 PINION SPEEDOMETER 17T $12.42 USD | + | |
| - | * 32703-N9018 PINION SPEEDOMETER 18T $12.42 USD | + | |
| - | * 32703-N9019 PINION SPEEDOMETER 19T $11.80 USD | + | |
| - | + | ||
| - | == Application == | + | |
| - | === 56 & 60 Series === | + | |
| - | * B110 with 3.90: 17T | + | |
| - | * B110 with 4.11: 18T | + | |
| - | * B210 with A13: 17T | + | |
| - | * B210 with A13: 18T (optional Sedan) | + | |
| - | * B210 with A14: 17T to 0376 | + | |
| - | * B210 with A14: 16T from 0476 | + | |
| - | * B310 with A12 North America: 17T | + | |
| - | * B310 with A14/A15: 16T | + | |
| - | + | ||
| - | === FS5W63A === | + | |
| - | NOTE: 63 5-speed and 4-speed pinion gears have a different part numbers, so perhaps do not interchange. | + | |
| - | + | ||
| - | * 32703-N9016 16T | + | |
| - | ** JDM A10 F5 | + | |
| - | ** USA B210 F5 | + | |
| - | + | ||
| - | * 32703-N9017 17T | + | |
| - | ** USA S10 1977-1979 | + | |
| - | ** USA D21 2WD F5 | + | |
| - | ** USA GC22 1987-1989 Nissan Van [RS5W71C] | + | |
| - | + | ||
| - | * 32703-N9018 18T | + | |
| - | ** USA D21 F4 1988-1989 | + | |
| - | ** USA D21 2WD F5 1986-1992 SELECT | + | |
| - | + | ||
| - | * 32703-N9019 19T | + | |
| - | ** USA D21 2WD F5 1986-1992 SELECT | + | |
| - | + | ||
| - | == Pinion or Assembly == | + | |
| - | Each drive gear (on the output shaft of the transmission) works with a variety of different pinion gears. | + | |
| - | + | ||
| - | For the A-series gearboxes, there is only one size of drive gear, which works with 16-19 teeth pinions. The sleeves are all the same, so all you need is the gear (not the assembly). | + | |
| - | + | ||
| - | Different transmission have different methods: | + | |
| - | Jeep - offset holder is rotated to various positions for each gear | + | |
| - | GM TH350 - two drive gears, each works with a range of driven gears | + | |
| - | 720 - all have 6T drive gear | + | |
| - | 56-series, 60, driven gear is machined on the shaft | + | |
| - | 4W63, 71B, 71C replaceable gear | + | |
| - | + | ||
| - | == Ratio Adapter Box == | + | |
| - | http://www.speedscreen.com.au/clarkbros.html | + | |
| - | + | ||
| - | http://www.speedscreen.com.au/Images/rbox.gif | + | |
| - | + | ||
| - | = Photo Index = | + | |
| - | [http://datsun1200.com/modules/myalbum/photo.php?lid=226 http://datsun1200.com/modules/myalbum/photos/thumbs/226.jpg] [http://datsun1200.com/modules/myalbum/photo.php?lid=1085 http://datsun1200.com/modules/myalbum/photos/thumbs/1085.jpg] [http://datsun1200.com/modules/myalbum/photo.php?lid=2192 http://datsun1200.com/modules/myalbum/photos/thumbs/2192.jpg] [http://datsun1200.com/modules/myalbum/photo.php?lid=2729 http://datsun1200.com/modules/myalbum/photos/thumbs/2729.jpg] [http://datsun1200.com/modules/myalbum/photo.php?lid=4352 http://datsun1200.com/modules/myalbum/photos/thumbs/4352.jpg] [http://datsun1200.com/modules/myalbum/photo.php?lid=5043 http://datsun1200.com/modules/myalbum/photos/thumbs/5043.jpg] [http://datsun1200.com/modules/myalbum/photo.php?lid=8881 http://datsun1200.com/modules/myalbum/photos/thumbs/8881.jpg] [http://datsun1200.com/modules/myalbum/photo.php?lid=9301 http://datsun1200.com/modules/myalbum/photos/thumbs/9301.jpg] [http://datsun1200.com/modules/myalbum/photo.php?lid=10675 http://datsun1200.com/modules/myalbum/photos/thumbs/10675.jpg] [http://datsun1200.com/modules/myalbum/photo.php?lid=10754 http://datsun1200.com/modules/myalbum/photos/thumbs/10754.jpg] [http://datsun1200.com/modules/myalbum/photo.php?lid=10934 http://datsun1200.com/modules/myalbum/photos/thumbs/10934.jpg] [http://datsun1200.com/modules/myalbum/photo.php?lid=10935 http://datsun1200.com/modules/myalbum/photos/thumbs/10935.jpg] [http://datsun1200.com/modules/myalbum/photo.php?lid=11799 http://datsun1200.com/modules/myalbum/photos/thumbs/11799.jpg] [http://datsun1200.com/modules/myalbum/photo.php?lid=12944 http://datsun1200.com/modules/myalbum/photos/thumbs/12944.jpg] [http://datsun1200.com/modules/myalbum/photo.php?lid=13092 http://datsun1200.com/modules/myalbum/photos/thumbs/13092.jpg] | + | |
| - | [[Category:Body Electrical System]] | + | |
Current revision
Speedometers were either in kilometers or miles. Australia started with mph and then switched to kph via sticker overlays. Some speedometers had a trip meter.
Contents |
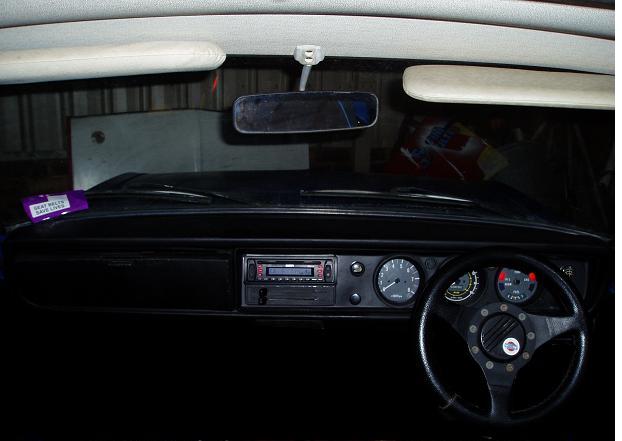
Overview
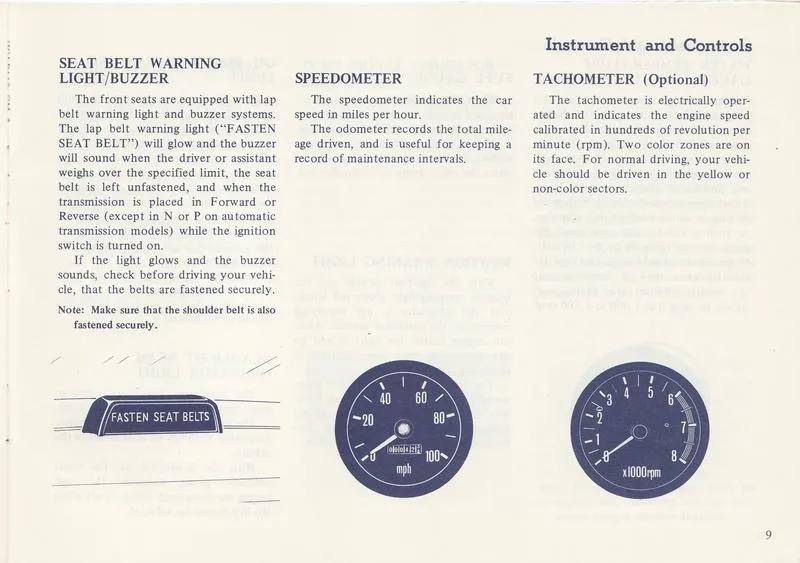
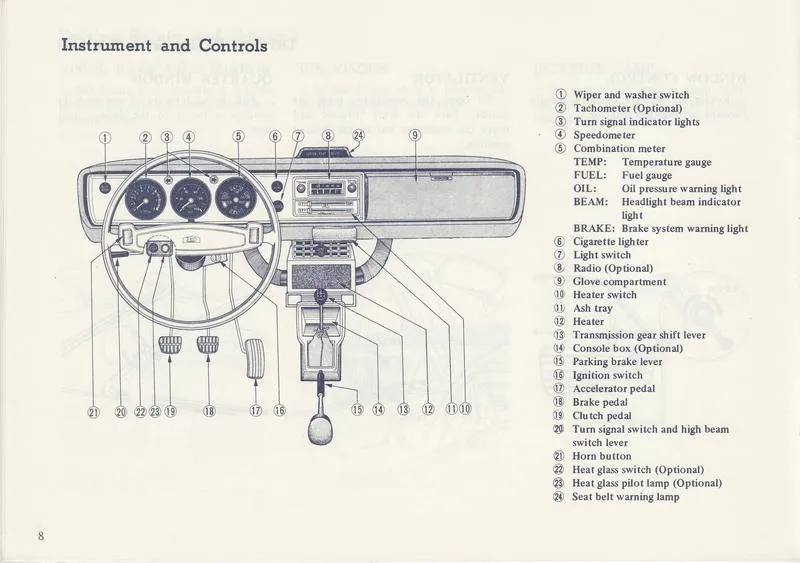 Instrument and Controls

Odograph
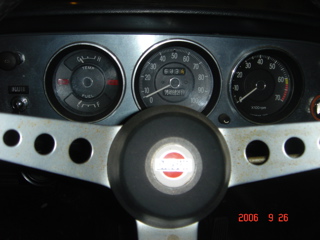
The odometer has five digits as shown by this 2006 unit:

When the count exceeds 99999 it turns back to 00000.

Variations
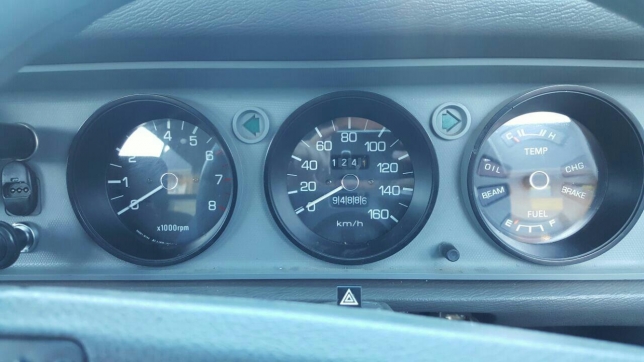
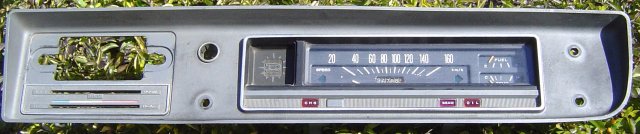
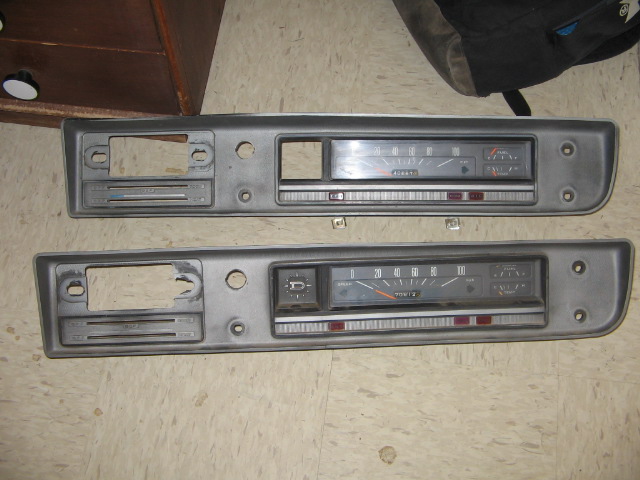
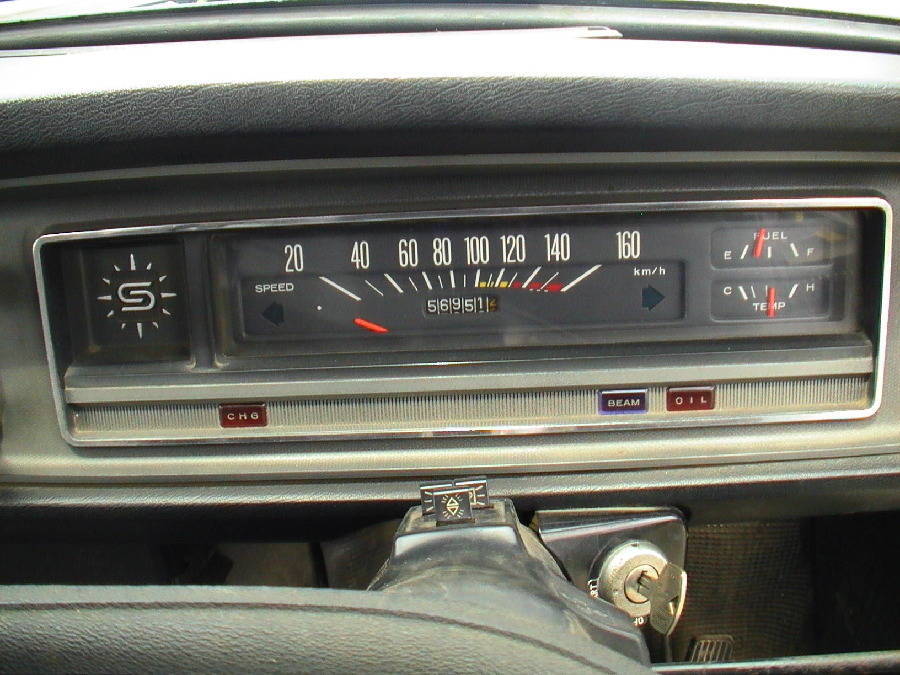
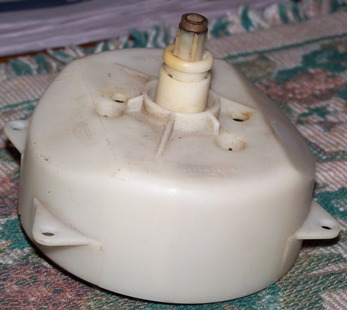
STD bar gauge
STD speedometer was a rectangular type (GL & GX used round gauges as did all coupes). DX varied: Mostly rectangular, but USA Deluxe had round gauges.

24850-B8600 B110 ute Speedometer until 1975-1978
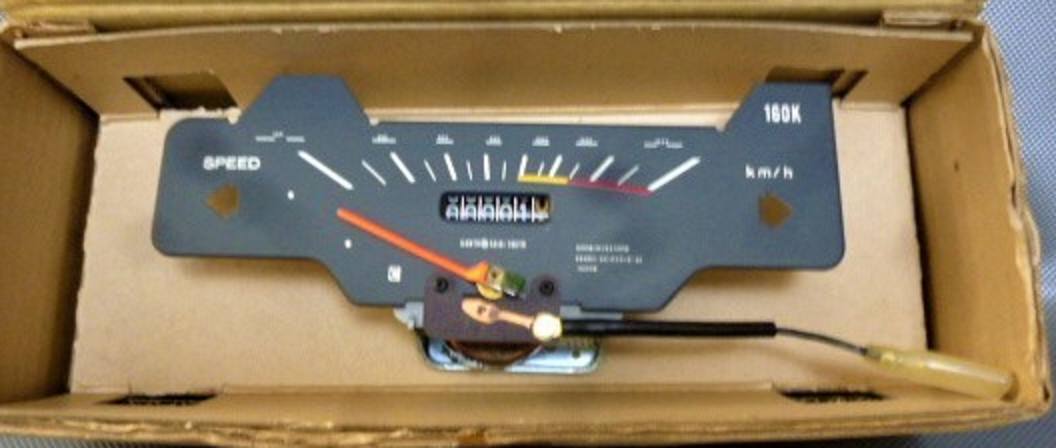
24850-B8600 KANTO SEIKI TOKYO 160K km/h with wire for intermittent buzzer
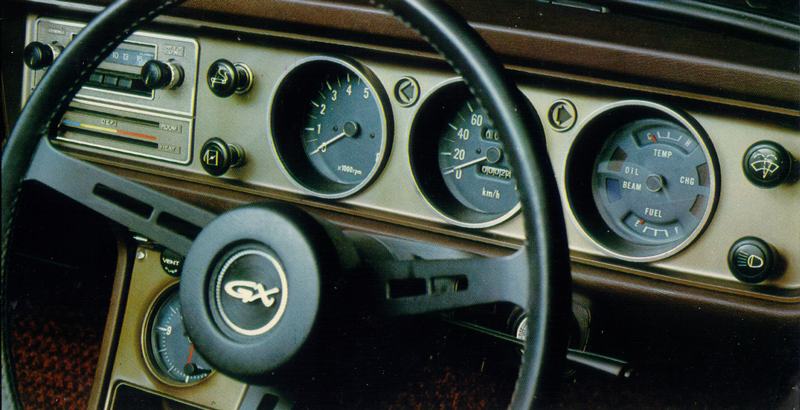
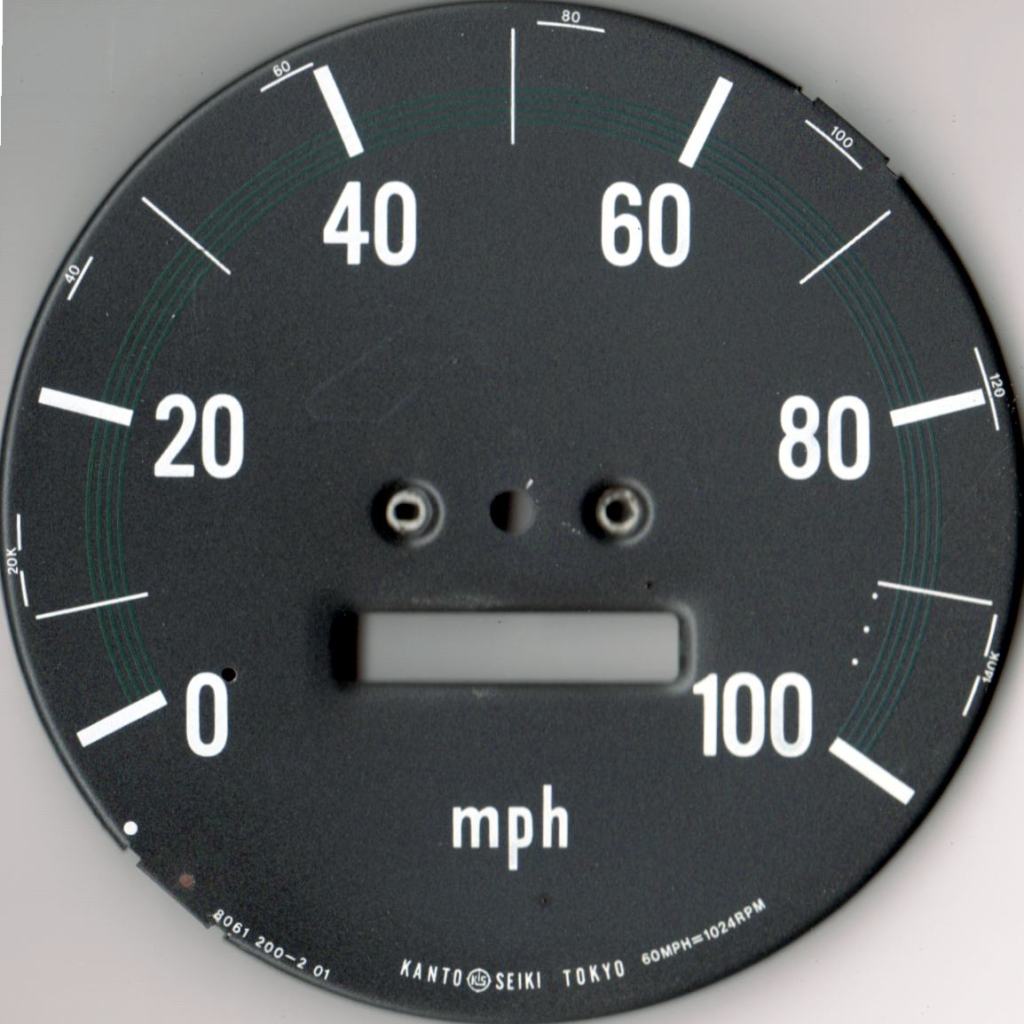
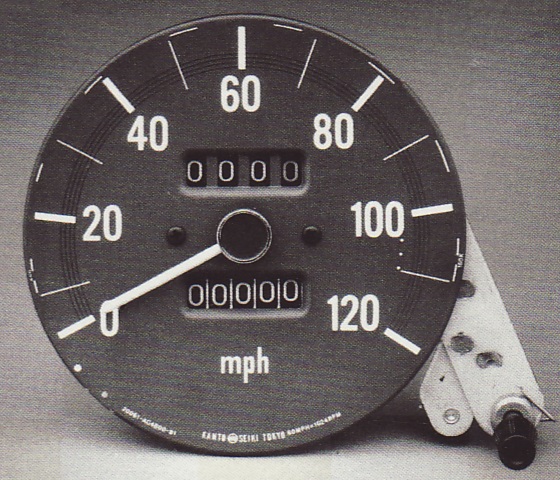
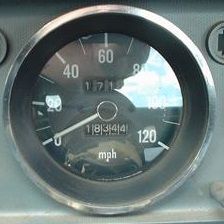
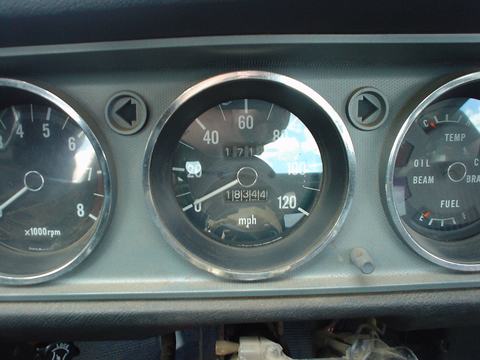
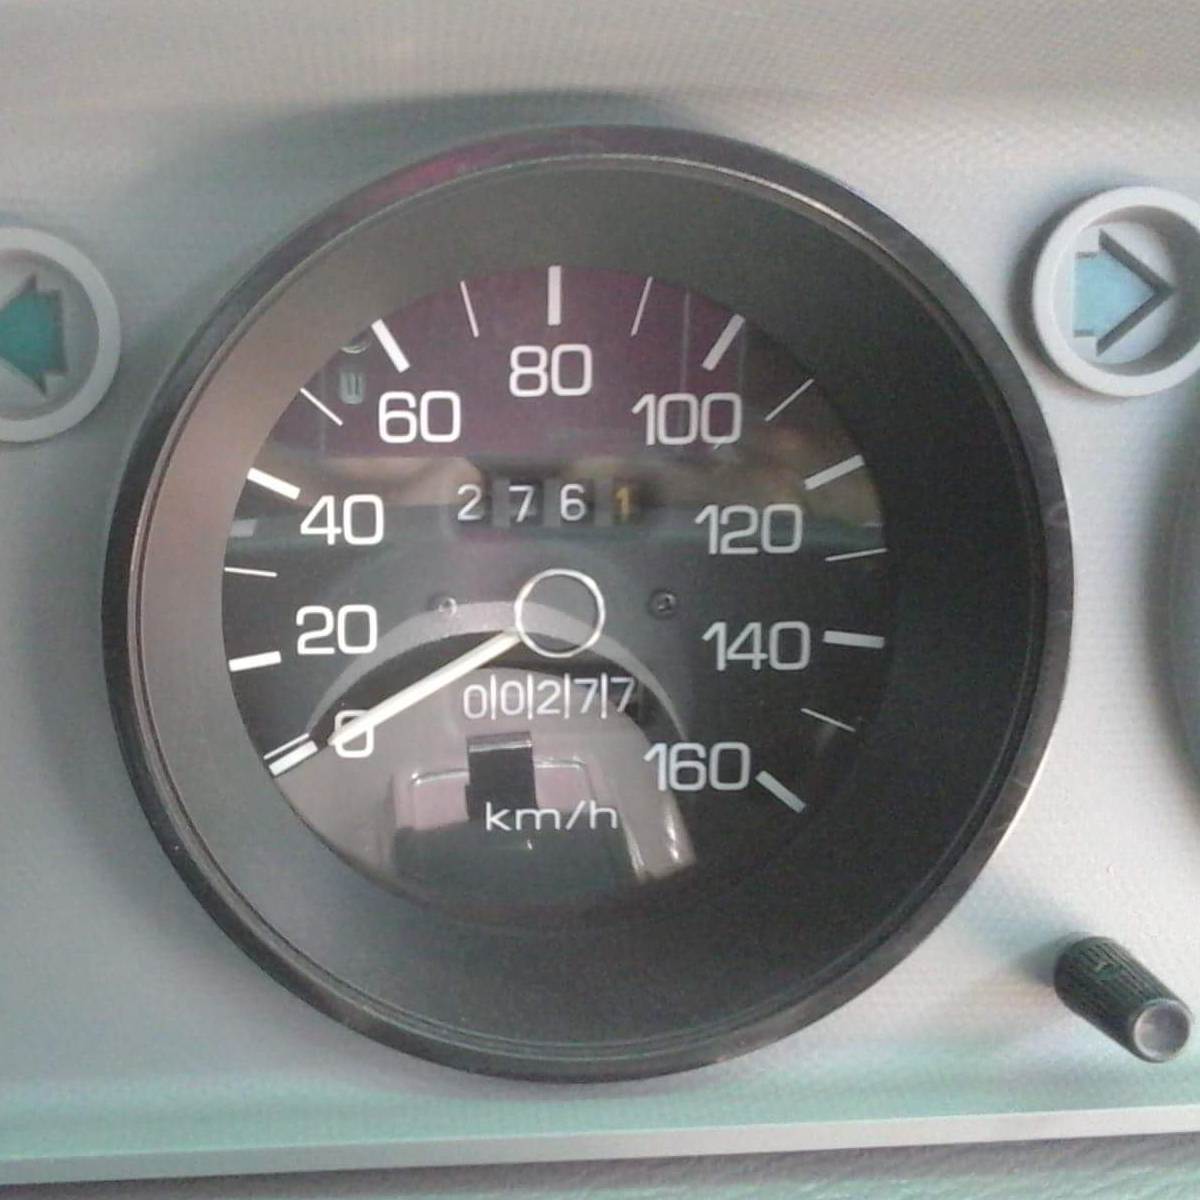
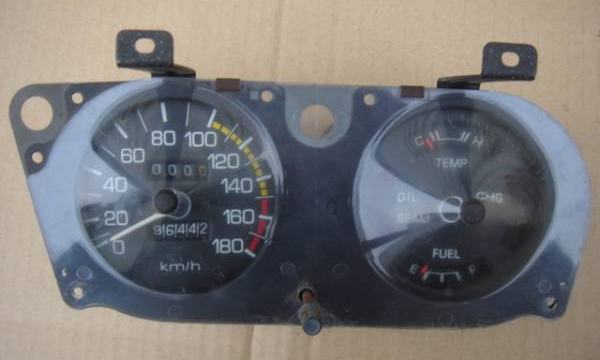
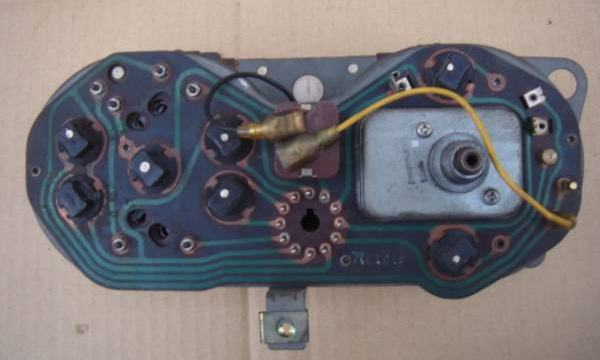
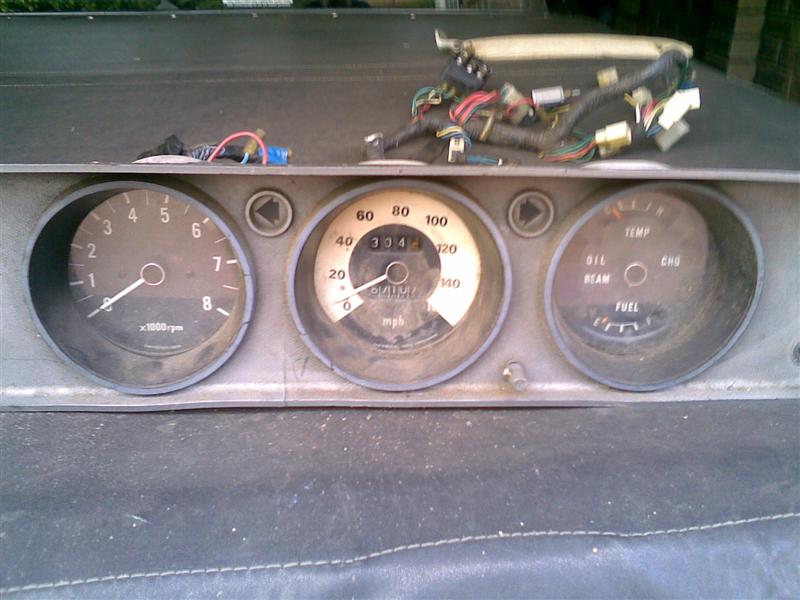
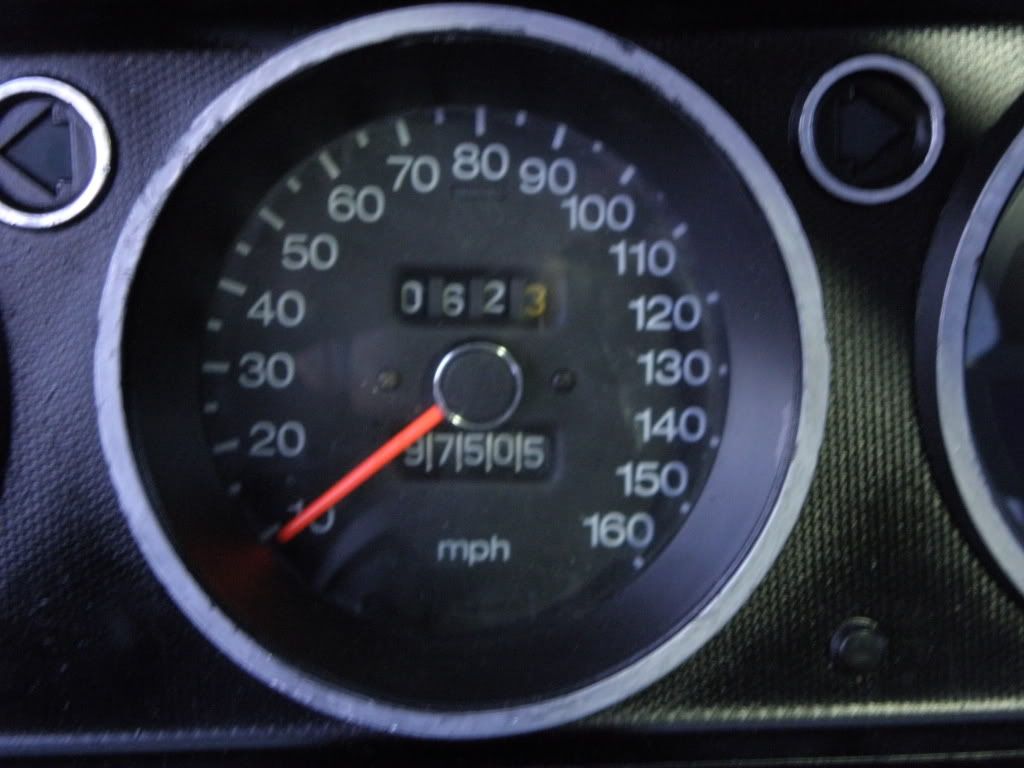
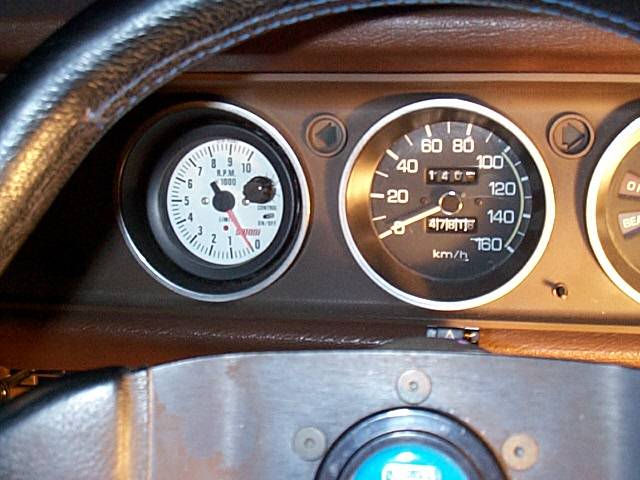
Round gauge
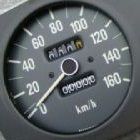
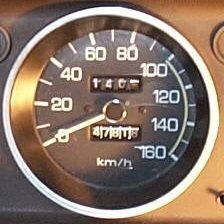
Comparo
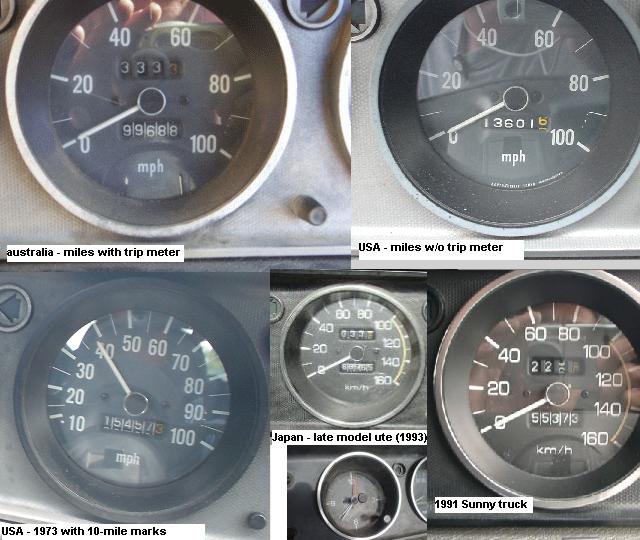
For calibration, the MPH speedo is marked in KPH ranges on the very edge, which are partly visible when installed.
24850-H1816 100MPH w/o tripmeter (AUS/USA standard equipment)
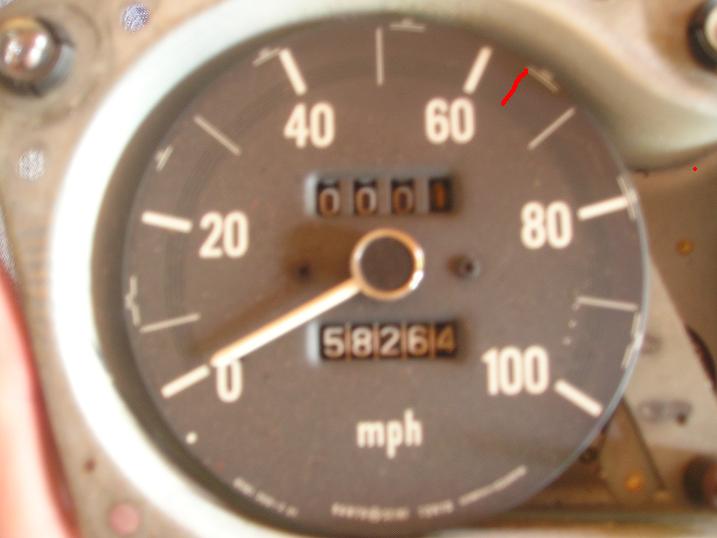
?? 100MPH with tripmeter
1973 5mph marks

24850-H3400 1200 120MPH SPEEDOMETER Includes tripmeter
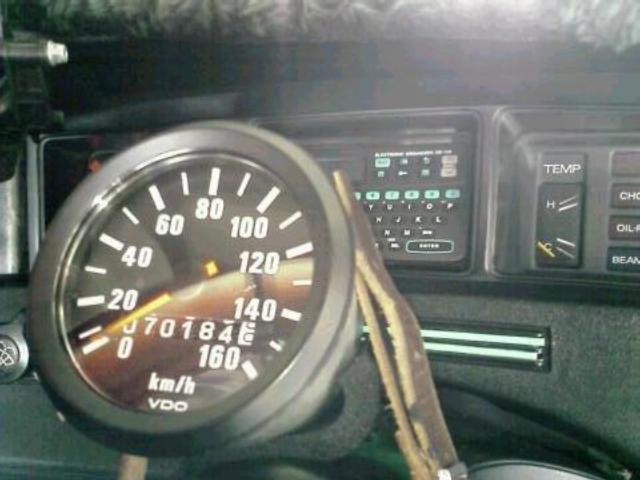
140 kph
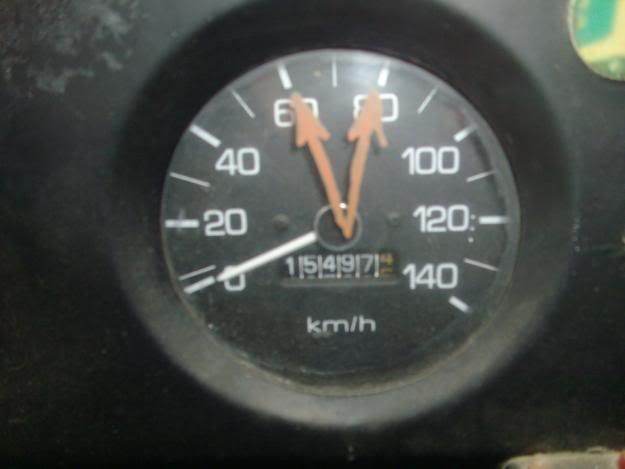
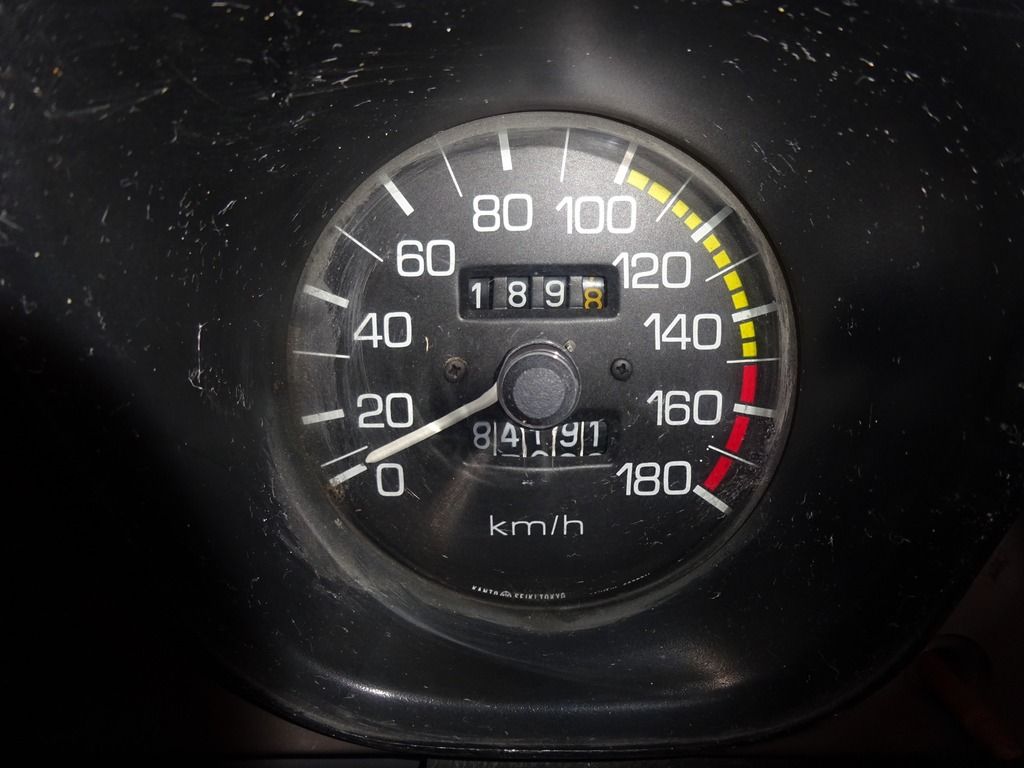
160 kph
160 kph late
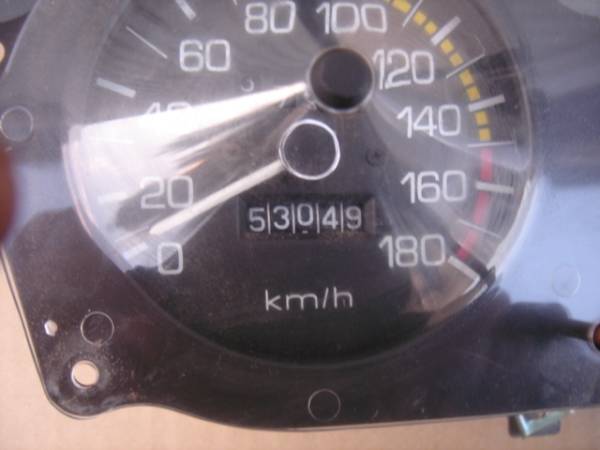
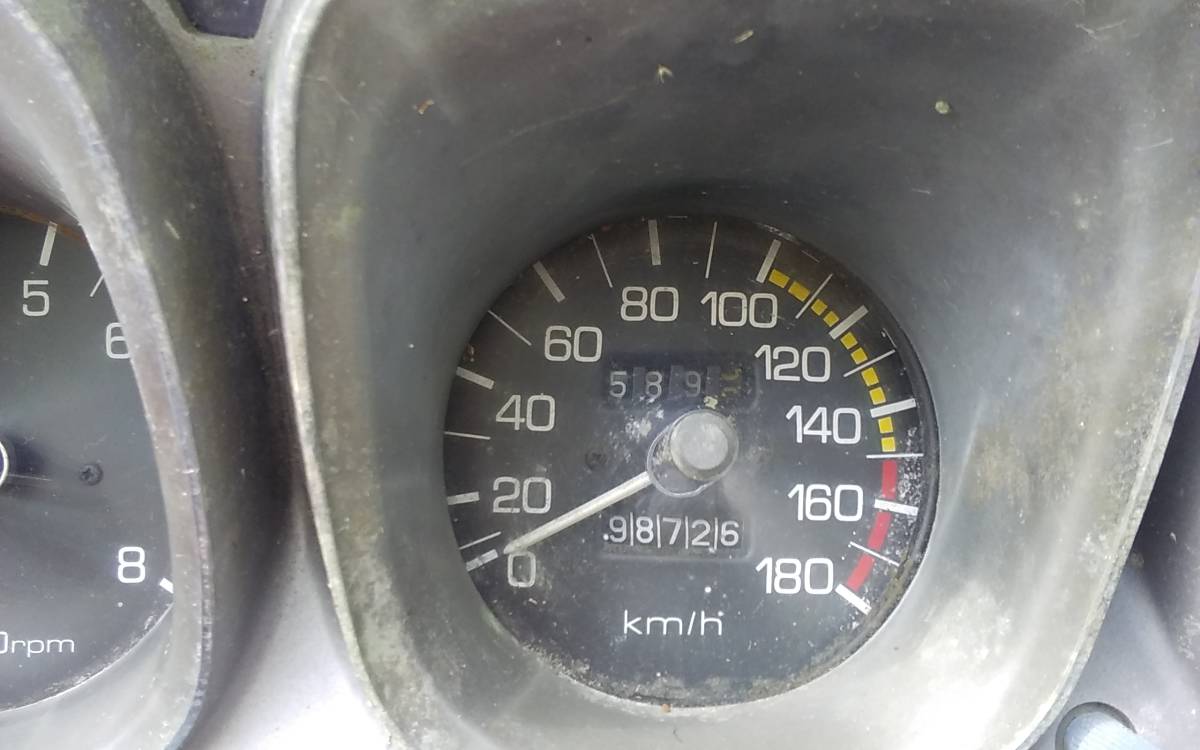
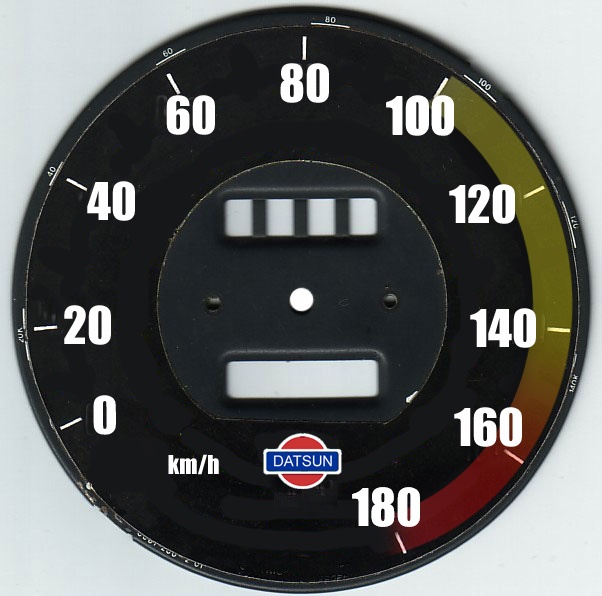
GX - 180 kph

#Facelift GX - 180 kph
Matsuoka - 240 kph
B140 2008
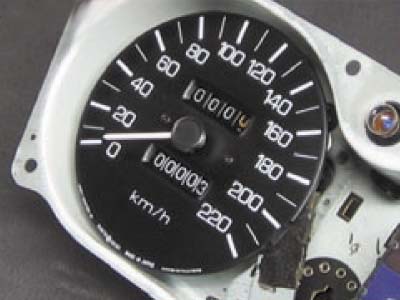
Facelift GX
Gauges changed for the 1972 minor facelift in Japan. As before the GX speedometer went to 180km/h instead of the regular 160km/h. As with all 1972s it had the speed warning sensor.
Part Numbers
Round
USA
24850-H1816 ASSY-SPEEDOMETER 100MILE/H [With 20 mph markings]
24850-H7000 ASSY-SPEEDOMETER 100MILE/H From 7/72 [With 10 mph markings]
24850-H3400 120MPH SPEEDOMETER Includes tripmeter
JDM Sunny Truck
24850-G1670 SPEEDOMETER ASSY 7804- [Round]
Rectangle
JDM Sunny Truck
24850-G1000 SPEEDOMETER ASS'Y (up to '72-6)
24850-G1001 SPEEDOMETER ASS'Y (from '72-7 for speed buzzer) > 24850-G1000
24850-G1002 SPEEDOMETER ASS'Y (from '72-12 for intermittent buzzer) > 24850-G1001
24850-B8600 SPEEDOMETER ASSY 7510-7803 [Rectangle]
JDM Meter Kaku (Bar Gauge)
Through '70 Dec
 24850-H1000 ASS'Y-SPEEDOMETER Std
 24850-H1100 ASS'Y-SPEEDOMETER S-Dx, VDT [Van Super-Deluxe T]
 * with trip meter
From '71 Jan
 24850-H1001 ASS'Y-SPEEDOMETER S-Std
 24850-H1101 ASS'Y-SPEEDOMETER S-Dx
 * with trip meter
 24850-H1410 ASS'Y-SPEEDOMETER VS,VP [Van Standard, Van Deluxe]
 24850-H1401 ASS'Y-SPEEDOMETER VDT
 * with trip meter
H10 ? - all red lamps
MPH Rectangle - 0-100 Miles Per Hour
B86 - Blue H.B. lamp + yellow/red zones
KPH+MPH

Metric-Imperial Conversion
Sometimes on eBay Australia you can get the vintage conversion stickers.


OR
print this on plain paper at 125%, for a test fit. If you like it, print on sticker stock then apply to the speedometer
OR
Take the face plate and scan it on the flatbad scanner, then modify it. Finally, print a new one out with the photo printer. You can modify the font, colors, etc. You might think you can simply bolt it to the speedo using the standard screws, but it will not lay flat. Adhesive paper (sticker paper) will work
Speedometer Calibration
It is normal for the speedometer to read fast. The specified tolerance is +5% -10%. So at actual 60mph it can read 57 to 66 and still be acceptable. But you can blueprint the speedometer to be closer to the actual speed.
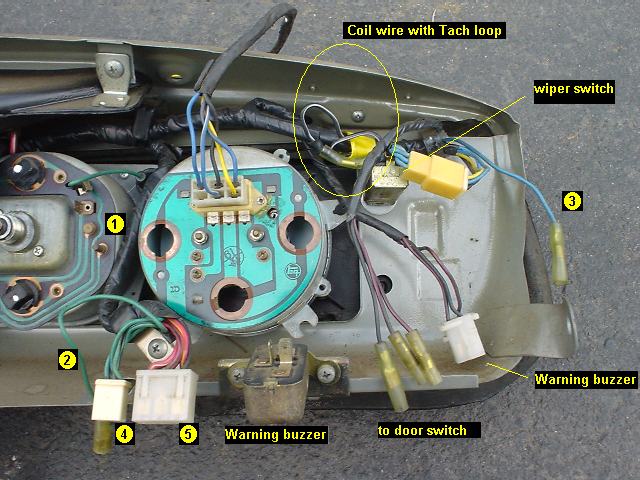
Speed Buzzer
Starting in 1972, all JDM speedometer came with speed switch for warning of excess velocity.
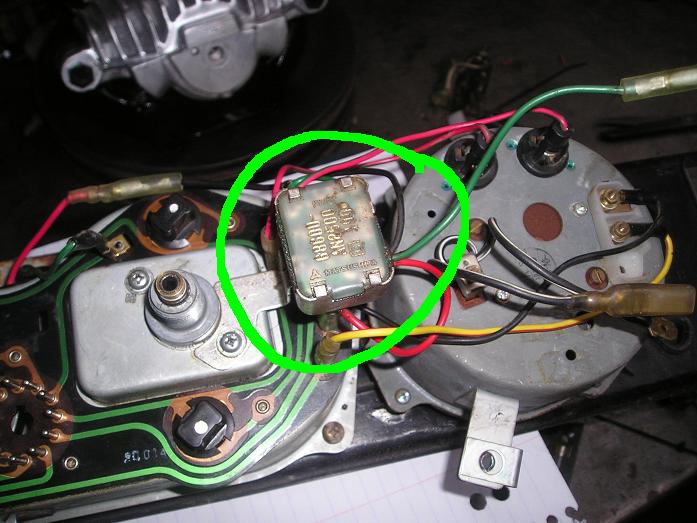
Amplifier Speed Switch
1972 Japan, Australia late utes and 1973 USA used a speed switch.
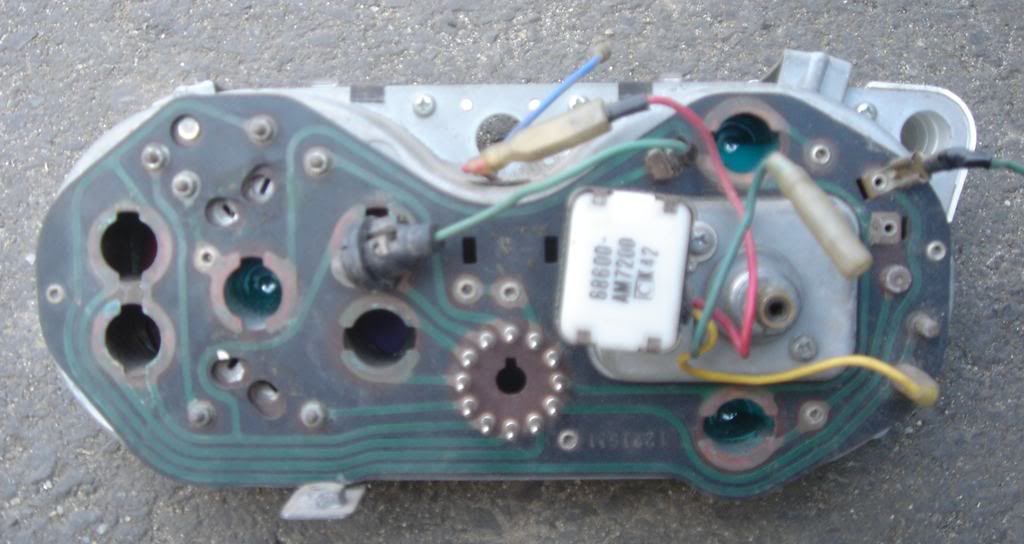
Alternatives
Possible fit: POST Smith's guage from a Triumph

VDO
220km/h coversion from Matsuoka-M

Custom Faces
Z Speedometer
280Z speedometer fits in the 1200 dash cluster.
- Swap the mounting cups as the 280Z unit is deeper
- Drill a hole for the trip meter shaft through the back
- The face is to large for the opening in the 1200 housing, so carefully reduce the diameter by 1/8 inch
350Z speedometer looks a similar size.

Electronic Speedometer
Yes, you can fit an electronic speedometer into a 1200.

Speedometer Cable
Drive Ratios
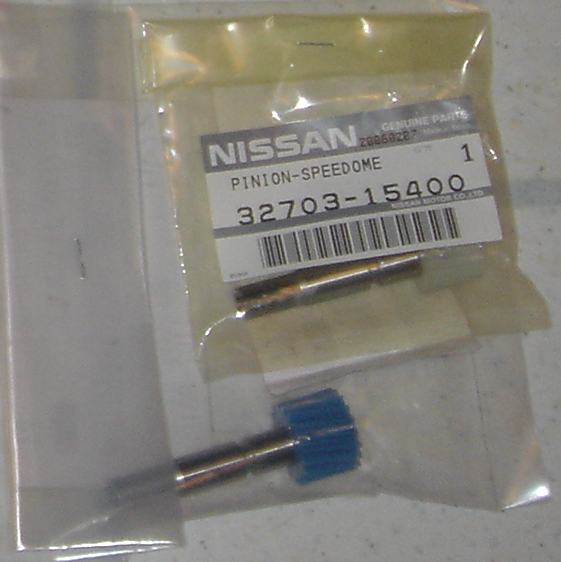
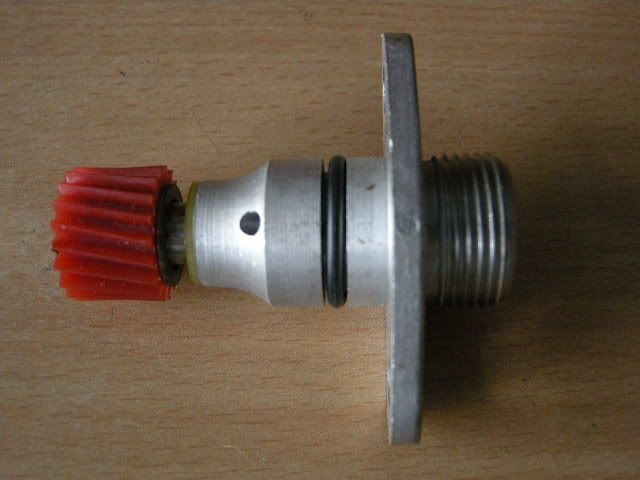
Photo Index


スピードメーター